48RE Transgo Shift Kit - Install

Install new teflon seals on the input shaft, this step is only applicable if the transmission is apart. Install new accumulator spring, pretty self explanatory.

The problem that many have with Transgo's instructions is they are written for a trans builder that already has a rough idea on how to take the valvebody apart.
I didn't get good pictures of removing the electronics, however, it is just (3) T-25 screws for the lockup/overdrive solenoids, (2) T-25 screws for the governor pressure solenoid & transducer, and (1) T-25 for the main harness plug.

Next remove all the T-25 screws that hold the (3) main layers of the valve body together.

There is a bracket with (3) T-25 screws all different lengths that holds the adjuster for the main line pressure, this bracket must be removed to separate the valve body since on of the long screws ties through all the layers of the valve body.

Picture of valvebody main layers coming apart, this is pretty dirty and not typical of a healthy valve body:


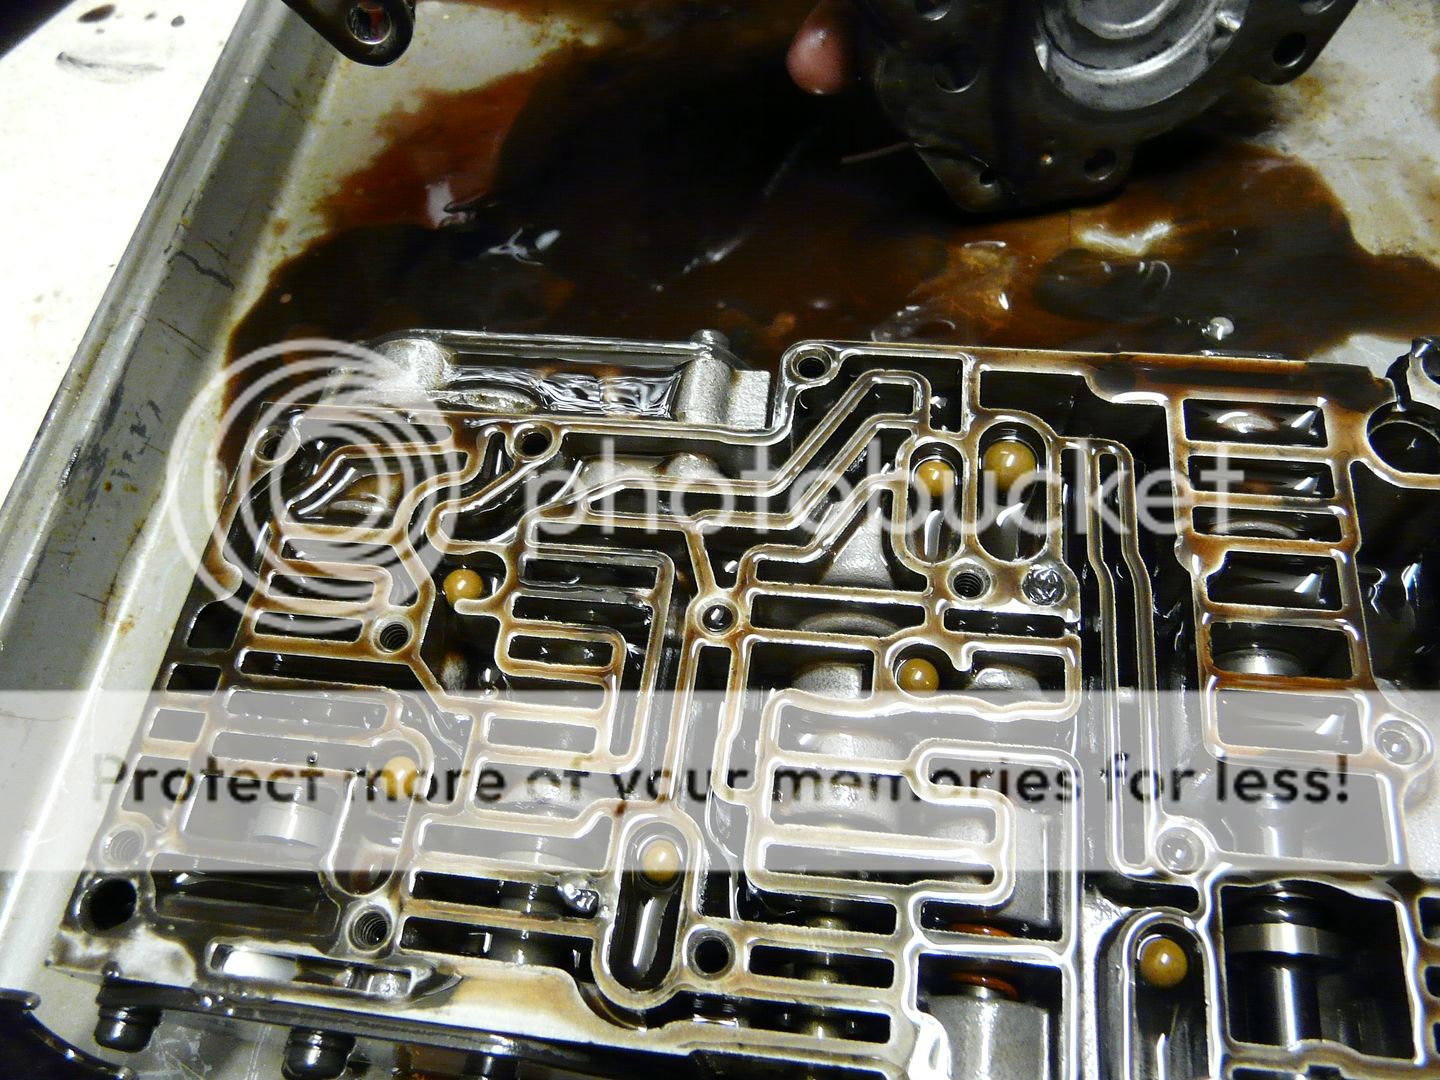
Save the checkballs, all but (1) will be reused:

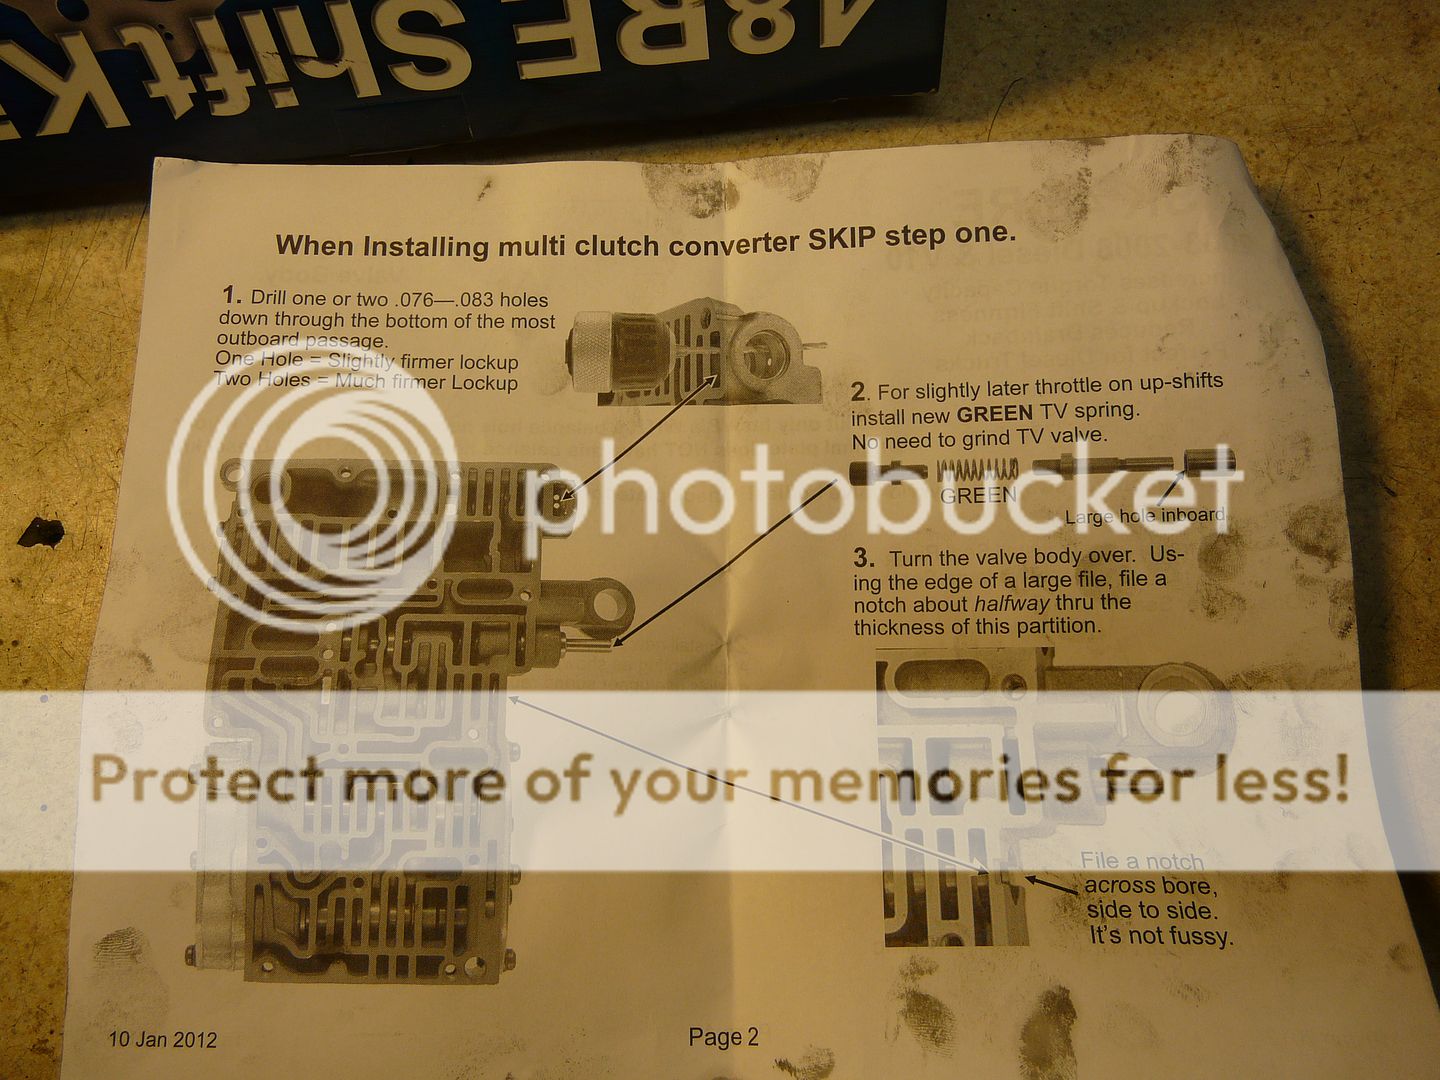
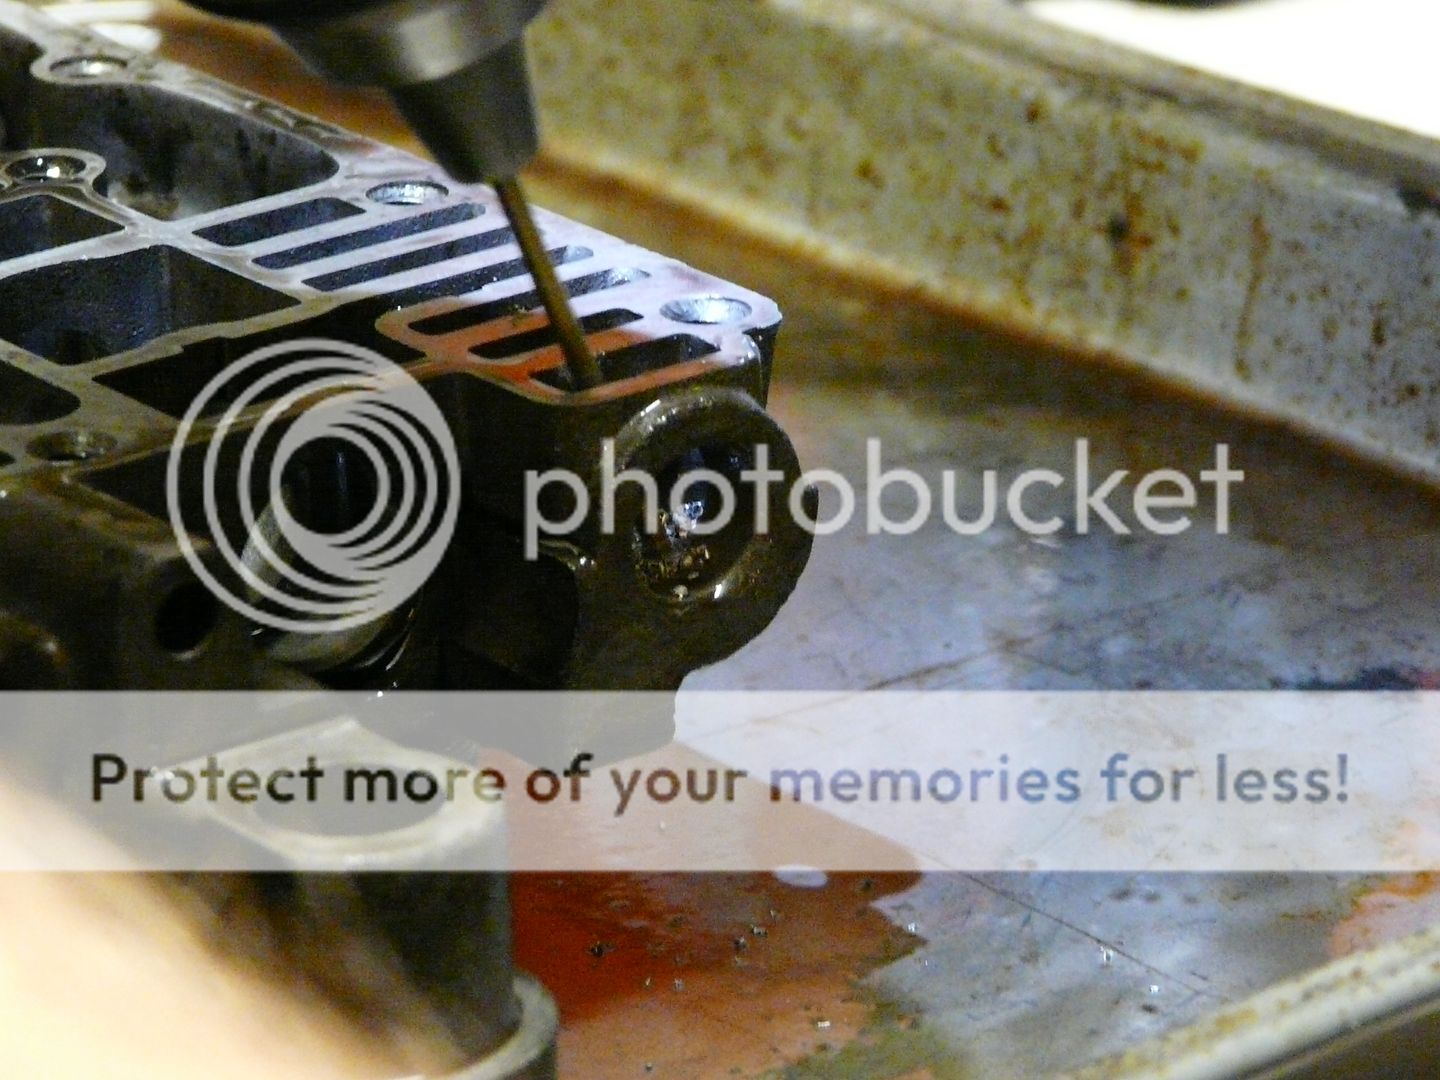
The first step once you finally get the valvebody apart is to add a couple of vent holes to speed-up how quickly lockup engages. This doesn't change the MPH of lock-up that is controlled electronically, this changes how much time it takes the lock-up piston to fully engage from the time the electronic solenoid opens to the time the torque converter is solidly locked.
Transgo recommends you don't add multiple holes for triple disk converters because they already lock-up quite abruptly, for this build with a billet input shaft, I felt comfortable with (2) .076" holes.
Also the instruction call for a notch to be filed across the manual valve bore, I use a 4.5" grinder with a metal cutting blade.


Replacing the green TV spring is self-explanatory.