
You are using an out of date browser. It may not display this or other websites correctly.
You should upgrade or use an alternative browser.
You should upgrade or use an alternative browser.
Show & Tell: The crap I do under a tarp
- Thread starter BC847
- Start date
Red Sleeper
Active member
Damn that crimp tool would be nice. I've eyed them for a few years now, AC machine first for me.
I like your heat shield on the HVAC box, just might borrow that same idea. What sort of support do you have on the two primaries? Is it just supported via the piping and tied together with the speed sign bracket?
I've found the same short comings of the VE as well. Especially compared to driving my common rail Cummins. Seems a VE will pull hard up to 2,800 and then turn off, allowing your forehead to bonk the steering wheel if not careful. The low end torque is hard to beat for daily work.
Also, when you narrowed the rear axle, did you remove the axle tubes? I see they are seal welded to the differential.
Last edited:
BC847
New member
I like your heat shield on the HVAC box, just might borrow that same idea. What sort of support do you have on the two primaries? Is it just supported via the piping and tied together with the speed sign bracket?
I've found the same short comings of the VE as well. Especially compared to driving my common rail Cummins. Seems a VE will pull hard up to 2,800 and then turn off, allowing your forehead to bonk the steering wheel if not careful. The low end torque is hard to beat for daily work.
Also, when you narrowed the rear axle, did you remove the axle tubes? I see they are seal welded to the differential.
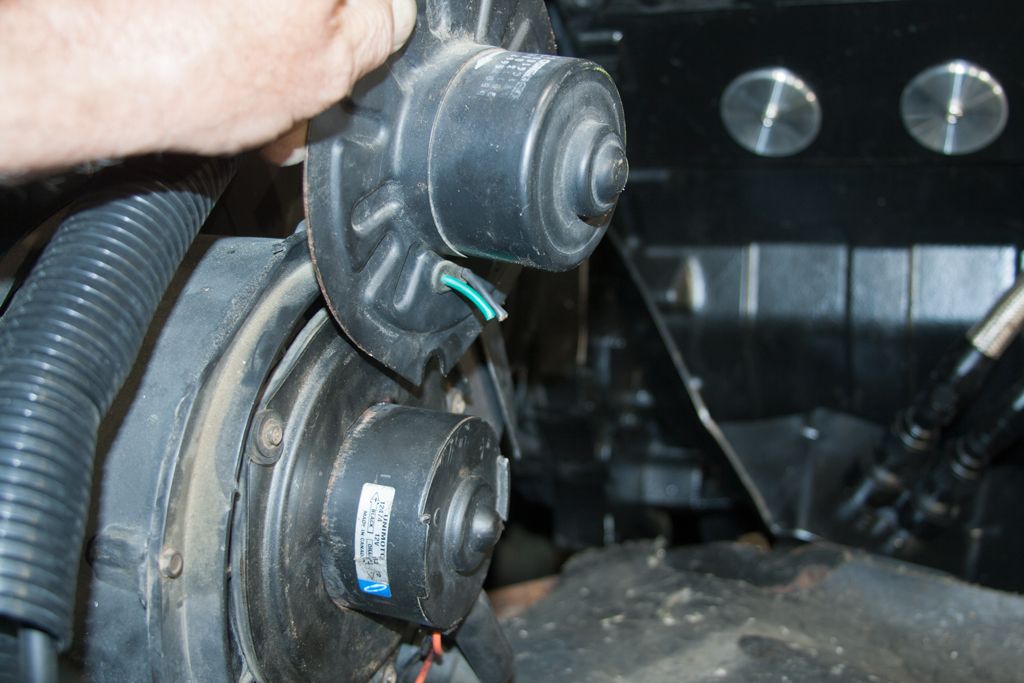
Yup, the HVAC box was a hoot.
As found, the blower motor was dead-against the 3" hotpipe coming off the upper primary. So . . .
- I moved the blower motor a little deeper in its mounting flange, that gave me almost a half inch.
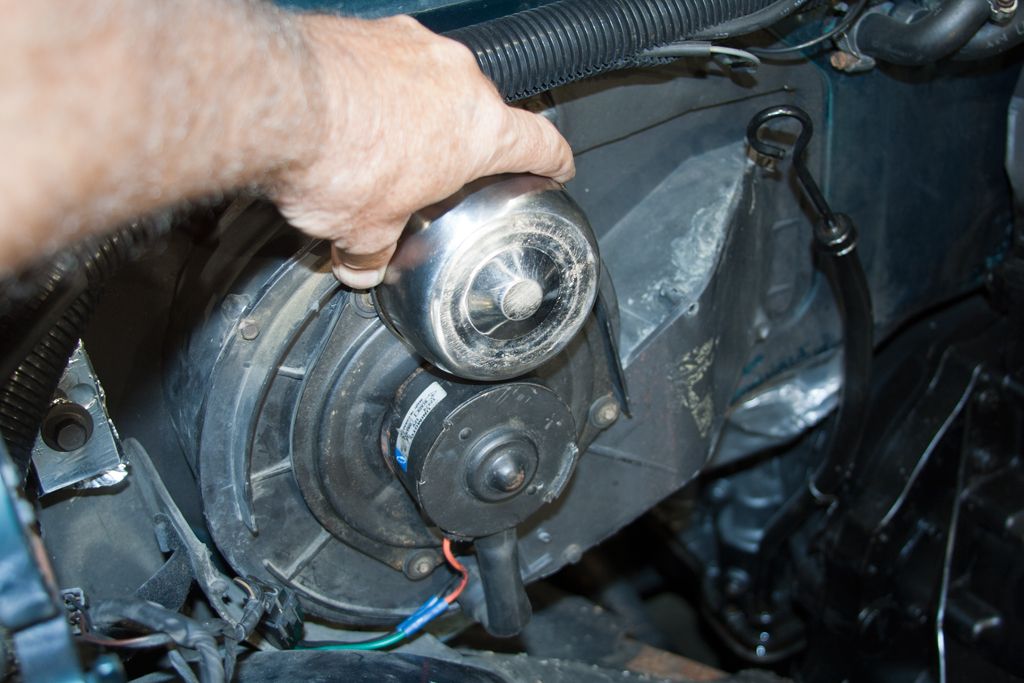
- I raided the kitchen (again) and got a little stainless bowl and dimpled its floor . . .
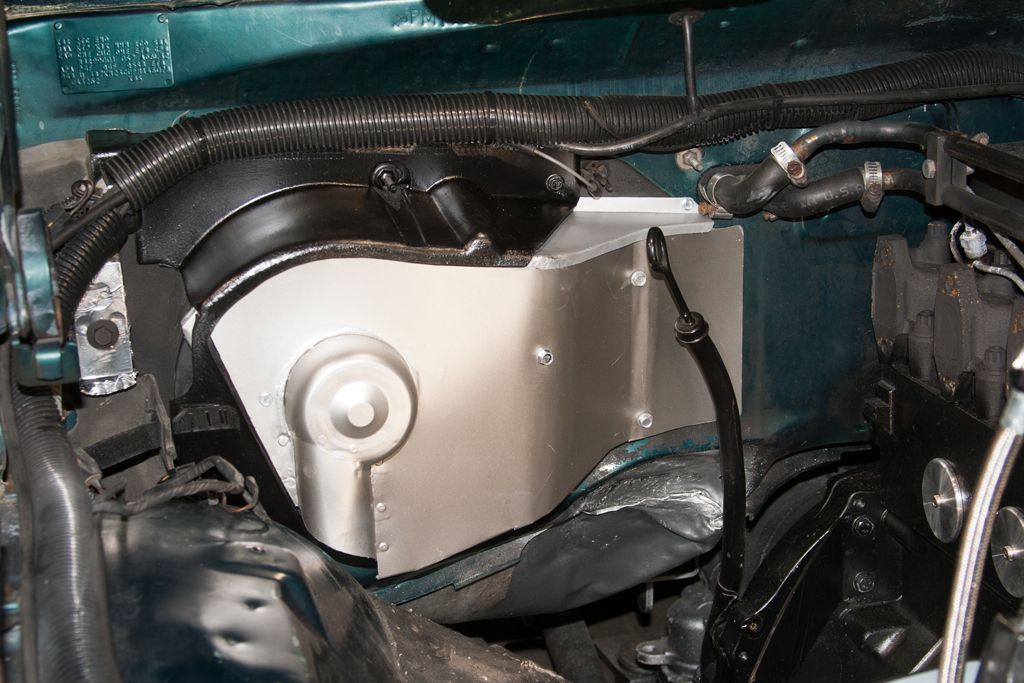
- A small section of 26ga sheet metal completes it. There's right at 1/4" space between the heat-shield and the HVAC box stuff .. .
The primaries are tied together by a 10ga(ish) aluminum alloy bracket . . . .
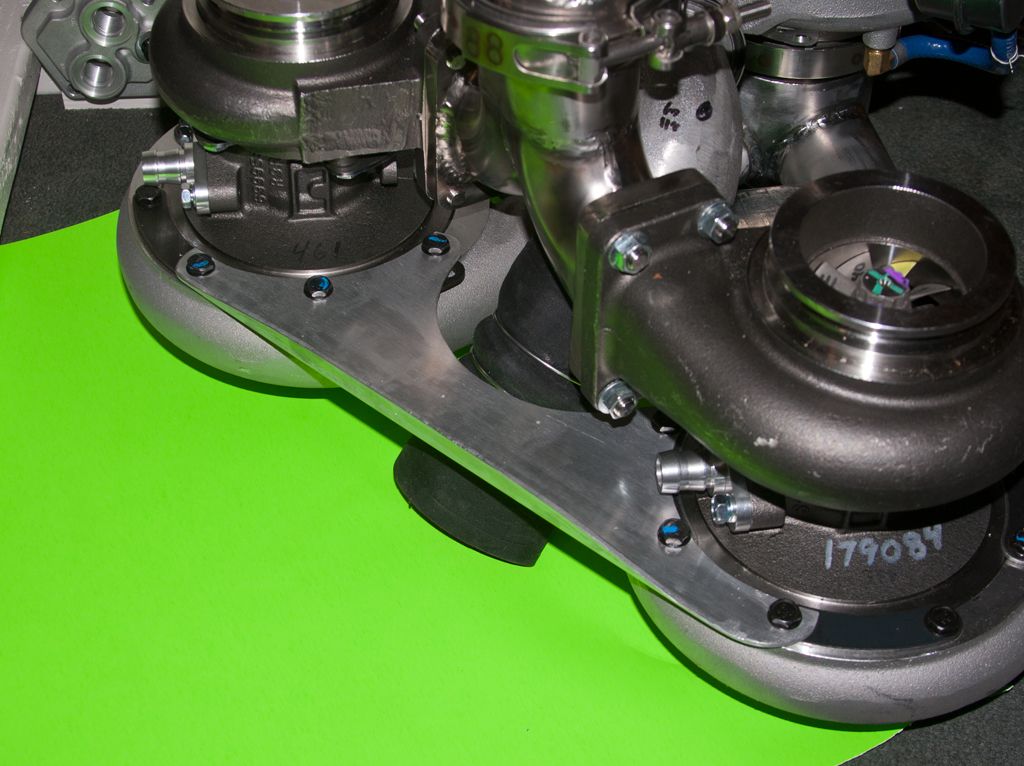
Using that same metal, I made a second bracket that attaches to the block side of the lower primary . . .
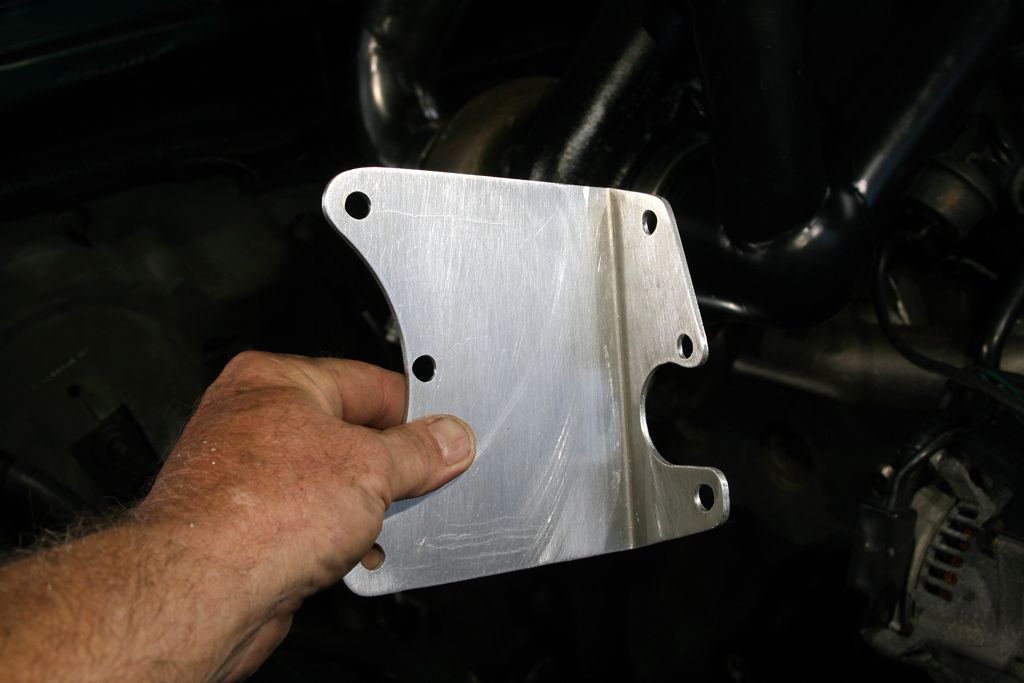
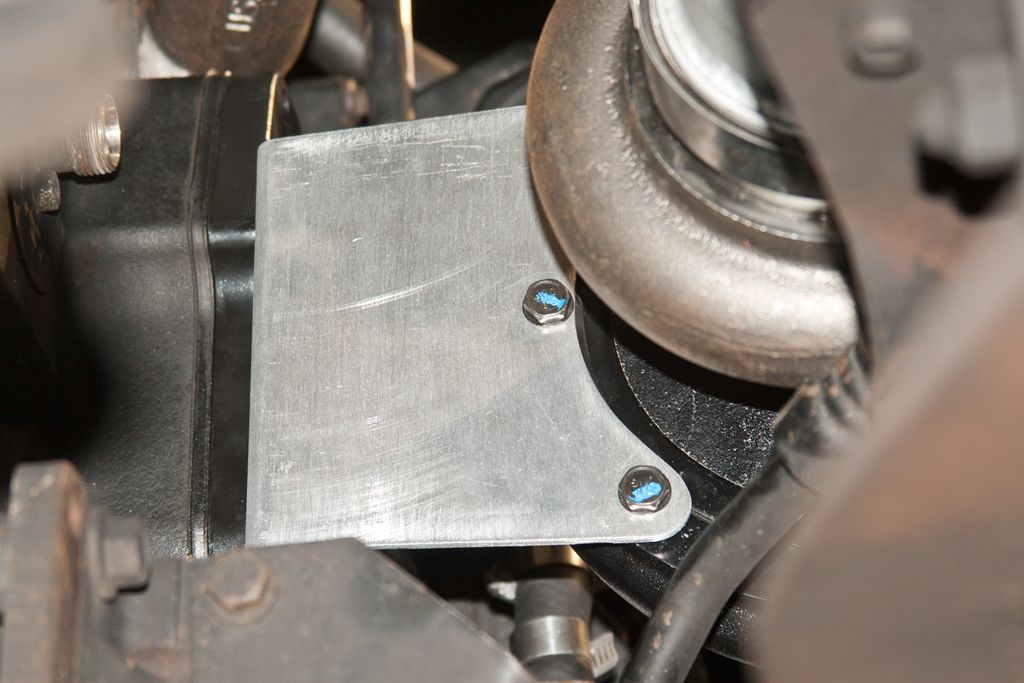
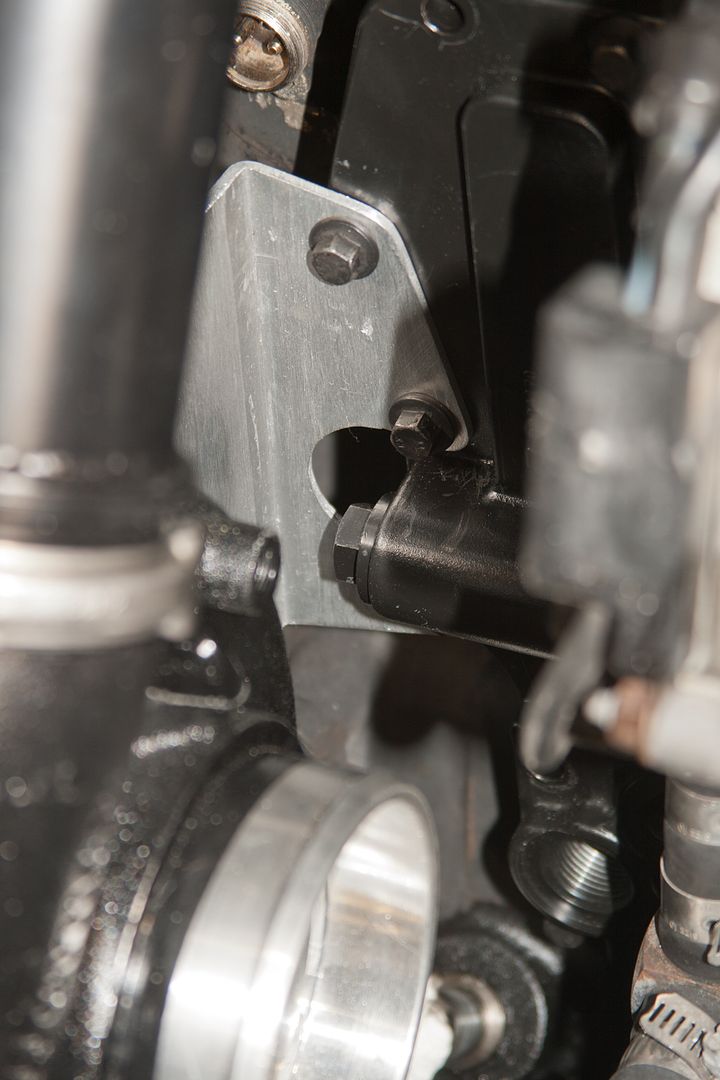
At the block, that lower primary bracket attaches to the oil-cooler cover-plate. I included a notch in the plate so as to afford access to the oil pressure regulator . . .
While not intended as a sho'nuf anchor-point, the cold pipe Wye-pipe ties the faces of the two primaries, with the face of the secondary. Certainly, it helps steady things.
The exhaust down-pipe ties the rears of the primaries together. The downpipe is secured at the transmission bellhousing (as per stock/OEM).
I figure the general triangular shape of the turbo assembly, coupled with the methods/materials used to tie it all together, allow a little wiggle room for thermal expansion/contraction, etc.
Yup, my torque is rolling off well before 2500 IIRC. That being said, it's had over 400hp to the ground after 4000. :evil
The axle was actually narrowed about 2.5" per side. This was to ensure the same footprint as the original axle. Had to move the spring perches inward about 5/16". The narrowing involved simply cutting out a plug of the axle tubes close to the brake flange. (I farmed out the axle housing/tube stuff so they could keep the heap straight).
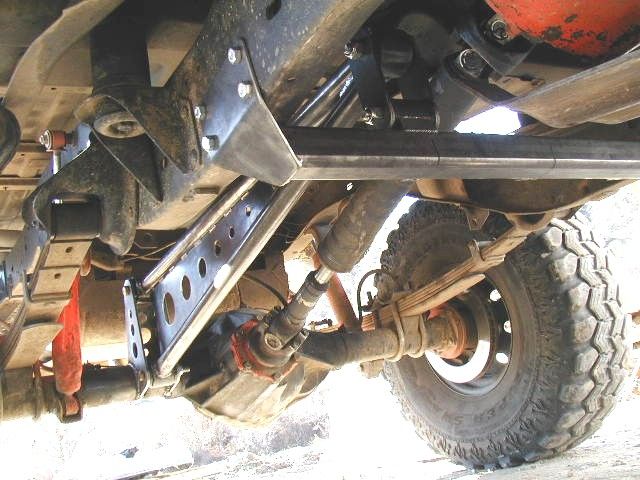
Currently, I run some stupid simple, bolt-on ladder bars. They are good for nothing but going absolutely straight. They do **** for general suspension performance other than prevent axle-wrap. That being said, I've run them for perhaps eight or so years now and, considering how i use the truck, I've never had a noticeable issue with them. But then, I don't intentionally try to diagonally traverse ditches either.
Well, with a new axle come an opportunity to improve on the anti-wrap stuff. Running heavy leaf-springs on top of a stock/OEM 8" block complicates poop though.
I had the axle tubes welded to the diff house in the event the method I used to locate the axle presented substantial twisting loads to one side or the other, of the diff housing.
At the moment, I was considering something like that used on some of the cars . . .
Dunno just yet. Bolted the ladder bars back on for now.
Chris Tobin
New member
Great fab work all around for sure!!!!
BC847
New member
Welp, got it all back together just in time for my Son to say: "Why's it sitting so high in the back?"
Because the stupid new spring perches are right at 3/4" taller than the OEM units. ->GOT'CHA!!<- :bang
It's about seven inches from the top of the tire, to the wheel-well up front, and eleven inches at the back.
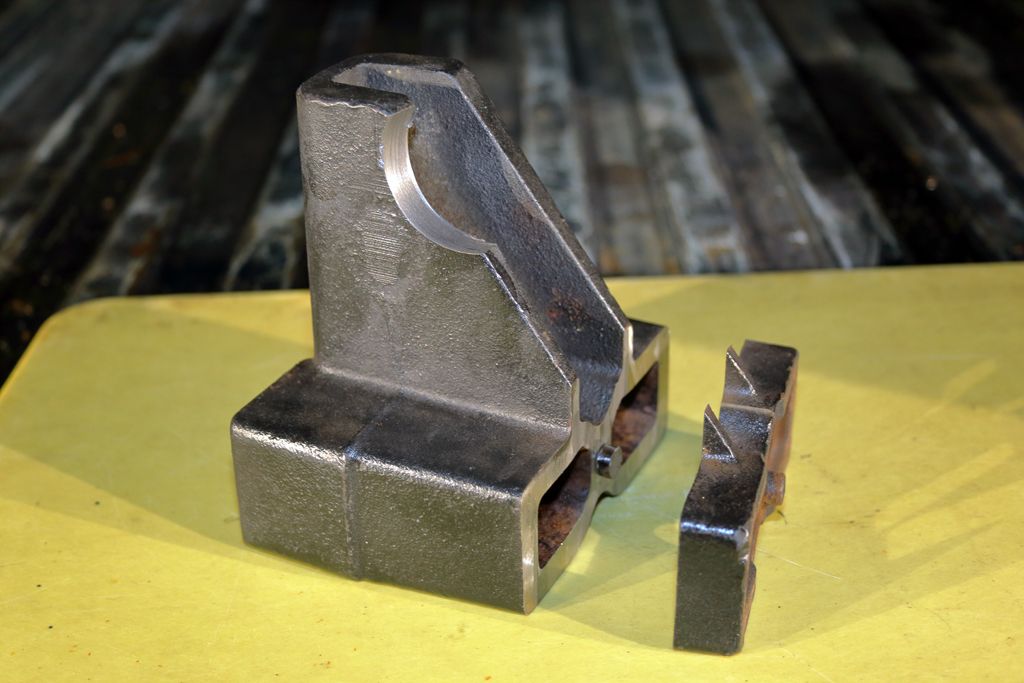
- I removed the very bottom, true leaf-spring. It's about 3/8" thick. It may even soften the ride a little. (I kept the very bottom 3/4" flat Shelf-spring thing).
- I removed about an inch from the bottom of the stock/OEM lift-blocks. Had to notch them for the ladder-bar mount.
I drilled and tapped a hole in the base and spun in a rounded-head 3/8" bolt to replace the block's locating-pin.")
Over all it dropped the rear about 1.75". The ass is still in the air compared to the front, but notably lower than before the mod. It's positively NOT doing he Carolina-Squat.
I'm now at the coast for the second time in the last week with a solid 500ish miles on the R&P.
The truck certainly handles differently under a firm throttle. I don't know it it's the locker or the new wheels/tires.
I'd been running these for the last ten or so years . . .
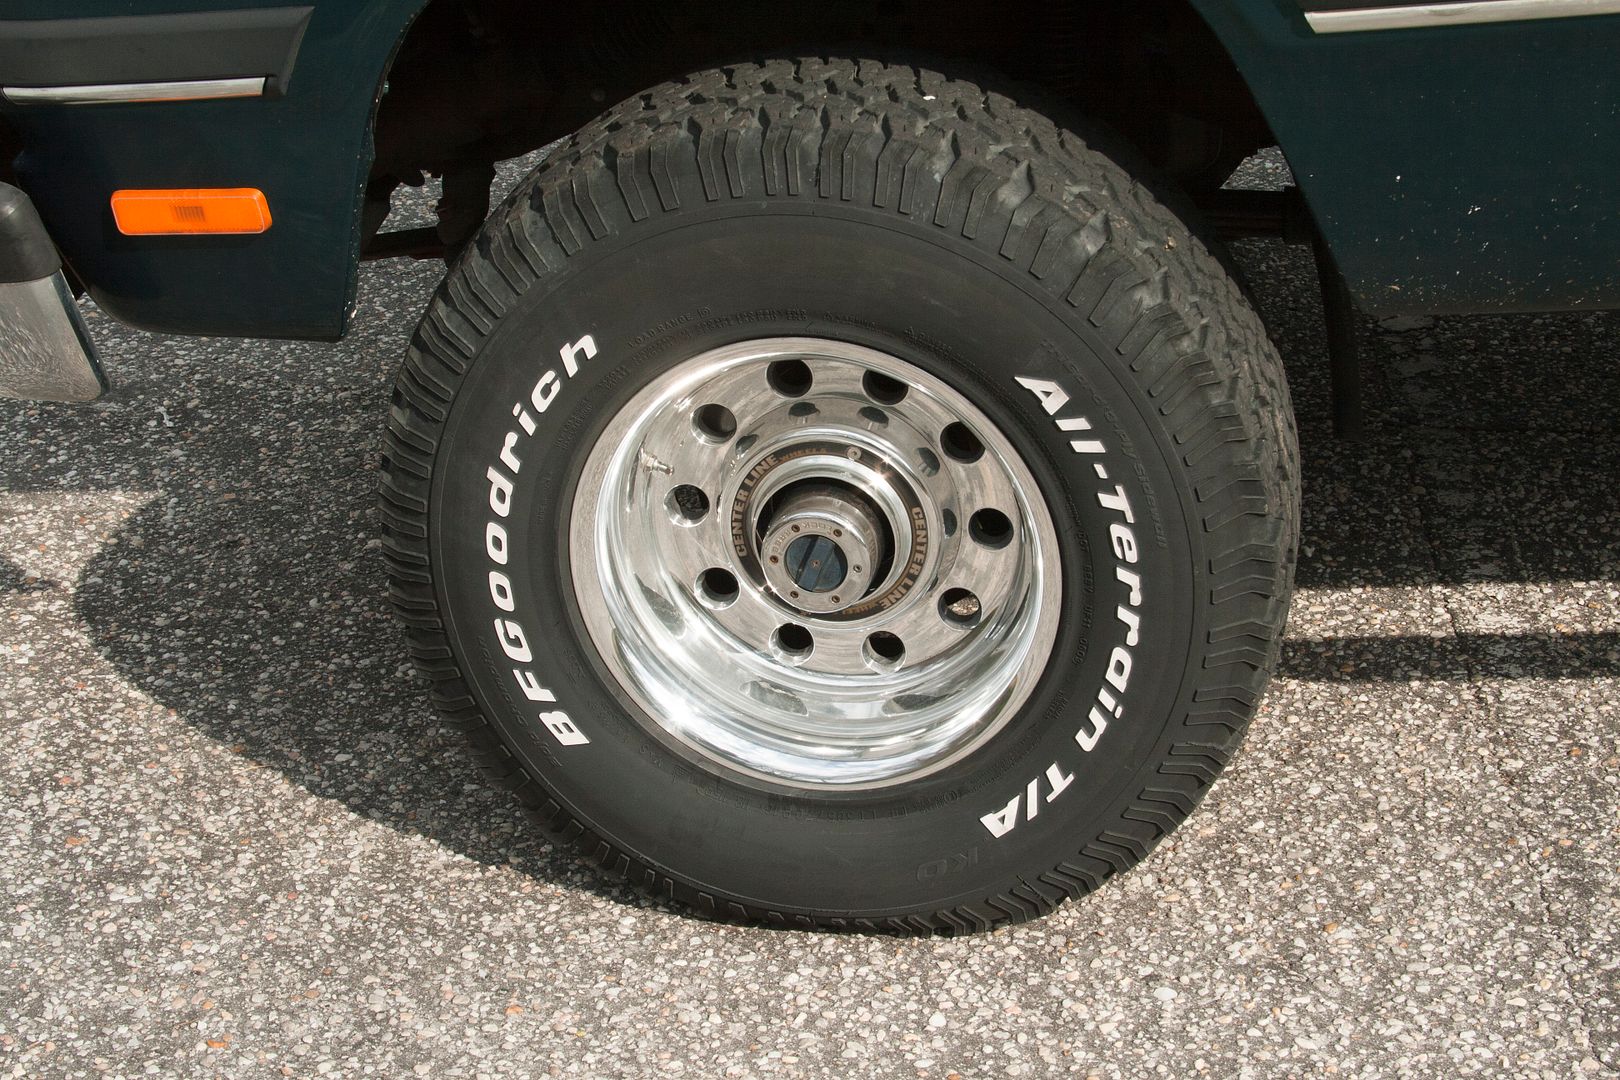
Recently switched over to these as I was at the limit of traction with the former . . . .
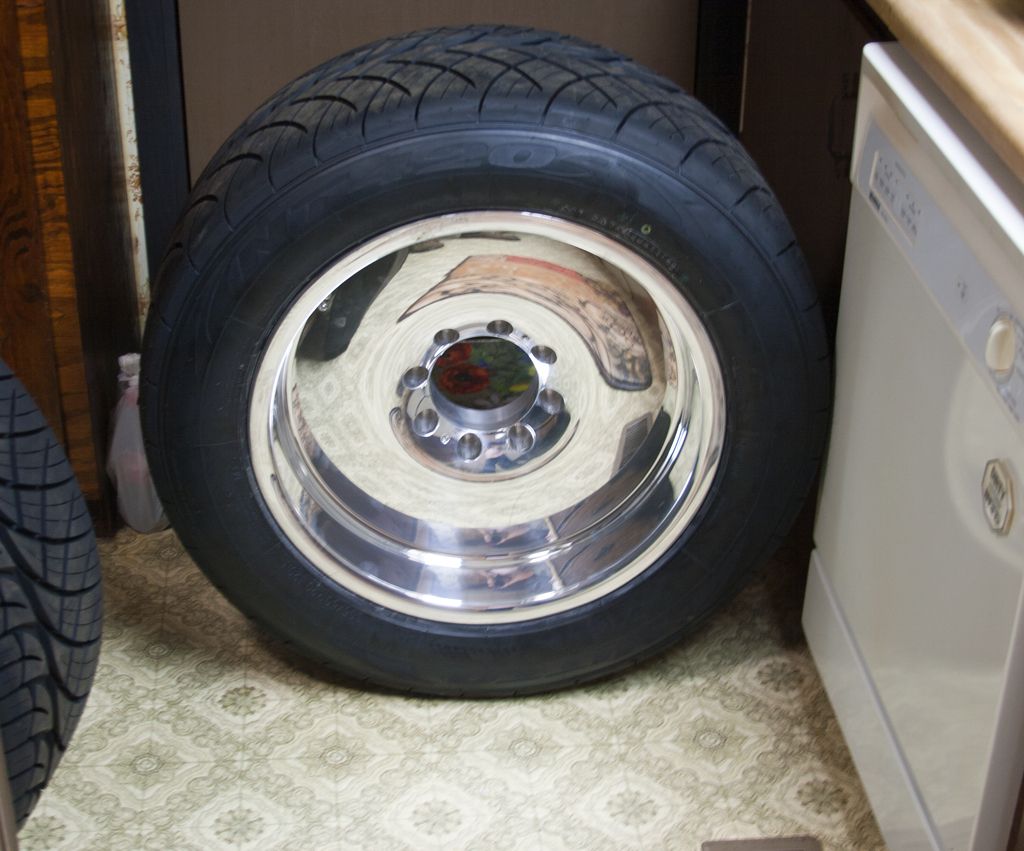
It seems to pull a LOT harder than before .. . . but that may also be the additional air.
Dunno. Got to get on with increasing the volume from the lift-pump stuff.
Because the stupid new spring perches are right at 3/4" taller than the OEM units. ->GOT'CHA!!<- :bang
It's about seven inches from the top of the tire, to the wheel-well up front, and eleven inches at the back.
- I removed the very bottom, true leaf-spring. It's about 3/8" thick. It may even soften the ride a little. (I kept the very bottom 3/4" flat Shelf-spring thing).
- I removed about an inch from the bottom of the stock/OEM lift-blocks. Had to notch them for the ladder-bar mount.
I drilled and tapped a hole in the base and spun in a rounded-head 3/8" bolt to replace the block's locating-pin.
Over all it dropped the rear about 1.75". The ass is still in the air compared to the front, but notably lower than before the mod. It's positively NOT doing he Carolina-Squat.
I'm now at the coast for the second time in the last week with a solid 500ish miles on the R&P.
The truck certainly handles differently under a firm throttle. I don't know it it's the locker or the new wheels/tires.
I'd been running these for the last ten or so years . . .
Recently switched over to these as I was at the limit of traction with the former . . . .
It seems to pull a LOT harder than before .. . . but that may also be the additional air.
Dunno. Got to get on with increasing the volume from the lift-pump stuff.
Last edited:
YOUNG GUNS15
Im AWESOME!!!!
Runs good! Toying with the idea of a similar triple turbo setup on a tow truck.
Sent from my iPhone using Tapatalk
Sent from my iPhone using Tapatalk
Chris Tobin
New member
Personally I would get rid of the cast block... I have heard of and seen broken ones and that could get ugly with a powerful truck!!!
If you determine that you still need a block at all, determine the height you need/want then use a fabricated block like the ones that Top Gun Customz makes. I have them on my Tahoe and if I needed a block on my Silverado these are the ones I'd use for sure!!!
Suspension Components - Lift Blocks - Dodge
BC847
New member
I've, off and on, considered replacing the OEM cast lift-blocks with something of steel, with some means of custom fabing/including stuff to mimic the Caltrac type design.Personally I would get rid of the cast block... I have heard of and seen broken ones and that could get ugly with a powerful truck!!!
If you determine that you still need a block at all, determine the height you need/want then use a fabricated block like the ones that Top Gun Customz makes. I have them on my Tahoe and if I needed a block on my Silverado these are the ones I'd use for sure!!!
Still ciphering on it.
Anyhoo . .. .
Back to what I was doing when the rear-end showed it's @ss.
My injectors are big enough that at WOT, they draw enough fuel volume that the case-pressure is dropping/sagging thus retarding the injection event timing while at WOT.
I've been running a simple Walbro-392 through an Aeromotive bypass-type pressure regulator set for 18ish psig. At WOT, that feed-pressure drops to 16ish psig. (At that pressure, the Walbro moves only a few less GPH than an Aeromotive 1000)
So: Walbro-392 v2.0
We'll see . . . .
BC847
New member
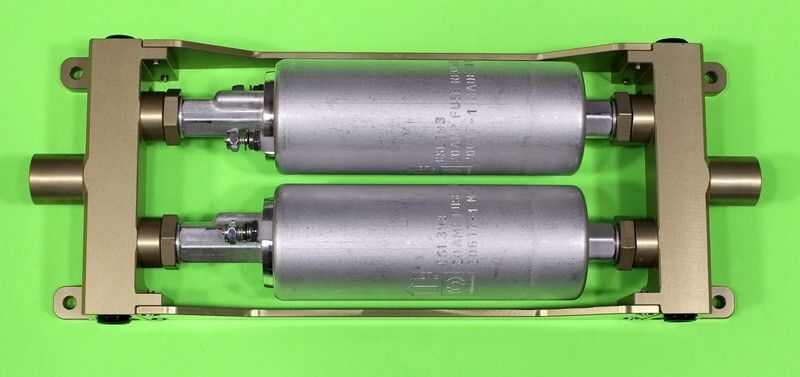
Nope, it's actually found on hot-rodded smaller aircraft running the likes of Lycoming, Continental, Rotax, etc engines.Dam, did you make that double fuel pump holder?
Racetech/SDS . . . .. w ww.sdsefi.com/aircraft.html
Last edited:
not enoughsmoke
floatin in tha gulf
wow you have some good Fab work Where did you get the ac line stuff if you dont mind me asking
BC847
New member
Thanks.wow you have some good Fab work Where did you get the ac line stuff if you dont mind me asking
Places like:
Auto A/C Fittings
Cold Hose - AC Hoses, Hose Kits and Fittings
Pretty-much just did a lot of Google searches.
One thing I found right off was:
- Most of the older automotive AC systems used what one might call a Standard hose wall thickness (Standard Barrier).
- Newer vehicles take advantage of newer technologies/materials and use a Reduced Barrier type hose. I suppose it's for the weight savings overall.
Basically, the latter is thinner than the former. That being said, pay attention to what fittings/hoses you're contemplating buying. The reduced-barrier fittings won't work on the standard barrier hose, for example.
If you can effectively envision where you want stuff to run, it's then a matter of finding the correct fittings (What connects to it, what it connects to, what direction you want it to point, etc), then select the appropriate hose.
There are companies that will custom make stuff for you, but you've GOT to provide them with the complete plan you have in mind, so that what they make (based on YOUR plan) fits like you intend.
In my case, the stock/OEM refrigerant lineset had the suction line leave the H-block and run diagonally down the fenderwell to the compressor. That location potentially conflicted with the top primary turbo. My concern was the heat would threaten the rubber hose.
So, I made a new H-block fitting that would have that suction line run straight forward, past the hot stuff, and turn down in front of the top primary, on its way to the compressor.
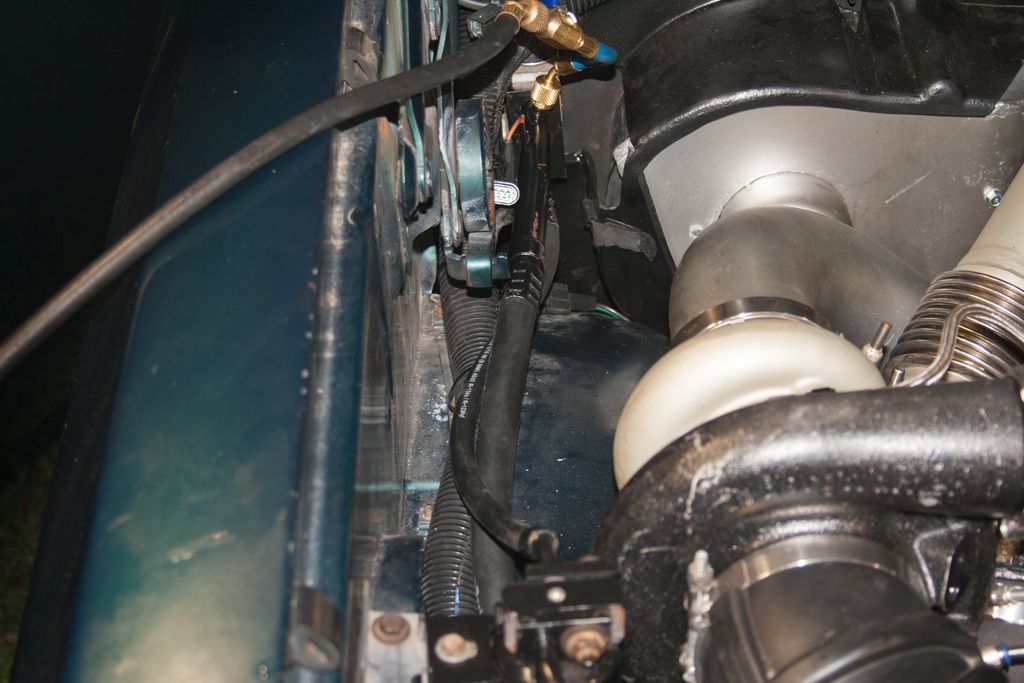
At the compressor, the OEM stuff had that suction line pointing at the lower primaries hot stuff. Had to locate fittings that would aim the hose nipple at the front of the turbos.
I converted all the hoses from the original standard-barrier to the reduced-barrier as I needed the room.
Red Sleeper
Active member
Your ladder bar idea should work really well. And it's a simple solution that won't hinder axle articulation.
I built that exact same concept for a lifted Dakota with 1 ton axles on 39" rubbers. Only difference is I left mine slightly lower than the drive shaft for protection. Otherwise, all axle wrap was removed.
I built that exact same concept for a lifted Dakota with 1 ton axles on 39" rubbers. Only difference is I left mine slightly lower than the drive shaft for protection. Otherwise, all axle wrap was removed.
BC847
New member
To keep this thread alive, I reckon I need to post something. Not done much to the truck in the last week or so. That new axle was not planned. The lot rent for the beach place is due, auto insurance, etc. You know the drill. :blahblah1:
Perhaps I can Show-&-Tell a few things I found looking stuff to make stuff with . .. .
- Frigging velocity stacks are expensive for what they are. My stock-pot cold-air intake was originally made using a 4" turbo supply. I needed to up-size it for the triples.
Check the folks who make dust/shavings collection systems. You know, the stuff for woodworking shops etc. They often use round duct-work.
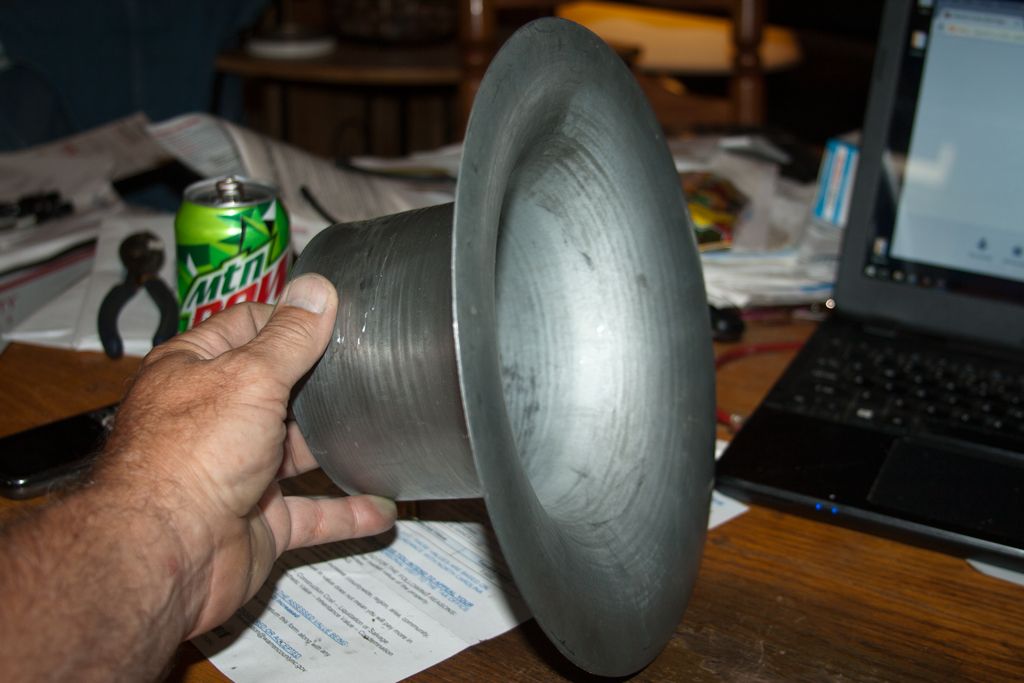
I used that to blend the air-filter element to the actual duct . . .
That round duct-work needs adapters to connect the drop-lines to the main truck-lines. I found one of those adapters was an excellent fit for the turbo feed Tee . . .
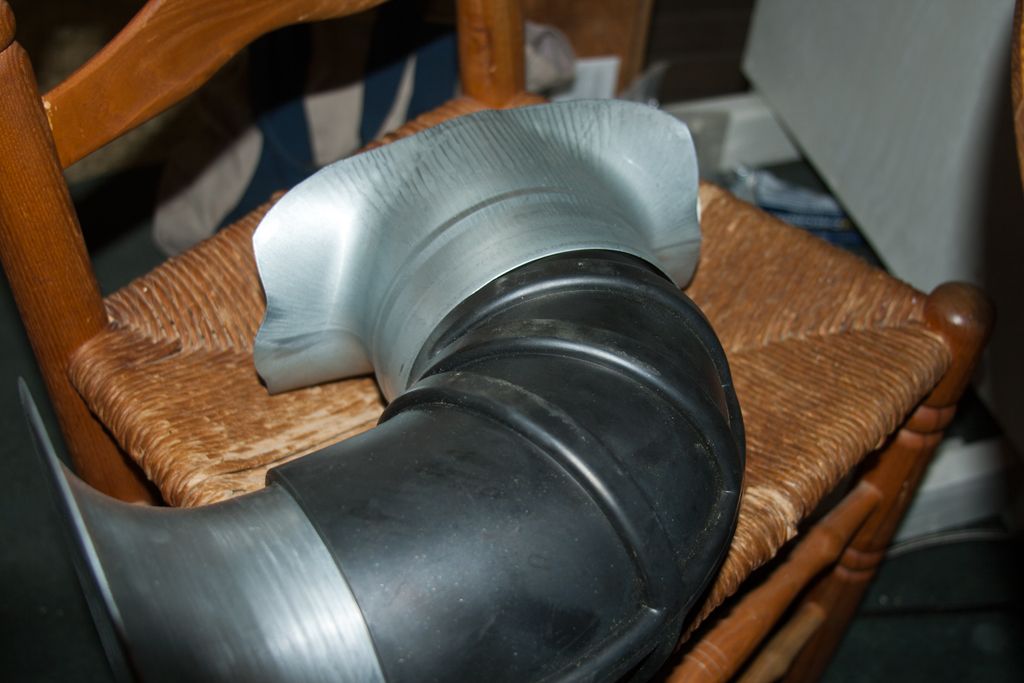
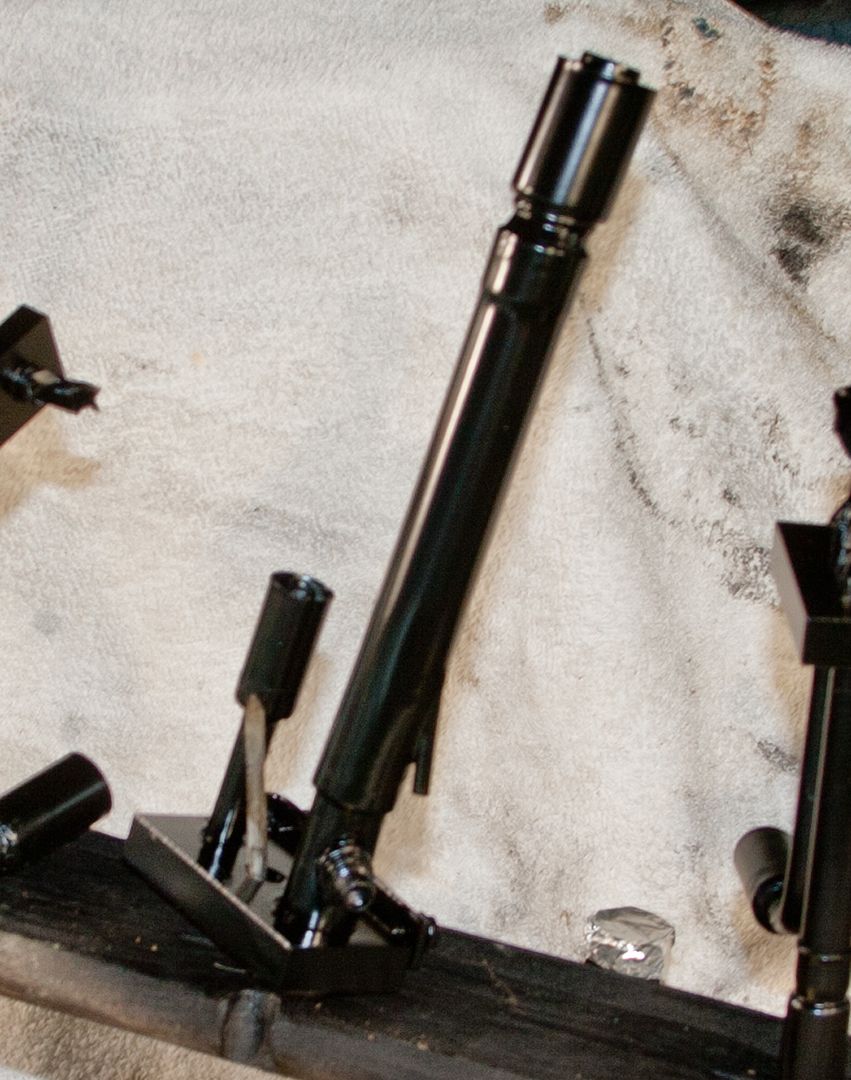
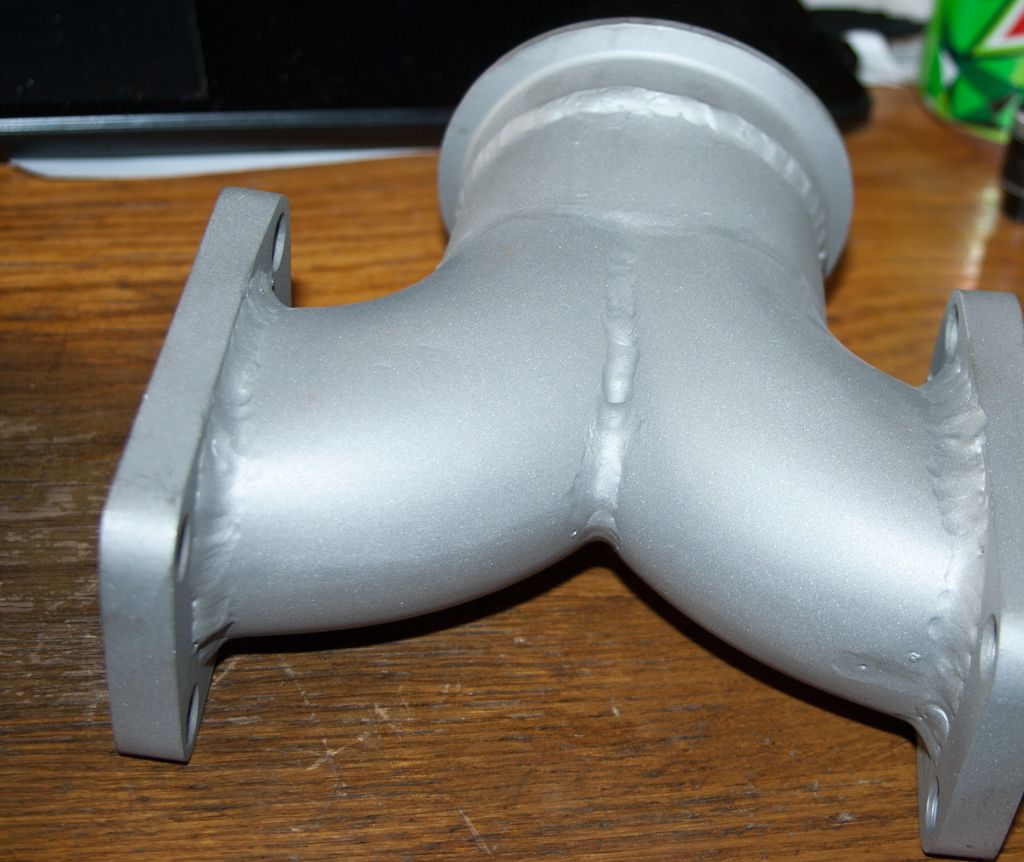
That hot-pipe from the secondary to the primaries was a hoot. The way things fall in the 1st Gen engine bay, the typical mandrel-bent exhaust tubing would not fit the way I was steering things as the smallest radius available would be in the HVAC box.
As I understand how mandrel-bending works, to make a bend as sharp as I needed, would have the metal of the outer radius be stretched too thin resulting in fracture/perforation.
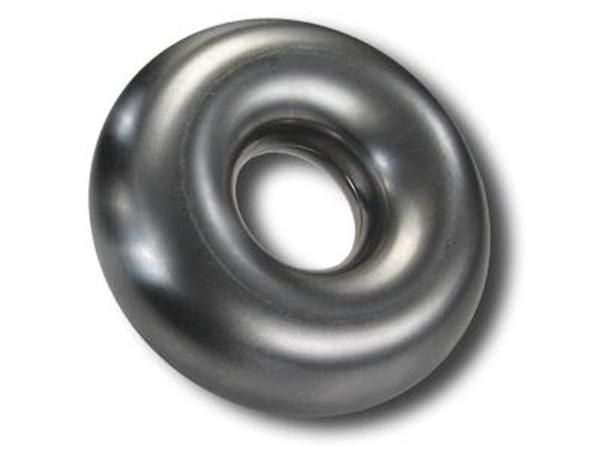
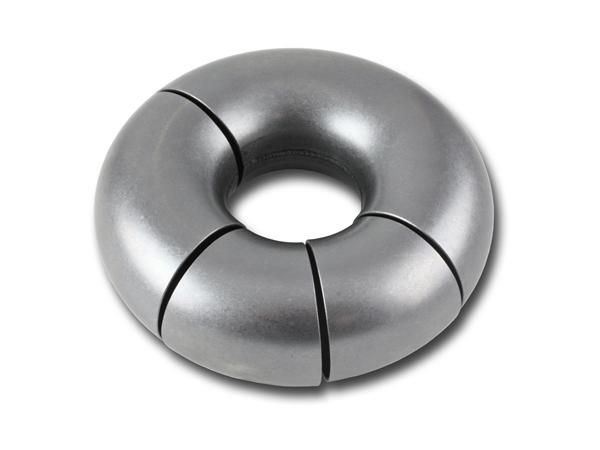
So, I found a company that makes Donuts. CRS and stainless steel donuts to be exact. They stamp 14ga metal so as to make 1/2 of the donut. They punch that out of the plate. To complete the things, they then weld the outer seam (you get to weld the inner seam). I could only find one company that makes them, and they're especially proud of them.
BUT, It appears they sell the blemished product on Ebay for a LOT less.
They were most helpful in keeping the hot-wye compact . . .
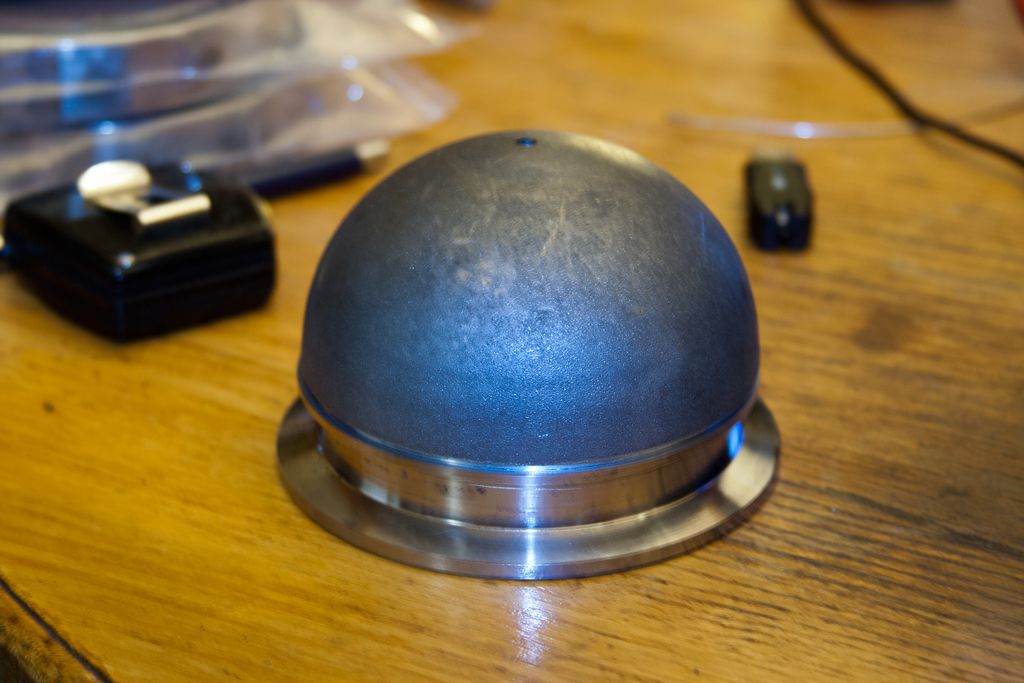
That wye-pipe for the cold-side includes a bollard cap (mocking-up stuff here) . . . . .
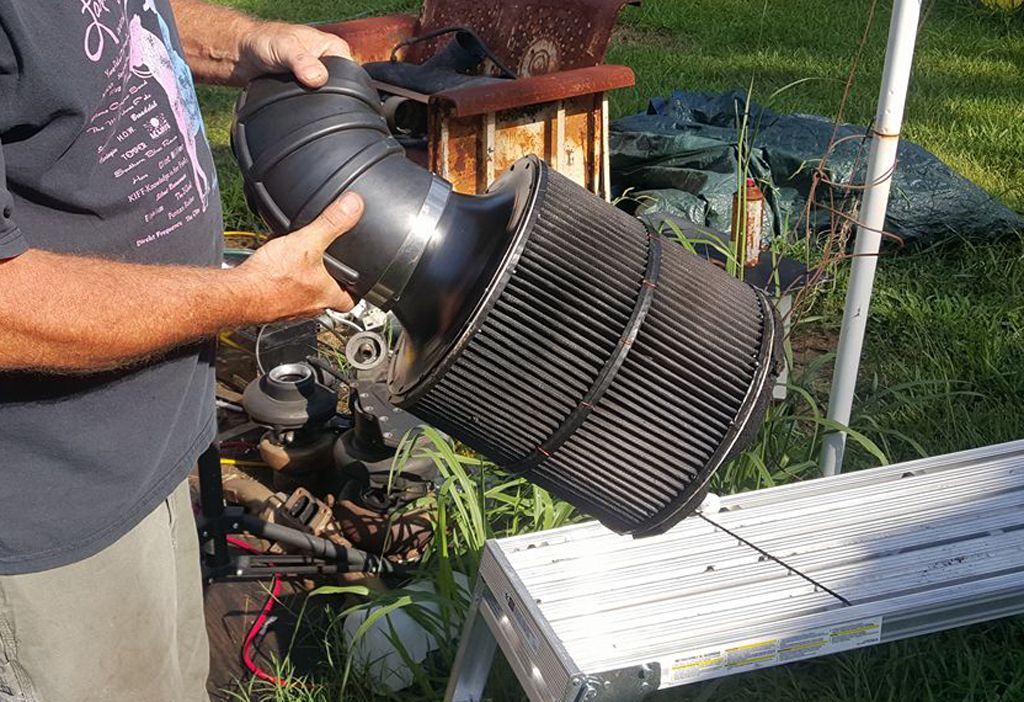
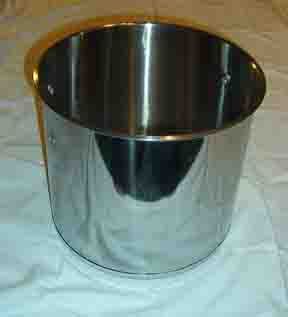
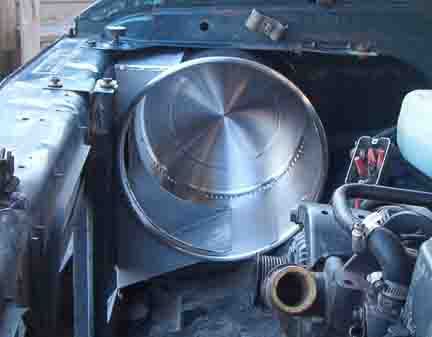
A stainless steel 33qt stock-pot, makes an excellent air filter housing . . . .
Throw in some seamless gutter metal and . . . .
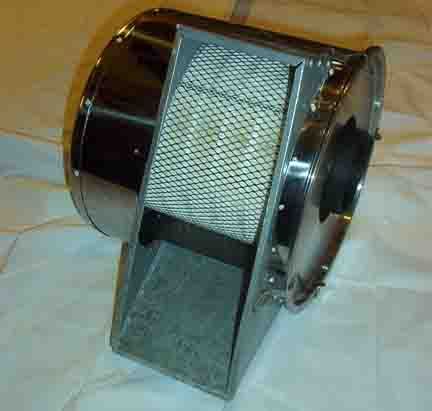
Necessity is the mother of invention.
.
Perhaps I can Show-&-Tell a few things I found looking stuff to make stuff with . .. .
- Frigging velocity stacks are expensive for what they are. My stock-pot cold-air intake was originally made using a 4" turbo supply. I needed to up-size it for the triples.
Check the folks who make dust/shavings collection systems. You know, the stuff for woodworking shops etc. They often use round duct-work.
I used that to blend the air-filter element to the actual duct . . .
That round duct-work needs adapters to connect the drop-lines to the main truck-lines. I found one of those adapters was an excellent fit for the turbo feed Tee . . .
That hot-pipe from the secondary to the primaries was a hoot. The way things fall in the 1st Gen engine bay, the typical mandrel-bent exhaust tubing would not fit the way I was steering things as the smallest radius available would be in the HVAC box.
As I understand how mandrel-bending works, to make a bend as sharp as I needed, would have the metal of the outer radius be stretched too thin resulting in fracture/perforation.
So, I found a company that makes Donuts. CRS and stainless steel donuts to be exact. They stamp 14ga metal so as to make 1/2 of the donut. They punch that out of the plate. To complete the things, they then weld the outer seam (you get to weld the inner seam). I could only find one company that makes them, and they're especially proud of them.
BUT, It appears they sell the blemished product on Ebay for a LOT less.
They were most helpful in keeping the hot-wye compact . . .
That wye-pipe for the cold-side includes a bollard cap (mocking-up stuff here) . . . . .
A stainless steel 33qt stock-pot, makes an excellent air filter housing . . . .
Throw in some seamless gutter metal and . . . .
Necessity is the mother of invention.
.
Last edited:
QMFB
Fastest Welder in Texas
So, as a welder/fabricator by trade... I can't follow that last post through. Did you section a pre-fab "doughnut" into an intake tract ? And what part of that had to do with the "hot" y-pipe ??? Just trying to understand your specific thought train... I appreciate your fabrication skills for sure ��
j.fondler
Slow Learner
At the moment, I was considering something like that used on some of the cars . . .
Dunno just yet. Bolted the ladder bars back on for now.
I run an axle wrap bar like this on my little 03 shorty 12v swap truck. I wanted to keep the stock rear leaf springs for comfort but not twist them to shred and wheel hop was an issue so I went with one of these. the shackle on one end allows the rear suspension to still work but no axle wrap or wheel hop.
BC847
New member
So, as a welder/fabricator by trade... I can't follow that last post through. Did you section a pre-fab "doughnut" into an intake tract ? And what part of that had to do with the "hot" y-pipe ??? Just trying to understand your specific thought train... I appreciate your fabrication skills for sure ��
The goal was to make sharp turns in pipe, the radius of which is not available with the typical mandrel-bent pipe.
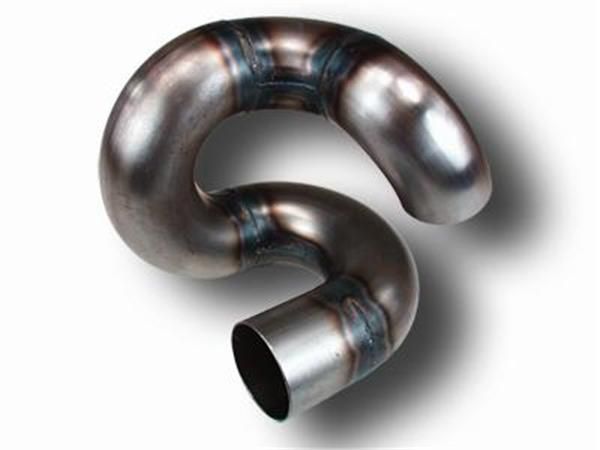
I used the donuts to fabricate the plumbing of the hot-stuff exclusively. Those pics of the donut being sectioned and welded together are simply images of what one might do with the things (as provided by the donut vendor).
- That hot-pipe coming off the secondary is 3" 14 gauge 304 SS. The donut was the only means of making the turn as sharp as I needed it (3" bend radius).
- The Hot-Wye is of a 2.5" 14 gauge 304 SS. It has a 2.5" bend radius. That greatly helped keeping the Wye compact, . . . . eight of the nine voices agreed.
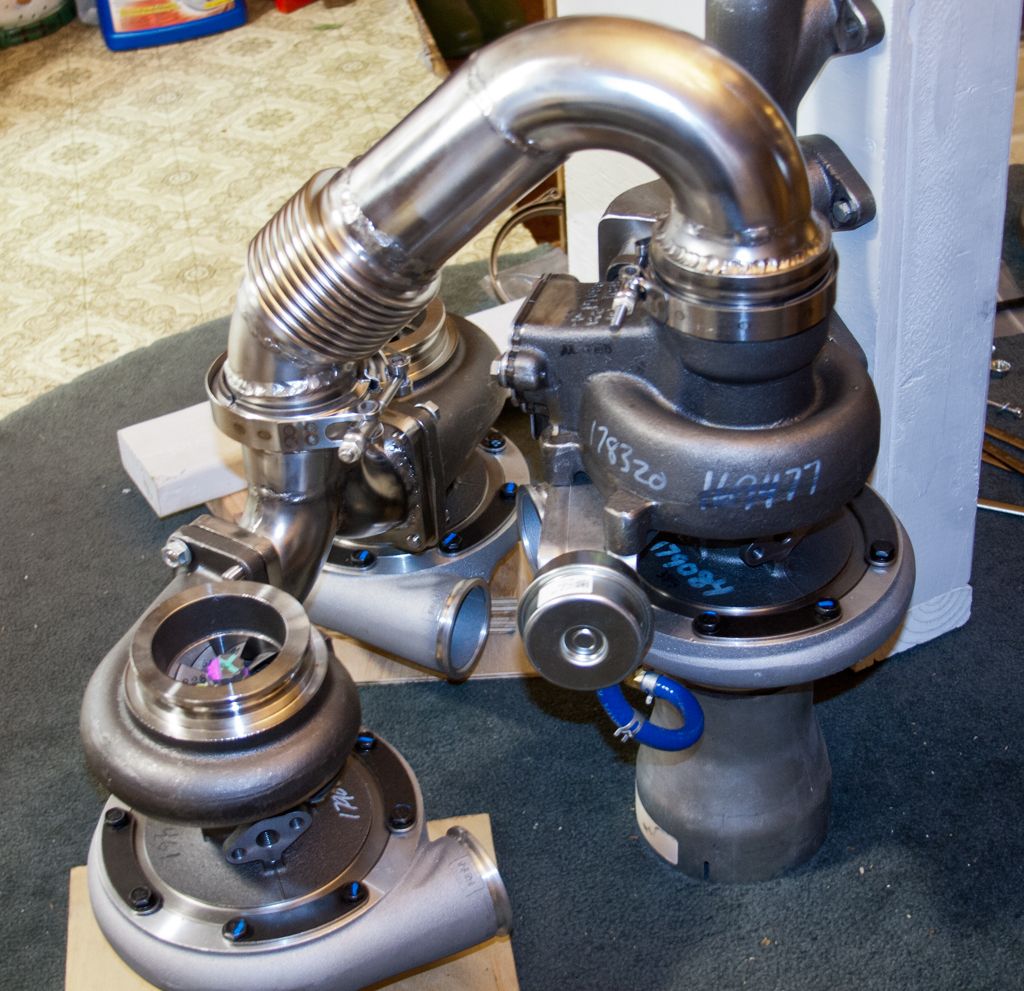
(My welding sucks, leave me alone).
Last edited:
mfsuper90
300ft is all I need
The goal was to make sharp turns in pipe, the radius of which is not available with the typical mandrel-bent pipe.
I used the donuts to fabricate the plumbing of the hot-stuff exclusively. Those pics of the donut being sectioned and welded together are simply images of what one might do with the things (as provided by the donut vendor).
- That hot-pipe coming off the secondary is 3" 14 gauge 304 SS. The donut was the only means of making the turn as sharp as I needed it (3" bend radius).
- The Hot-Wye is of a 2.5" 14 gauge 304 SS. It has a 2.5" bend radius. That greatly helped keeping the Wye compact, . . . . eight of the nine voices agreed.
(My welding sucks, leave me alone).
Your welds look fine! Sweet looking setup there, dont worry my tig welds look worse than that. Guess thats what I get for only using tig once a month.