| Advertisement |
|
|
|
|
|
|
|
If this is your first visit, be sure to check out the FAQ by clicking the link above.
You may have to register before you can post: click the register link above to proceed.
To start viewing messages, select the forum that you want to visit from the selection below.
|
 11-25-2013, 06:21 PM
|
#21
|
Name: 97rada
Title: Too Much Time
Status: Not Here
Join Date: Feb 2008
Member`s Gallery
Posts: 5,410
|
Awesome work. I want to do this someday
__________________
Austin
tow truck- 14-3500 with tuning
toy truck -94 rclb auto- 5.2x with a lot left. Shooting for 4s
Any intelligent fool can make things bigger and more complex...it takes a touch of genius- and alot of courage to move in the opposite direction.
|
|
|
|
|
11-25-2013, 09:46 PM
|
#22
|
Name: millsy102
Title: Rookie
Status: Not Here
Join Date: Feb 2013
Location: acton, On
Member`s Gallery
Posts: 13
|
I think all of us would like to do this. Looks awesome wish I had the time and space to do a project like this.
__________________
96 cclb, auto 4x4, plate mia, racked barrels, 4gsk, 60#'s, 18*, 191 dv's, tork tek ofv, holly black pusher, rack plug, 5x14's, hx52
|
|
|
|
|
11-26-2013, 01:35 AM
|
#23
|
Name: whitetrash21
Title: der sparky
Status: Not Here
Join Date: May 2009
Location: Vegas
Member`s Gallery
Posts: 496
|
Very nice... even more impressive doing it all with no lift. I know how much work that takes.
|
|
|
|
|
11-26-2013, 02:07 AM
|
#24
|
Name: purediesl
Title: Overkill
Status: Not Here
Join Date: Aug 2012
Member`s Gallery
Posts: 100
|
Yeah no lift and by yourself takes some time and creative thinking. Also what I've learned is that anything is possible as long as you stick to it. If I didn't have the space, Id still do it in the driveway haha. I'd just be doing it all in the summer. You just need the inspiration as well as the will to follow through, and then anything is possible. Just DO WORK and alls well! (As I keep telling myself everyday)..
|
|
|
|
|
11-26-2013, 12:41 PM
|
#25
|
Name: murphy41
Title: Too Much Time
Status: Not Here
Join Date: Jan 2009
Location: Utah
Member`s Gallery
Posts: 1,624
|
I didn't realize the rust belt was that harsh on a vehicle. Guess I'm just used to the climate here haha.
__________________
Brandon
1997 2WD
Engineered Diesel
Manning Motorsports
Outlaw Diesel Performance (Utah)
AT Performance Diesel
|
|
|
|
|
11-27-2013, 11:31 AM
|
#26
|
Name: purediesl
Title: Overkill
Status: Not Here
Join Date: Aug 2012
Member`s Gallery
Posts: 100
|
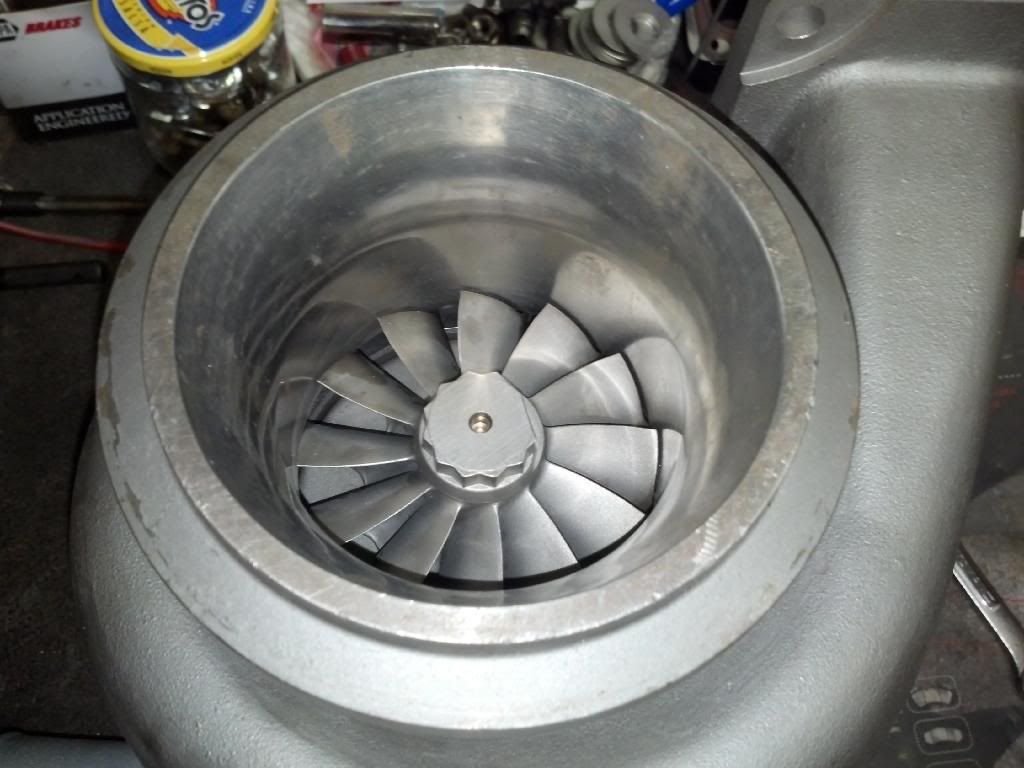
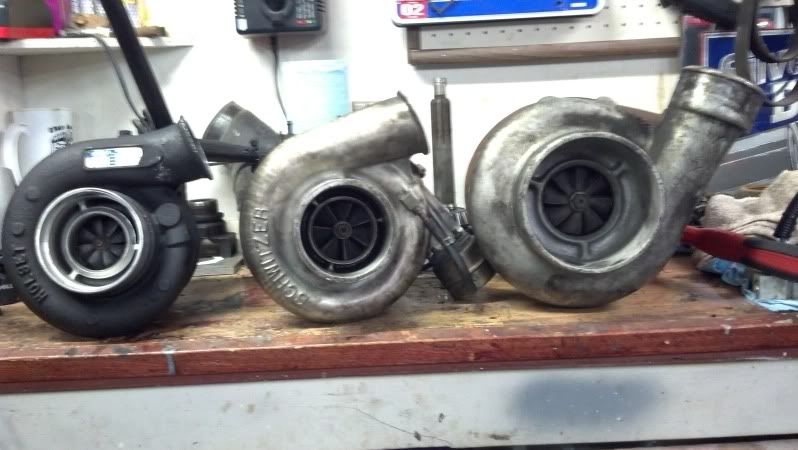
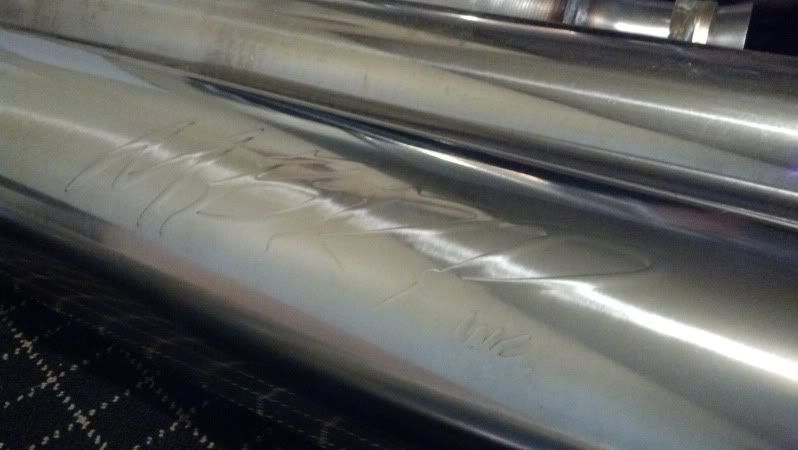
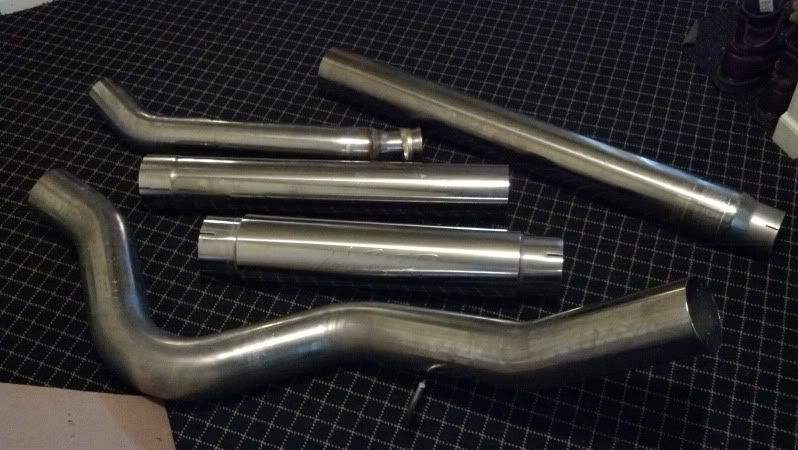
Well the wrench I was referring to in the earlier post is going to be a nice set of towing compounds. This truck is purely a tow rig for my jeep as well as the typical use for a truck. Compounds have always been what I wanted for a tow rig and thanks the the classified section, I bought some sooner than I wanted haha. From the previous owner I was told that they are a 62/65/14cm over a ht3b with a 23cm housing. Came with all piping, lines and mount. Turbos just need a little tlc and they'll be good to go. Now I'm on the hunt for some studs and 5x.014 injectors. Ought to be a nice set for towing and spool pretty quick.

nice comparison
|
|
|
|
|
11-27-2013, 12:01 PM
|
#27
|
Name: zfaylor
Title: Comp Diesel Sponsor
Status: Not Here
Join Date: Nov 2010
Location: P-TOWN!, Indiana
Member`s Gallery
Posts: 5,024
|
5 gallons of purple power later my fan pulley I sent ya might be worthy of that engine again!  watching this!
__________________
2015 half ton heavy chevy
81 Fairmont LS project
Many yard ornament projects...
North American Turbo
|
|
|
|
|
11-27-2013, 12:08 PM
|
#28
|
Name: murphy41
Title: Too Much Time
Status: Not Here
Join Date: Jan 2009
Location: Utah
Member`s Gallery
Posts: 1,624
|
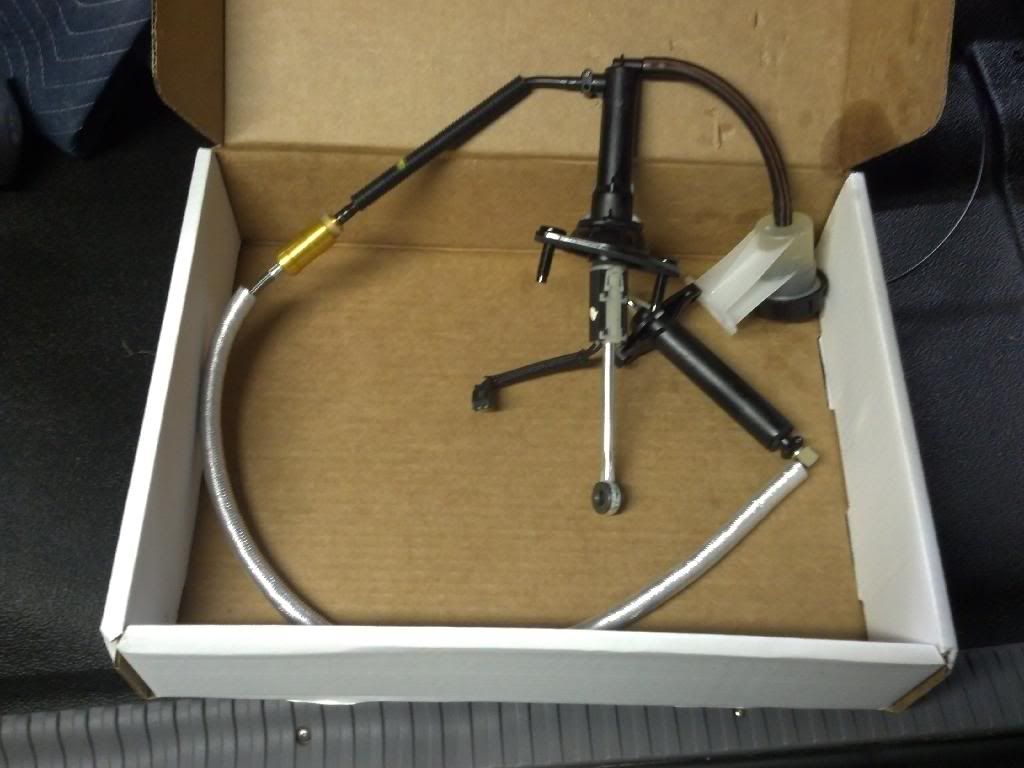
Creative way of shipping the turbos. Definitely sturdy.
__________________
Brandon
1997 2WD
Engineered Diesel
Manning Motorsports
Outlaw Diesel Performance (Utah)
AT Performance Diesel
|
|
|
|
|
11-27-2013, 12:37 PM
|
#29
|
Name: purediesl
Title: Overkill
Status: Not Here
Join Date: Aug 2012
Member`s Gallery
Posts: 100
|
Haha, it took about a half a can of brake clean and a stiff bristle brush to get that pully clean! Turbos showed up in great shape, the box wasn't even damaged. 138lb box you'd think might have some damage.
|
|
|
|
|
12-11-2013, 08:33 PM
|
#30
|
Name: purediesl
Title: Overkill
Status: Not Here
Join Date: Aug 2012
Member`s Gallery
Posts: 100
|
Update 12-11-13
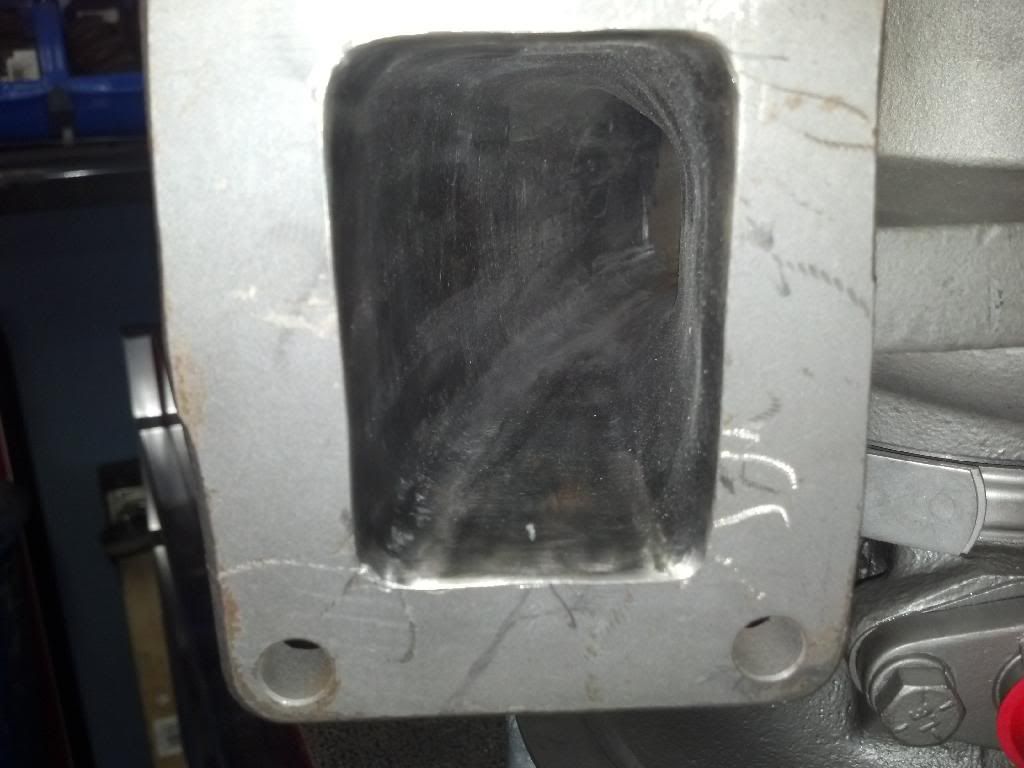
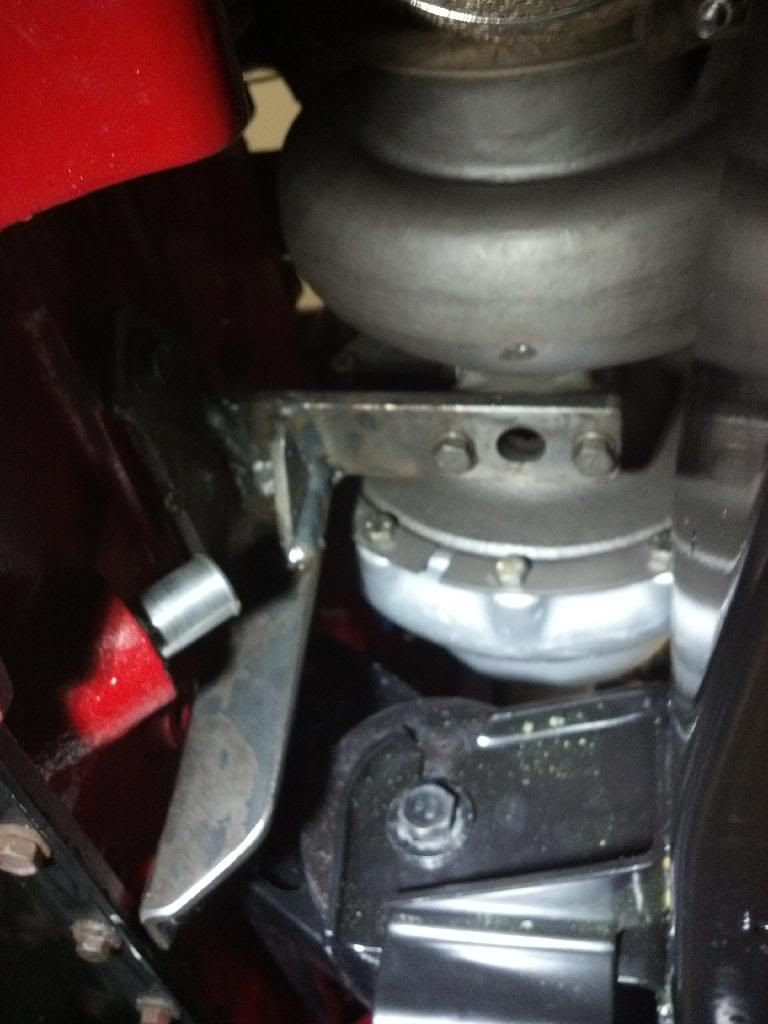
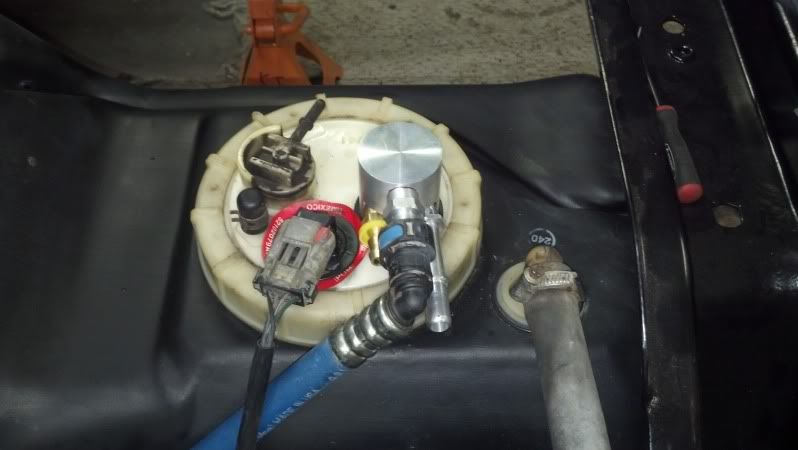
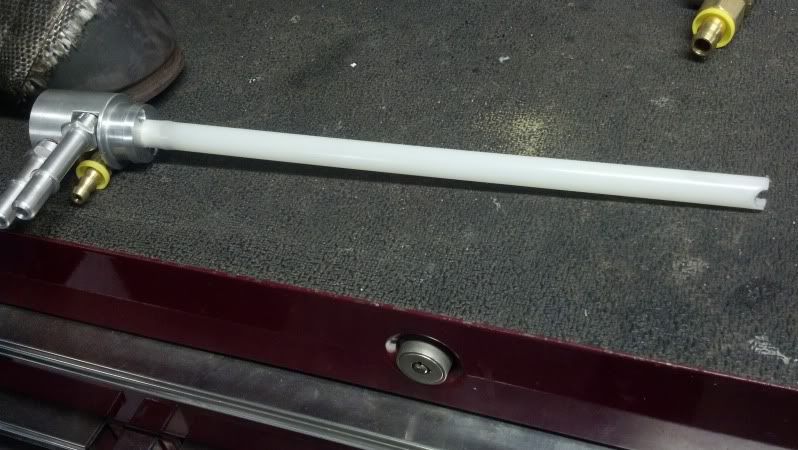
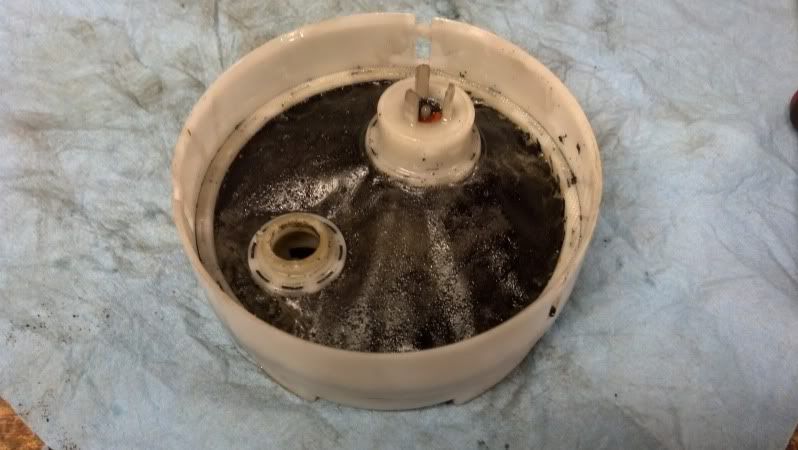
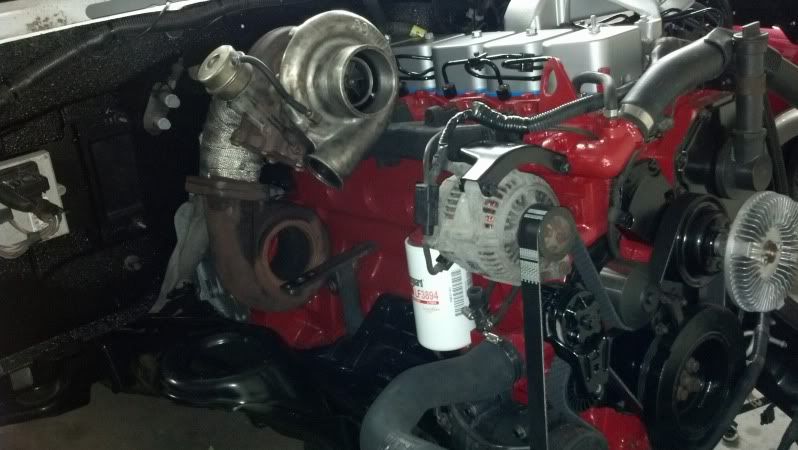
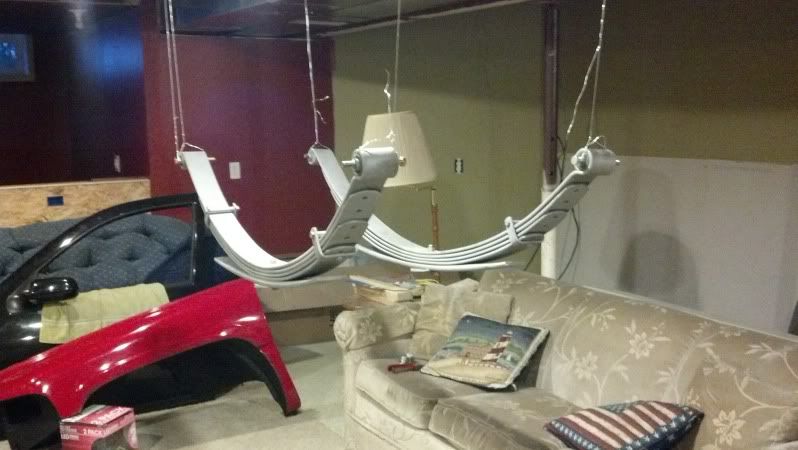
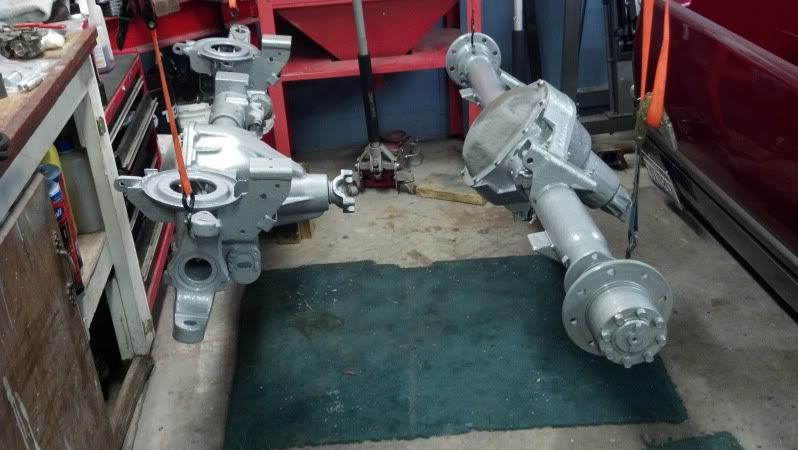
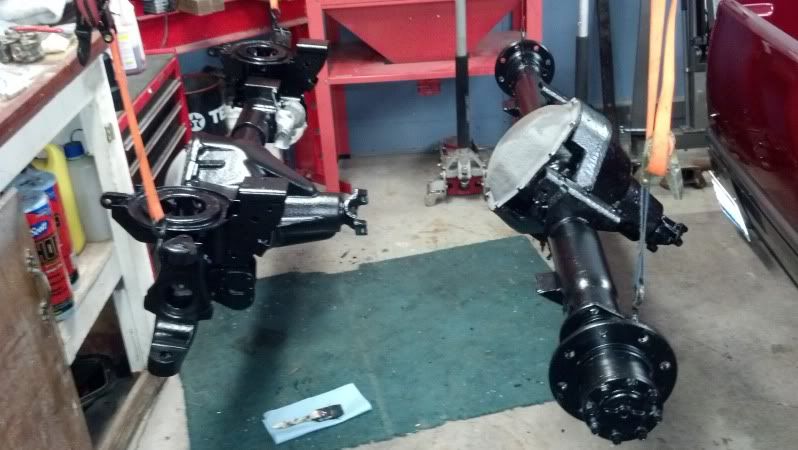
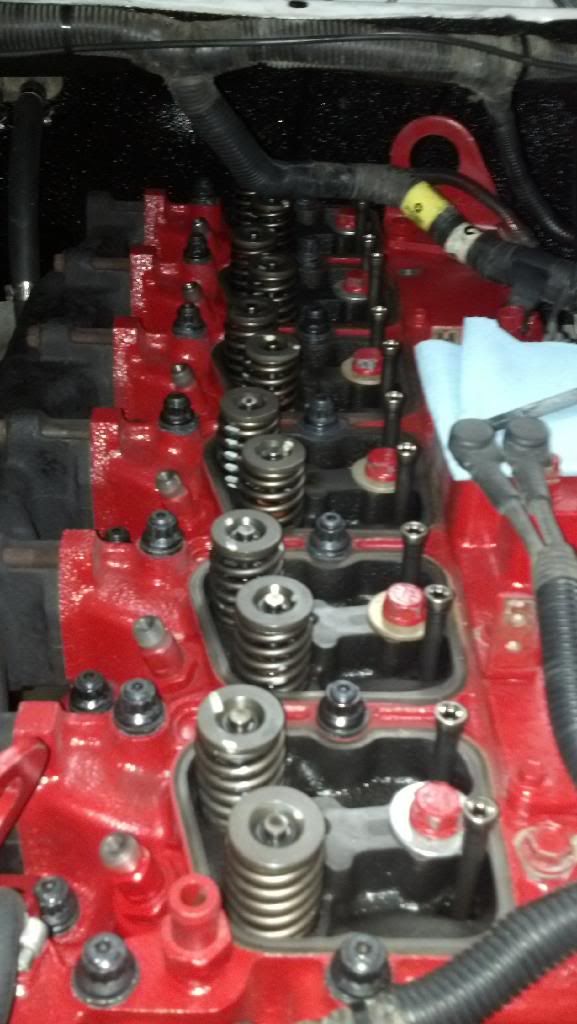
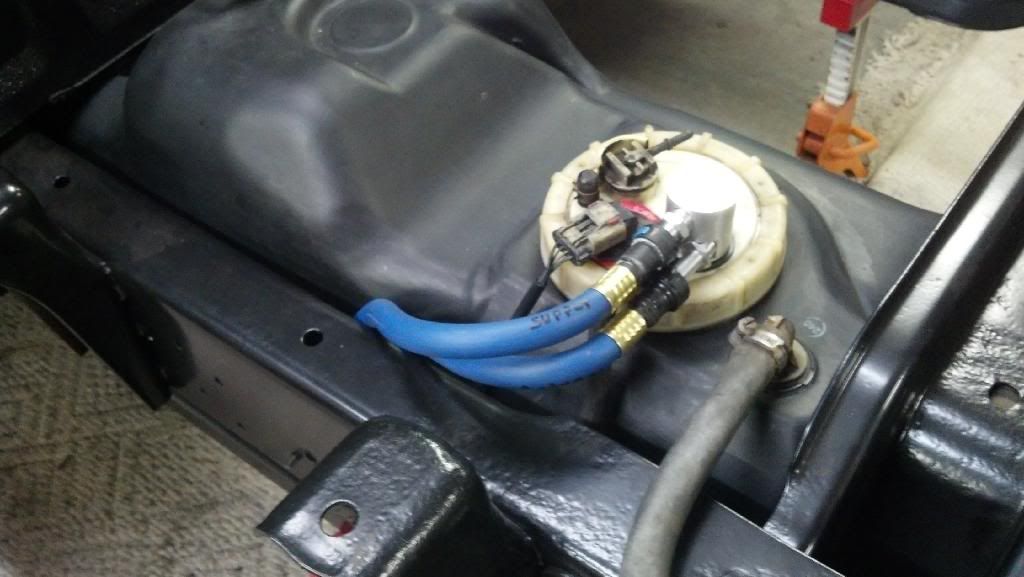
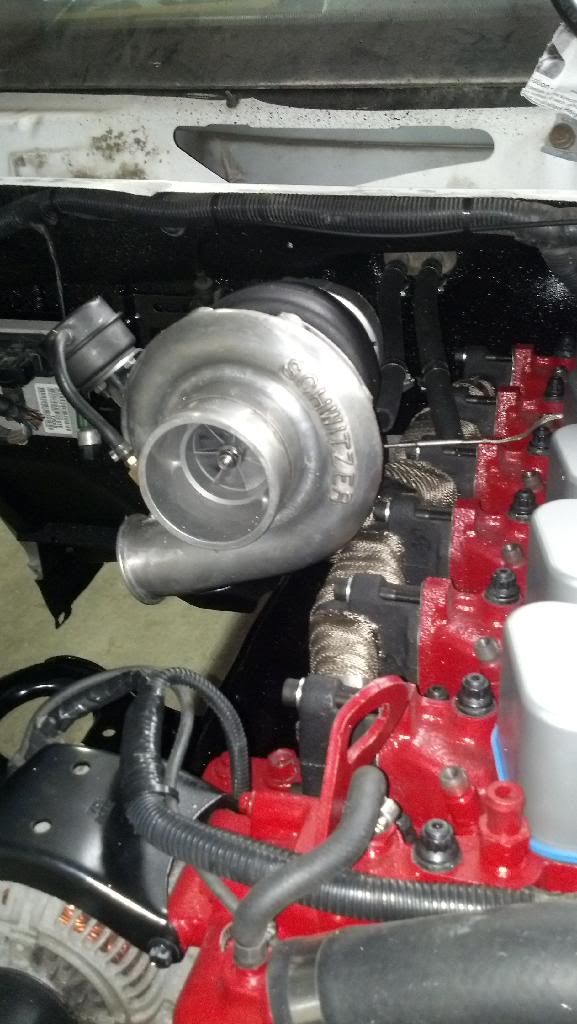
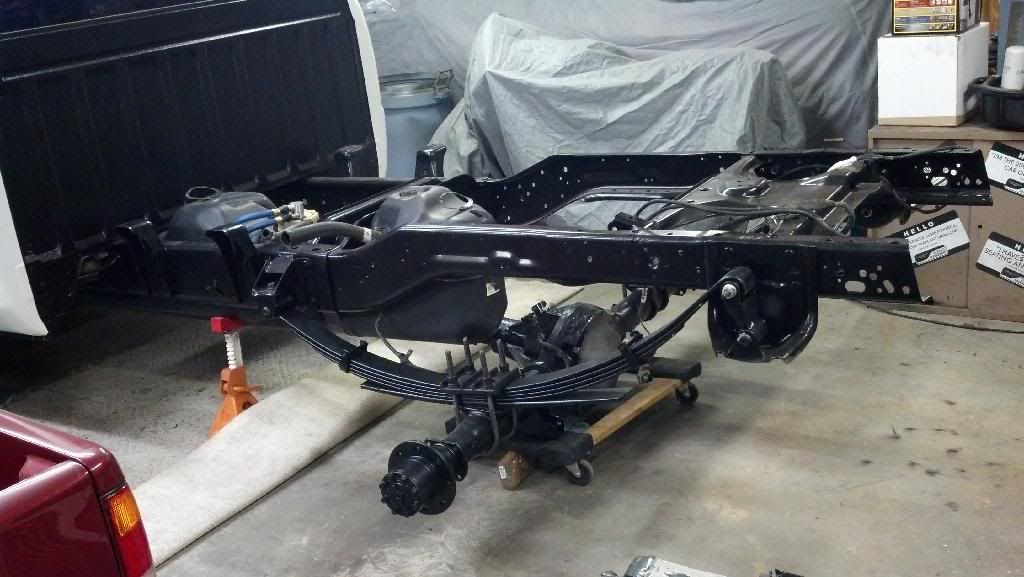
Well its been awhile since I've updated this so I figured I might as well get back at it since I have some free time. Alot has been going on and some decisions have been made that Im pretty happy with. Since all the black friday sales were going on I decided to see what I could get at a good price. Needless to say a couple grand later I have some pretty cool parts that are gonna show up in a few weeks. From Thoroubread diesel I purchased a MBRP 409ss 5" system with the lifetime warranty. I know their stainless isn't the greatest in the world but its better than aluminized and it has a lifetime warranty, and at 20% off I couldnt pass it up. Ordered some ARP 2000's from CPP and some 7x.012's. The 2 decisions that were racking my brain for a week or so. Talked to Jamie at CPP for awhile as well as Lavon Miller for awhile, so I think that the 7x.012's are gonna be great. Cant wait to drive this thing!! Also been mocking up the turbo set up to make sure it all fits. And of course I have to modify the primary support bracket. No big deal just have to take out about an inch or so and reweld it back together. Also picked up an Airdog 150 from a forum member and a drawstraw from Vulcan performance since my connections broke off my sending unit upon removal. While installing the draw straw you wouldnt believe the dirt that I found in the pump suction screen! Check out the pics! Finally after about a month I also have my axles and springs back from media blasting. Took 8 hours to paint them all up, but they look better than new!
Ohh.. shiney
Drawstraw install..
Notched the suction tub at the end to insure propper suction at all times
Annnd the dirt I was referring to.
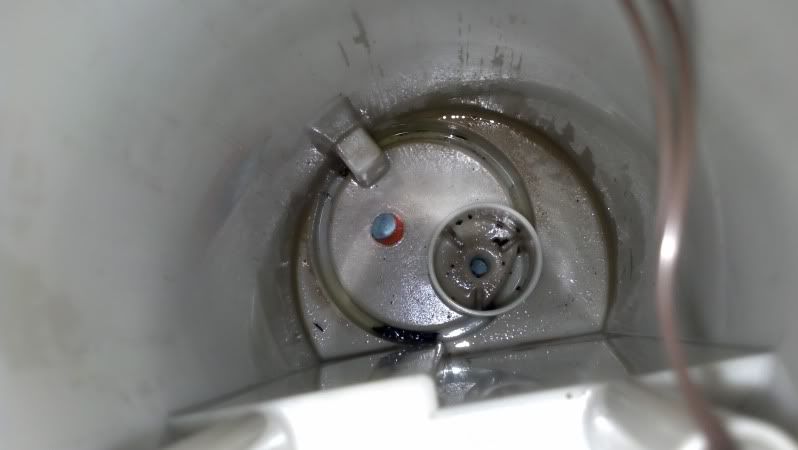
Also drilled abour 5-6 other holes in the module to allow more fuel to get to the suction, just didnt take any pics.
Here you can see that the mount is going to have to go down about an inch or so to work right.
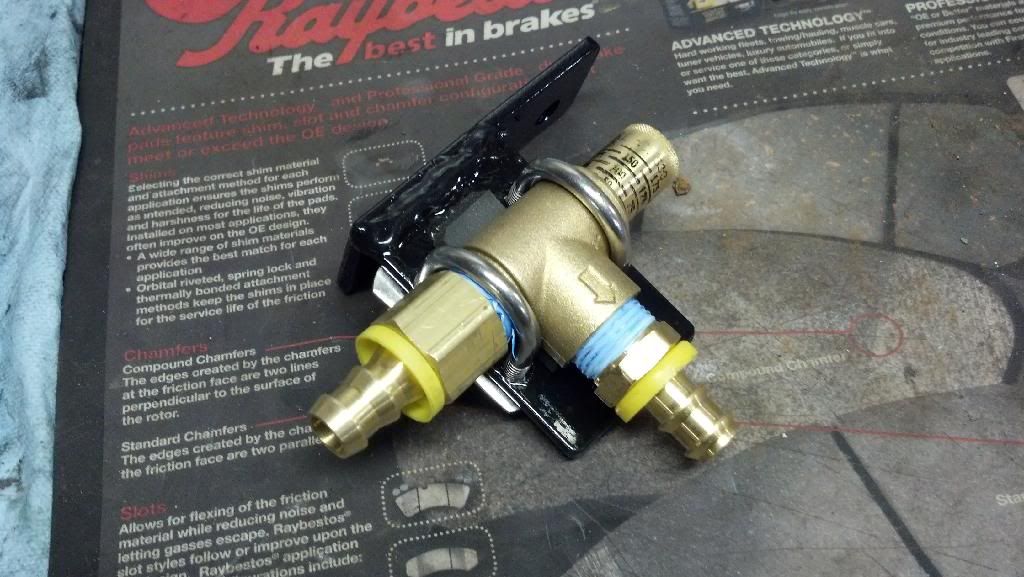
Also installed my DIY coolant bypass kit. Still have to mount the Watts 530c valve though.

More mock up pics.
Checking clearances
Its not hitting the mount, just looks like it in the pic

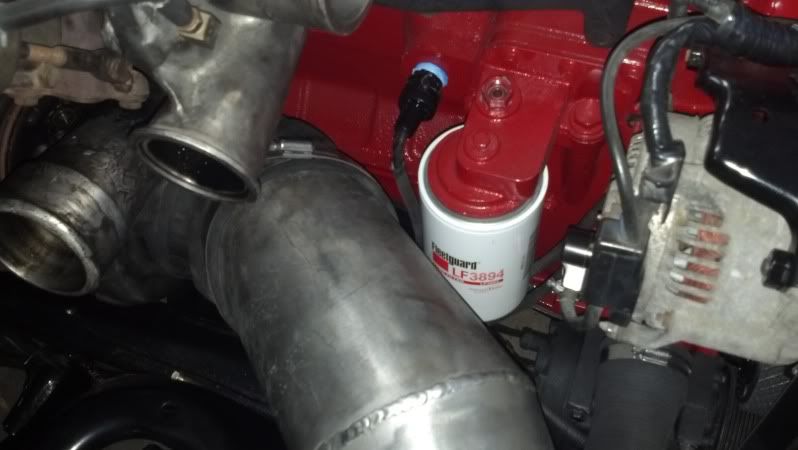
Definitely doing a filter relocation kit.

|
|
|
|
|
12-11-2013, 08:49 PM
|
#31
|
Name: purediesl
Title: Overkill
Status: Not Here
Join Date: Aug 2012
Member`s Gallery
Posts: 100
|
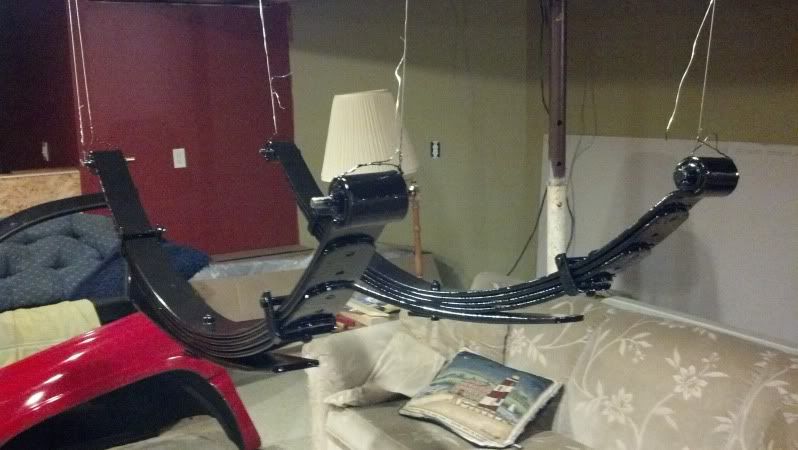
Fresh metal and most importantly.. NO RUST!!! These parts are getting painted with silver POR15 because the silver actually has aluminum in it that helps to resist the oxidation process. Then they get top coated with POR15 Chassis Coat Black

I decided on not taking them apart because of my time restraint and the fact that the paint that would be in between the leafs would get rubbed off and probably start to rust anyways. And yes, my basement had become a paint both haha. Sometimes being single has its benifits haha.

You can see the silver POR15 to the bare steel
Both coated
Done!
Ill tell ya and take it from me, IF anyone does this same process to their front 60 SPRAY the POR15 on. It took forever to ensure that every crevis got coated with some paint. I do like to brush the stuff on because it gives it a thicker coat and since its a self leveling paint it doesnt show brush strokes. But the front coil buckets are so darn time consuming that it would have better to just spray it on.
I think were all caught up. Ill be taking the turbos this friday to Columbus diesel to see what they can do for a rebuild on the 62, and Ill see what they think about the 3b. I cant spend to much money on the 3b since their only like $400 new haha.
|
|
|
|
|
12-11-2013, 09:16 PM
|
#32
|
Name: 59fordcummins
Title: Rookie
Status: Not Here
Join Date: Aug 2013
Member`s Gallery
Posts: 17
|
Haha small world, I'm pretty sure that's my old 62mm, if it came from Pierre,SD. Your build is great, should be a solid pickup for sure all said and done
|
|
|
|
|
12-11-2013, 11:21 PM
|
#33
|
Name: kawi600
Title: got Coal for Christmas
Status: Not Here
Join Date: Jun 2008
Location: communist urban hell
Member`s Gallery
Posts: 861
|
The rot in the bottom of those frame 'horns' is pretty common. Theres not a lot of drainage, and they fill with sand and water pools up.
I drilled some holes, blew it out with air and welded on some patches.
Have you thought about undercoating the truck with paraffin or fluid film? Those are my two favs for keeping the water out. Sprayed all the void spaces in the cab like the cab mounts and rocker panels.
I spent awhile welding the floor up this summer and it wasnt a fun job. Went nuts with the seam sealer and undercoat after that.
__________________
Psalm 144
Psalm 37:10,11
Isaiah 65:20
|
|
|
|
|
12-11-2013, 11:39 PM
|
#34
|
Name: purediesl
Title: Overkill
Status: Not Here
Join Date: Aug 2012
Member`s Gallery
Posts: 100
|
Yup Fluidfilm is gonna be my new friend, along with tranny fluid and a 3M pariffin spray that I already have in the cabinet in the garage. All those items will be either sprayed, poured or pumped into the rockers, fenders and all doors. Pretty much every crevis that's been known to rust will get some type of oil coating.
And 59ford, the turbos did come from Pierre SD so I bet its your old turbo. What did you do with it? Can you give me some insight on it? Sent ya a pm.
|
|
|
|
|
12-12-2013, 12:13 AM
|
#35
|
Name: Shawdrainage
Title: Shaw
Status: Not Here
Join Date: Feb 2010
Location: Wapakoneta, OH
Member`s Gallery
Posts: 1,617
|
Lookin good Ken!!!!
__________________
2016 Ram Powerwagon...... Stock for now
2006 Dodge Powerwagon "REHAB" Hot Street Puller. A whole truckload of SECERT SQUIRREL stuff, but still a small block HEMI!!!
1974 Dodge Powerwagon... Undecided roller.
|
|
|
|
|
12-12-2013, 01:55 AM
|
#36
|
Name: madmikeismad
Title: So mad
Status: Not Here
Join Date: Dec 2009
Location: Newalla, OK
Member`s Gallery
Posts: 14,347
|
If only I had this kind of ambition.
Great work.
__________________
Mike Hill
|
|
|
|
|
12-12-2013, 02:05 AM
|
#37
|
Name: DDually
Title: Still spooling..
Status: Not Here
Join Date: Nov 2009
Member`s Gallery
Posts: 2,095
|
Quote:
Originally Posted by madmikeismad

If only I had this kind of ambition.
Great work.
|
Right? Oh my goodness.
__________________
1995 Cummins with almost no matching paint, 2 dents
2001 VW TDI South bend, tune, nozzys, custom stuff that's rusting, one custom thing that's not rusting
|
|
|
|
|
01-08-2014, 10:17 PM
|
#38
|
Name: purediesl
Title: Overkill
Status: Not Here
Join Date: Aug 2012
Member`s Gallery
Posts: 100
|
1-8-13
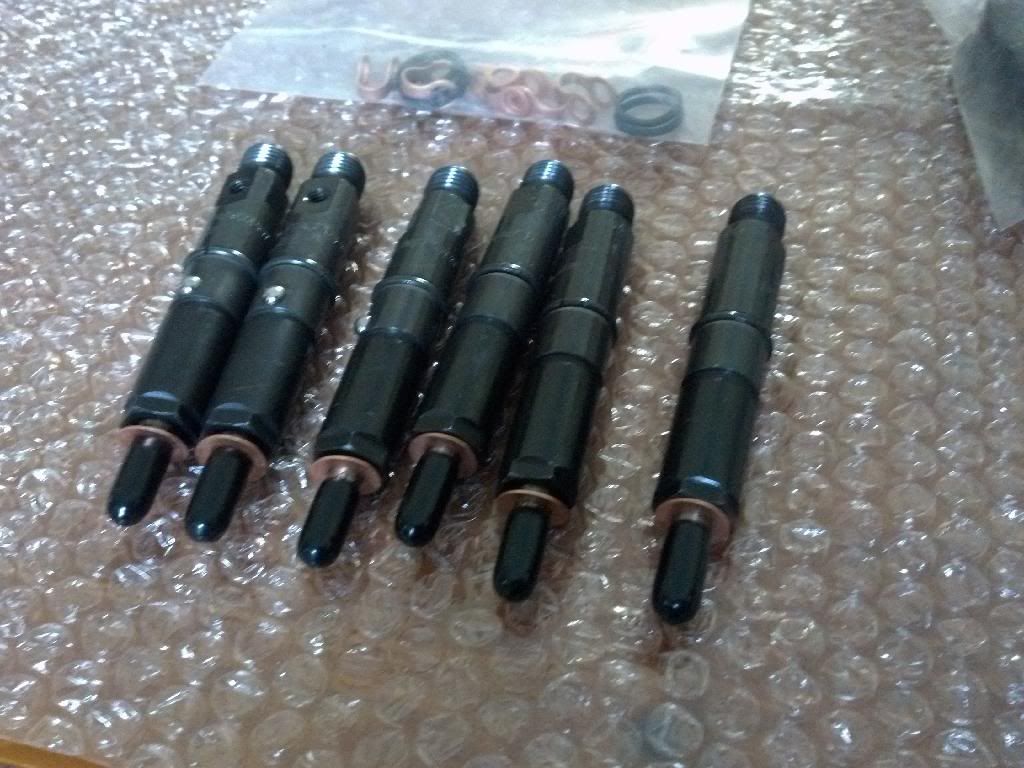
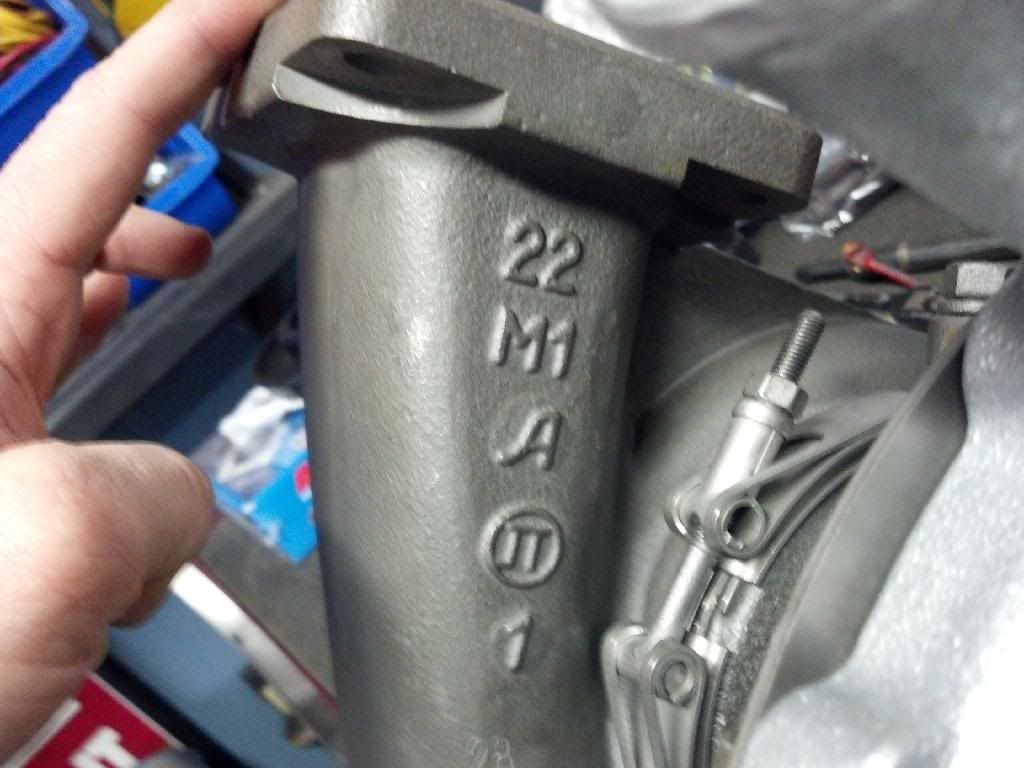
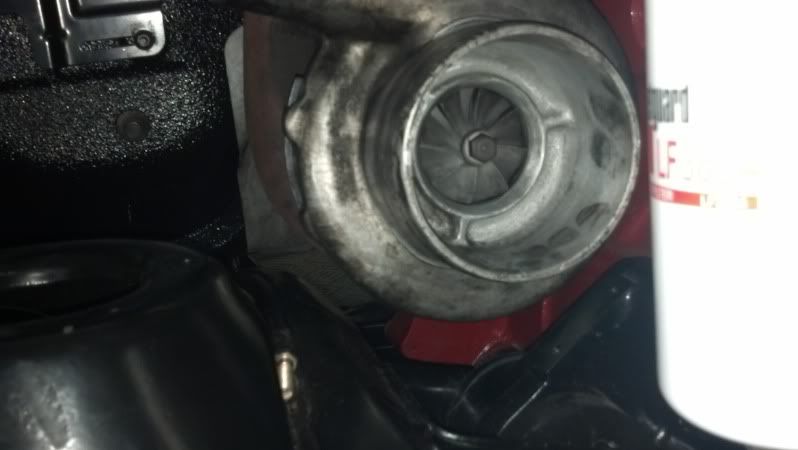
Thanks for the comments guys! Got some more work done and some more parts installed. Been back and forth with vendors on here and been yanked around by some forum members on some new/used parts. Just BS that I'm not going to clutter my thread with. Anyways got the 62 back from Columbus Diesel and picked up a rebuilt 3B with 22cm housing, which ended up getting damaged in shipping, all because the seller didnt have the Vband on the exhaust housing..  Anyways, the turbo situation has set me back for a bit as well as waiting on injectors and a few other items.
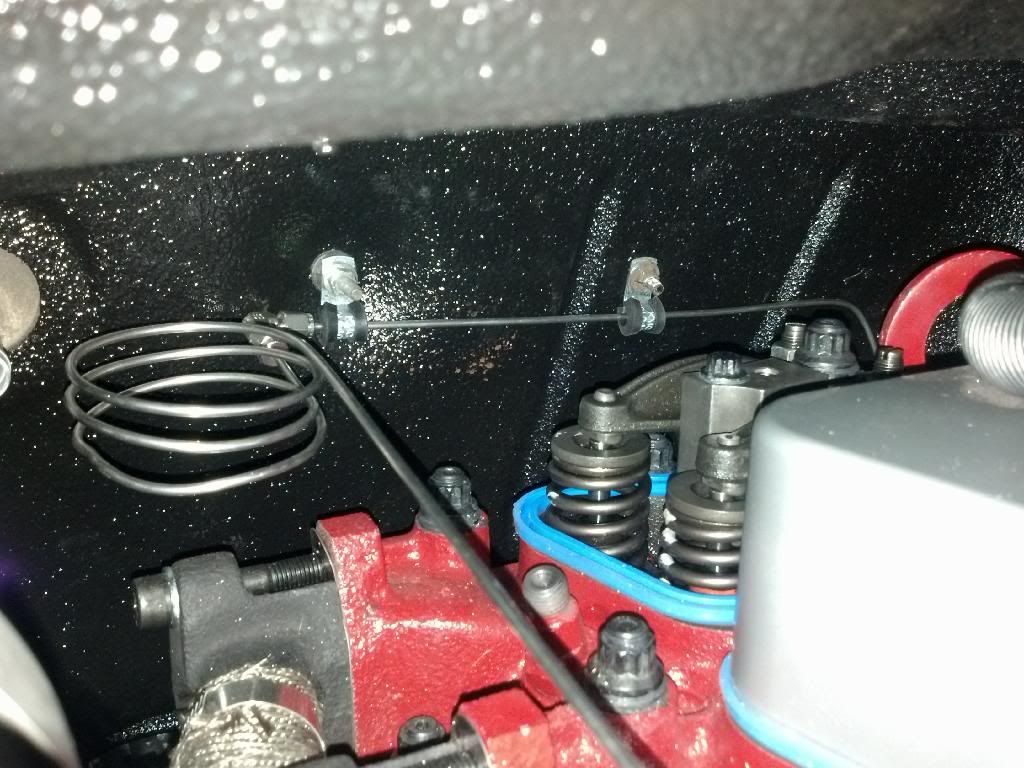
Installed the ARP 2000's. Here is a tip for those that are doing them one at a time and have to get their rockers machined. Take the short factory head bolt and use it to torque down the head untill your pedestals are done. I had a friend do them so they were gone for a few days. I used a washer under the bolt head just to be safe.

Worked on the DIY coolant bypass a bit. Made up a bracket to mount the valve and ran the hose.

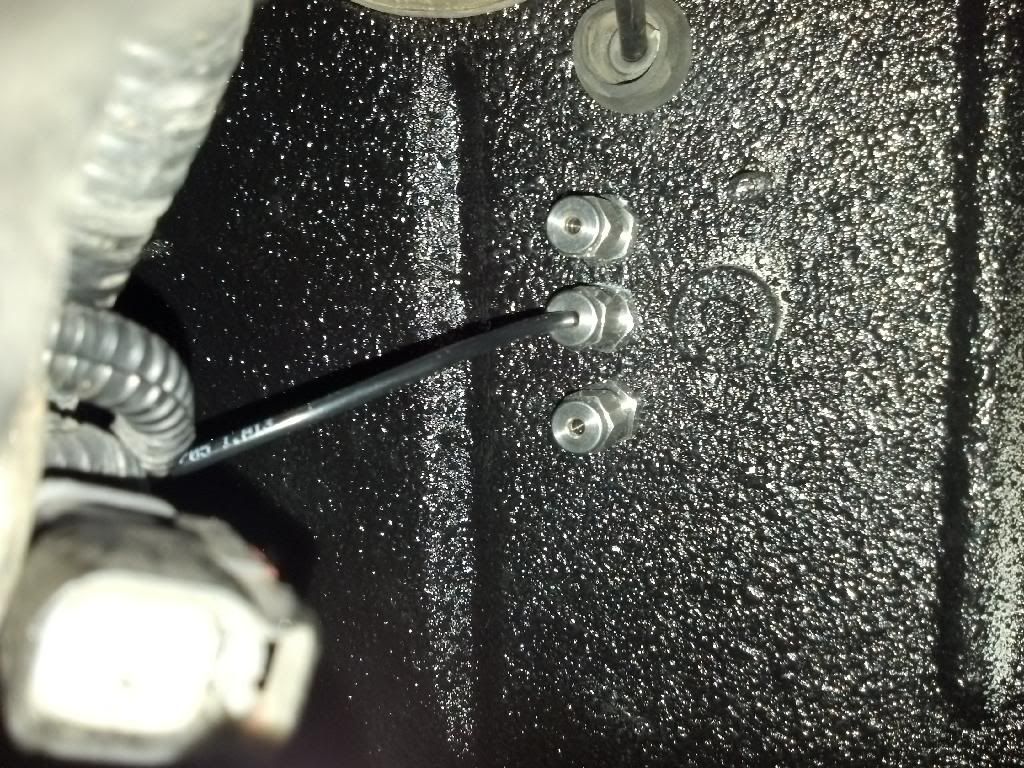
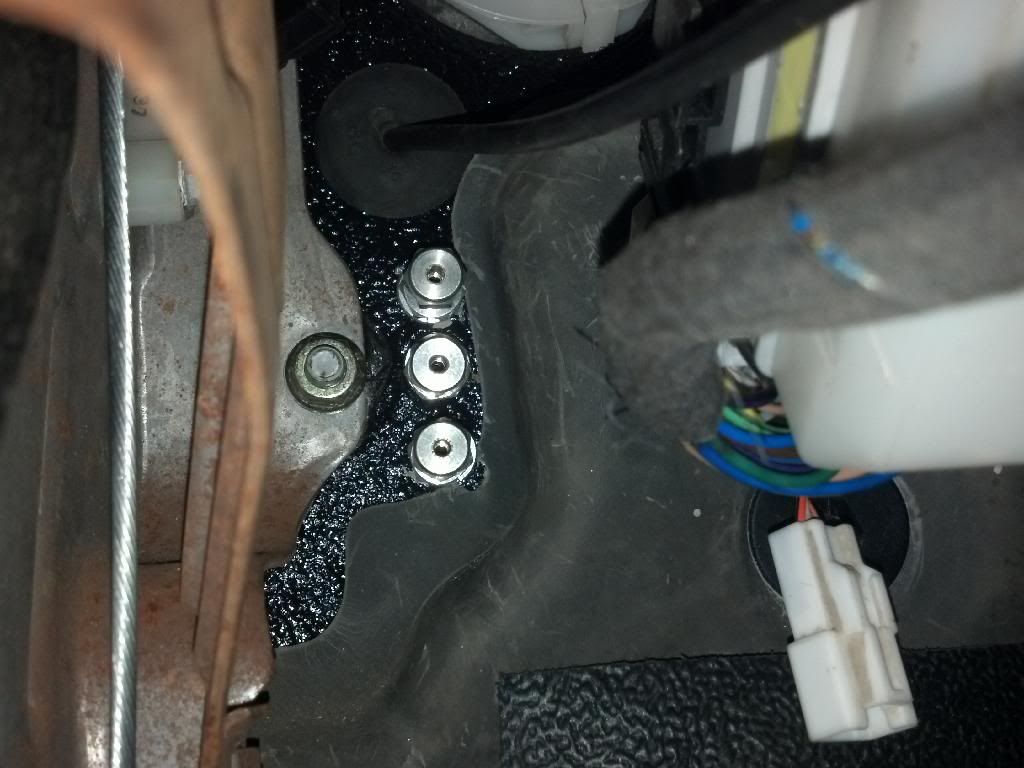
Also worked on the AirDog150. Blasted and painted all the brackets and upgrated all the hardware to 304 stainless.
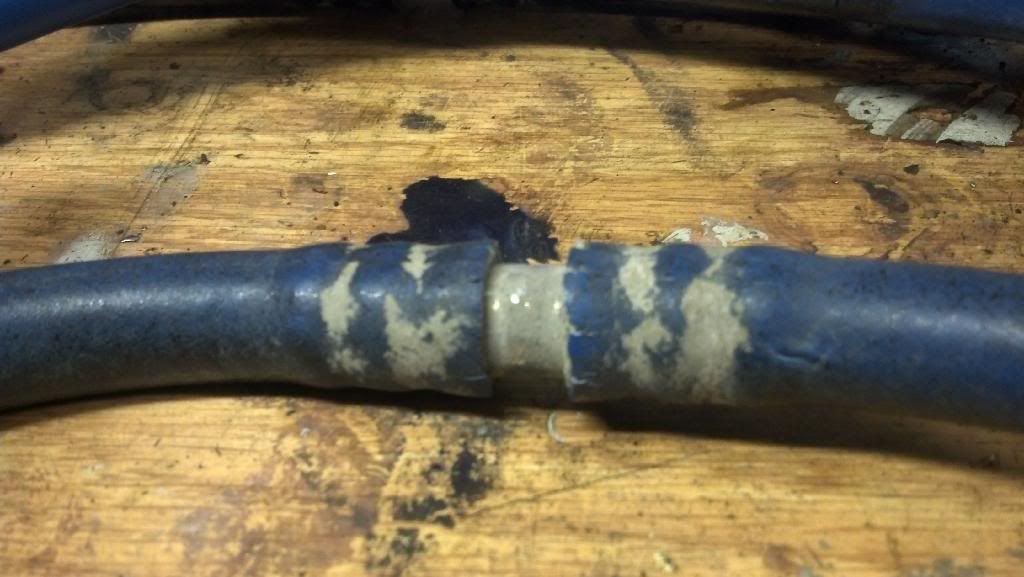
The lines were starting the dryrot as you can see in the pics, so I had some new lines made up using the airdog fittings which also got rid of the jank barbed unions.
New
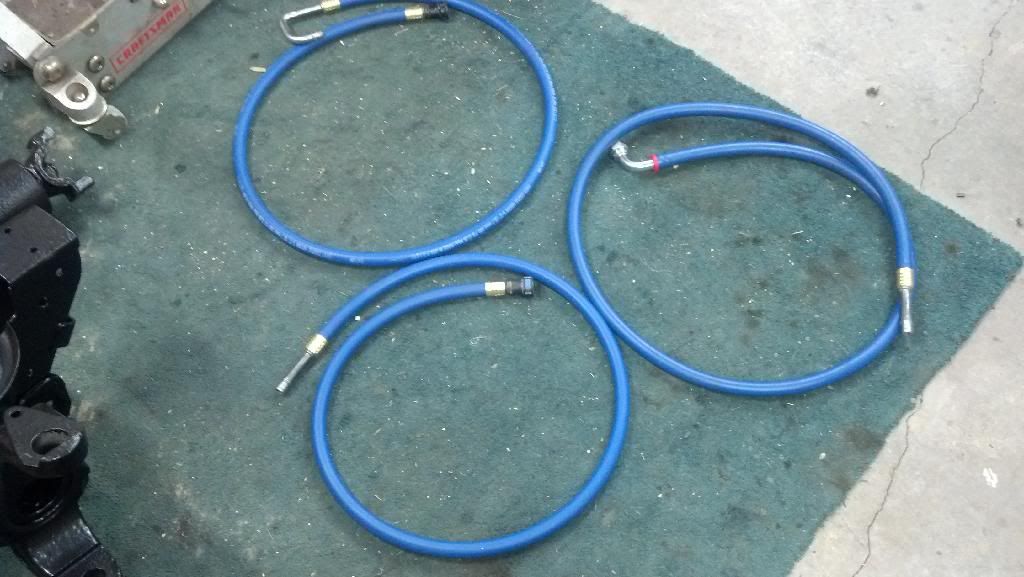
Old
Ill keep the barbed unions in the truck in the event of a leaking line or something of that nature.
Also finalized the draw straw. I'm also going to be covering up the lines so that they dont rub on anything and rub threw.
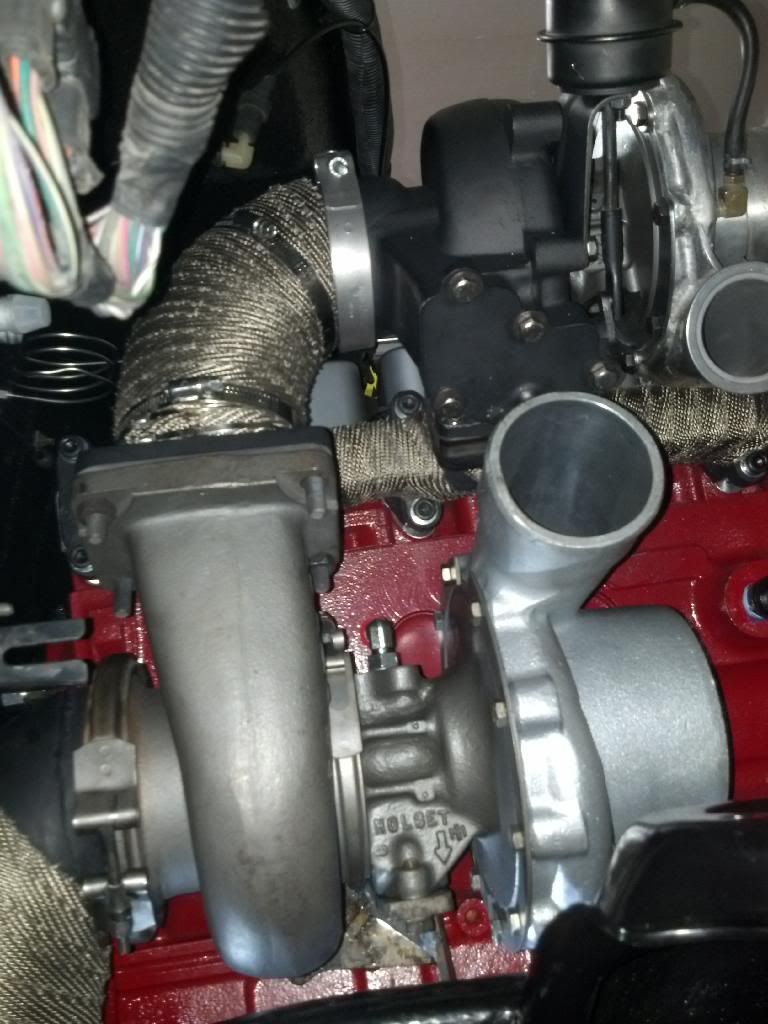
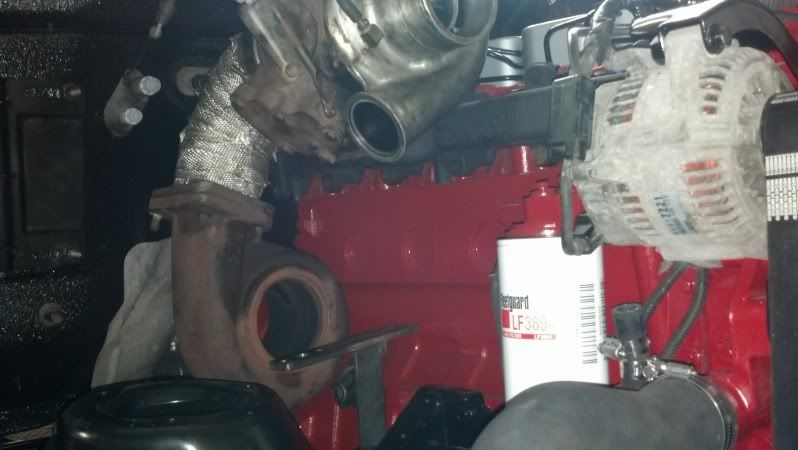
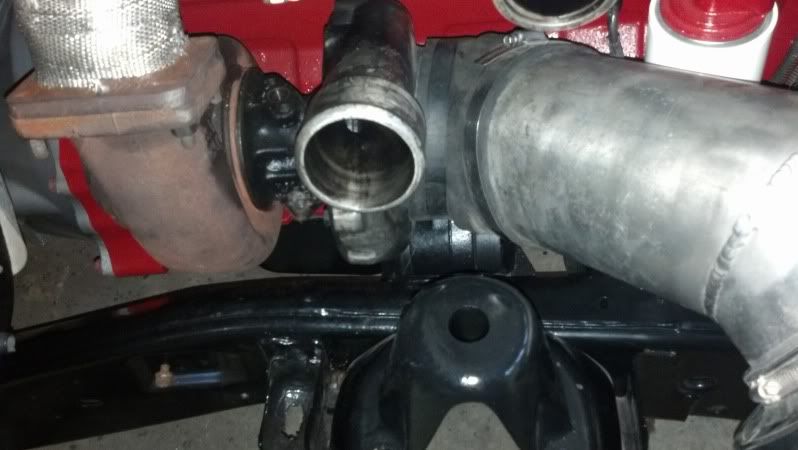
Did a whole bunch of heat wrap.. Used DEI Lava/titanium wrap. I figured it was cheaper to wrap the manifold than do a blanket. I had to wrap the hot pipe and I wanted to wrap the downpipe, so a few more feet and I was able to wrap the manifold as well.
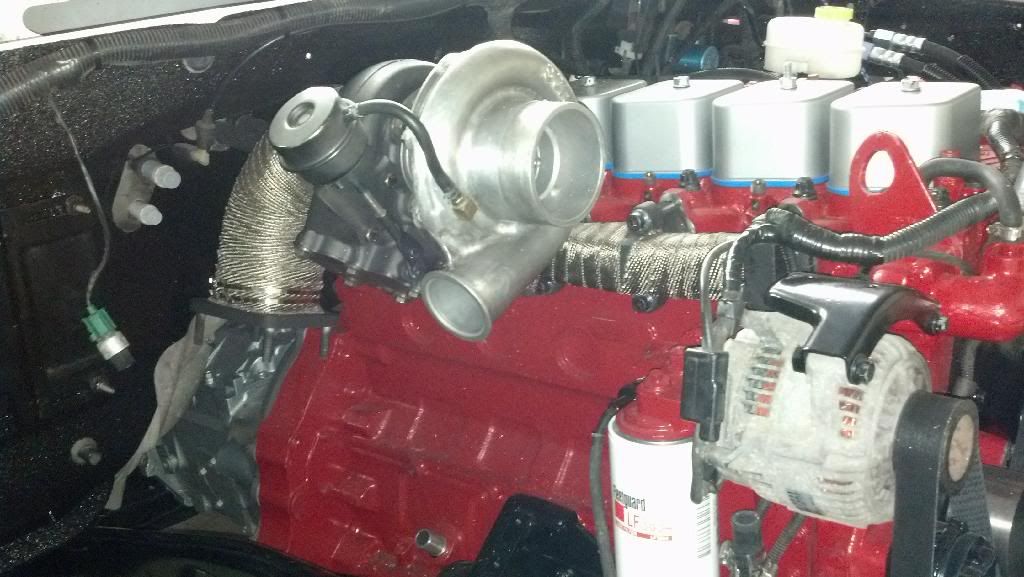
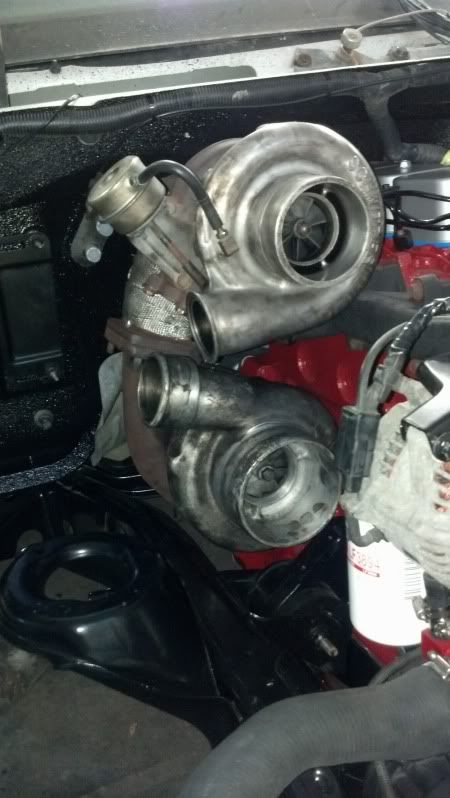
Hot pipe and down pipe were media blasted then painted with VHT flameproof paint then wrapped. I bought this twin setup used as a complete kit, hence the squeeze in the 5" downpipe. It fits beautifully and will work just fine for a tow rig. If I was going all out for high hp then I'd change it. If it gives me problems then Ill look at other option. For the sake of time and money that needs to be spent elswhere it works just fine.

Last edited by purediesl; 01-08-2014 at 10:19 PM.
|
|
|
|
|
01-08-2014, 10:40 PM
|
#39
|
Name: purediesl
Title: Overkill
Status: Not Here
Join Date: Aug 2012
Member`s Gallery
Posts: 100
|
Also been working on the rear a bit. Got it put under the tuck then found out that the U bolts were the wrong size. Luckily there is a local place that makes them to order. Had 4 5/8" U bolts made up for a christmas price of around $60. Installed new hub seals and new abs sensor.
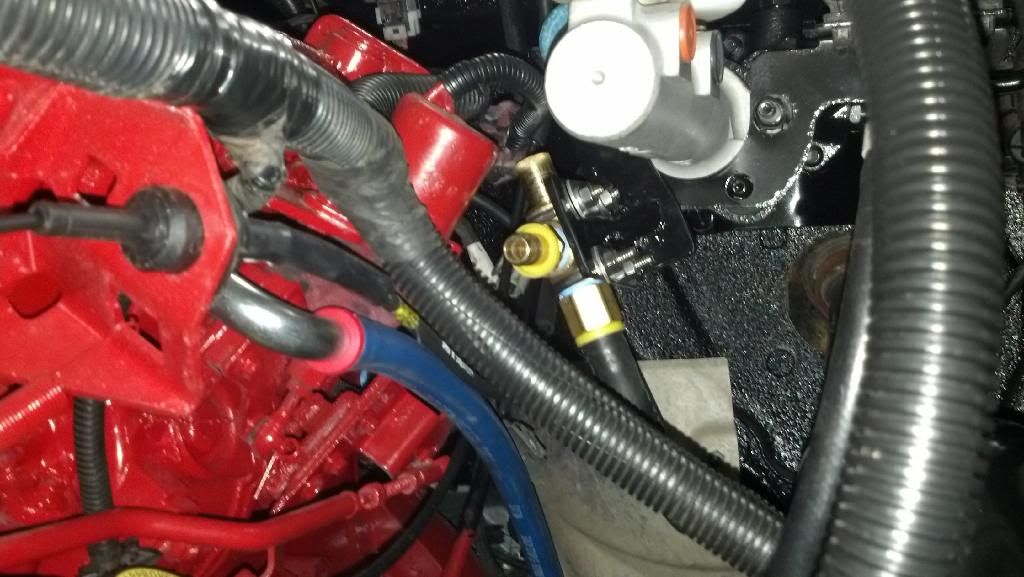
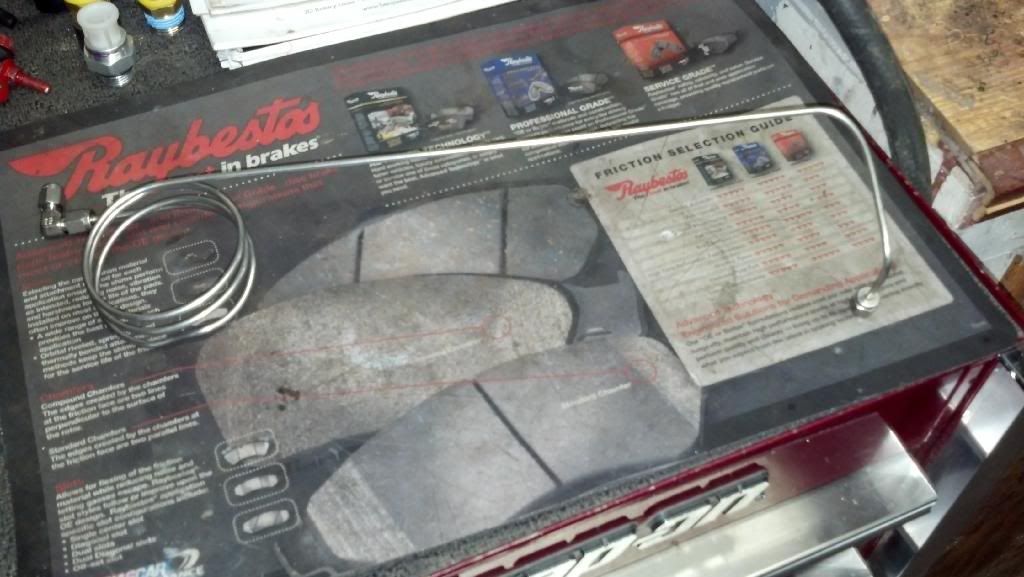
Turned my attention back to the front of the truck and been working on the EMP guage setup. I used a scrap piece of stainless tubing and some fittings and this is what I came up with. Still have to make a support for it, but you get the idea.
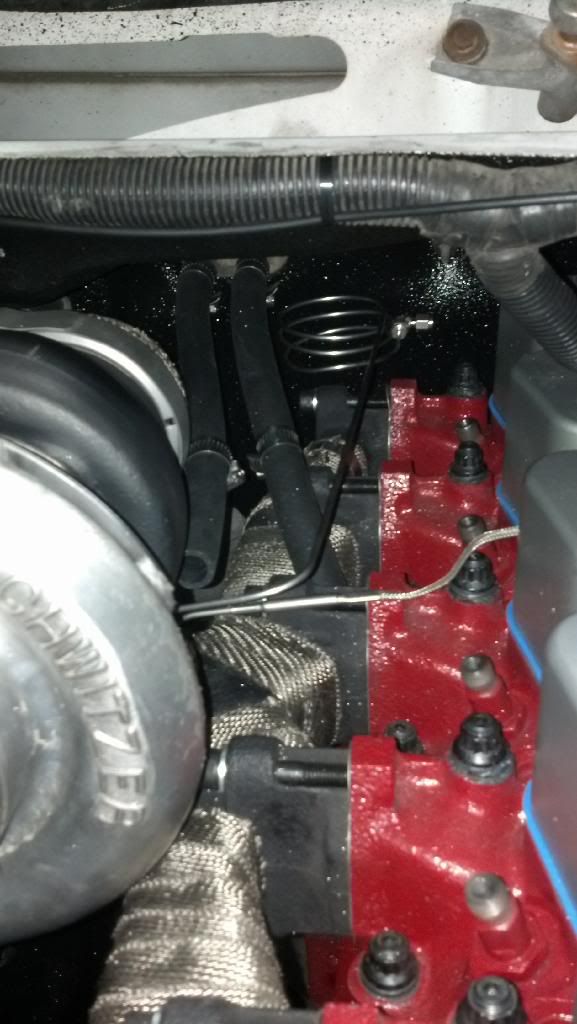
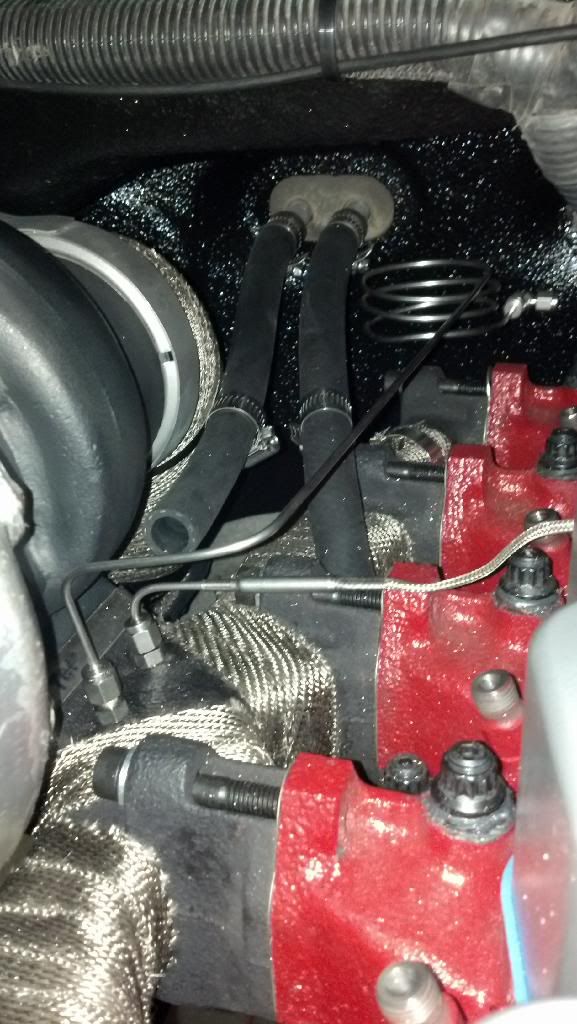
Im not sure how its all going to work with the heat hoses running in the same area, but Ill deal with it when the time comes.
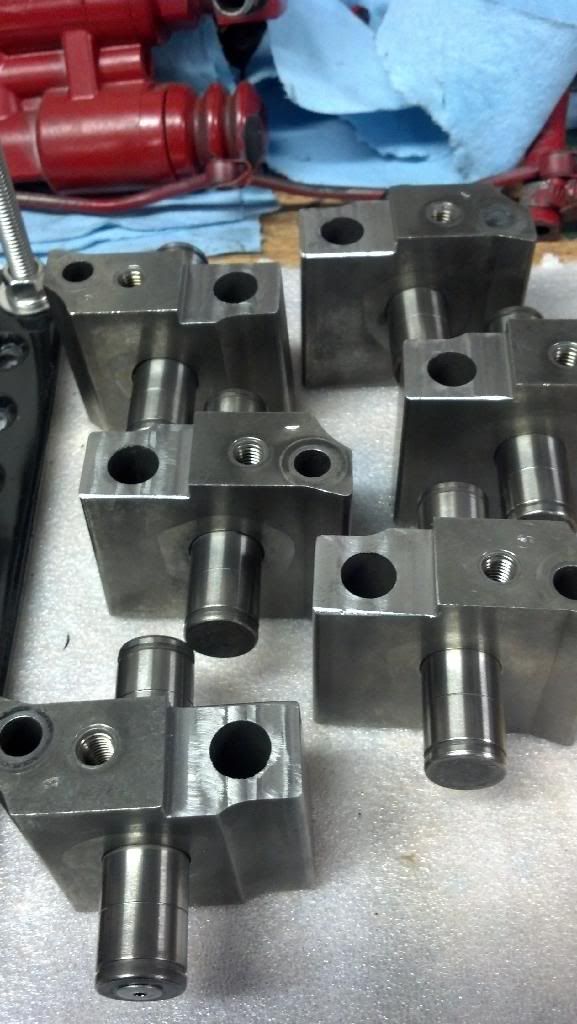
The next battle its going to be converting the 98 dana 80 to the 04-09 disc brake setup. I know Ill have to change the mount on the axle tube, but we'll see how much when the brake brackets show up.
|
|
|
|
|
01-25-2014, 10:40 PM
|
#40
|
Name: purediesl
Title: Overkill
Status: Not Here
Join Date: Aug 2012
Member`s Gallery
Posts: 100
|
|
|
|
|
 Posting Rules
|
You may not post new threads
You may not post replies
You may not post attachments
You may not edit your posts
HTML code is Off
|
|
|
All times are GMT -5. The time now is 08:20 AM.
|