| Advertisement |
|
|
|
|
|
|
|
If this is your first visit, be sure to check out the FAQ by clicking the link above.
You may have to register before you can post: click the register link above to proceed.
To start viewing messages, select the forum that you want to visit from the selection below.
|
| Dodge Competition and Performance General Dodge Competition and Performance Discussion |
 11-20-2009, 06:47 AM
|
#21
|
Name: SWALLDOG
Title: Too Much Time
Status: Not Here
Join Date: Jun 2008
Location: Woods Cross, Utah
Member`s Gallery
Posts: 454
|
my buddie and i played around with how to re-machine the holes. no matter how we rotated it at least 4 holes intersected. 2 on each side. so i welded in 4 of the 10 holes. 2 on each side. figured that would be the best.
|
|
|
|
|
11-20-2009, 06:48 AM
|
#22
|
Name: SWALLDOG
Title: Too Much Time
Status: Not Here
Join Date: Jun 2008
Location: Woods Cross, Utah
Member`s Gallery
Posts: 454
|
|
|
|
|
|
11-20-2009, 06:49 AM
|
#23
|
Name: SWALLDOG
Title: Too Much Time
Status: Not Here
Join Date: Jun 2008
Location: Woods Cross, Utah
Member`s Gallery
Posts: 454
|
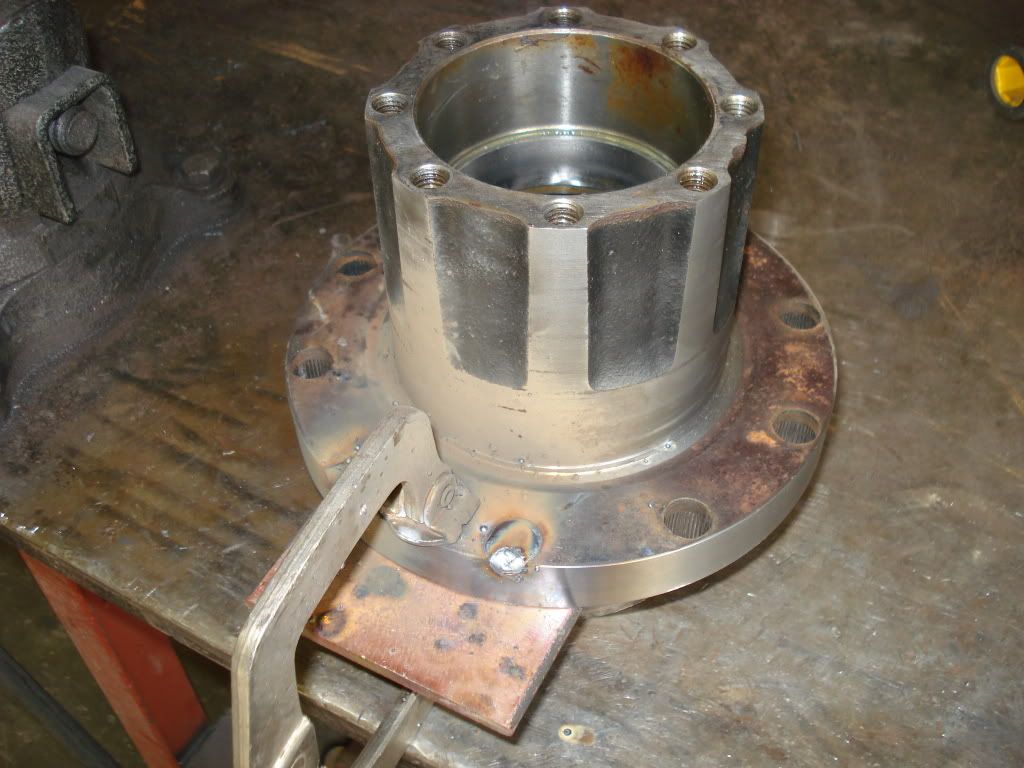
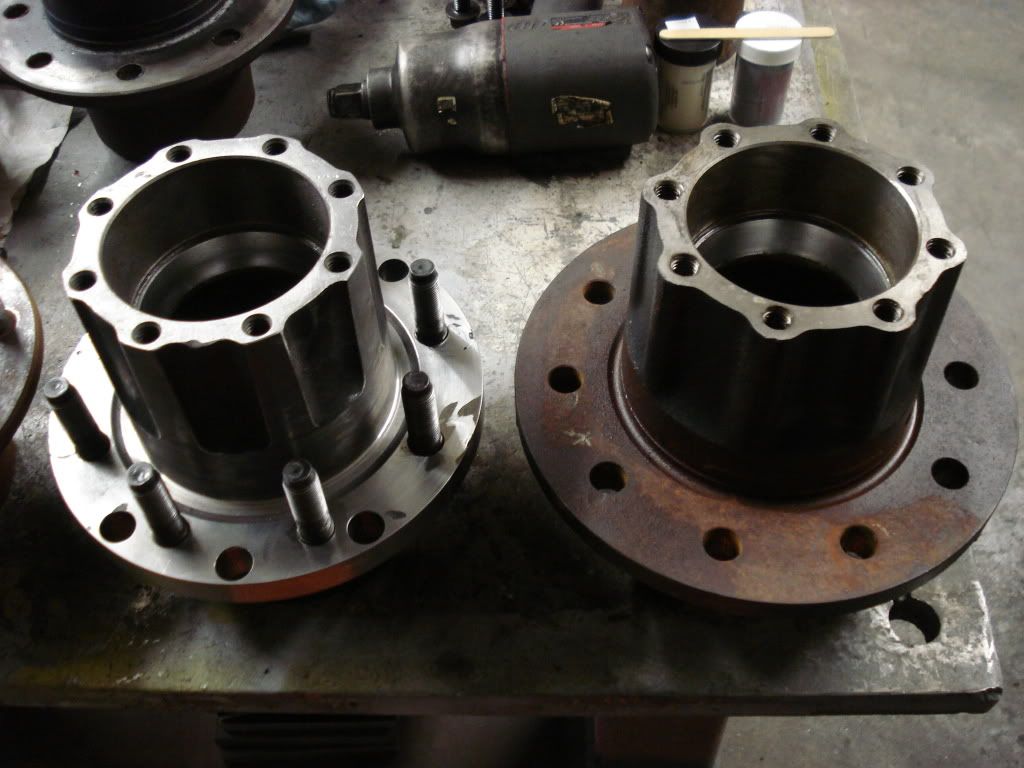
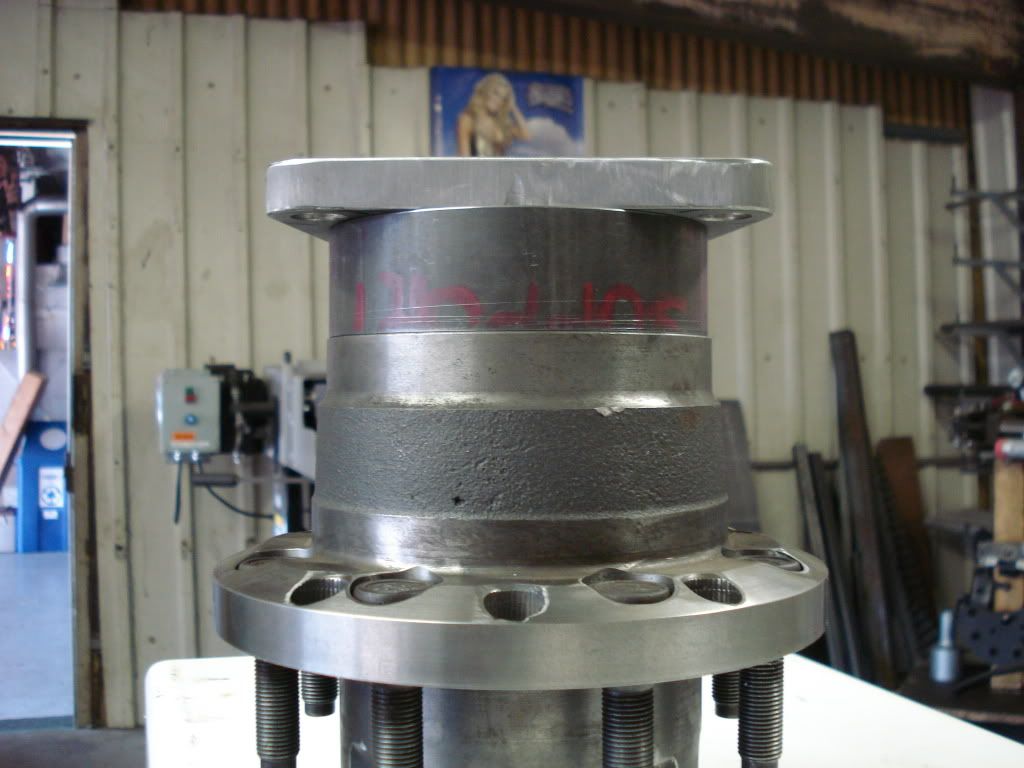
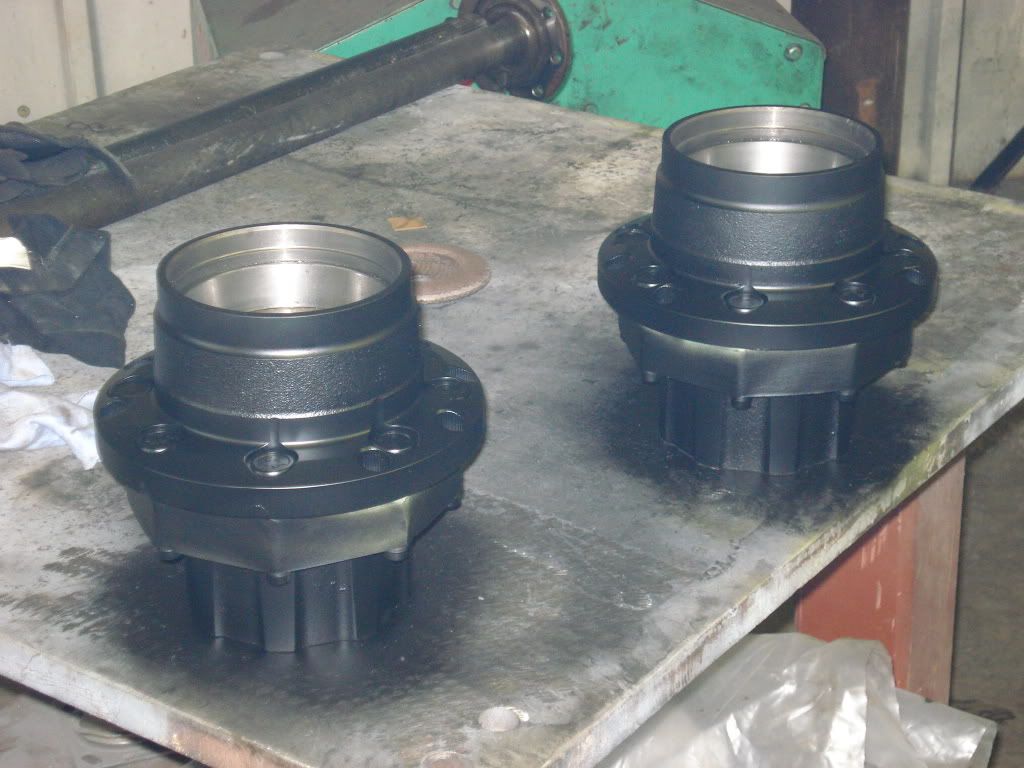
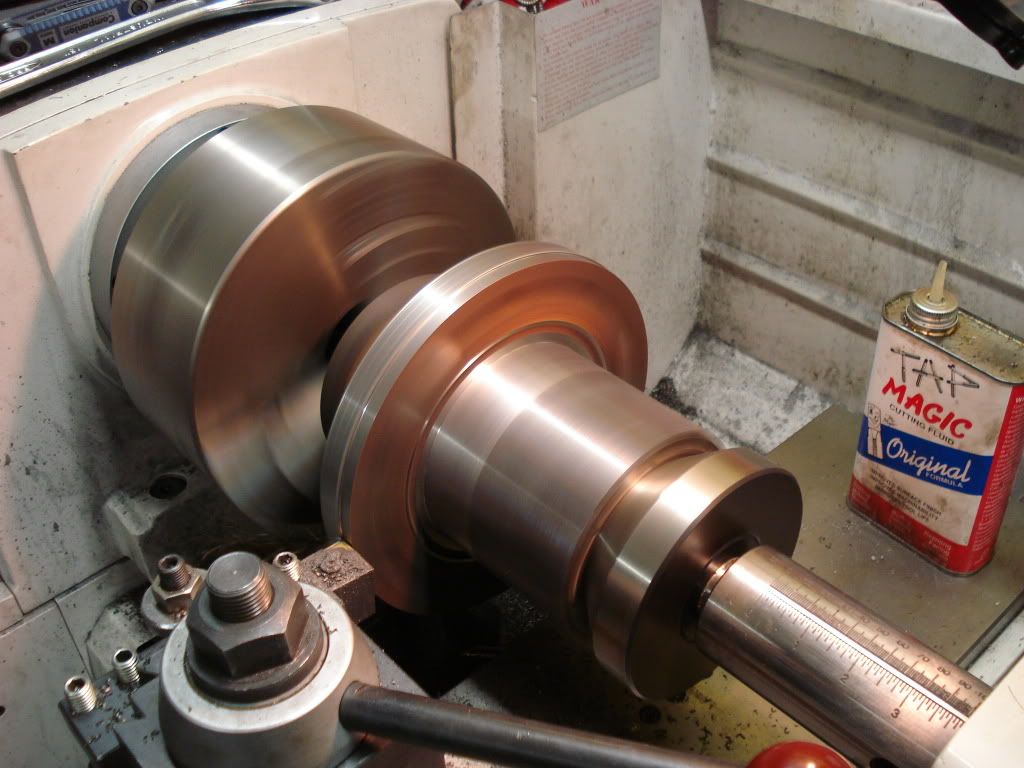
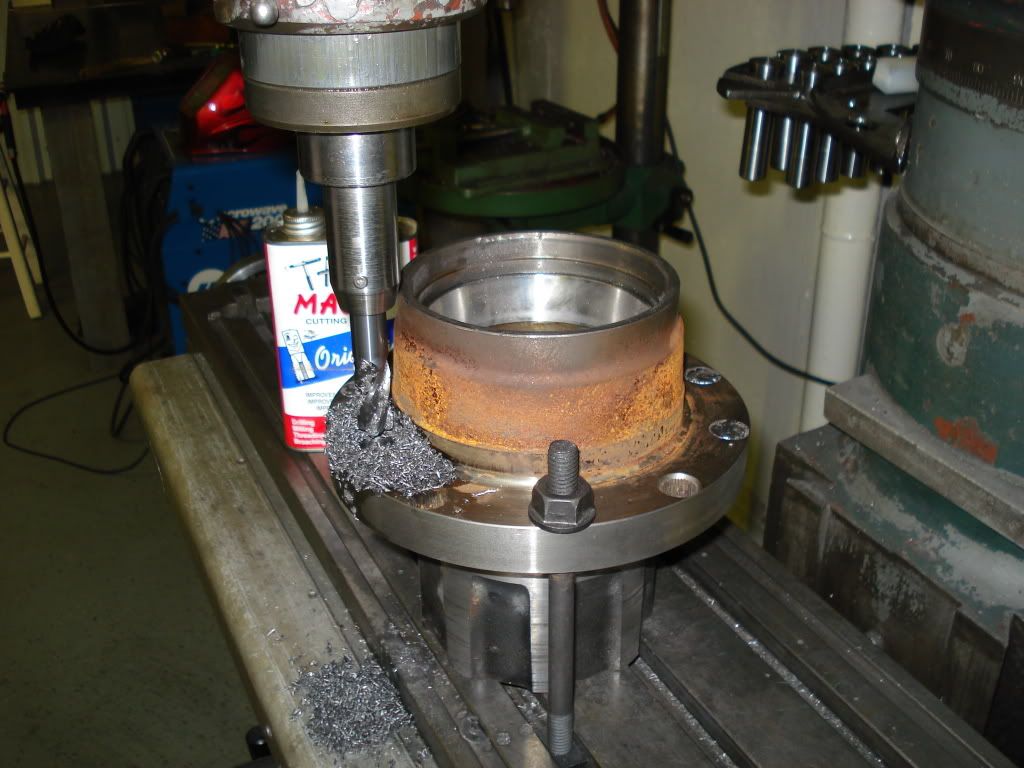
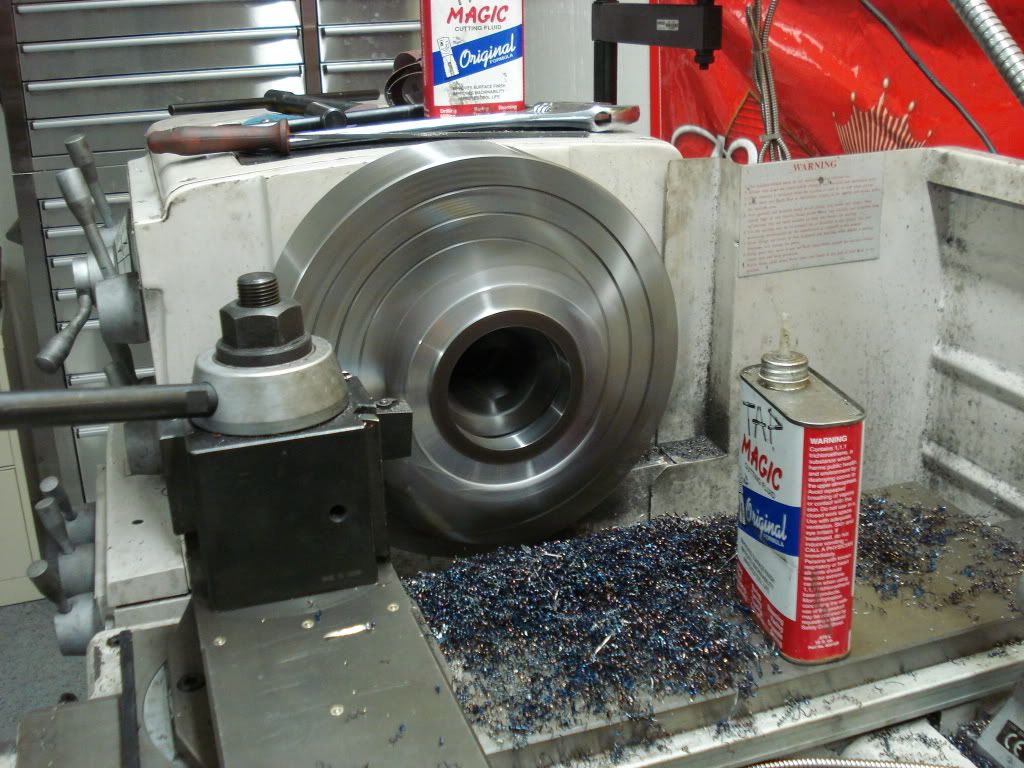
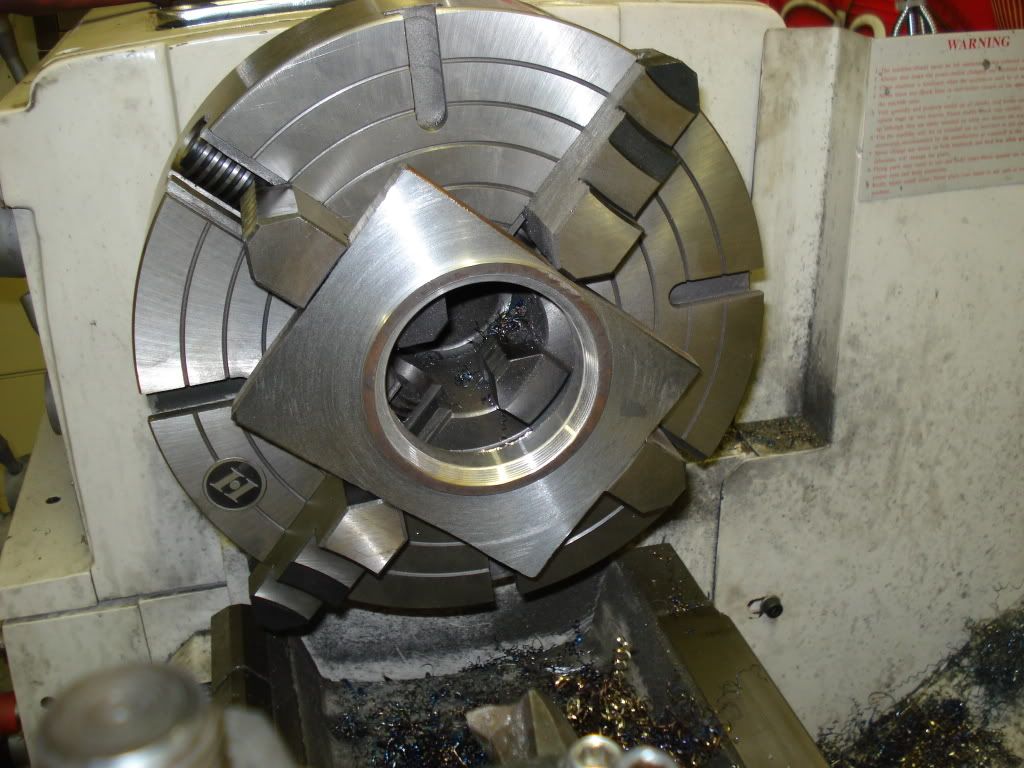
here is the hub all machined. had to turn it down small enough to get the stock dodge rotors to fit over it.
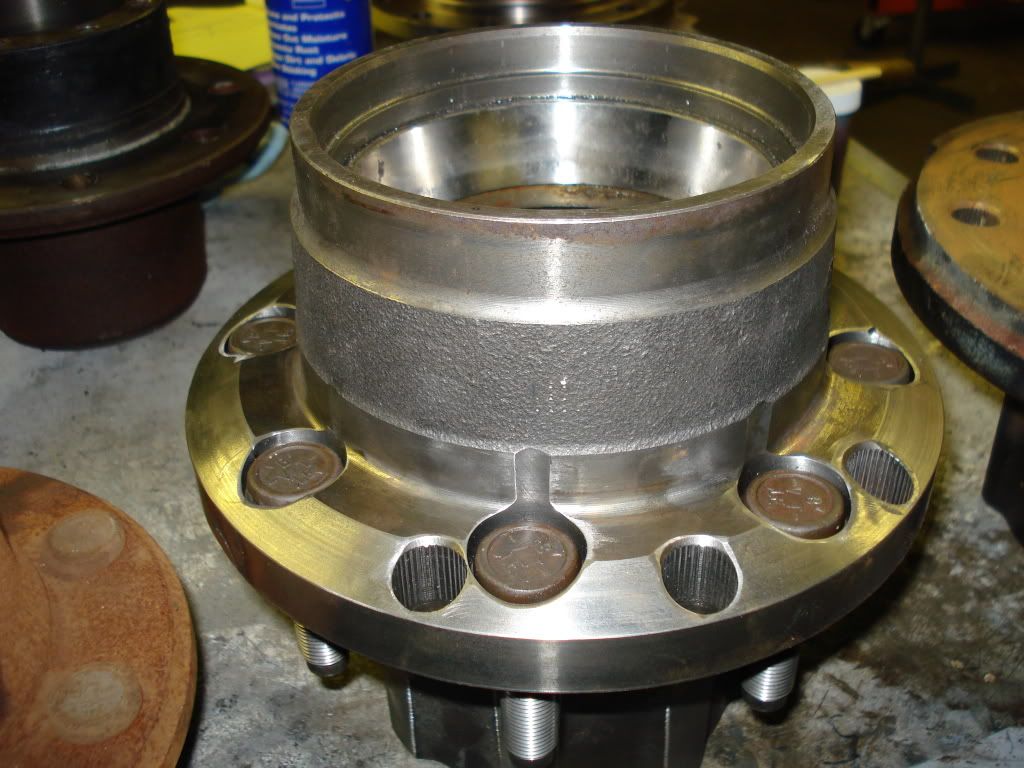
left to right. stock dodge dana 80 hub, machined 10 lug hub, stock 10 lug hub. look at the diffrence in the bearing size. :shock:
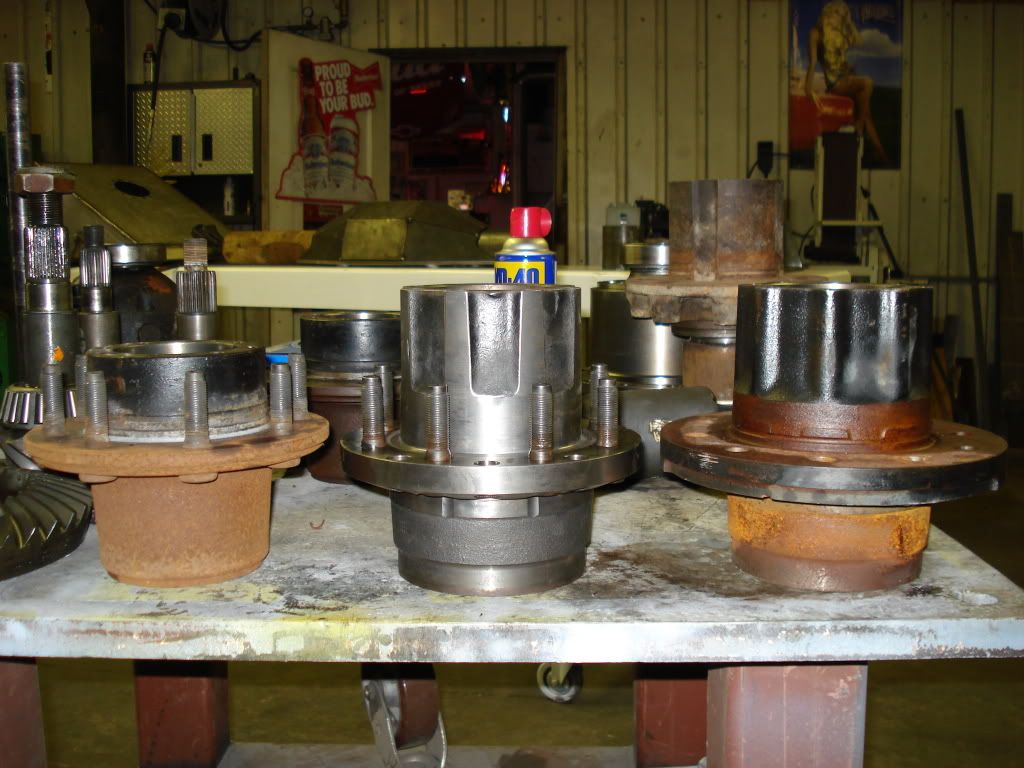
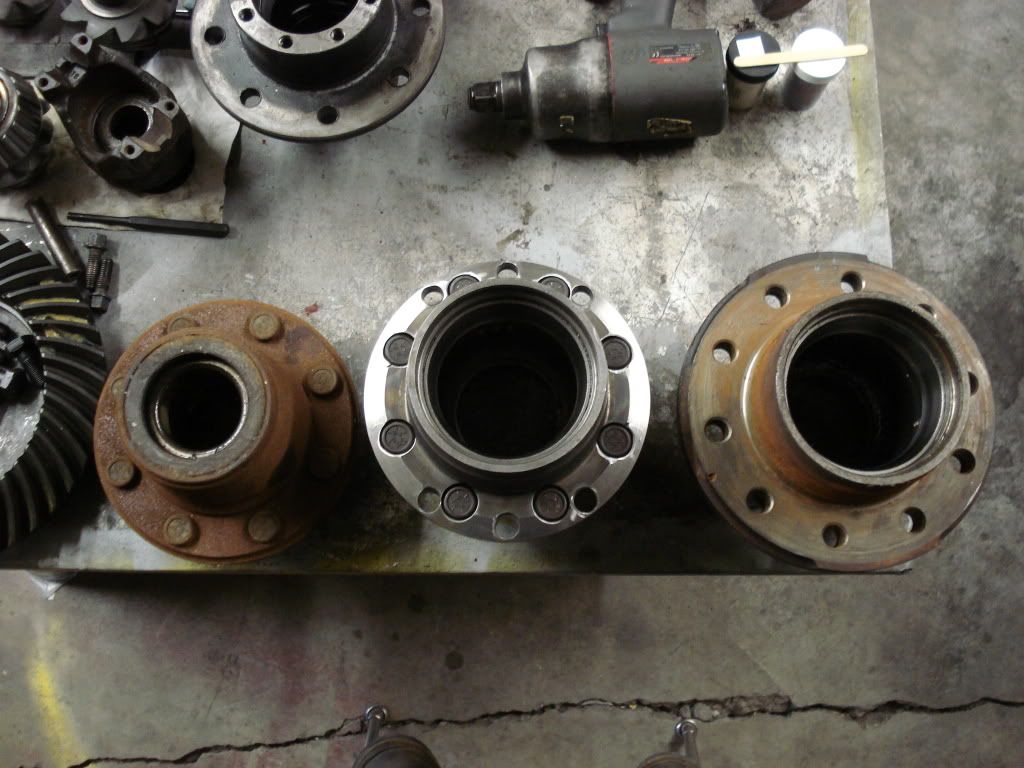
the two 10 lug dana 80 hubs before and after machining.
|
|
|
|
|
11-20-2009, 06:51 AM
|
#24
|
Name: SWALLDOG
Title: Too Much Time
Status: Not Here
Join Date: Jun 2008
Location: Woods Cross, Utah
Member`s Gallery
Posts: 454
|
|
|
|
|
|
11-20-2009, 06:52 AM
|
#25
|
Name: SWALLDOG
Title: Too Much Time
Status: Not Here
Join Date: Jun 2008
Location: Woods Cross, Utah
Member`s Gallery
Posts: 454
|
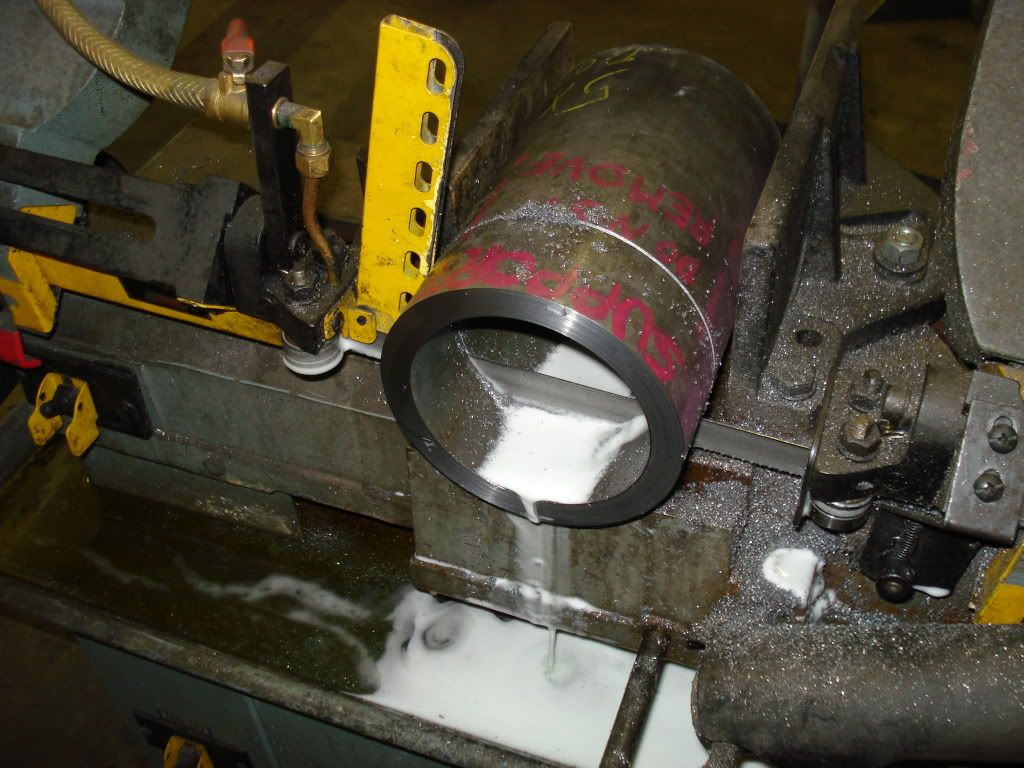
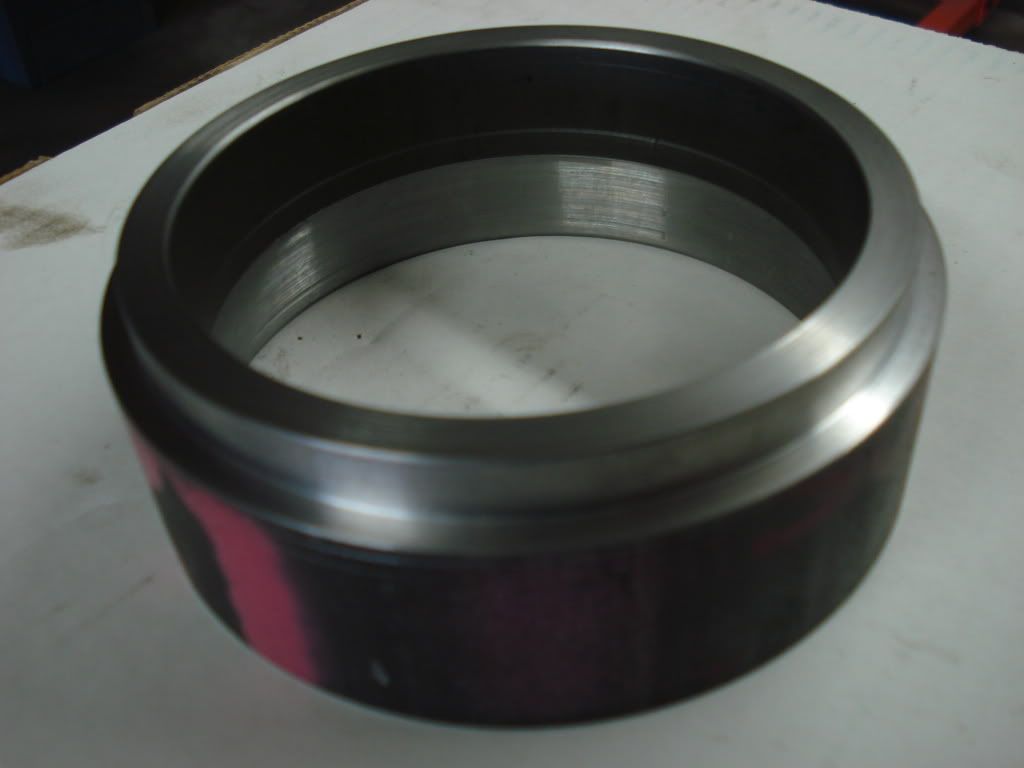
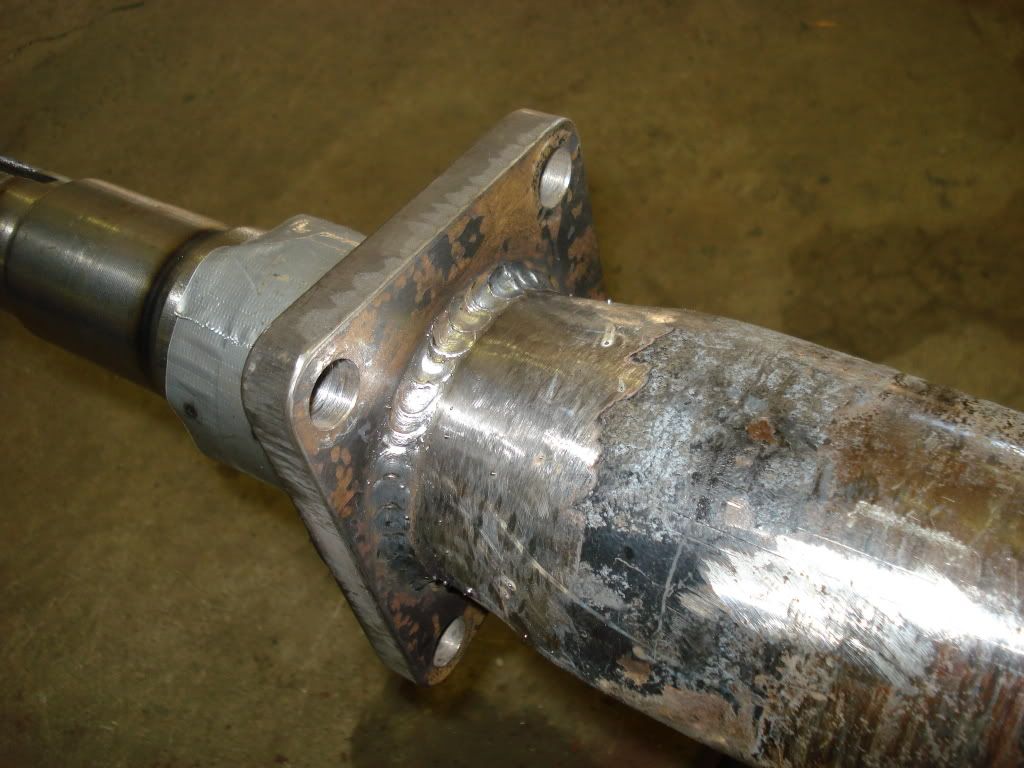
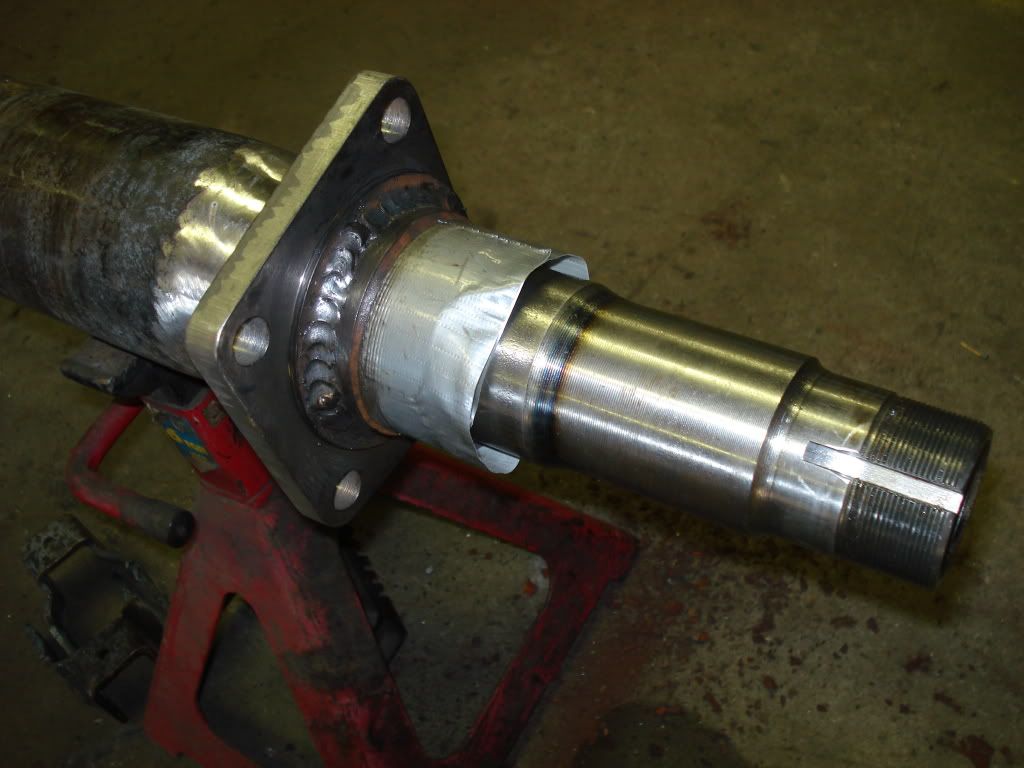
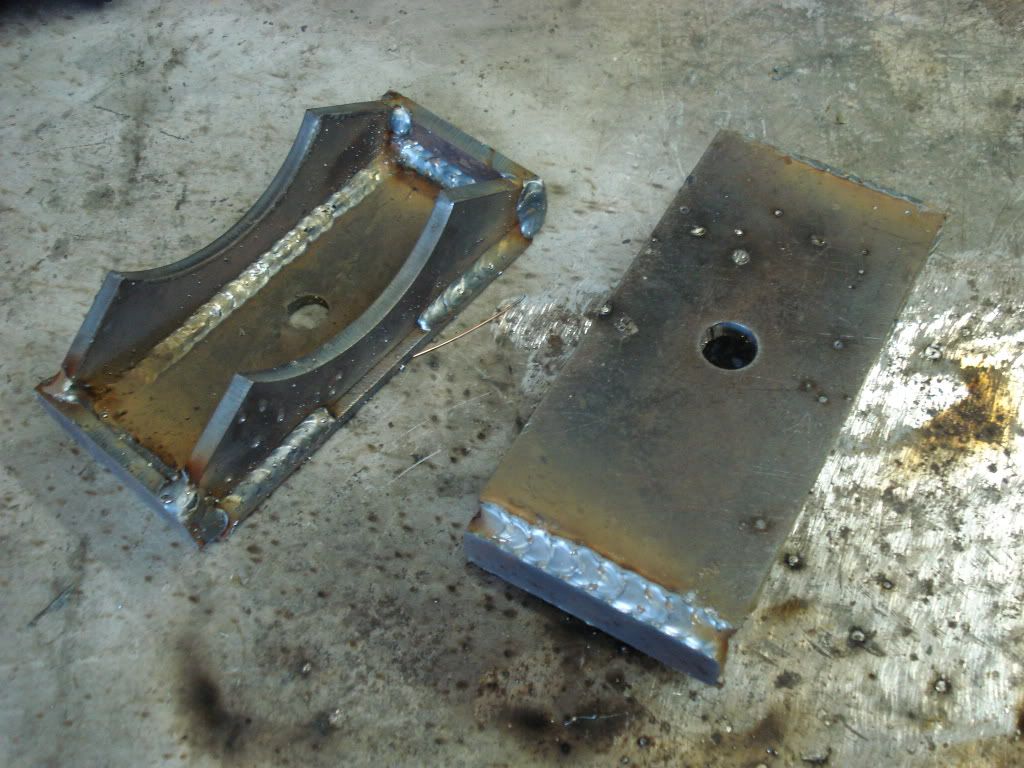
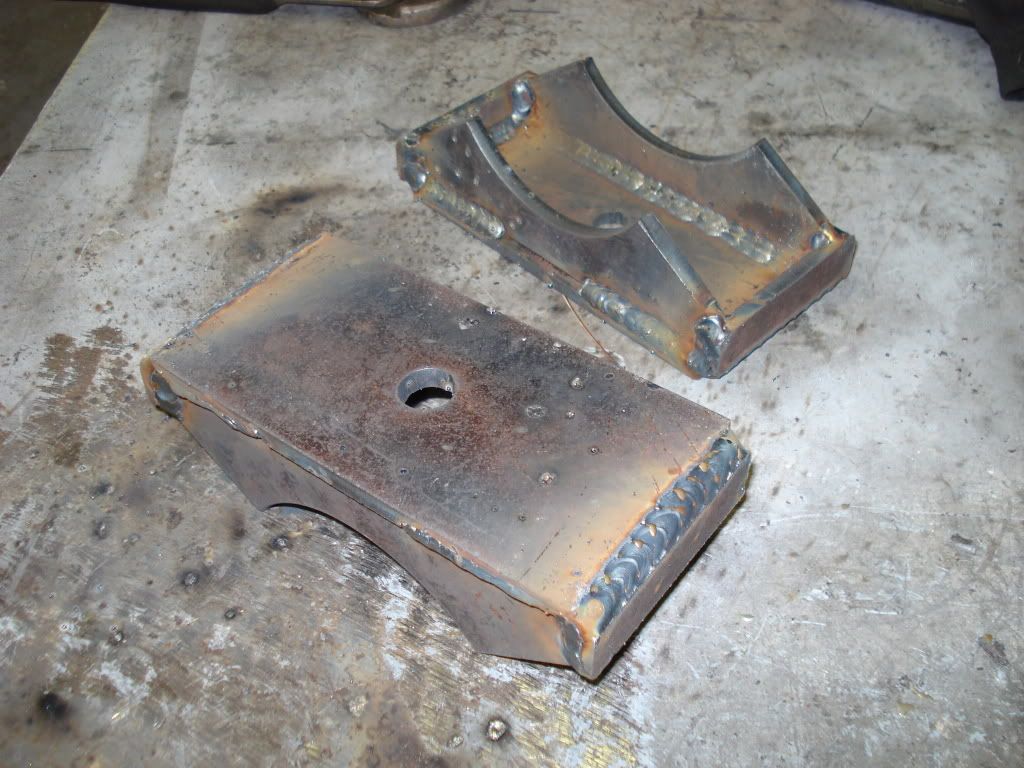
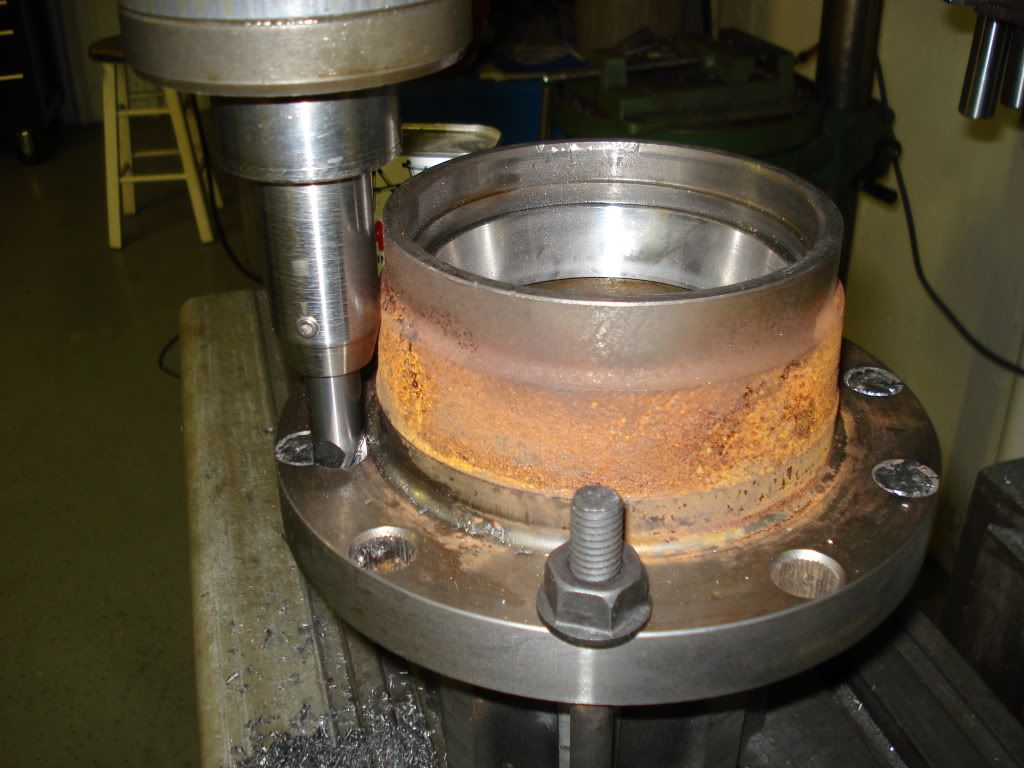
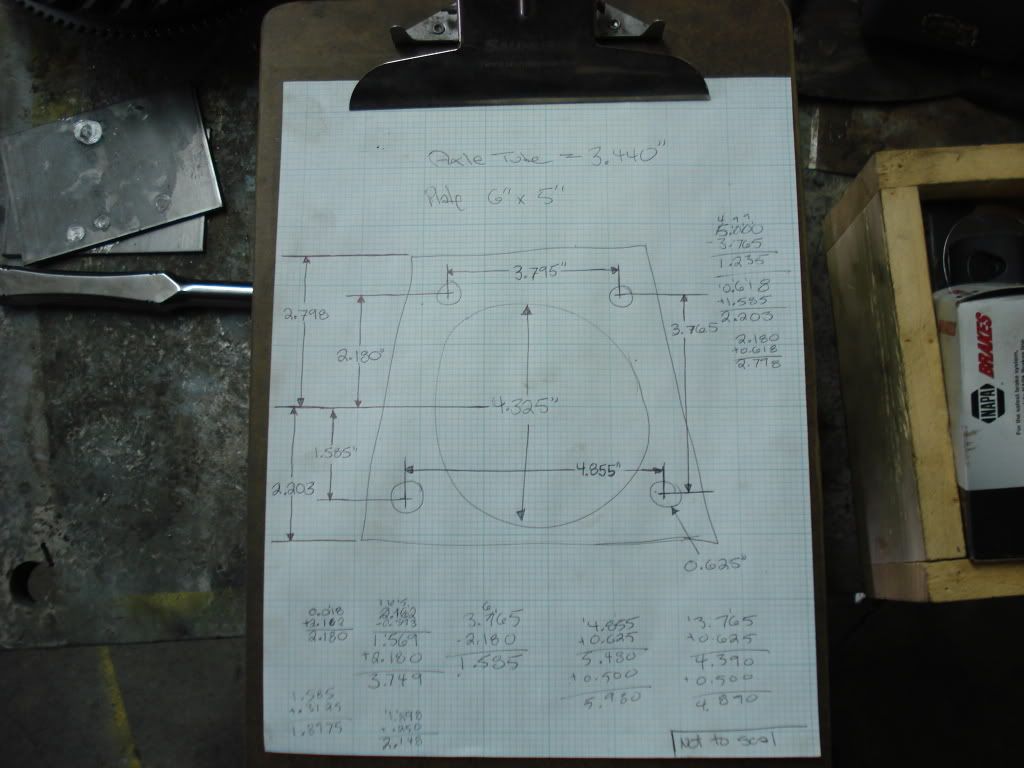
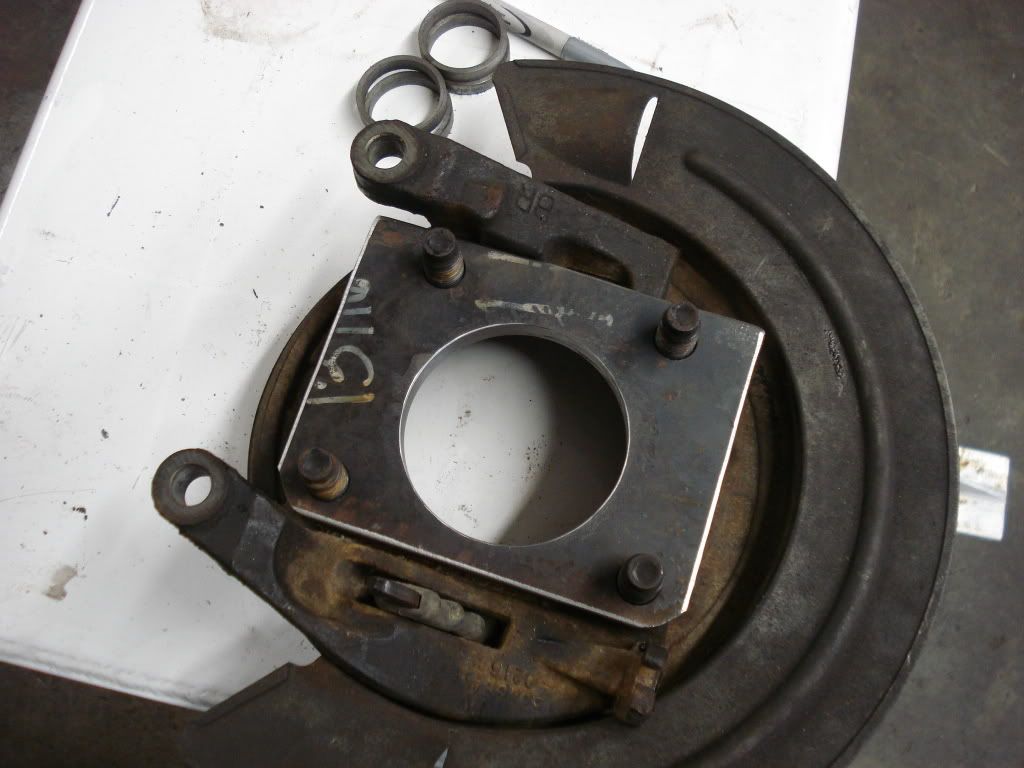
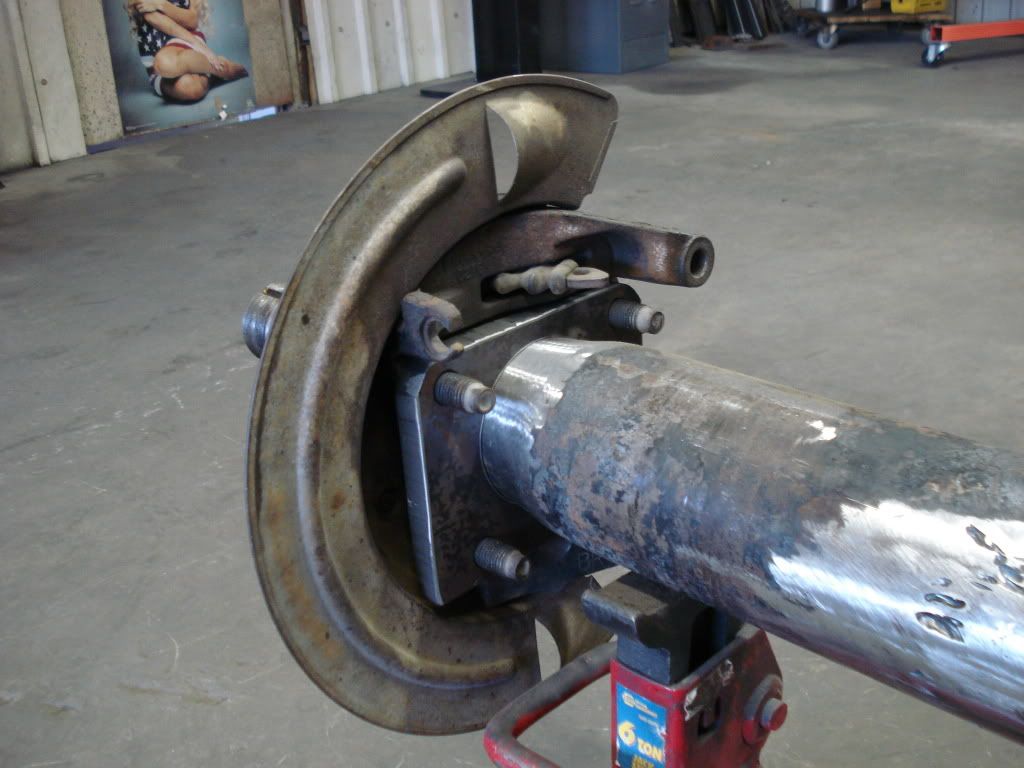
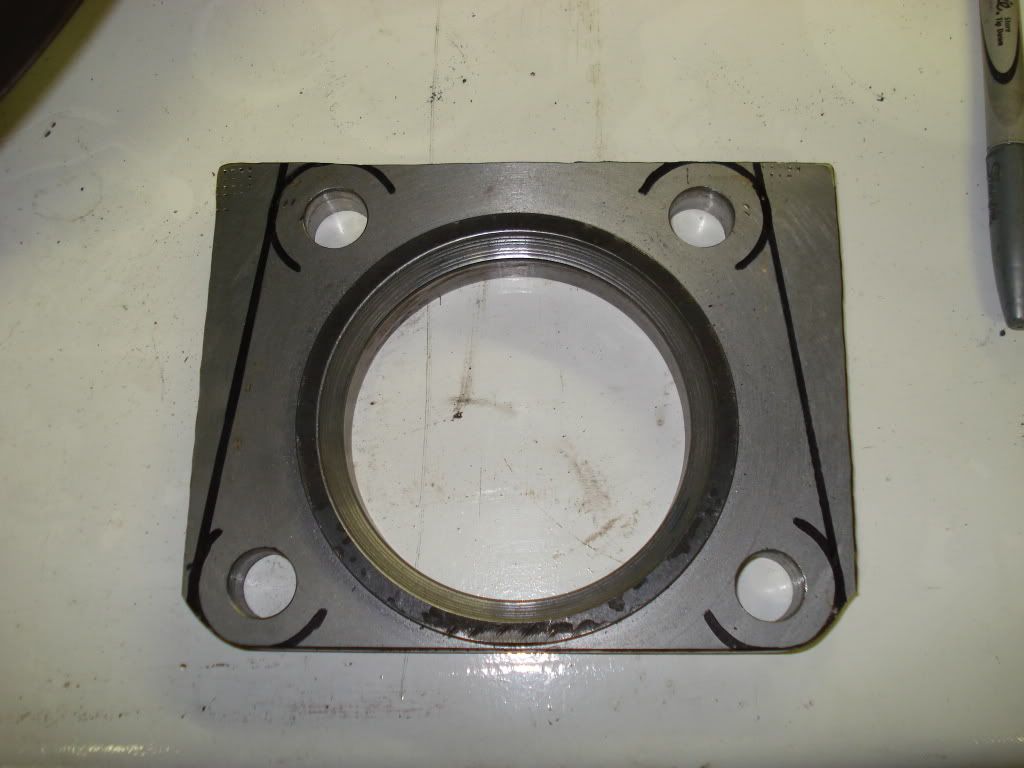
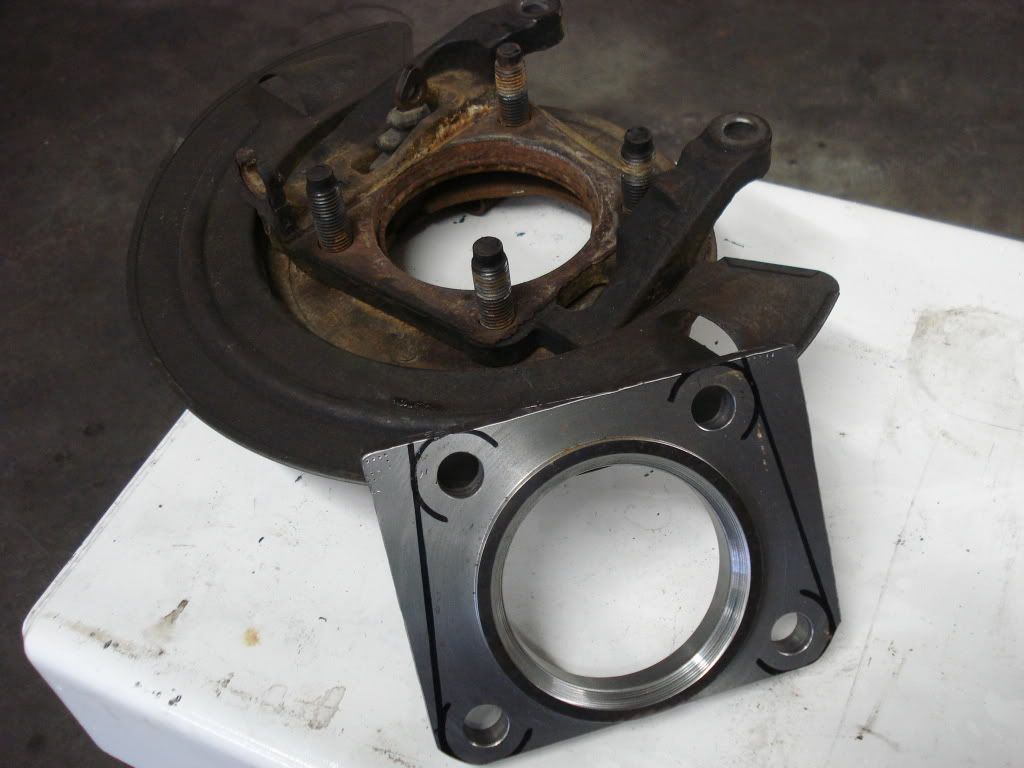
i was going to machine some plate to make a spacer that that would just clamp between the hub and the brake bracket so i could weld it in place. the center hole was machined pretty close to to the size on the axle tubing. figured it would center it really well. then my buddie said i should just machine a spacer out of tube that fits over the lip on the flange and in the step in the hub. then it would be perfectly centered. :headbang: got some 5" OD 1/2" wall DOM tubing and cut a chunk off.
spacer all machined.
test fit
installed and clamped with backing plate tacked in place
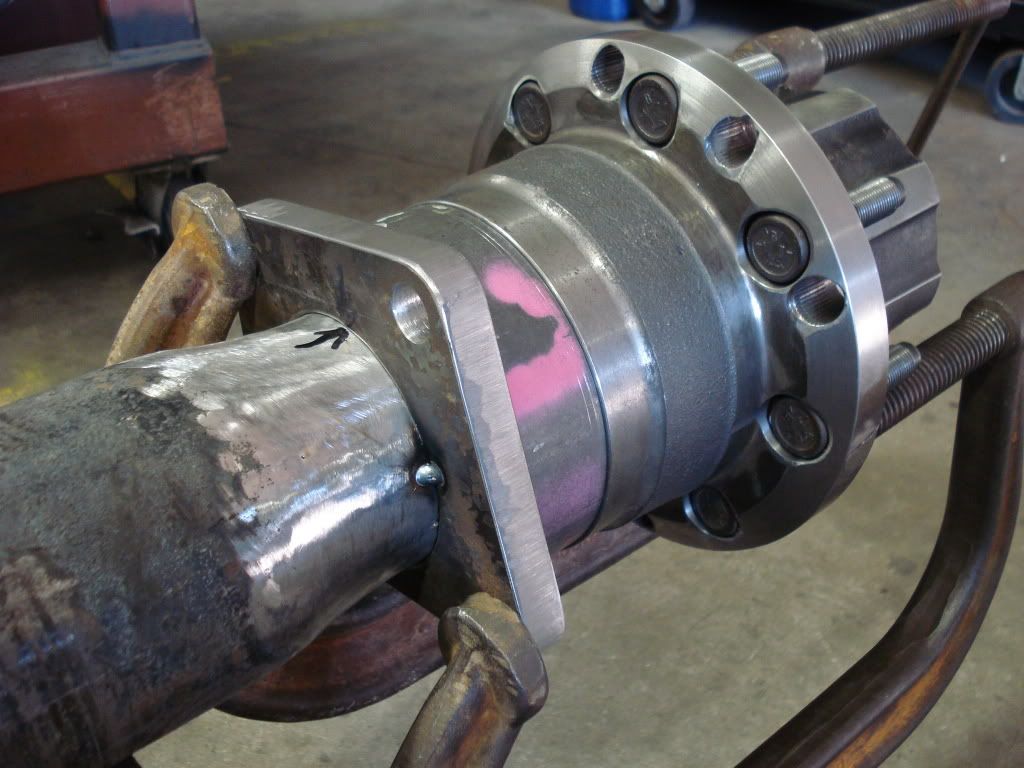

all welded up. one pass on the out side and three passses on the inside. the inside of the plate had a big bevel machined in it to get some good penitration. all welds were done in sections and alowed to cool before the next pass. dont want any thing warping. :thumbsup:
|
|
|
|
|
11-20-2009, 06:53 AM
|
#26
|
Name: SWALLDOG
Title: Too Much Time
Status: Not Here
Join Date: Jun 2008
Location: Woods Cross, Utah
Member`s Gallery
Posts: 454
|
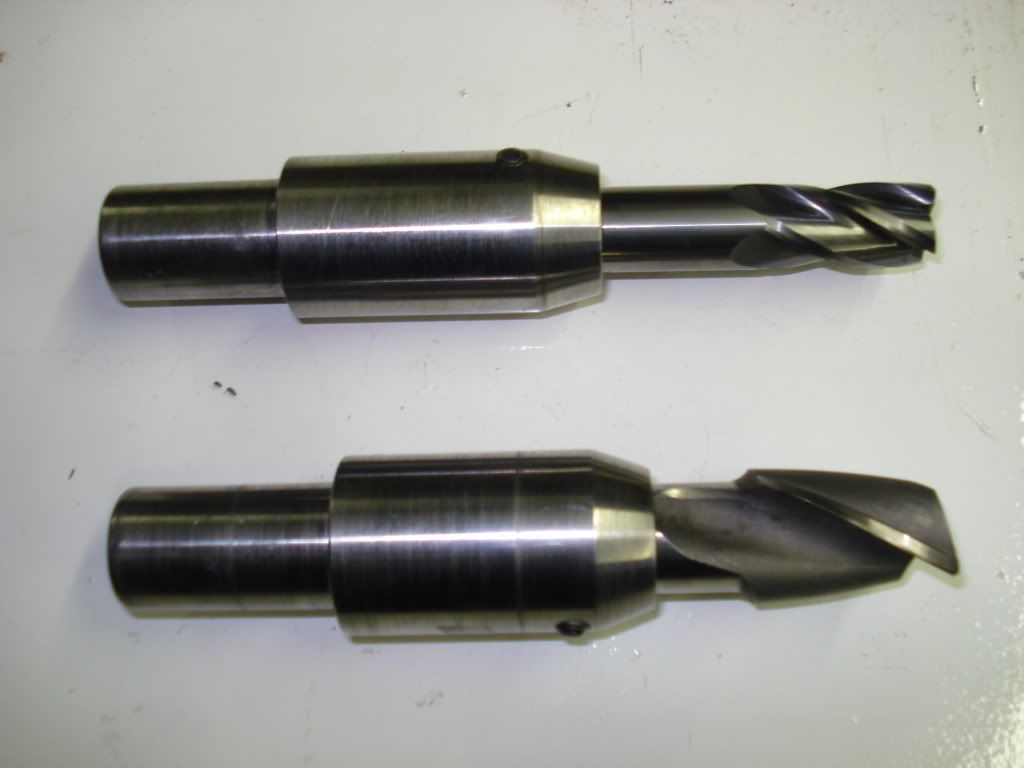
this is just a pic of me makin some set up carrier bearings for the dana 80. when my friend and i were going to set up the ring and pinion, well let me back up. so this 10 lug dana 80 had new carrier, 4.10 gears and bearings, but when i pulled it all apart i knew that it was not set up right. it was pretty bad. so i bought a shim kit so we could re-set up the gears. well when we started to pull the carrier bearings off things got worse. the bearings looked new but the races were defiantly old. same with the front pinion bearing and the pinion dam was all bent up. so i ordered a full install kit. new bearings and all. :thumbsup: so with the old carrier bearings, that were still new, i polished out the inside so they would just barley slide on the carrier. that way i dont have to press them on and off when changing shims. then once its set up press the good bearings on. :thumbsup:
|
|
|
|
|
11-20-2009, 06:56 AM
|
#27
|
Name: SWALLDOG
Title: Too Much Time
Status: Not Here
Join Date: Jun 2008
Location: Woods Cross, Utah
Member`s Gallery
Posts: 454
|
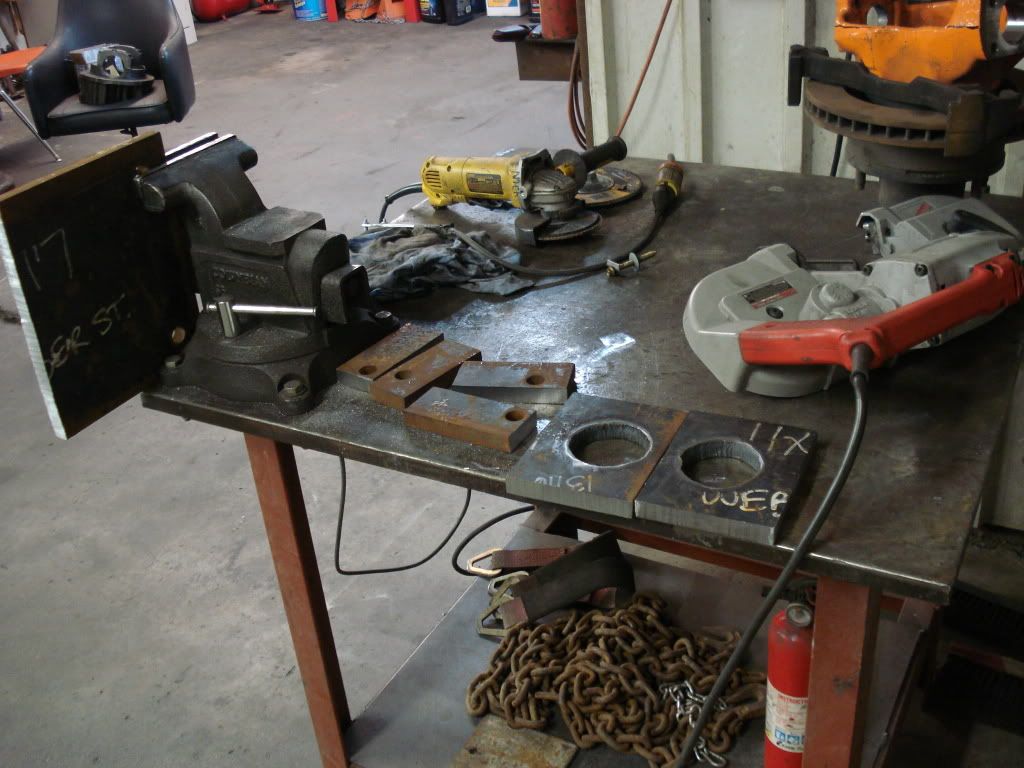
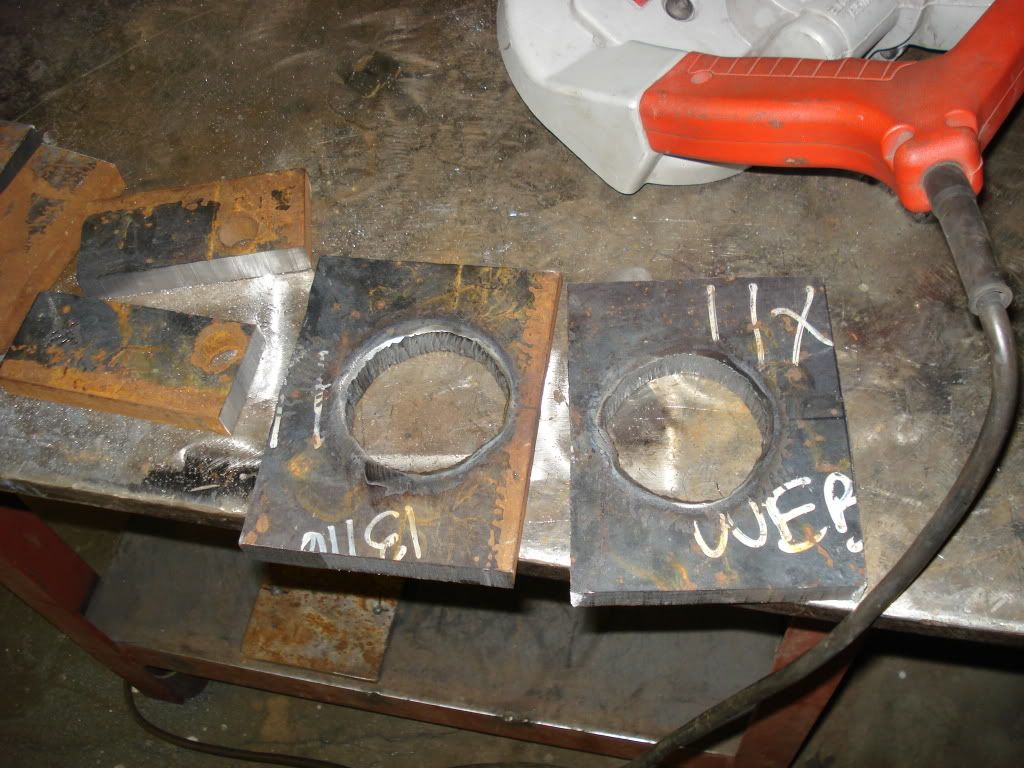
my buddie cut me out some spring perches on his plas table. turned out pretty slick.
all welded up on the axle.

|
|
|
|
|
11-20-2009, 07:01 AM
|
#28
|
Name: SWALLDOG
Title: Too Much Time
Status: Not Here
Join Date: Jun 2008
Location: Woods Cross, Utah
Member`s Gallery
Posts: 454
|
hubs painted ready to install.  arty018:
|
|
|
|
|
11-20-2009, 07:02 AM
|
#29
|
Name: SWALLDOG
Title: Too Much Time
Status: Not Here
Join Date: Jun 2008
Location: Woods Cross, Utah
Member`s Gallery
Posts: 454
|
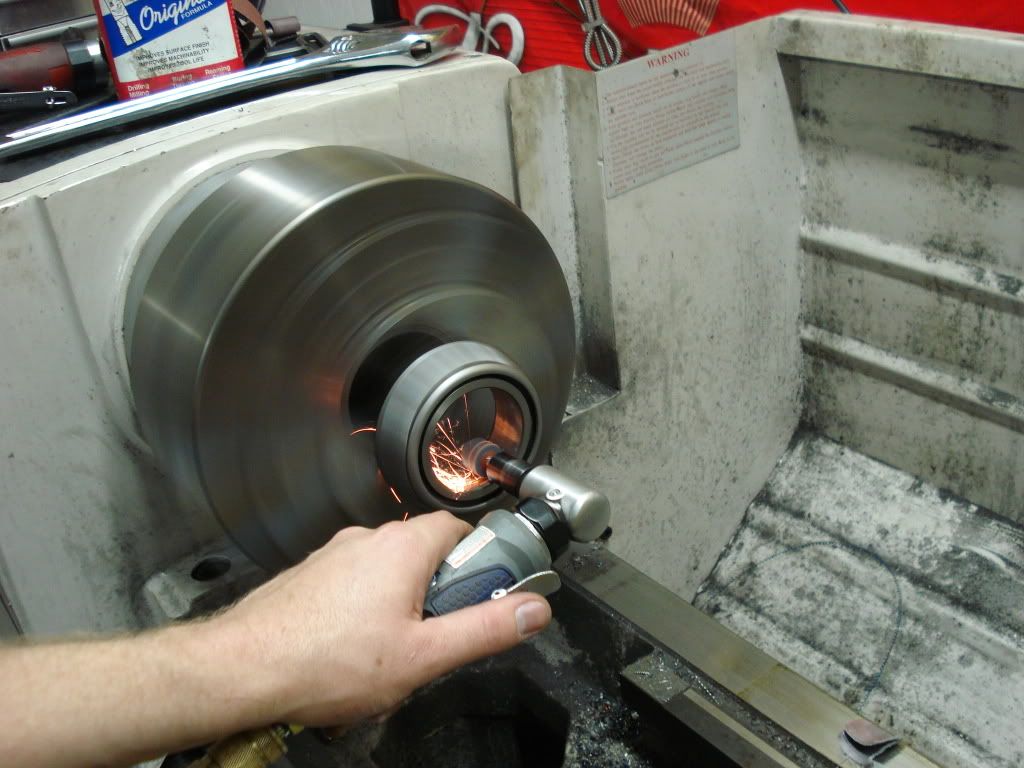
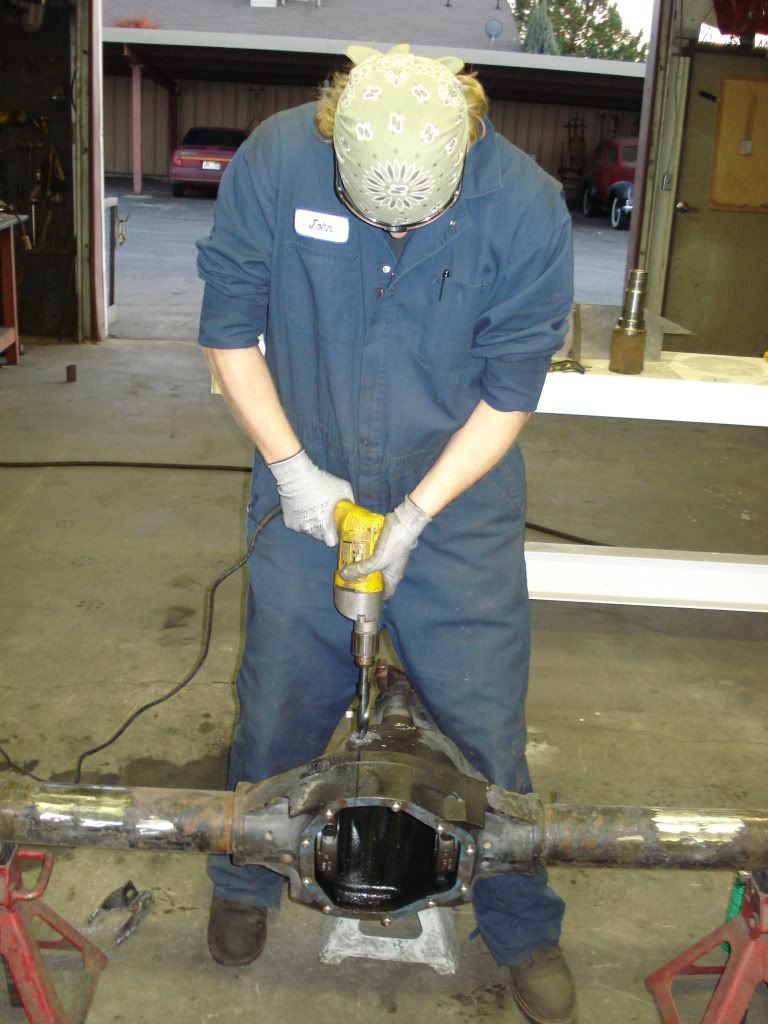
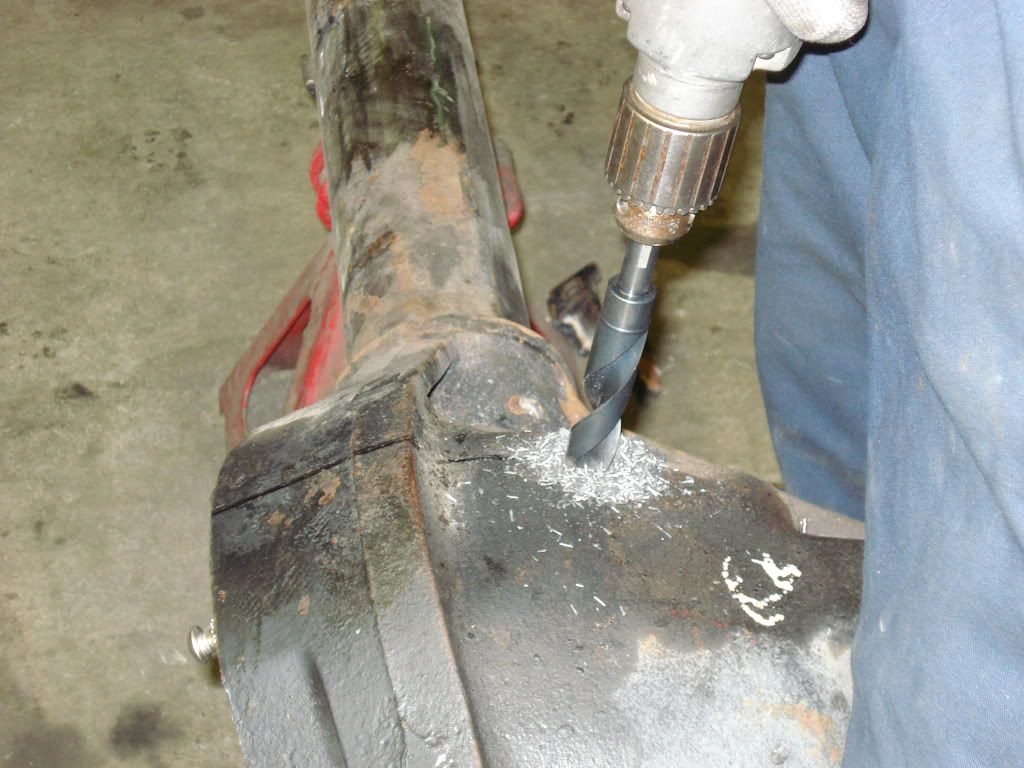
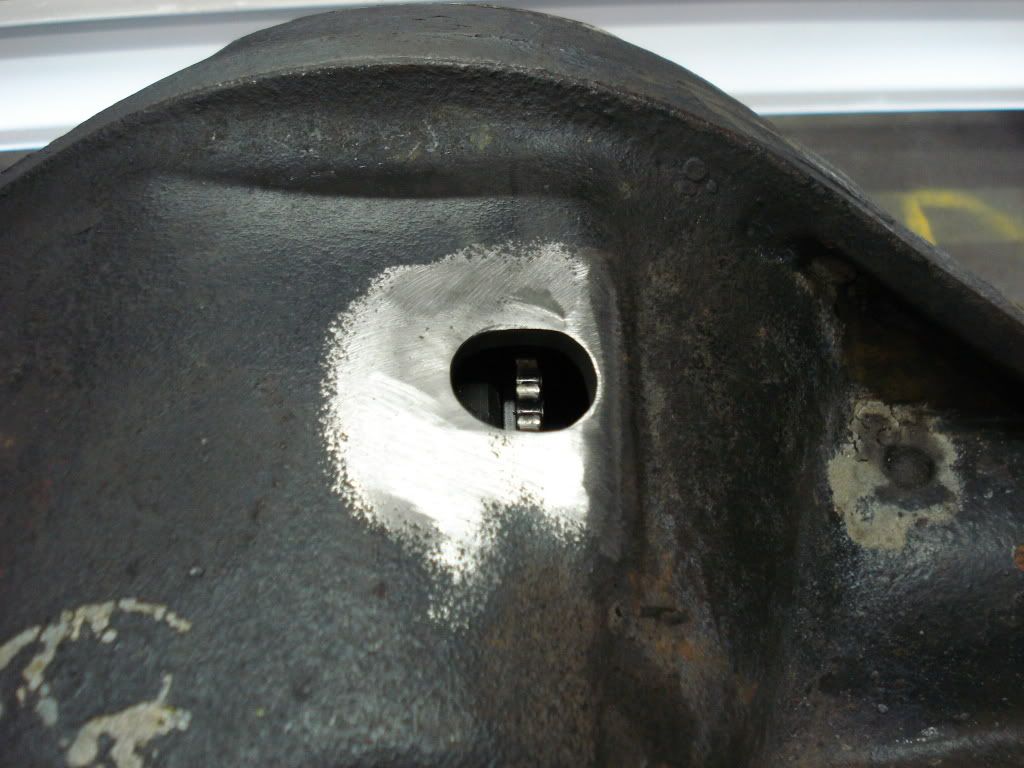
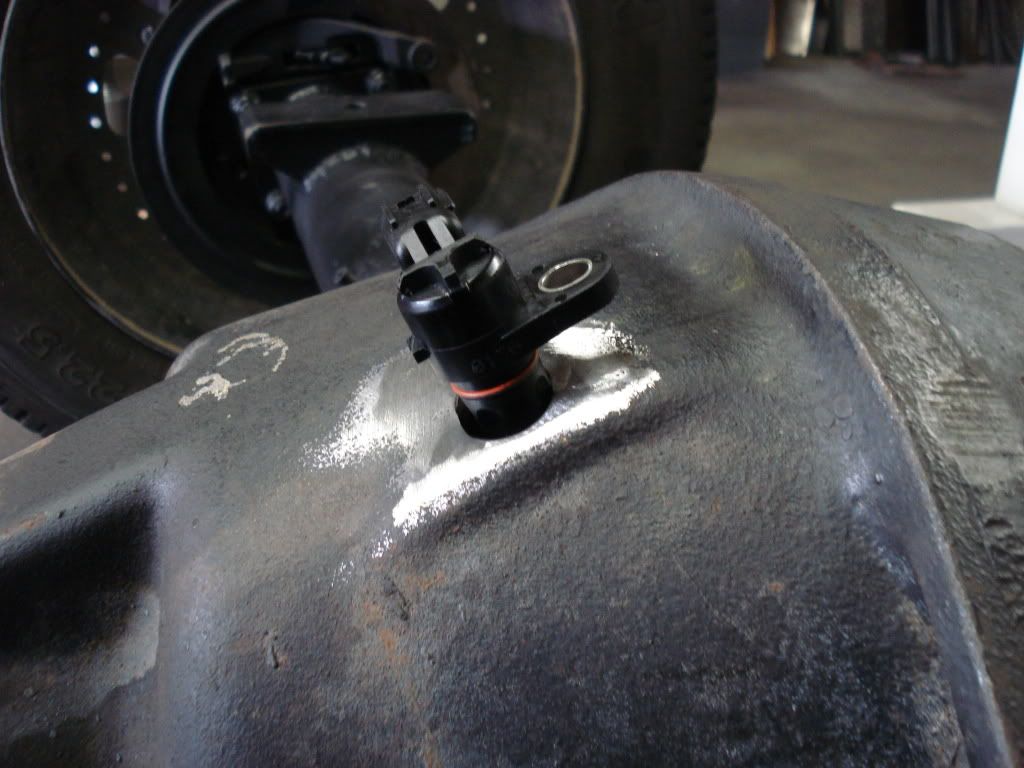
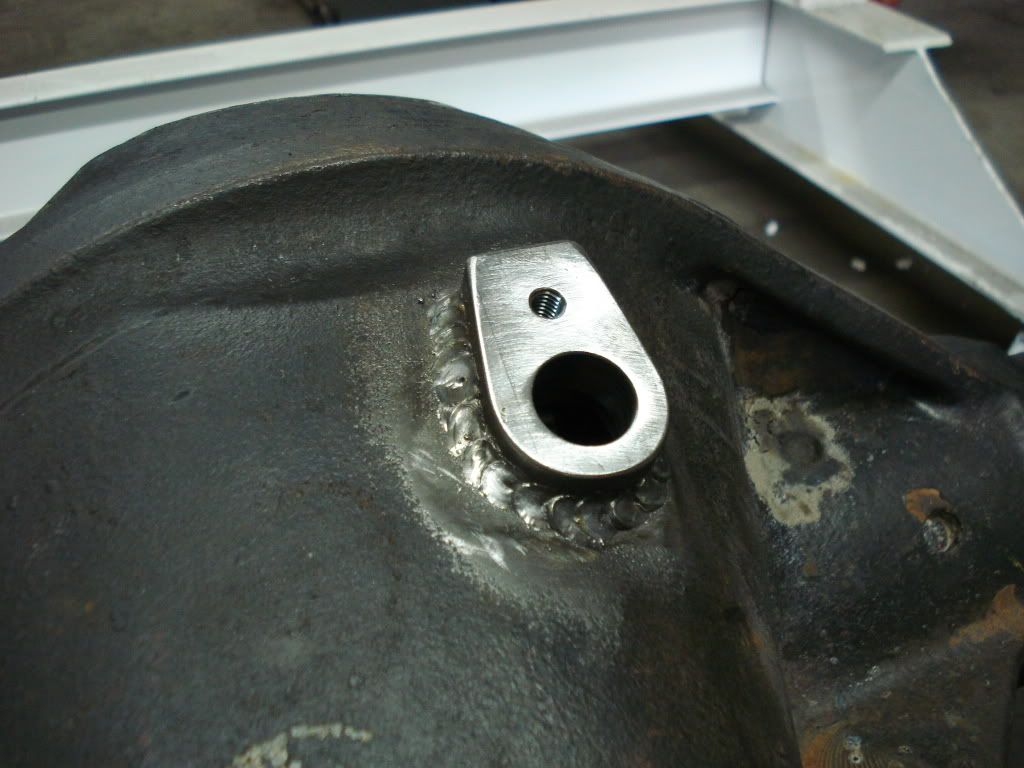
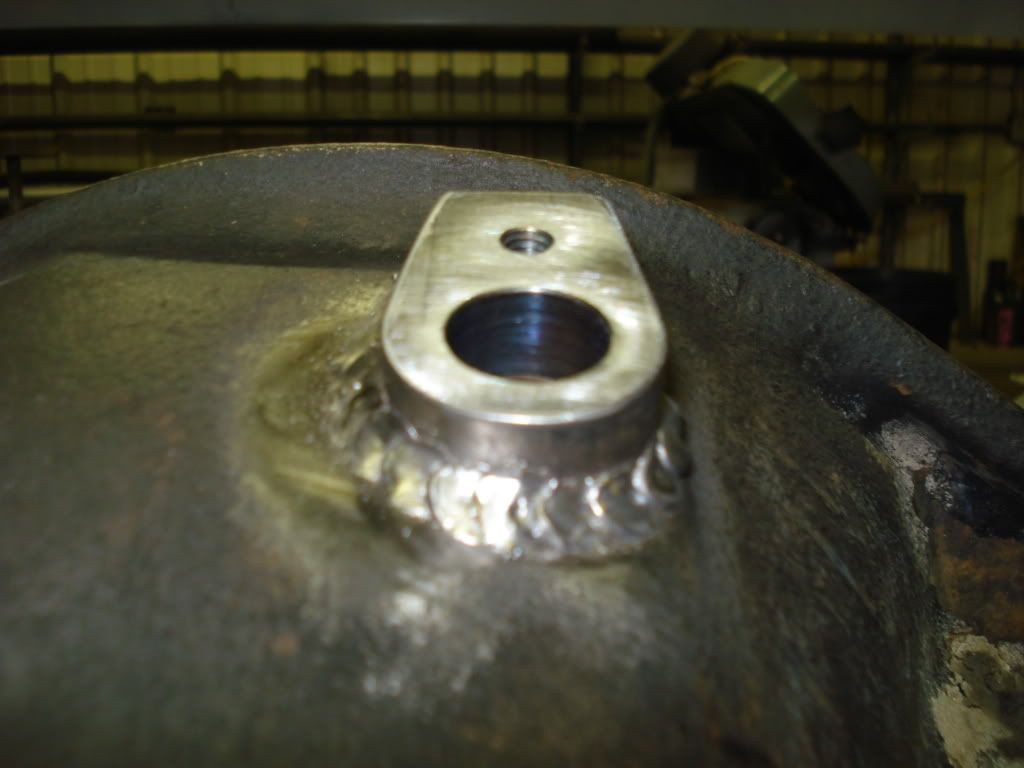
the last thing (for now) that i'm working on, to get it back on the road, is the wheel speed sensor. i drilled a hole in the housing before i got all the gears installed. today (guess it would be yesterday now) i got the block all machined that holds the sensor in place. forgot to take some pics.  but today after i get home from work and get some sleep, i should have it welded on. then i can throw the axle in and take it for a burn! :headbang:
|
|
|
|
|
11-20-2009, 06:27 PM
|
#30
|
Name: kalder
Title: Kevin Alder
Status: Not Here
Join Date: Oct 2006
Location: Kittitas Valley, WA
Member`s Gallery
Posts: 1,286
|
Wow! Nice work!
__________________
Kevin
03 3500
|
|
|
|
|
11-20-2009, 07:04 PM
|
#31
|
Name: jackblack99
Title: Too Much Time
Status: Not Here
Join Date: Sep 2008
Member`s Gallery
Posts: 1,813
|
thats sweet man. good job!
__________________
03 RCLB Lb7 6spd.
|
|
|
|
|
11-20-2009, 07:18 PM
|
#32
|
Name: milldog
Title: Yup...
Status: Not Here
Join Date: May 2009
Member`s Gallery
Posts: 108
|
I need to buy some more tools!!! First off a lathe...
__________________
04.5 A little extra fuel and air
|
|
|
|
|
11-20-2009, 08:02 PM
|
#33
|
Name: jordanjames81
Title: Too Much Time
Status: Not Here
Join Date: Jan 2009
Location: marion, ky
Member`s Gallery
Posts: 3,411
|
nice fab work
__________________
Hidden Valley Diesel Performance
BD Diesel Performance
Industrail Injection
Amsoil oil Dealer
AirDog Fuel Systems
Farmer's Machine
AutoMeter Gauges
AFE Power
Check us out on FaceBook
Incompatible Browser | Facebook
|
|
|
|
|
11-20-2009, 10:44 PM
|
#34
|
Name: SWALLDOG
Title: Too Much Time
Status: Not Here
Join Date: Jun 2008
Location: Woods Cross, Utah
Member`s Gallery
Posts: 454
|
Quote:
Originally Posted by kalder

Wow! Nice work!
|
Quote:
Originally Posted by jackblack99
thats sweet man. good job!
|
Quote:
Originally Posted by jordanjames81
nice fab work
|
THANKS! its finally comming together. 
|
|
|
|
|
11-20-2009, 11:49 PM
|
#35
|
Name: SWALLDOG
Title: Too Much Time
Status: Not Here
Join Date: Jun 2008
Location: Woods Cross, Utah
Member`s Gallery
Posts: 454
|
|
|
|
|
|
11-21-2009, 05:16 AM
|
#36
|
Name: Chevycummins
Title: Bad case of Tinkeritis!
Status: Not Here
Join Date: Jul 2008
Member`s Gallery
Posts: 3,488
|
nice work. got some pretty good fab skills. wish i had time to do something like that with my cummins conversion.
could you not use like a pop can or something and cut you out a couple shims to space that back to your 0.020???
__________________
2020 Ram 2500 4x4 Big Horn
|
|
|
|
|
11-22-2009, 06:33 AM
|
#37
|
Name: SWALLDOG
Title: Too Much Time
Status: Not Here
Join Date: Jun 2008
Location: Woods Cross, Utah
Member`s Gallery
Posts: 454
|
|
|
|
|
|
11-22-2009, 06:47 AM
|
#38
|
Name: SWALLDOG
Title: Too Much Time
Status: Not Here
Join Date: Jun 2008
Location: Woods Cross, Utah
Member`s Gallery
Posts: 454
|
Quote:
Originally Posted by Chevycummins
nice work. got some pretty good fab skills. wish i had time to do something like that with my cummins conversion.
could you not use like a pop can or something and cut you out a couple shims to space that back to your 0.020???
|
thanks man! yeah pop can for custom shims is a great idea. i just stuck 2 small pinion shims in there for now. kinda geto but i wanted to get it on the road. worked for today.
|
|
|
|
|
11-22-2009, 08:15 AM
|
#39
|
Name: JFlagg
Title: Gun for Hire
Status: Not Here
Join Date: Jul 2007
Location: St. Louis, MO
Member`s Gallery
Posts: 5,630
|
Thats some nice machine work and fabbing you did there! I think the 37 spline is a good upgrade for the D80's. That, along with the bigger bearings and 4.10's should make for a great rearend for a tow rig. Now the next question is, when are you doing the 4.10's in the front? Or did you do that at the same time, but didn't mention it since it didn't require any fancy fab work? 
__________________
P-pumped 24V... with a few mods 

|
|
|
|
|
11-22-2009, 08:19 AM
|
#40
|
Name: Goinbyyabig
Title: Free Thinker, Innovator
Status: Not Here
Join Date: Apr 2009
Member`s Gallery
Posts: 185
|
X2 on the "I need to buy some more tools", having access to the lathe, bridgeport, welders, etc. is nice but only part of the game. You have some excellent fab and machining skills man, takes brains as well for that stuff to come out right and last, keep us posted!!
|
|
|
|
 Posting Rules
|
You may not post new threads
You may not post replies
You may not post attachments
You may not edit your posts
HTML code is Off
|
|
|
All times are GMT -5. The time now is 01:46 AM.
|


 i'm really excided to see how it tows. dont know when that will be, maybe not till april. down to moab for the easter jeep safari.


