| Advertisement |
|
|
|
|
|
|
|
If this is your first visit, be sure to check out the FAQ by clicking the link above.
You may have to register before you can post: click the register link above to proceed.
To start viewing messages, select the forum that you want to visit from the selection below.
|
| Dodge Competition and Performance General Dodge Competition and Performance Discussion |
 04-03-2014, 06:07 PM
|
#1
|
Name: Big Blue24
Title: Comp Diesel Sponsor
Status: Not Here
Join Date: Jan 2008
Location: Cedar City, UT
Member`s Gallery
Posts: 6,310
|
48RE Performance Transmission Rebuild
This is a start to finish performance rebuild of a stock 48re transmission for a 2006 Dodge Ram 2500 Megacab Cummins.
It's going to take a couple weeks to complete in spare time in the evenings but the plan is to take pictures of many of the main components and upgrades during the build.
Step One: Tear-down and disassemble the whole transmission. The owner reported that this transmission had approx 120,000 miles of street use and abuse with an otherwise stock truck with the exception of a Bully Dog tuner set to extreme (for the best fuel economy) 
Fluid looks a little dark, I wonder what we'll find inside:


Removed the overdrive housing 7/16" bolts and lifted the complete overdrive assembly off from the main transmission case.


Removed the pan and take a look inside.... nasty scorched fluid!


Removed the two torx T-25 screws and removed the filter.
Picture of the line pressure adjustment screw and TV lever stop screw.

Before laying down the tranny, I unbolted the electronic TV controller (2) 1/2" bolts and the neutral safety switch (2) T-25 torx screws, and removed the shift lever (1) 1/2" pinch nut/bolt.
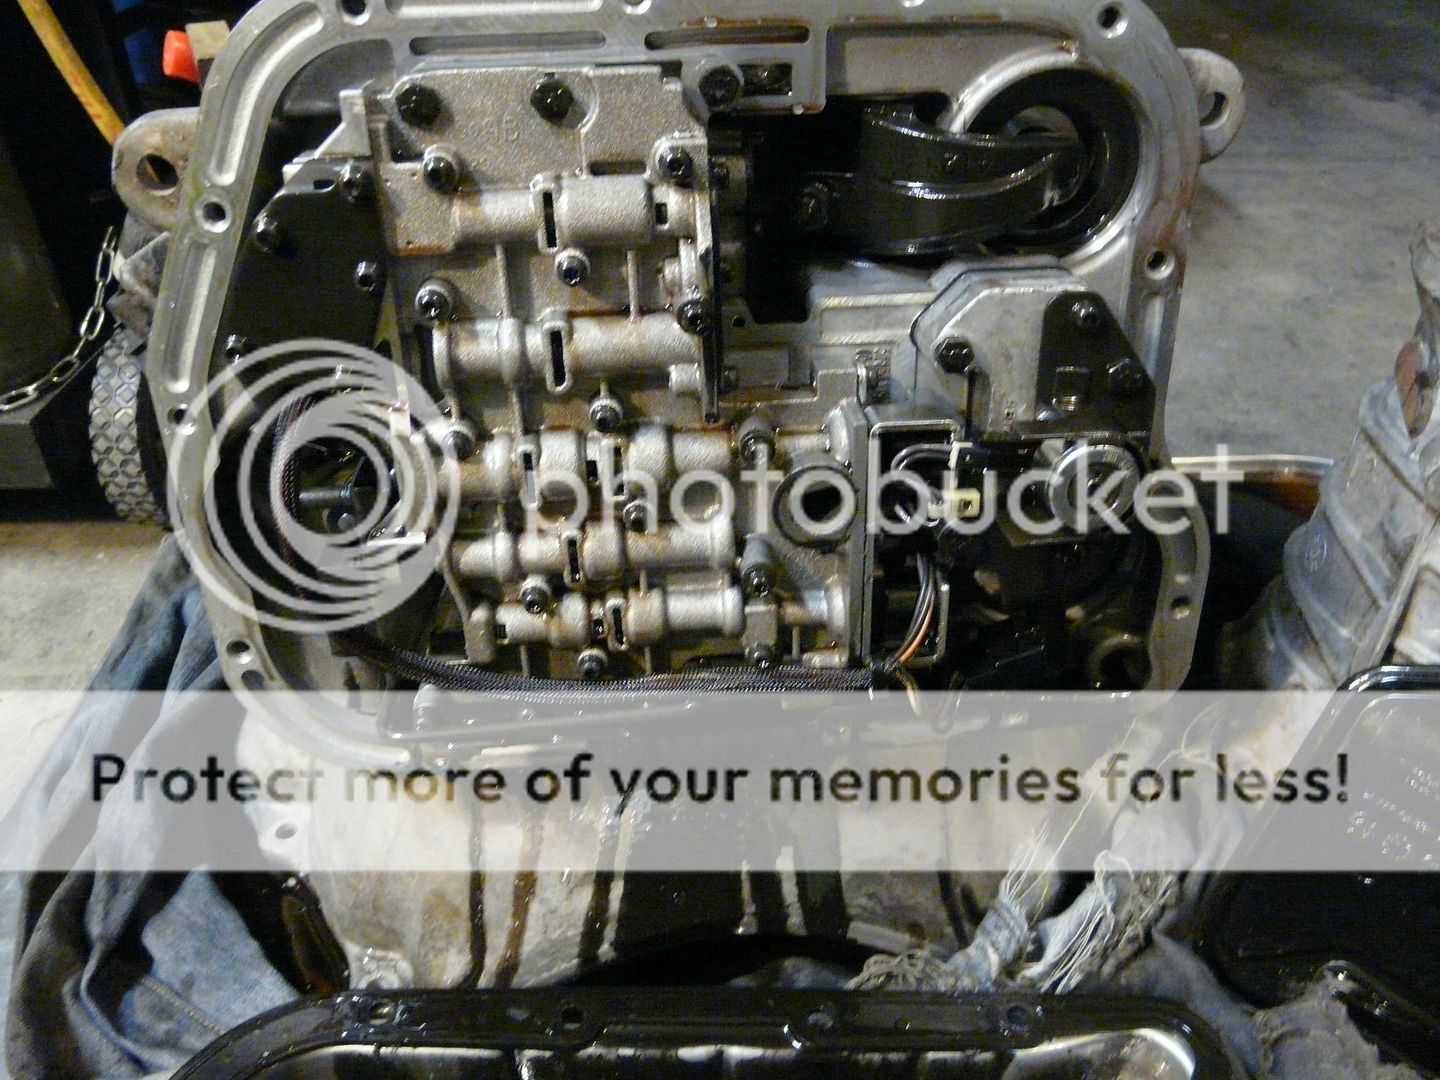
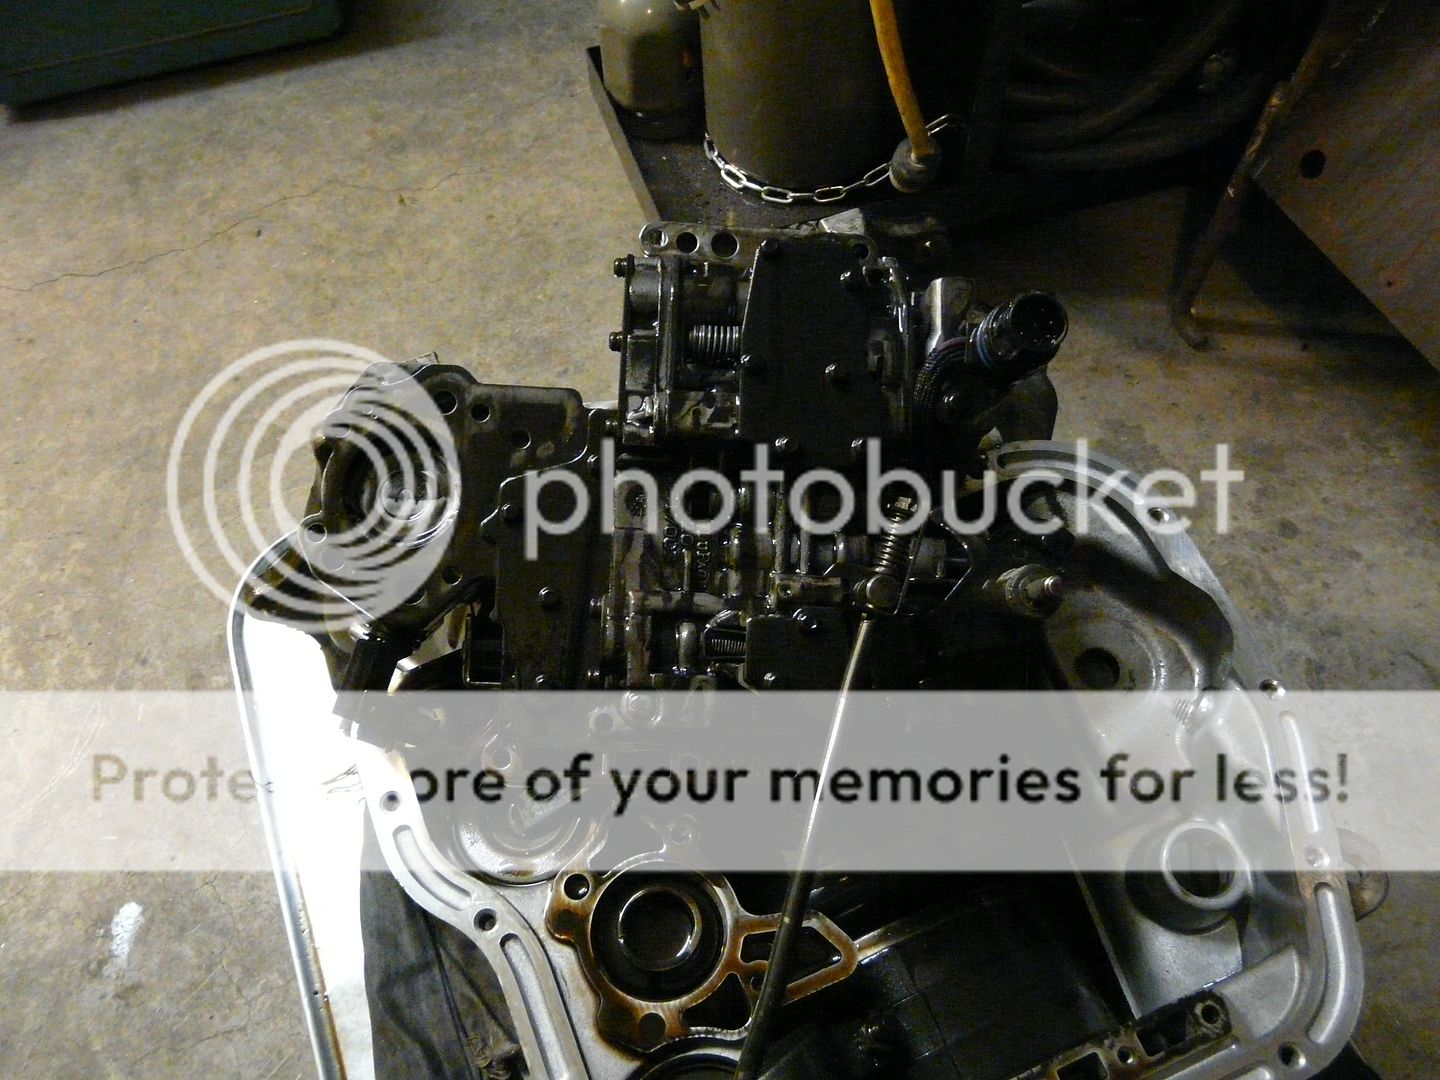
Next, lay the tranny on its back and prop the rear with a block of wood.

Remove the 7/16" valvebody bolts and lift the valvebody up off the main case using your other hand to help the shifter shaft and electronic connector to pull through the case and come up with the valvebody.

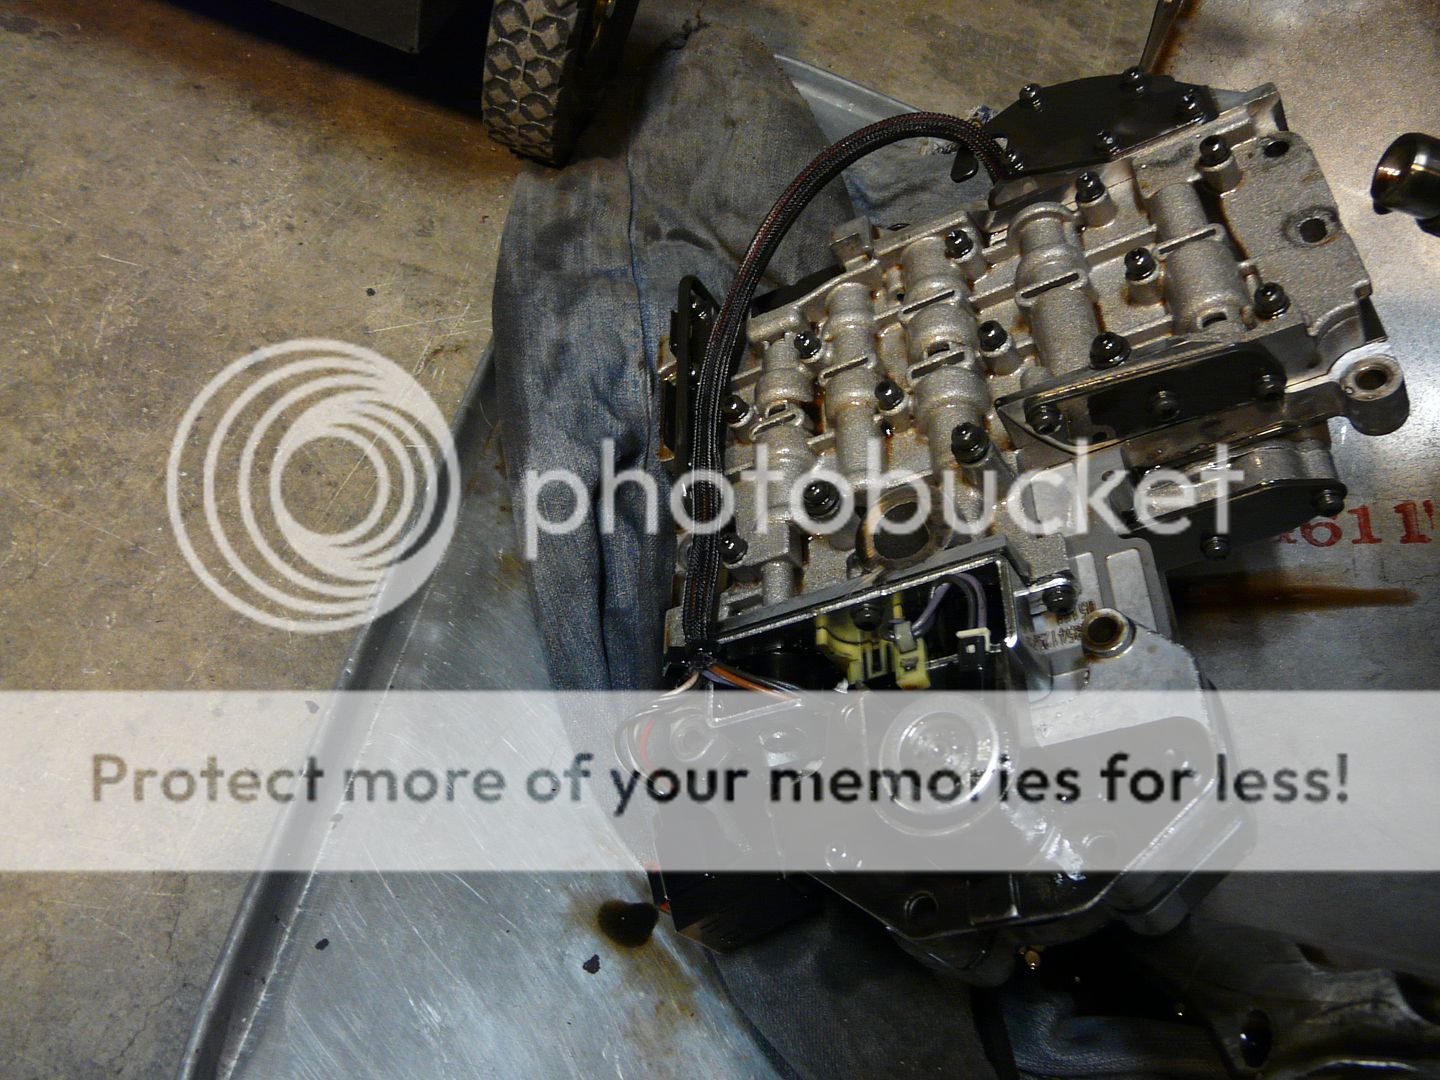
Valvebody
Place a rag or towel inside to front bell to help catch the 1/4 quart of fluid that will come out of the pump assembly during removal.
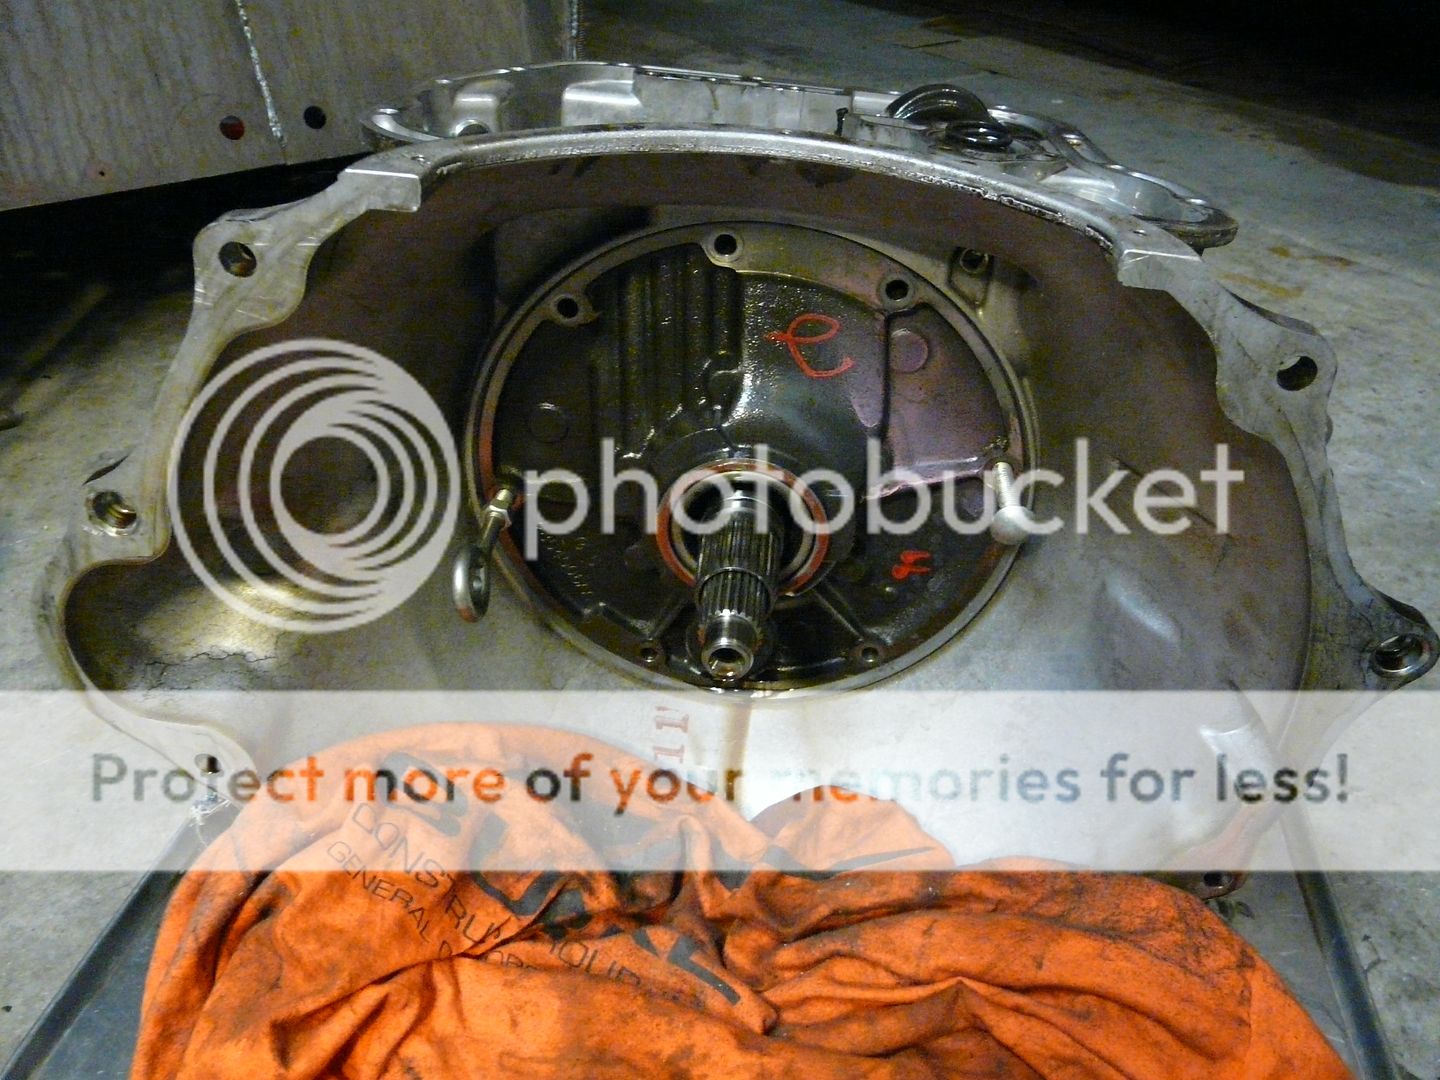
Remove the 1/2" bolts on the pump, then install a larger bolt on either side in the two holes with the larger tapped/threaded bore. Use a slide hammer or eyebolt and a hammer to work the pump forward out of the main case.

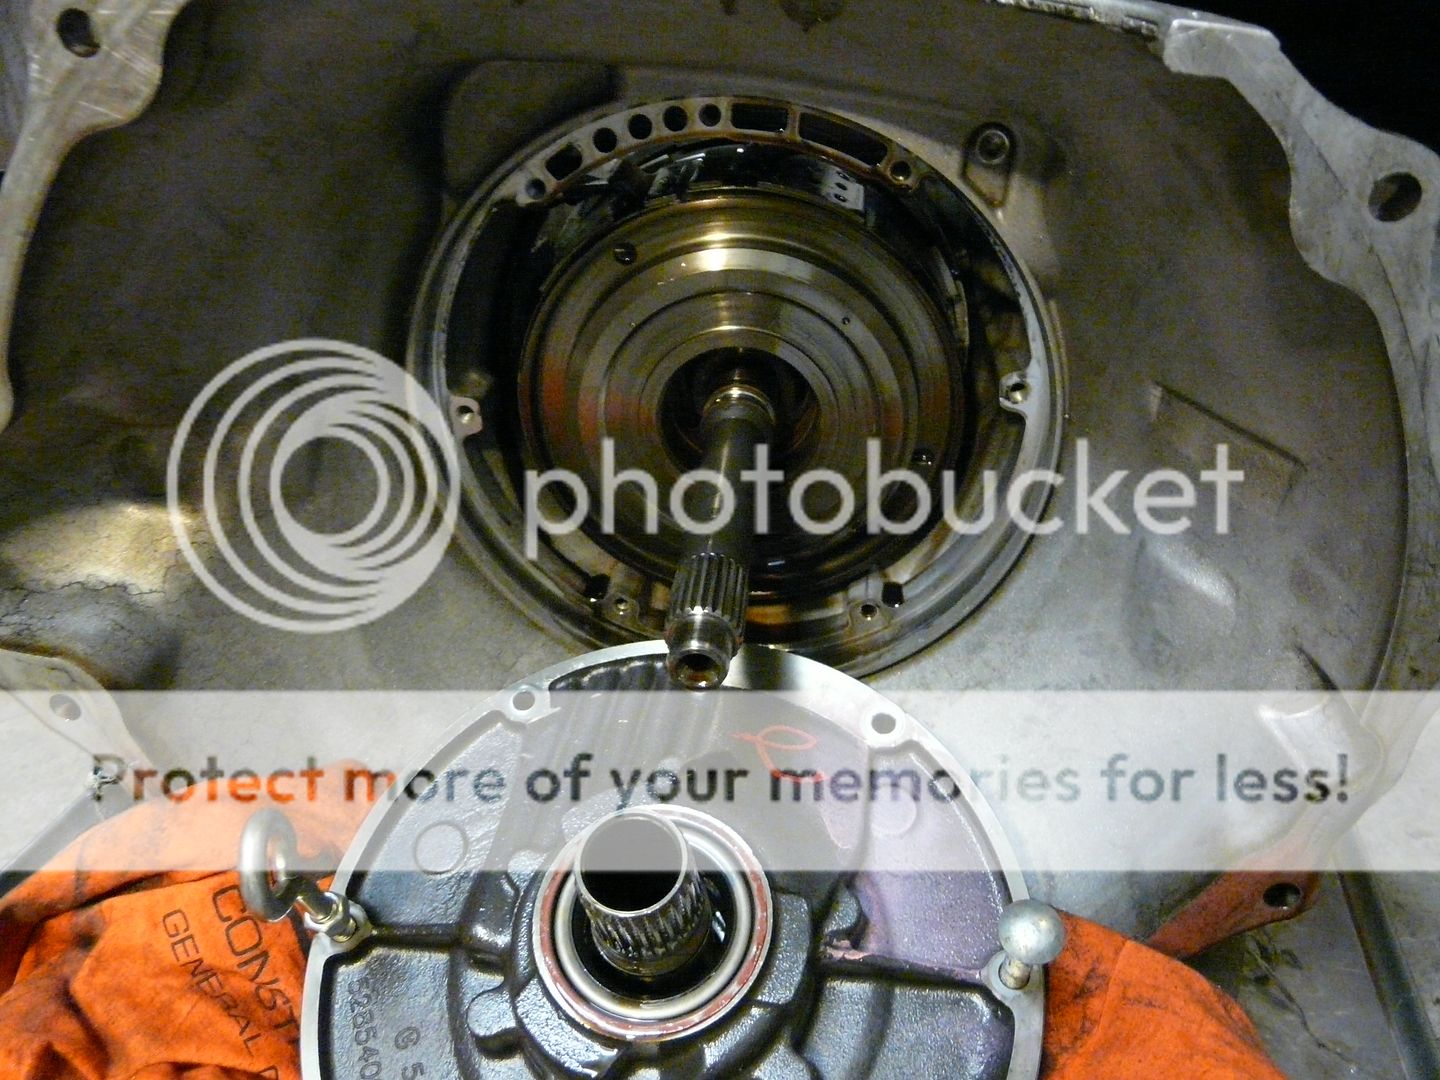
Grab the input shaft and lift/pull the shaft and hub assembly out of the main case.
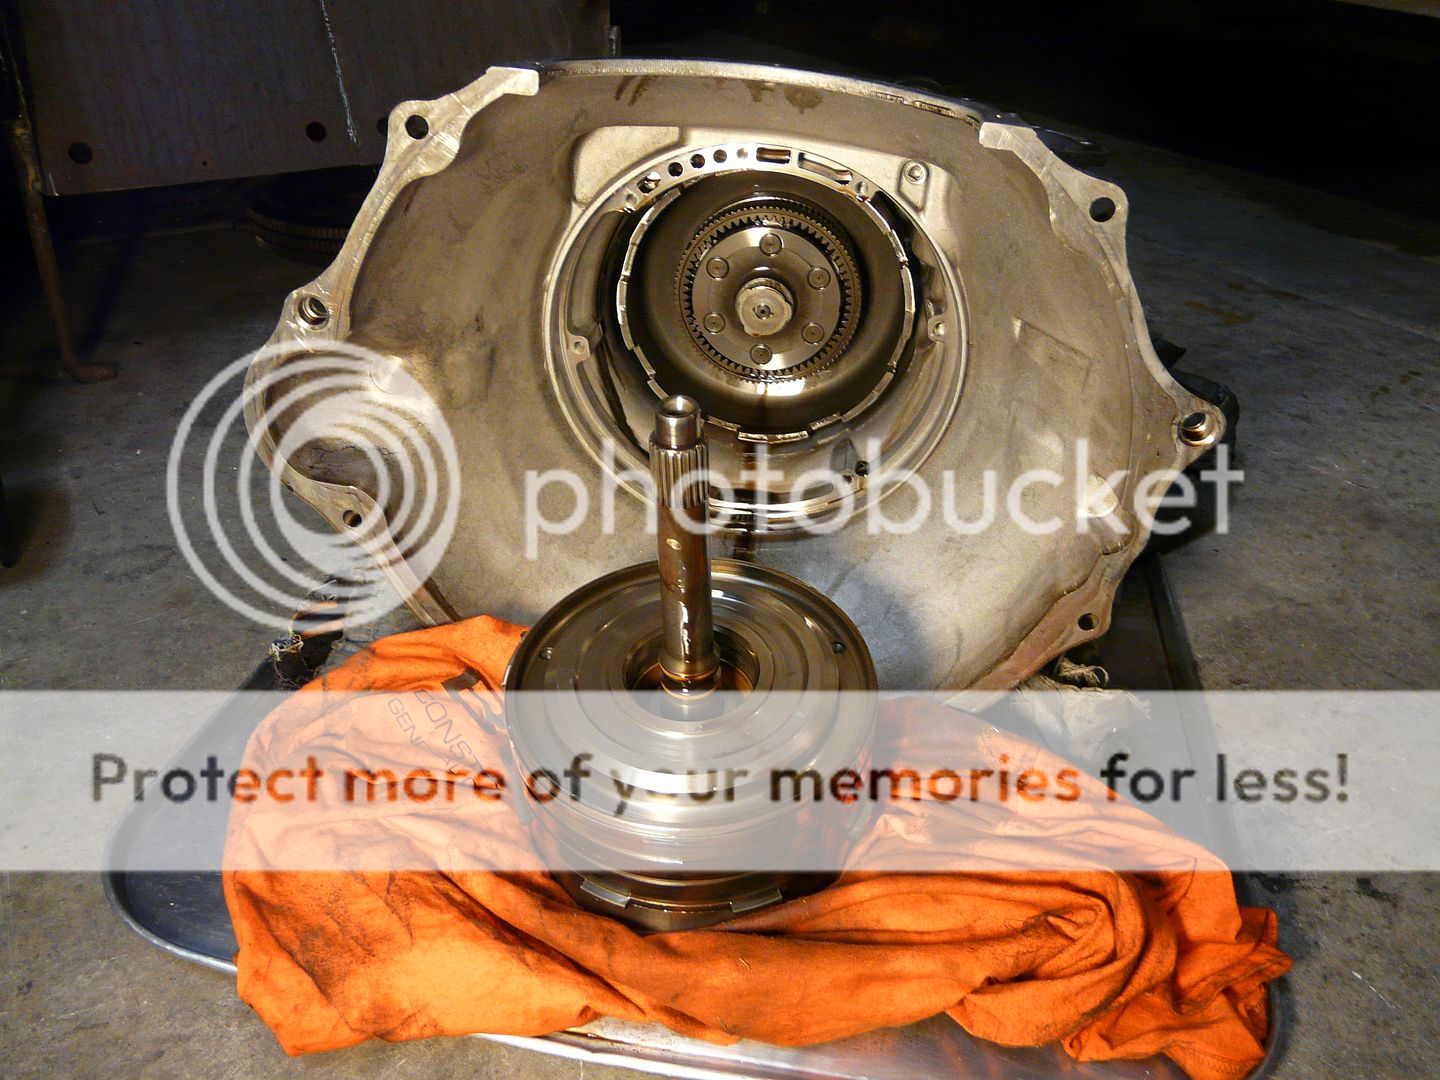
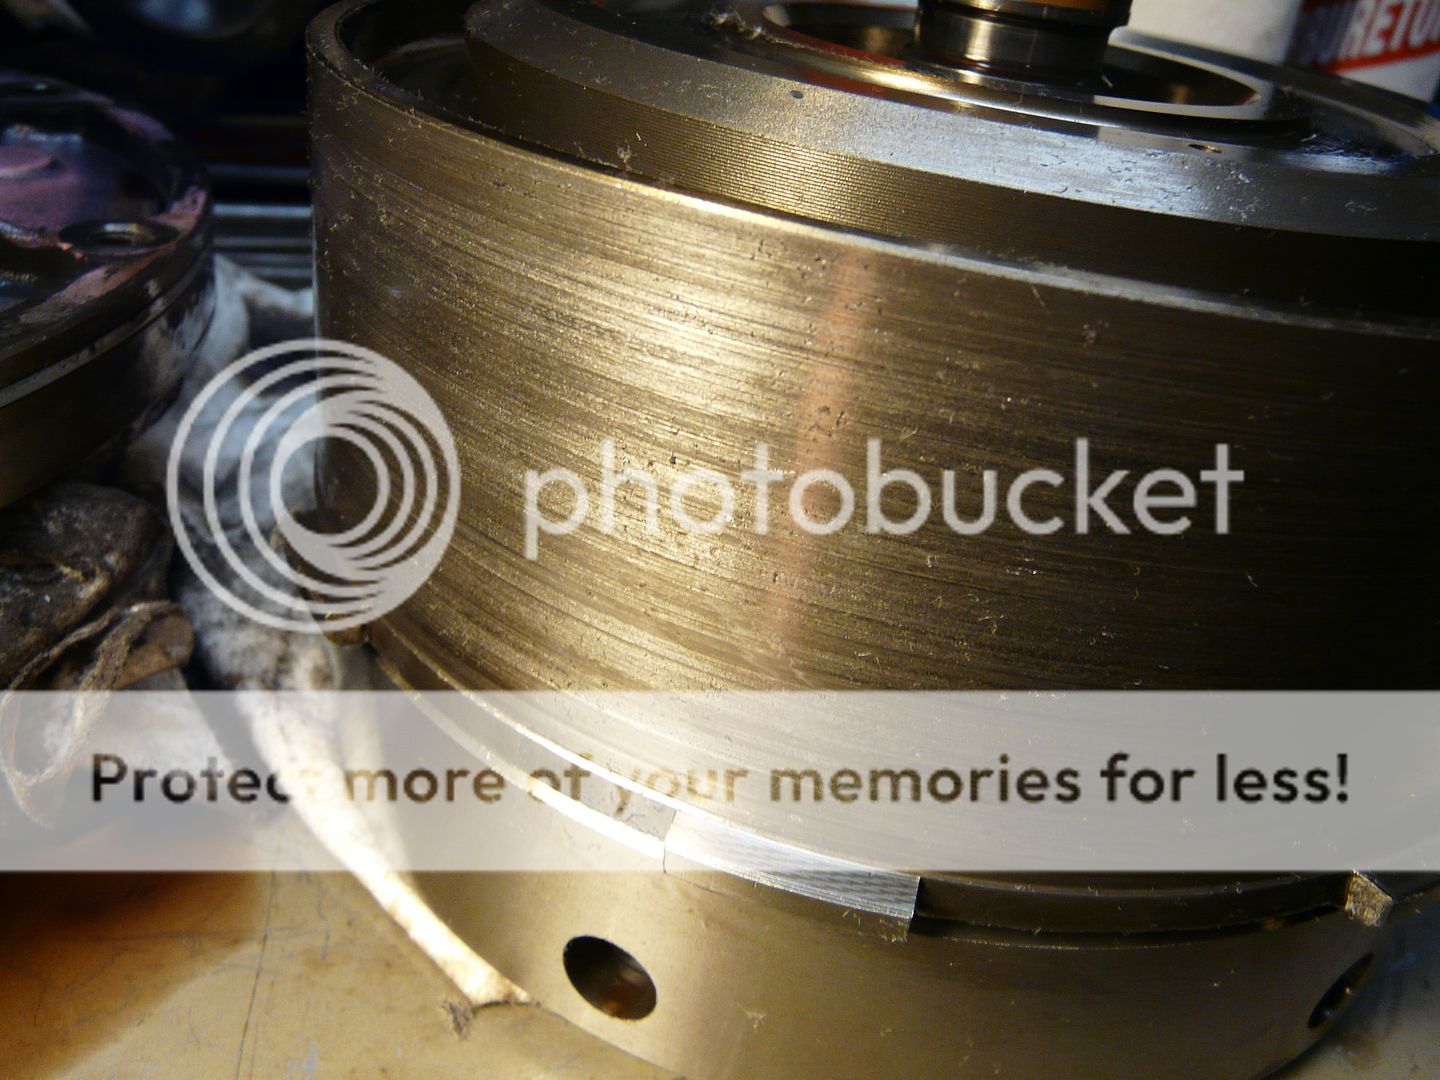
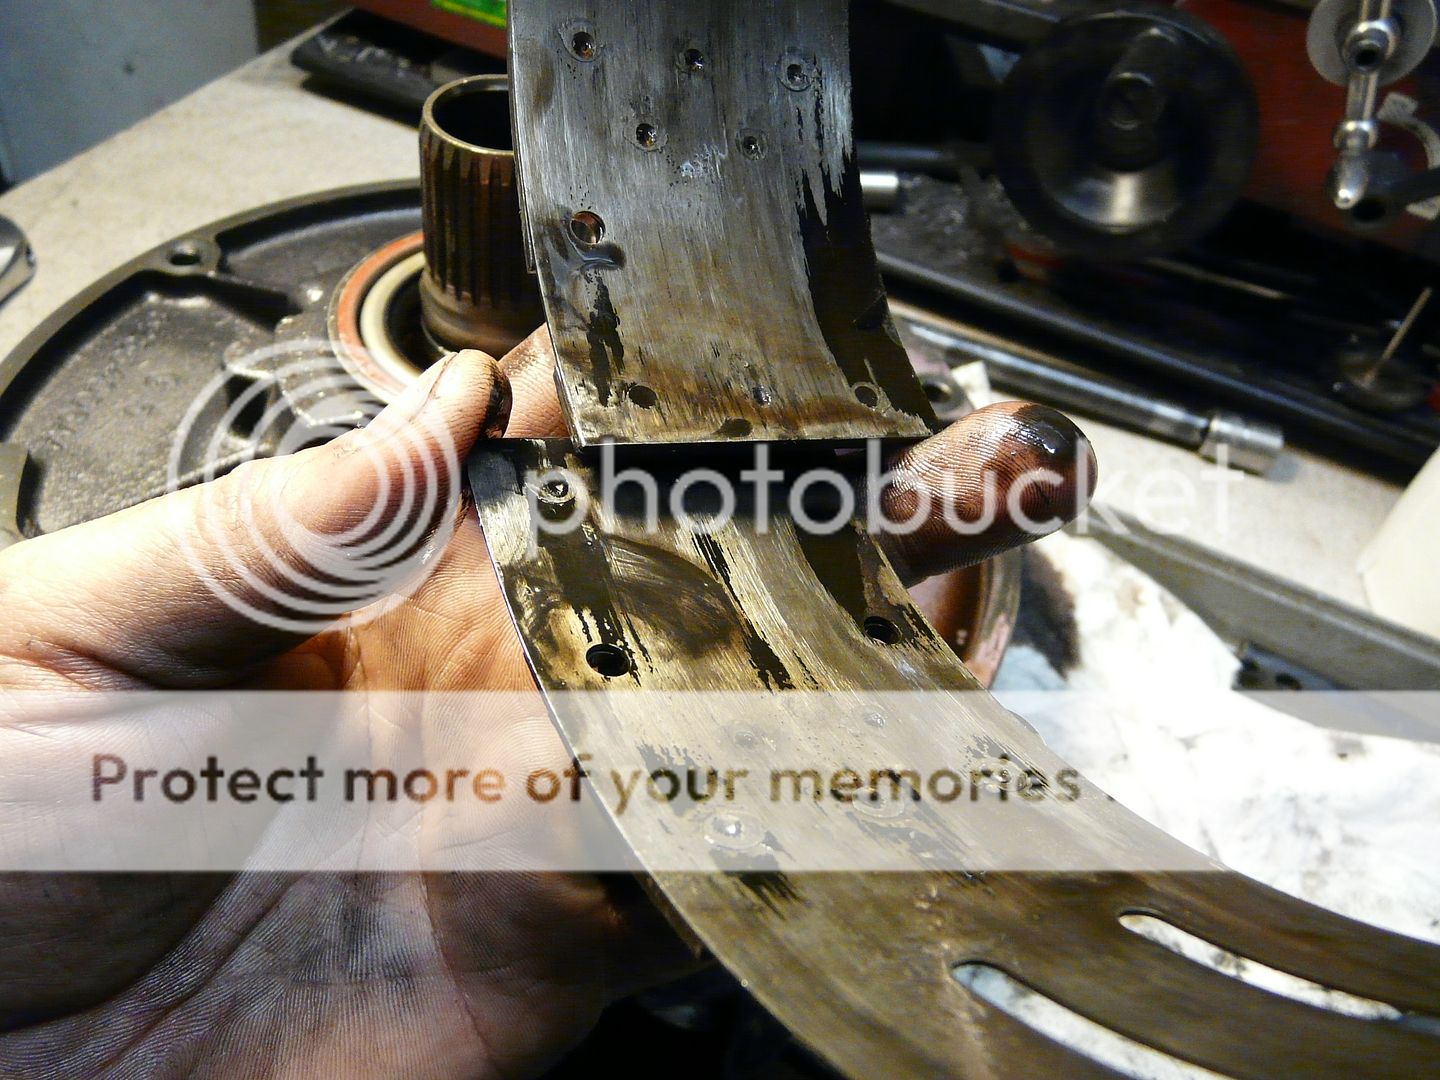
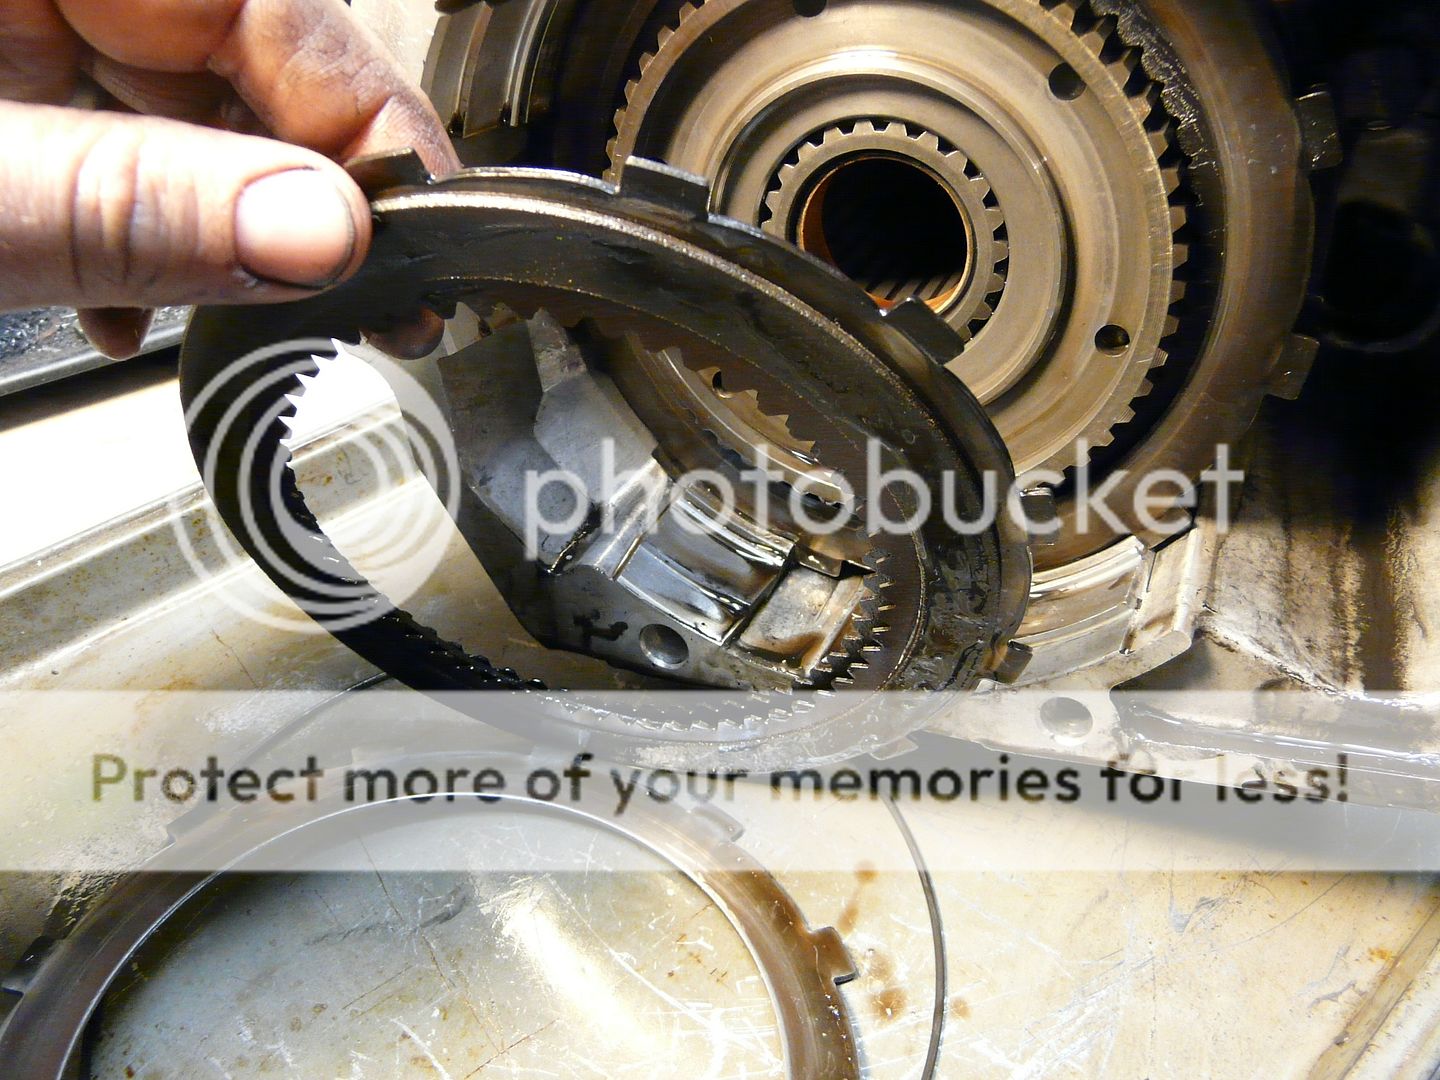
Some scoring and wear on the 3rd gear direct drum from the worn 2nd gear band that rides on the outside of the drum.
100% smoked 2nd gear band, never seen on this bad! All of the clutch lining is gone, and metal rivets are even worn off!

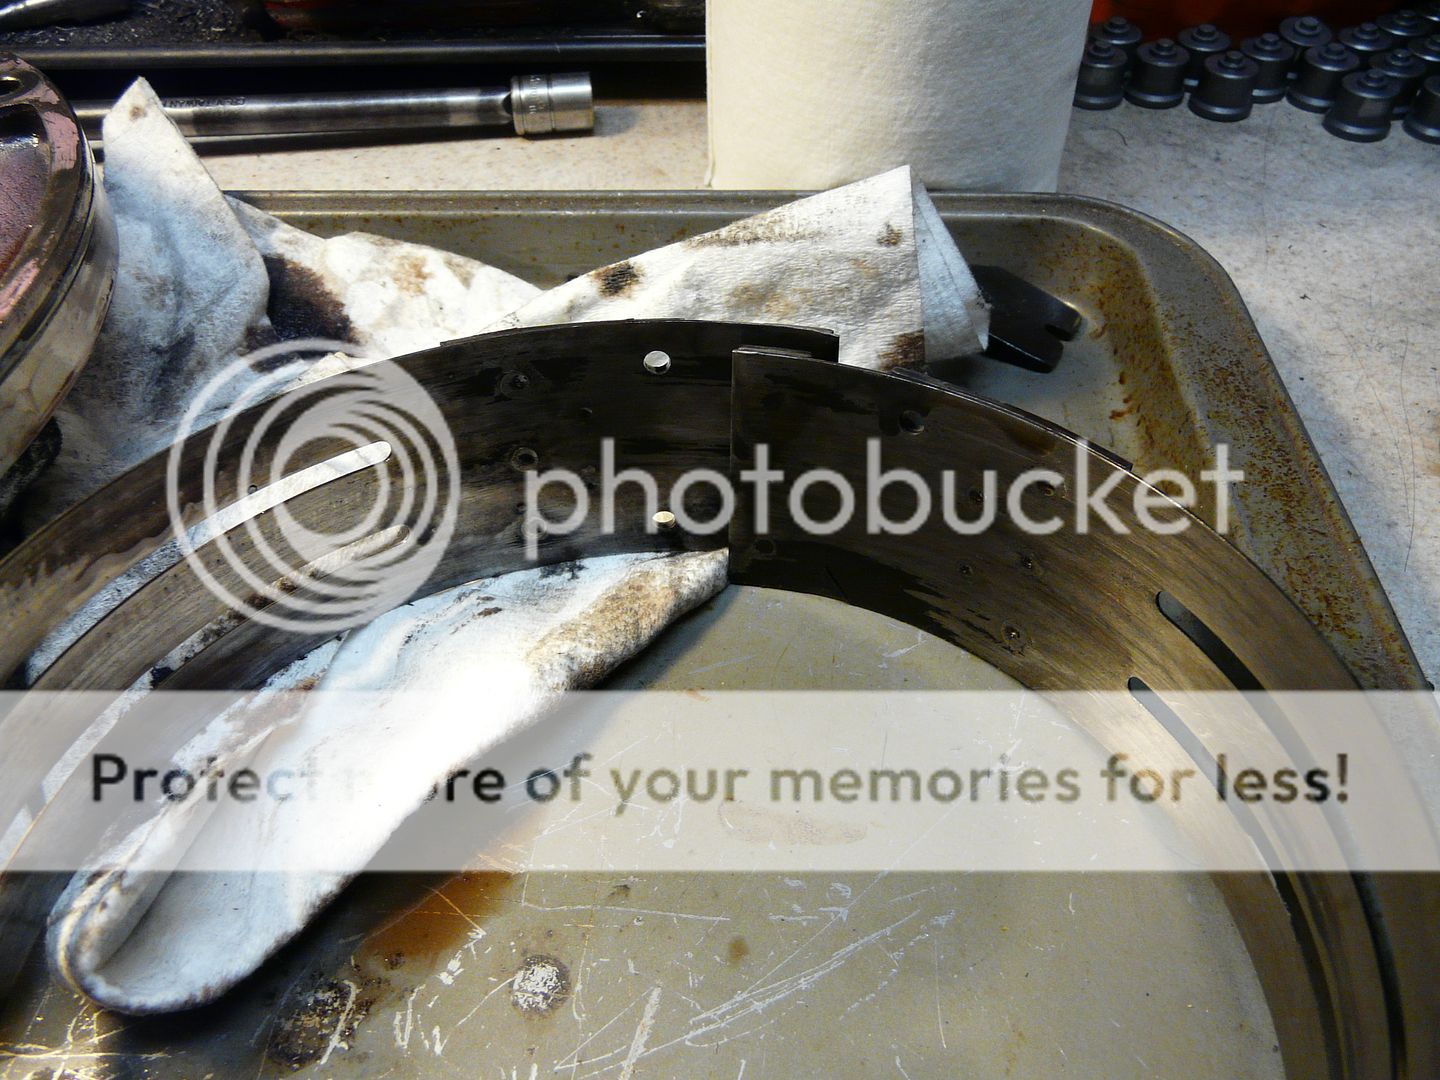
I spoke too soon, this band is 99% gone, there is still a trace amount of clutch lining left.
__________________
95' 2wd Junker Drag Truck
1502 HP Fuel-Only 12mm P7100 Pump
SXE 472 over GTX55 116mm 
OEM 12v Block 
|
|
|
|
|
04-03-2014, 06:07 PM
|
#2
|
Name: Big Blue24
Title: Comp Diesel Sponsor
Status: Not Here
Join Date: Jan 2008
Location: Cedar City, UT
Member`s Gallery
Posts: 6,310
|
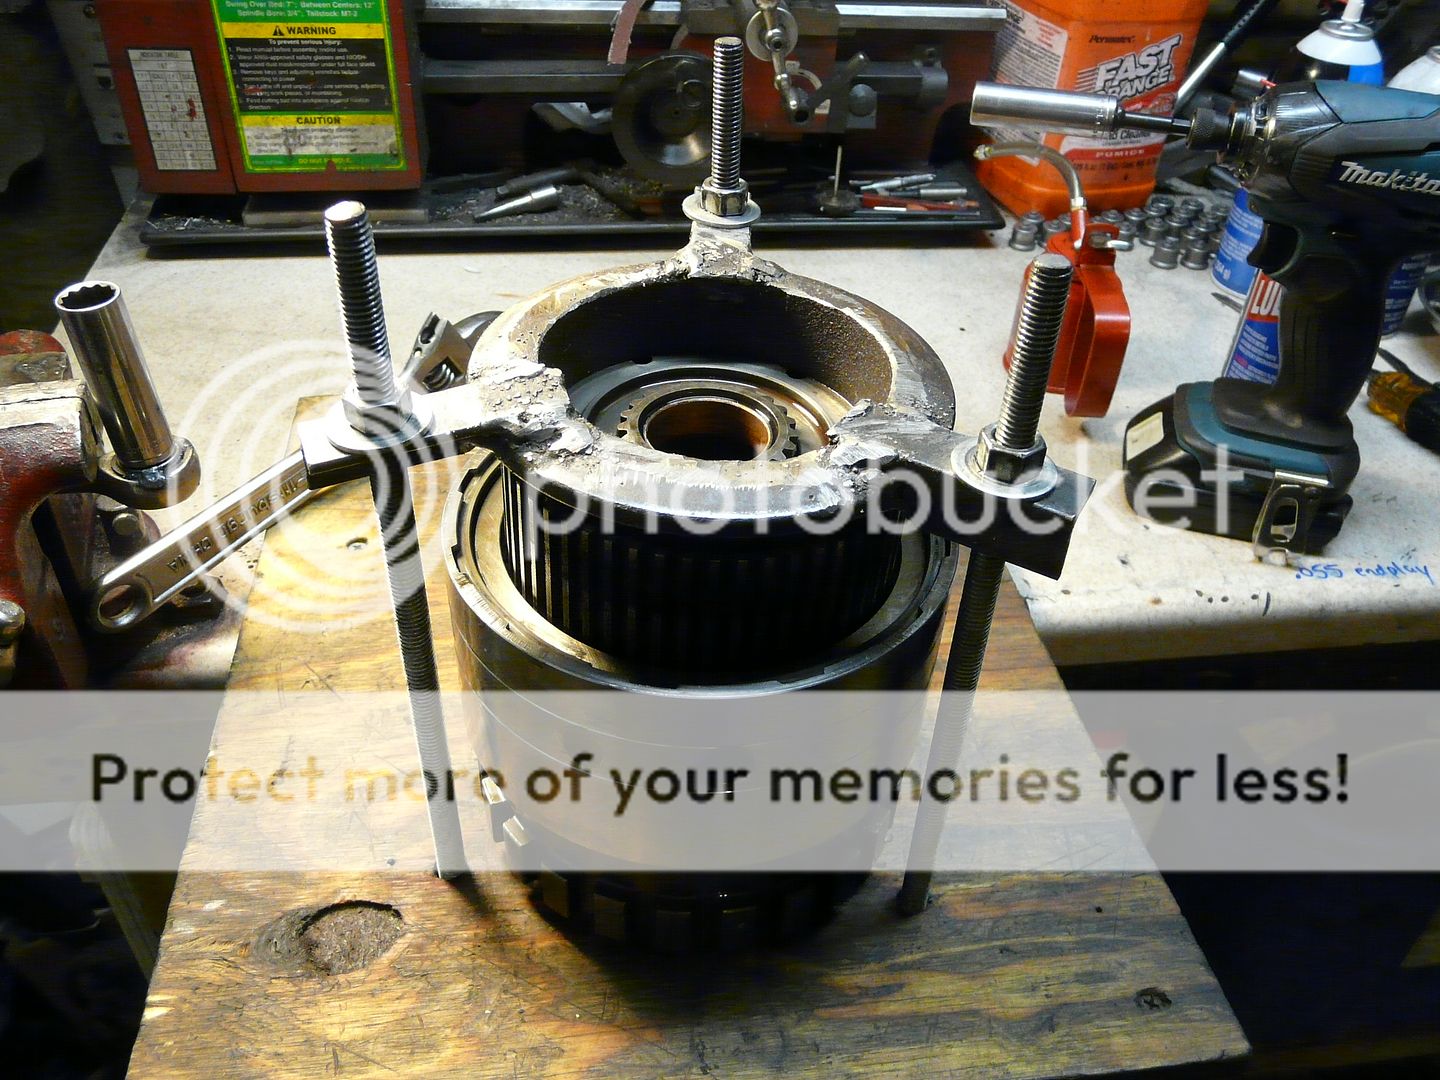
Normally the 3rd gear direct drum will easily lift off of the input shaft, this one is stuck for some reason.

This is not a magic trick, the drum should fall off when tipped like this.

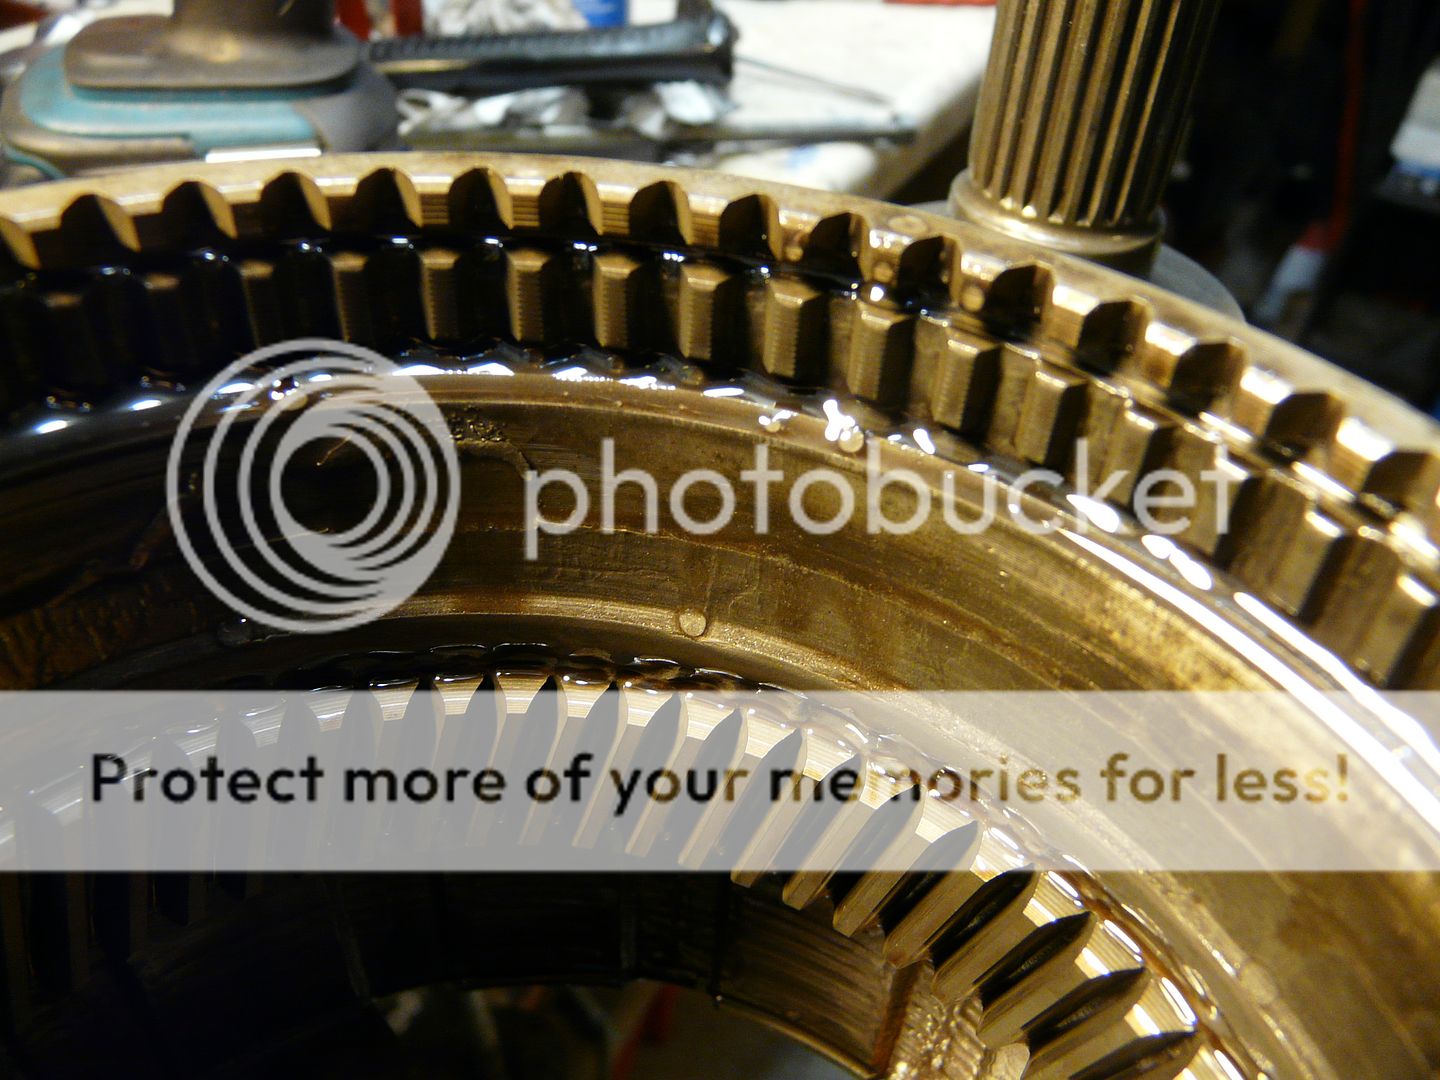
Here's why, the 3rd gear clutch teeth have mysteriously worn through the input shaft hub. This destroyed input shaft is now a wall decoration.


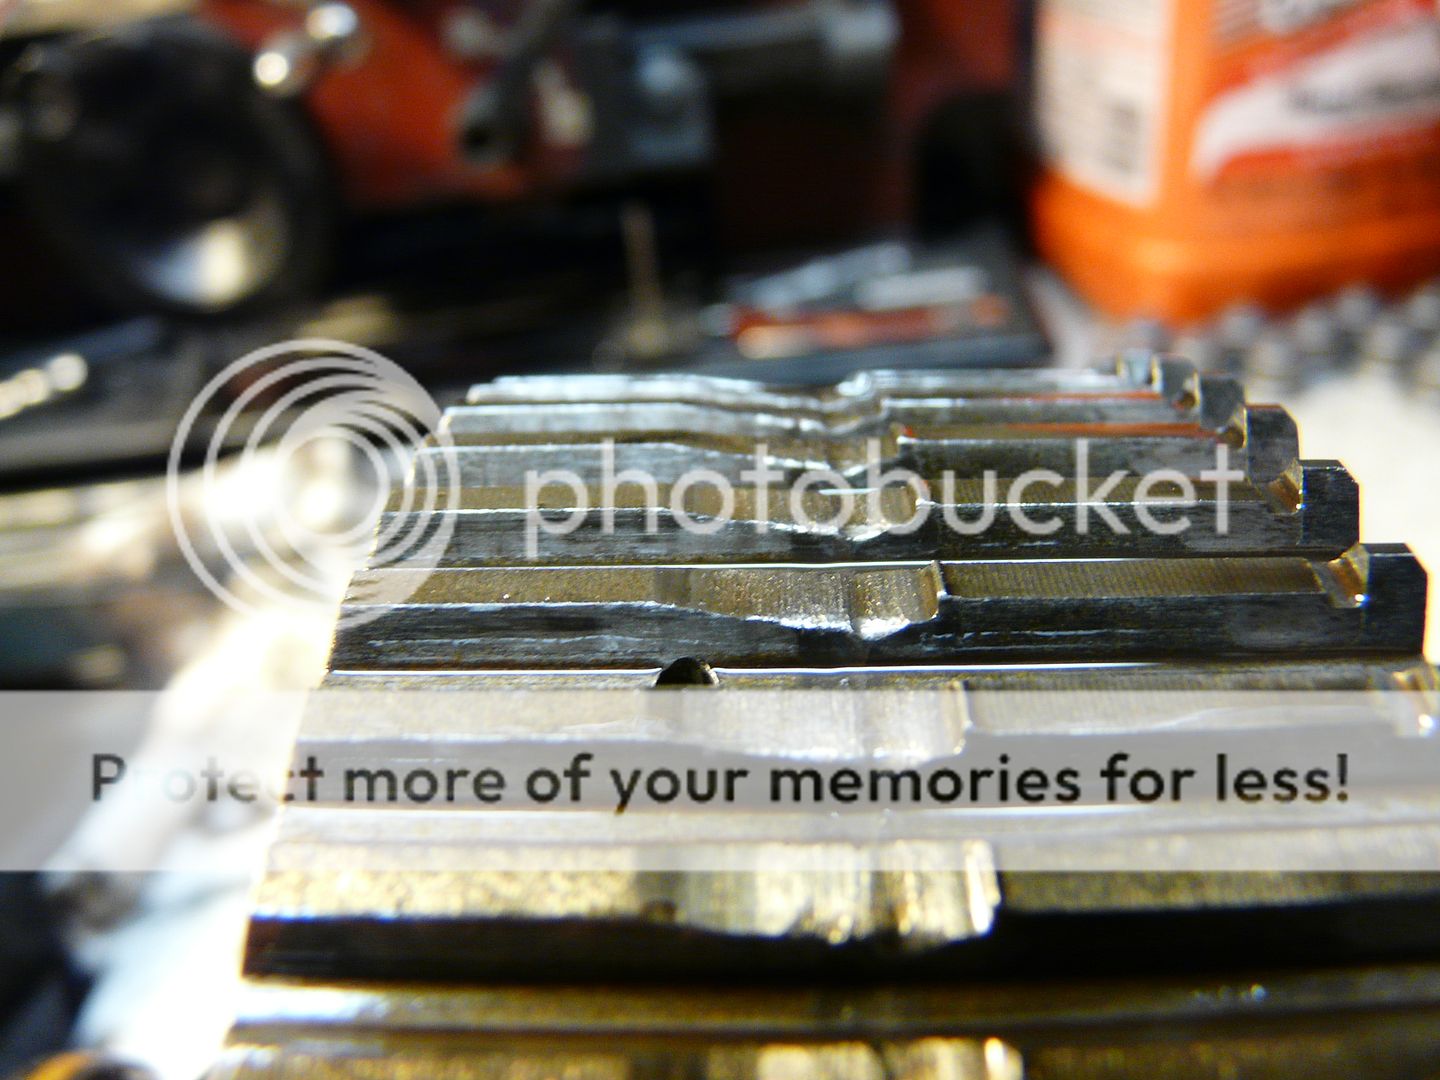
Remove the drum, snap ring, and clutch pack assembly. Blued steel is great for gun barrels, not for clutch pack steel plates.

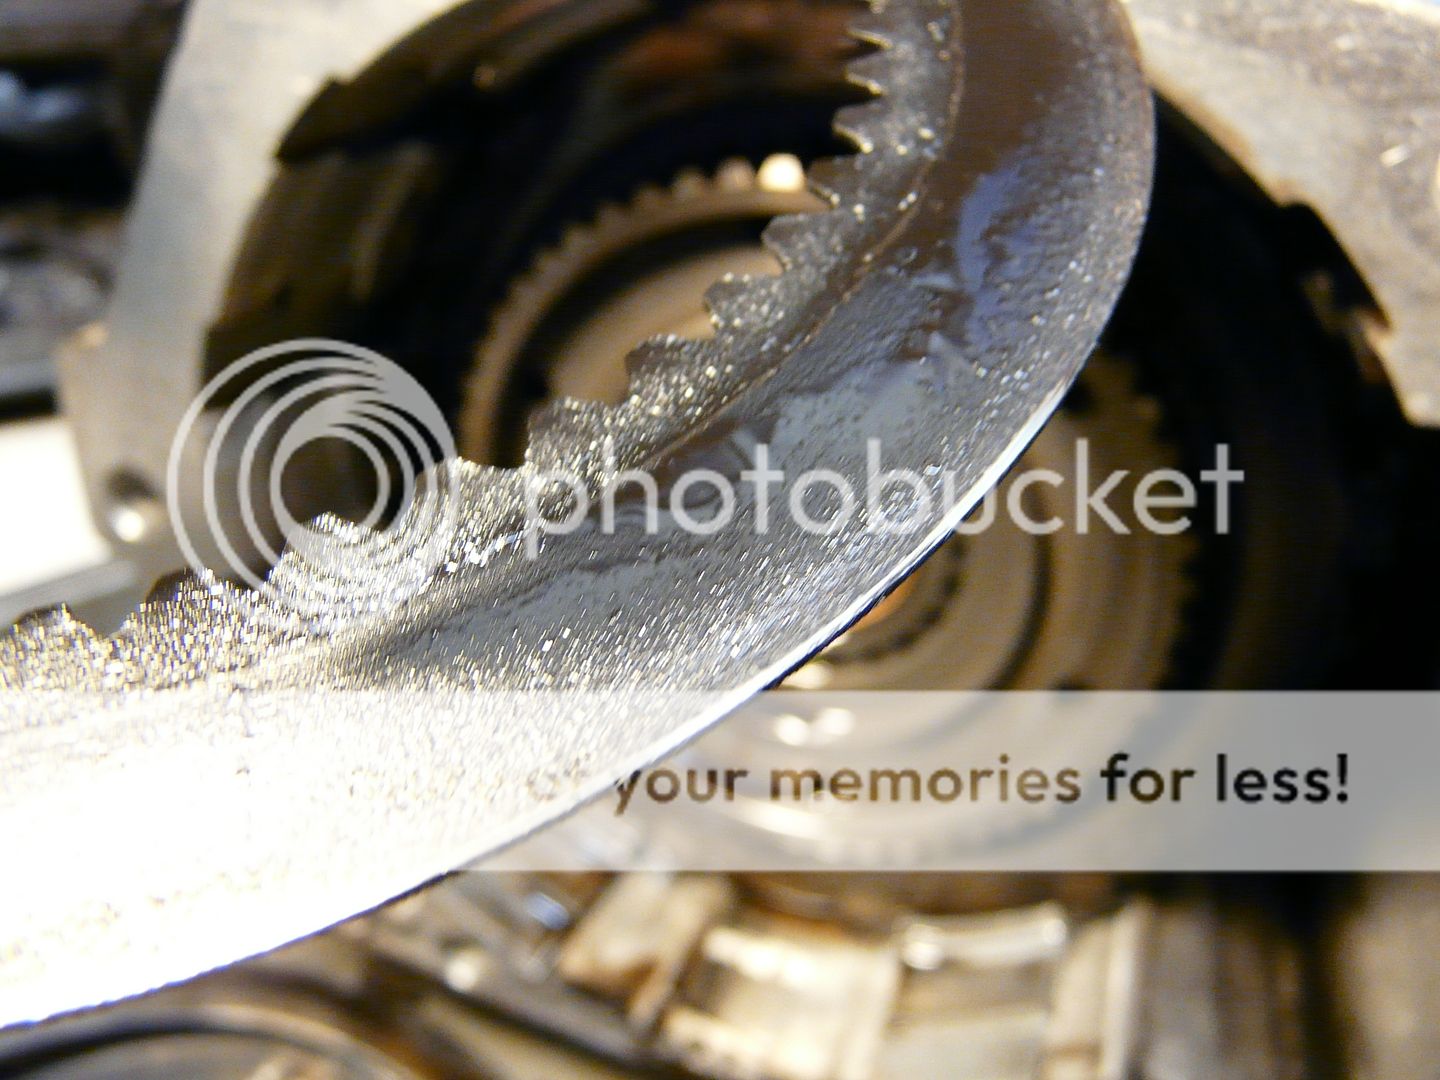
The friction lining is completely worn away on this 3rd gear clutch plate, in fact, the plate's inner steel core is worn through in places and several teeth are missing. I've never seen one quite this bad, ever!

Coned clutches are bad, bare metal is bad, this 3rd gear clutch pack is completely shot, no wonder the truck would barely move!

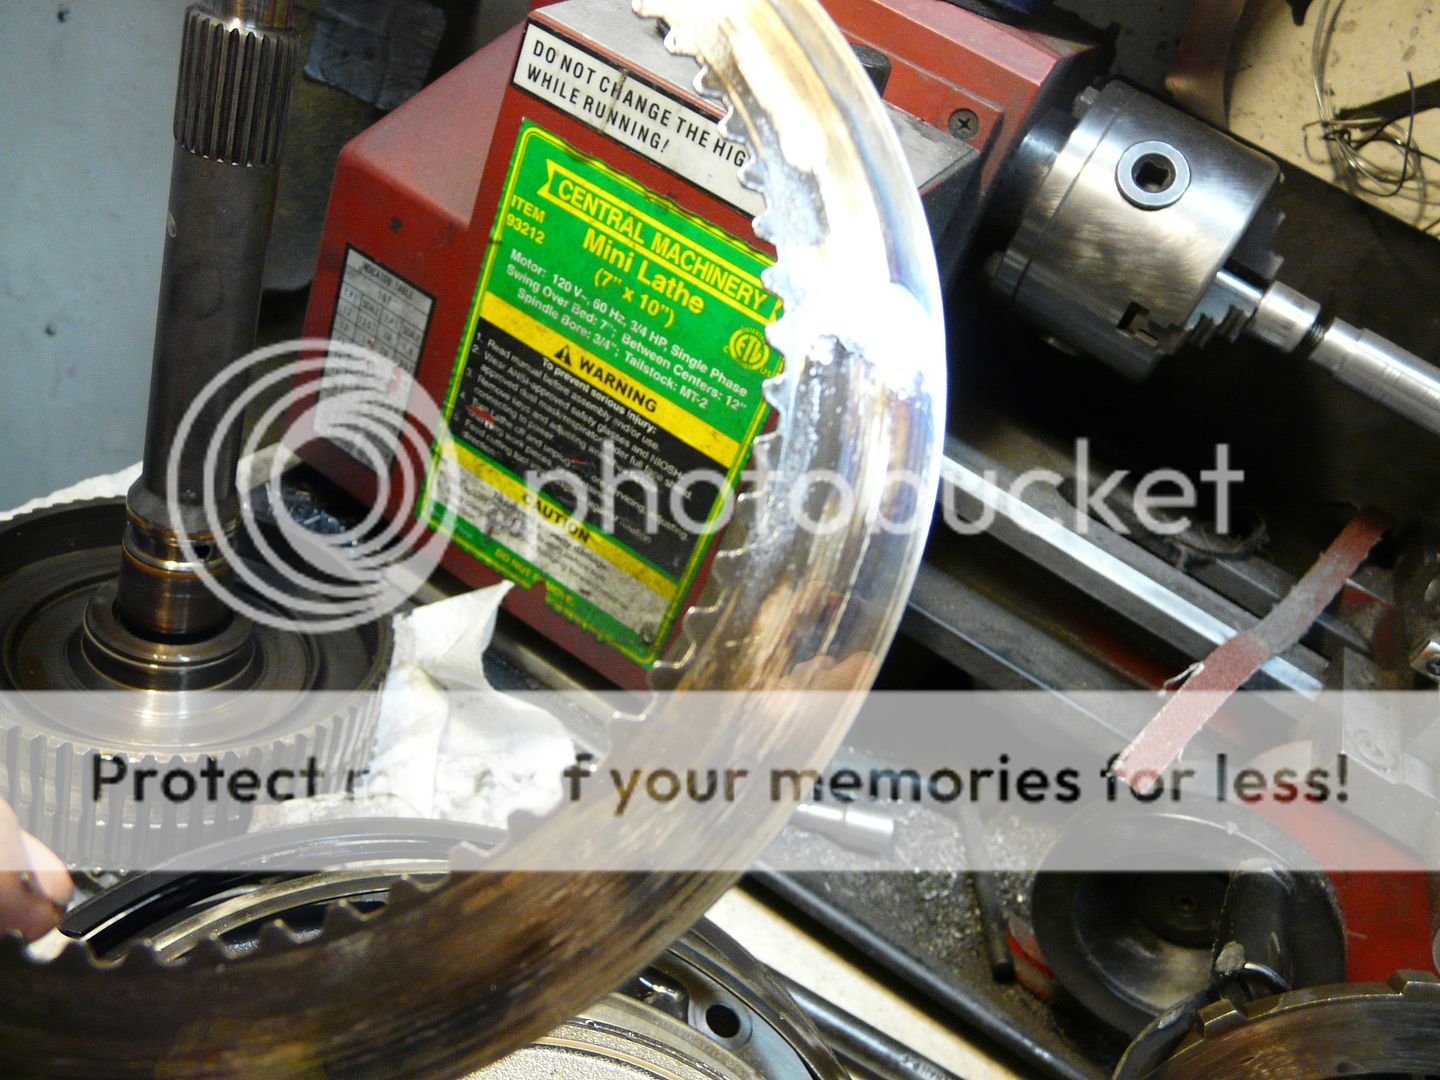
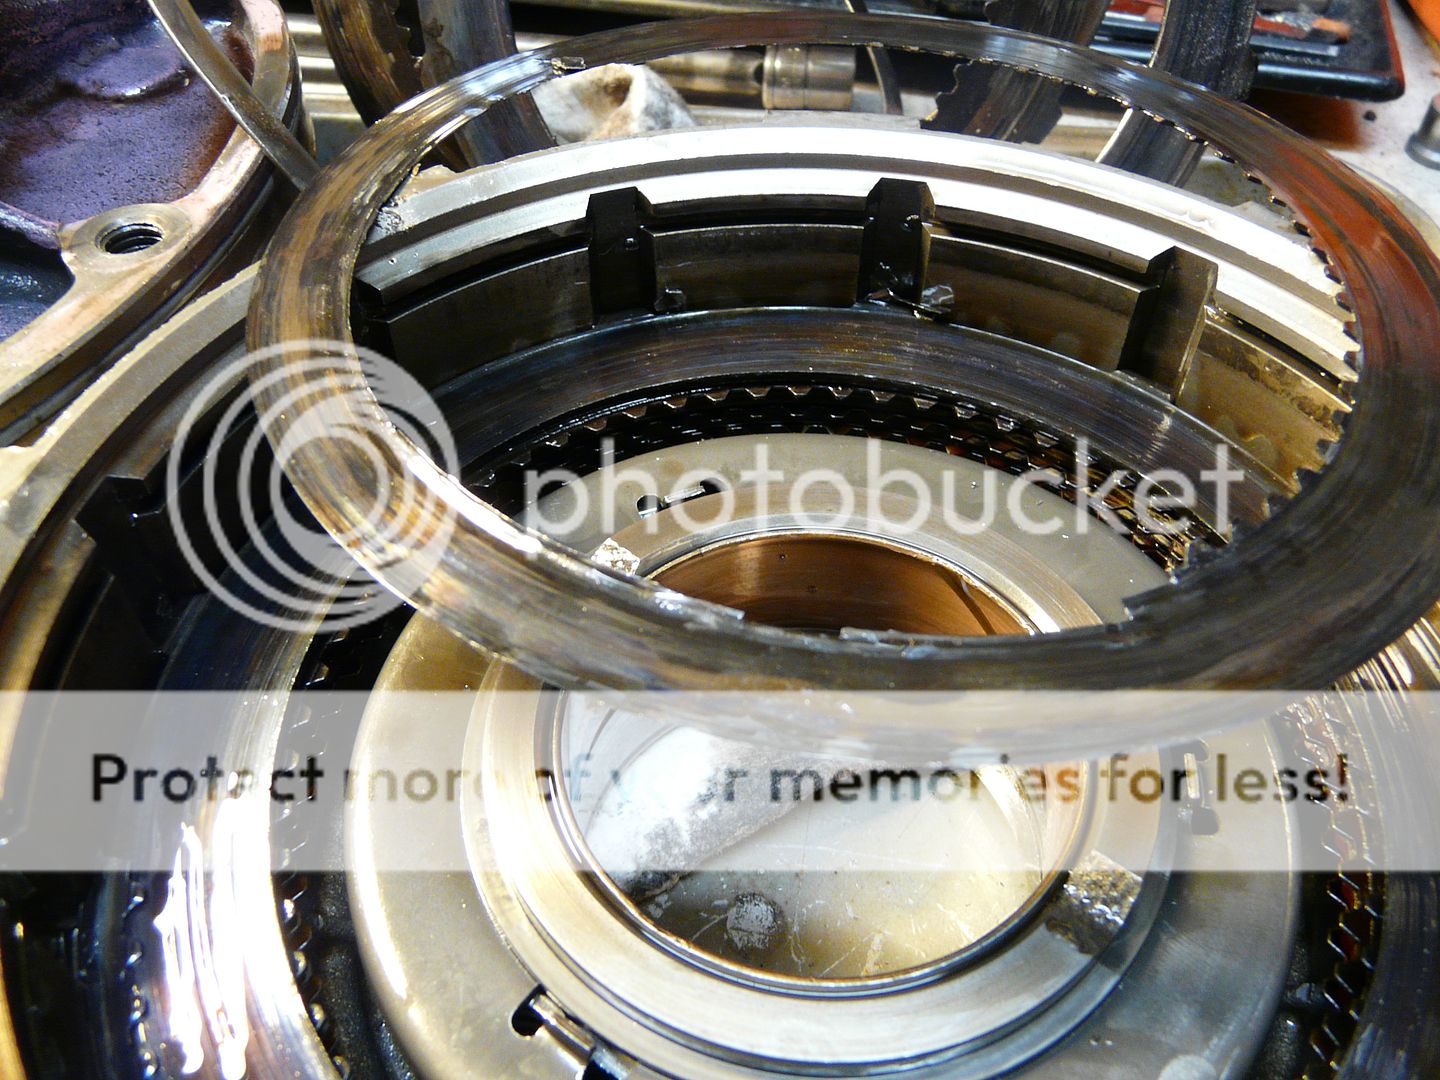
Moving back to the overdrive housing, remove the small diameter wire snap ring and the overdrive brake clutch pack.
This clutch is well worn and near failure as well, steel showing on the friction plate is not a good sign.

After removing the two lowest snap rings at the bottom of the clutch pack, (1) waved and (1) flat, remove the outer T-25 torx screws on the side of the OD case to access the retaining snap ring. Open the snap ring and remove the whole assembly. Next using a press or home-made contraption, compress the 820# spring and remove two snap rings to complete disassembly of the overdrive components.
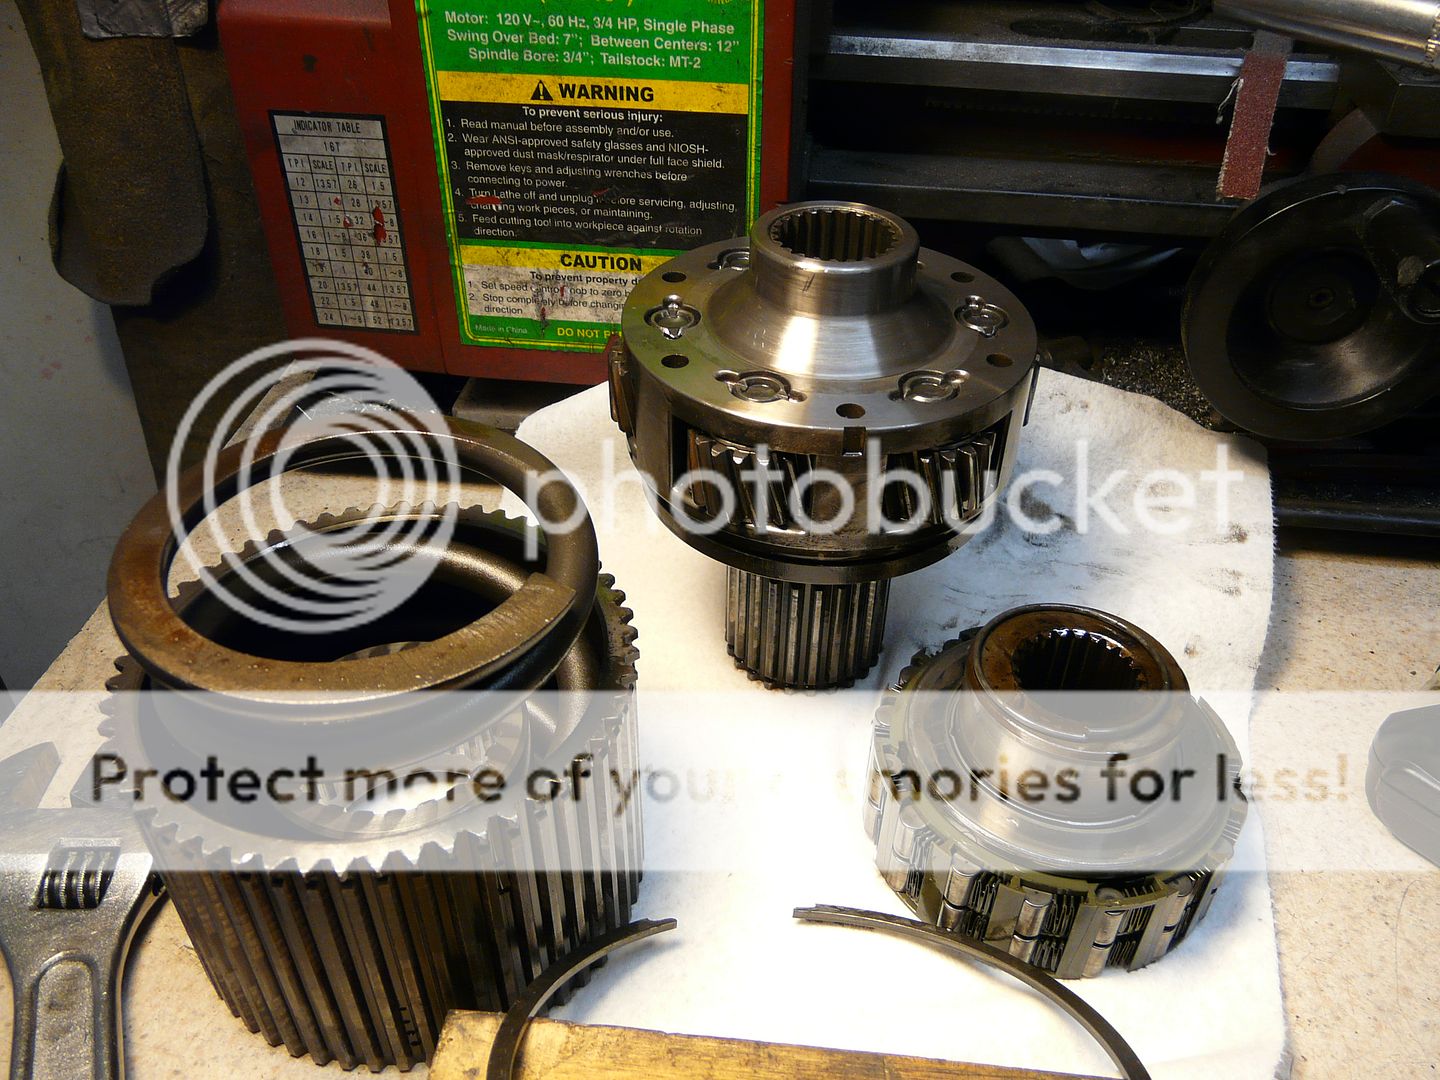
This build will incorporate a billet output shaft so the stock shaft was removed.

All torn down:

__________________
95' 2wd Junker Drag Truck
1502 HP Fuel-Only 12mm P7100 Pump
SXE 472 over GTX55 116mm
OEM 12v Block
|
|
|
|
|
04-03-2014, 06:27 PM
|
#3
|
Name: 97rada
Title: Too Much Time
Status: Not Here
Join Date: Feb 2008
Member`s Gallery
Posts: 5,410
|
Watching this
__________________
Austin
tow truck- 14-3500 with tuning
toy truck -94 rclb auto- 5.2x with a lot left. Shooting for 4s
Any intelligent fool can make things bigger and more complex...it takes a touch of genius- and alot of courage to move in the opposite direction.
|
|
|
|
|
04-03-2014, 06:33 PM
|
#4
|
Name: MufflerBearing
Title: Too Much Time
Status: Not Here
Join Date: Oct 2008
Location: Boyertown, PA
Member`s Gallery
Posts: 1,188
|
ouch
__________________
17' Mega 3500 W/Aisin, 2nd gen swap with billet S468
87' 4runner LS, NV4500, 1 Tons. 
|
|
|
|
|
04-03-2014, 07:19 PM
|
#5
|
Name: fatty
Title: VE
Status:
Here
Join Date: Mar 2009
Location: SW Idaho
Member`s Gallery
Posts: 959
|
I really enjoy threads like this, but how on earth do you find time to take this many pictures and still get something done?
__________________
91.5 W250
2019 F350
|
|
|
|
|
04-03-2014, 07:27 PM
|
#6
|
Name: hotrod04
Title: young grasshopper
Status: Not Here
Join Date: Nov 2009
Location: western NC
Member`s Gallery
Posts: 22
|
Sub'd
Sent from my SCH-I545 using Tapatalk 4
|
|
|
|
|
04-03-2014, 08:13 PM
|
#7
|
Name: Gasoline Sucks
Title: slow 12v
Status: Not Here
Join Date: Sep 2010
Location: Tampa Florida
Member`s Gallery
Posts: 967
|
Subscribed!
__________________
96 12v 4x4 RC, BILLET In/out, race vb, BIC OFV, 5x16s 62/65/14 over s475 , 9mm dv, 17*, true-track , 3.55s, Lowered on 420s
|
|
|
|
|
04-03-2014, 08:29 PM
|
#8
|
Name: Jkidder85
Title: Green Behind the Ears
Status: Not Here
Join Date: Jul 2012
Location: Central Fl
Member`s Gallery
Posts: 87
|
Subscribed! Great step by step!
|
|
|
|
|
04-03-2014, 08:54 PM
|
#9
|
Name: dangerous06
Title: diesel tech
Status: Not Here
Join Date: Mar 2008
Location: Escondido CA
Member`s Gallery
Posts: 3,564
|
Damn that looks like diesel oil! Gonna enjoy this! Please give ample instruction on Extra friction use and set up! Amazing how tuff these tranny's really are! Down to steel eating hard parts and probably still moved! Putting a billet input I hope!
__________________
E.D. 66-74-091, T-4 exhaust, 2 Micron filter pre CP3, EFI, S&B intake, ARP 625 head studs, 182-214 Hamilton Cam,springs and push rods,40% injectors, Banks Intercooler, T&C CP-3 & PRV, Built
48RE, 5" exhaust,Carrillo rods, Pacbrake! 
|
|
|
|
|
04-03-2014, 08:58 PM
|
#10
|
Name: Badbrad3701
Title: Borrowed Money
Status: Not Here
Join Date: Oct 2012
Location: South bloomingville, Ohio
Member`s Gallery
Posts: 646
|
Nice
|
|
|
|
|
04-03-2014, 09:12 PM
|
#11
|
Name: zstroken
Title: For $$$ your name here
Status: Not Here
Join Date: Sep 2006
Location: Western Michigan(by the lake)
Member`s Gallery
Posts: 23,151
|
Interesting I have been through several TV motor 48RE's and the 2nd gear band has been shot. Rest of the trans looked ok....
__________________
2008 4x4 Megacab, 68RFE
97 Dodge gone....
24V P-Pump Mafia member #1(retired)
Thanks to Mumau Diesel, Goerend Transmission, Northeast Diesel Service!
|
|
|
|
|
04-03-2014, 09:40 PM
|
#12
|
Name: 12vCumminsFTW
Title: Too Much Time
Status: Not Here
Join Date: Dec 2010
Location: Willcox, AZ
Member`s Gallery
Posts: 1,377
|
Quote:
Originally Posted by zstroken

Interesting I have been through several TV motor 48RE's and the 2nd gear band has been shot. Rest of the trans looked ok....
|
That is interesting the 06 48re I bought was the same way. Drum was also destroyed.
__________________
-Aaron H.
97 12v 4x4
|
|
|
|
|
04-03-2014, 10:12 PM
|
#13
|
Name: ehgent orange
Title: Diesel Freak
Status: Not Here
Join Date: Mar 2014
Member`s Gallery
Posts: 15
|
what kind of parts are you throwing into this bad boy?
__________________
2012 Omaha orange
4.10/Lowered on 22's/
H&S/Edge/ARP/Fass/Isspro/Dynatrac/Fleece Performance/Steed Speed/Borg Warner s471/Caltracs/Nitto/MCC
Commercial Powertrain 68rfe
Instagram: EhGent_Orange
|
|
|
|
|
04-03-2014, 11:31 PM
|
#14
|
Name: Kill
Title: Diesel Enthusiast
Status: Not Here
Join Date: Jul 2011
Member`s Gallery
Posts: 215
|
I wonder how that thing even got that bad, the first time I tore into mine the truck wouldn't move at all and didn't look near that bad. Great pictures of the teardown.
__________________
04 Cummins
|
|
|
|
|
04-04-2014, 06:04 AM
|
#15
|
Name: cmann250
Title: Rookie
Status: Not Here
Join Date: May 2011
Location: Lafayette, IN
Member`s Gallery
Posts: 221
|
Thanks for taking pics along the way. I know I have no patience to wipe my hands off and snap a pic every 10 minutes in a job like this
__________________
'02 F-250 regular cab, 4wd, 6 speed, stock, and staying that way.
|
|
|
|
|
04-04-2014, 02:37 PM
|
#16
|
Name: holsky
Title: Too Much Time
Status: Not Here
Join Date: Oct 2010
Location: Zanesville, Ohio
Member`s Gallery
Posts: 1,116
|
Definitely going to be keeping an eye on this! Thanks 
__________________
Austin
2007 Dodge Ram 2500 CR 5.9 EFI Live
|
|
|
|
|
04-04-2014, 02:47 PM
|
#17
|
Name: mathews8pt
Title: Too Much Time
Status: Not Here
Join Date: May 2009
Location: central ohio
Member`s Gallery
Posts: 2,269
|
Quote:
Originally Posted by cmann250
Thanks for taking pics along the way. I know I have no patience to wipe my hands off and snap a pic every 10 minutes in a job like this |
THIS^^
I tried to do a trans "how to" but it takes forever unless you dont mind your camera/phone being covered in ATF. lol
That ones in pretty bad shape, I'd say they got their moneys worth out of it. 
__________________
Hobie
2000 QCSB, 180 pump, 6x.013's, maxspool 2.5, trans built by me, AD150, 64/80 compounds 11.51@119mph w/s468 single
|
|
|
|
|
04-04-2014, 03:23 PM
|
#18
|
Name: DPC
Title: Diesel Enthusiast
Status: Not Here
Join Date: Sep 2009
Location: Elgin, OK
Member`s Gallery
Posts: 218
|
Wow! Surprised it even moved.
__________________
2006 QCSB Cummins EFILive, Built Tranny, HE351cw/S480FMW, 60hp inj, 85%cp3
2003 ECSB Duramax EFILive, Built Tranny, GT4094R,PPE Dual Fuelers,RDL Headers and Up-pipes
620HP 1170TQ @ BDP 12-12-09
|
|
|
|
|
04-04-2014, 04:37 PM
|
#19
|
Name: dangerous06
Title: diesel tech
Status: Not Here
Join Date: Mar 2008
Location: Escondido CA
Member`s Gallery
Posts: 3,564
|
Maybe someone should put a warning on the band adjustment thread!
"WARNING IF AFTER ADJUSTING FRONT BAND NO THREADS SHOW STOP AND TEAR DOWN TRANNY!"
__________________
E.D. 66-74-091, T-4 exhaust, 2 Micron filter pre CP3, EFI, S&B intake, ARP 625 head studs, 182-214 Hamilton Cam,springs and push rods,40% injectors, Banks Intercooler, T&C CP-3 & PRV, Built
48RE, 5" exhaust,Carrillo rods, Pacbrake!
|
|
|
|
|
04-05-2014, 10:03 AM
|
#20
|
Name: jakerc69
Title: still broke
Status: Not Here
Join Date: Mar 2011
Location: Casa Grande, AZ
Member`s Gallery
Posts: 399
|
I would not even think about tearing down with the trans on the floor.
I would tear it down on my tailgate before that...Pretty motivated though, and thanx for taking the time for the pictures, that has to be the worst part of this particular job.
__________________
hateful of all internal combustion engines...
|
|
|
|
 Posting Rules
|
You may not post new threads
You may not post replies
You may not post attachments
You may not edit your posts
HTML code is Off
|
|
|
All times are GMT -5. The time now is 10:03 PM.
|


