| Advertisement |
|
|
|
|
|
|
|
If this is your first visit, be sure to check out the FAQ by clicking the link above.
You may have to register before you can post: click the register link above to proceed.
To start viewing messages, select the forum that you want to visit from the selection below.
|
| Dodge Competition and Performance General Dodge Competition and Performance Discussion |
 11-16-2016, 03:09 PM
|
#1061
|
Name: DieselWrencher
Title: 6cyl Vette
Status: Not Here
Join Date: Dec 2006
Location: Mitchellville, Ia
Member`s Gallery
Posts: 2,886
|
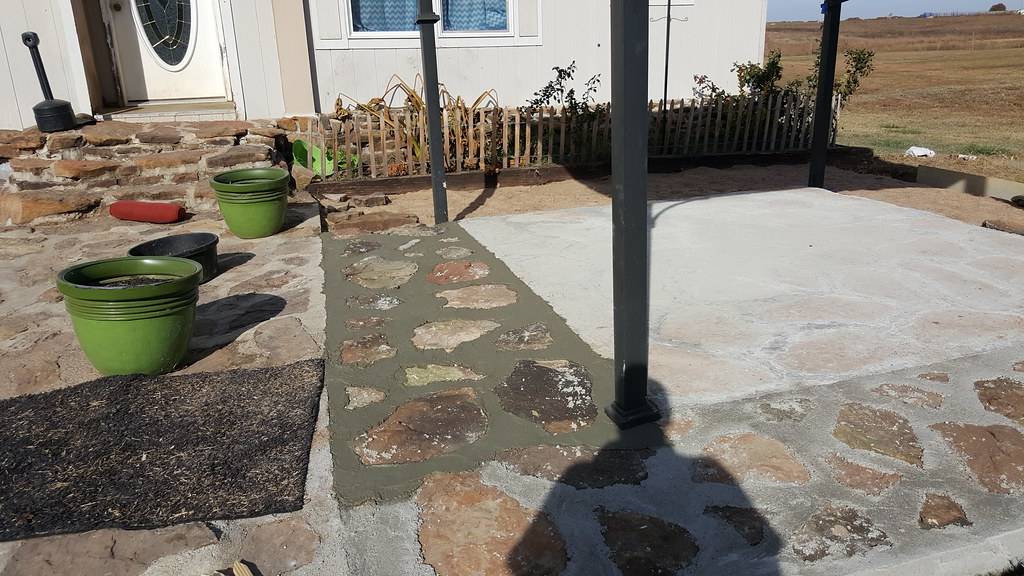
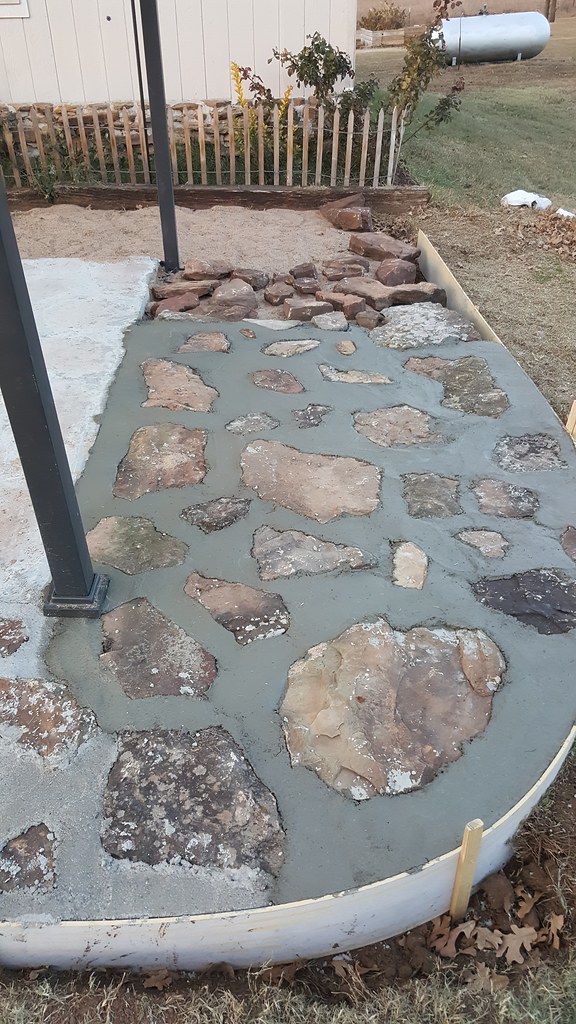
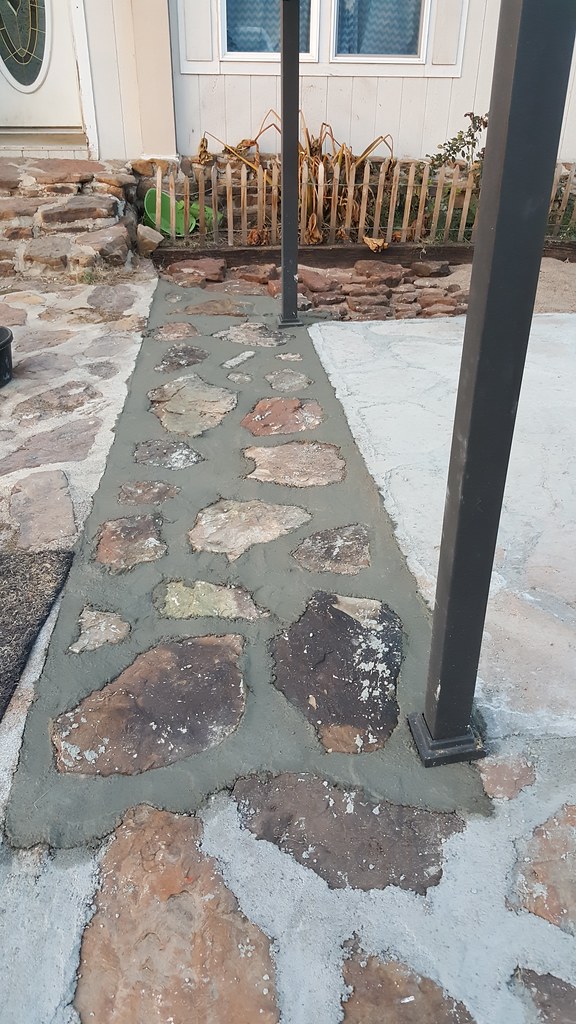
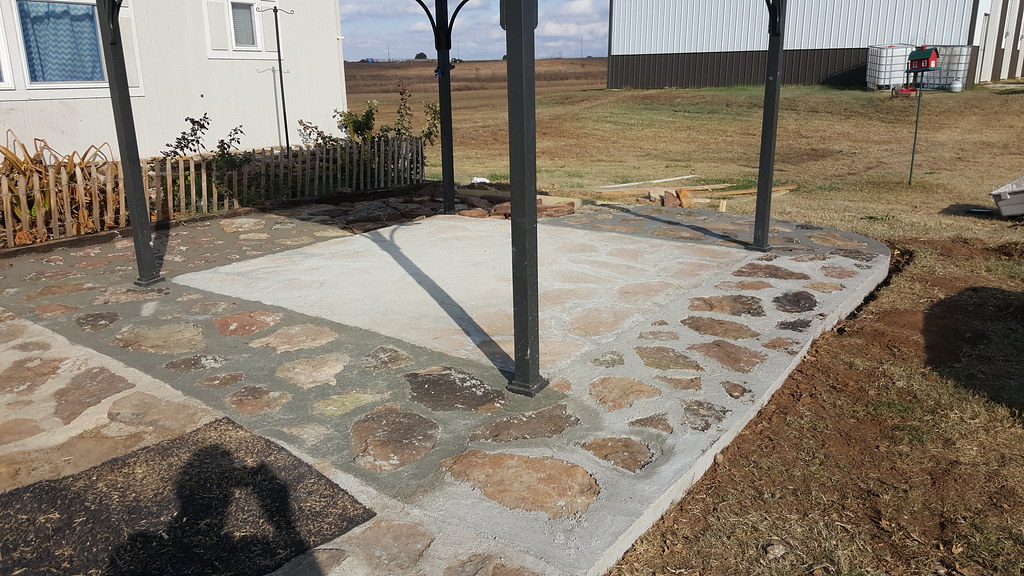
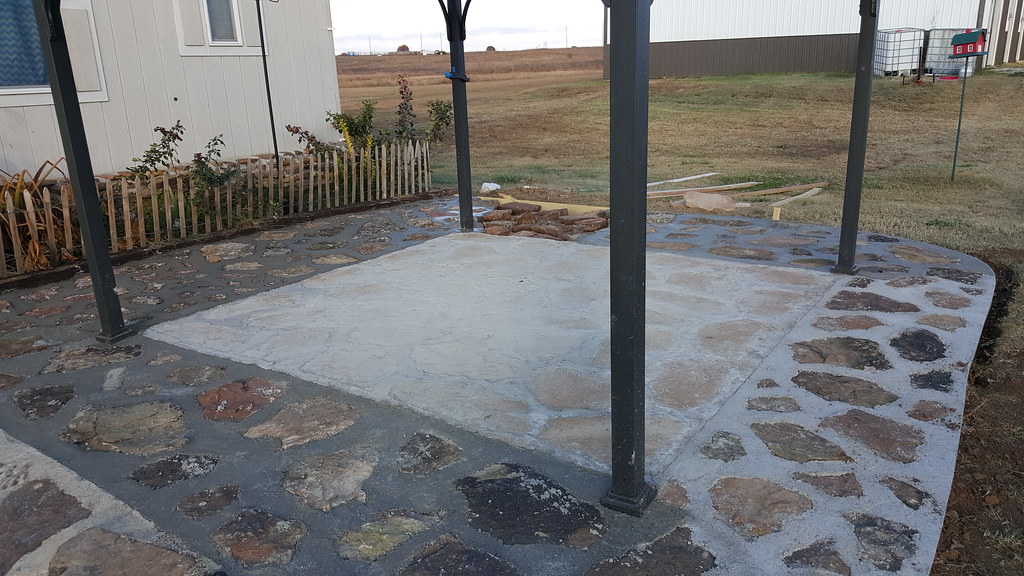
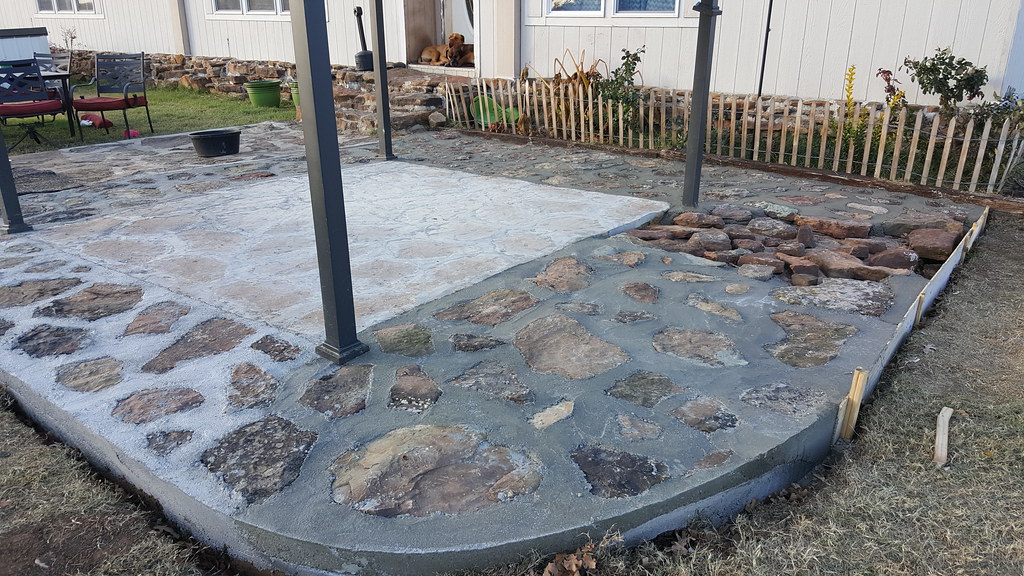
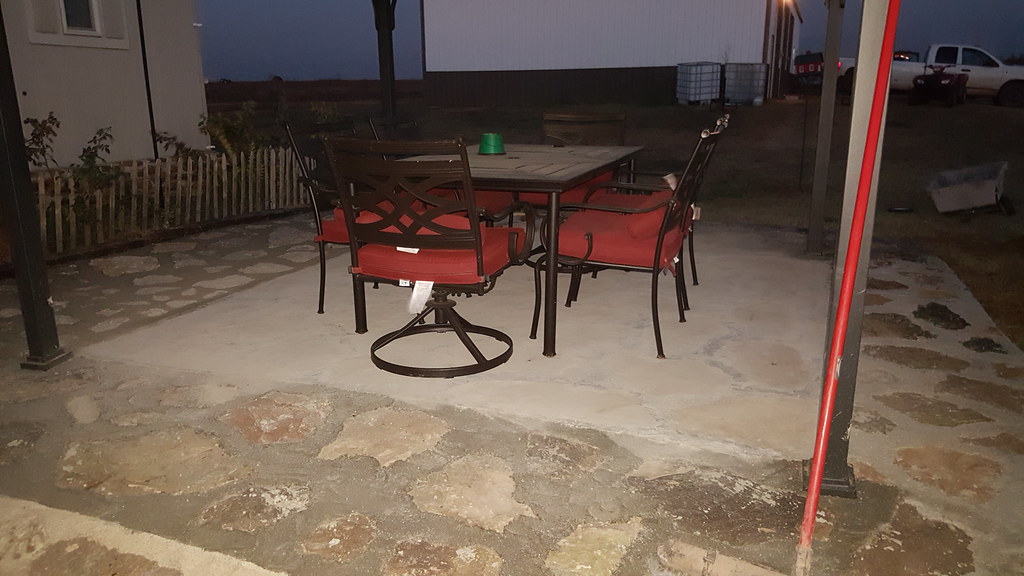
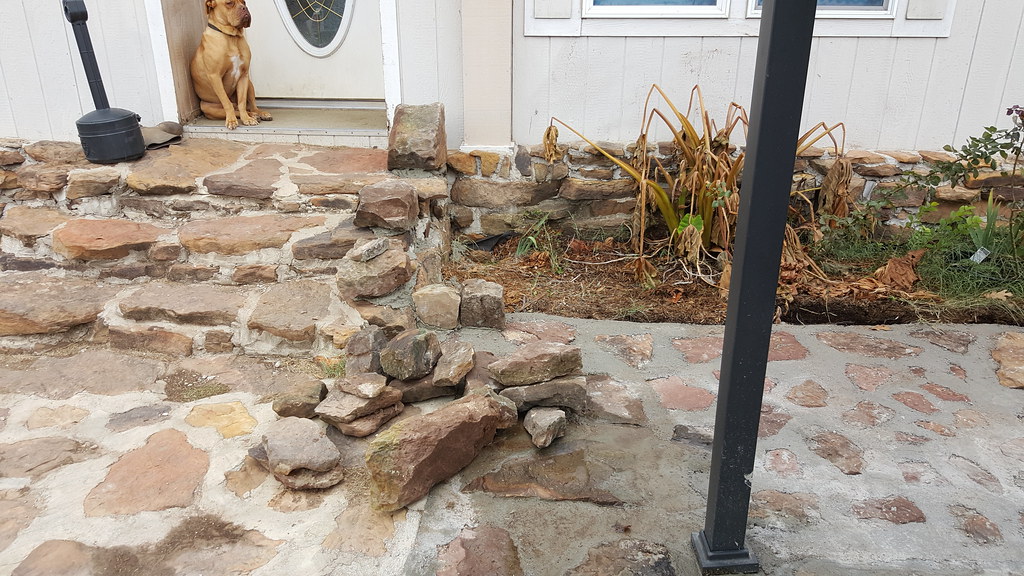
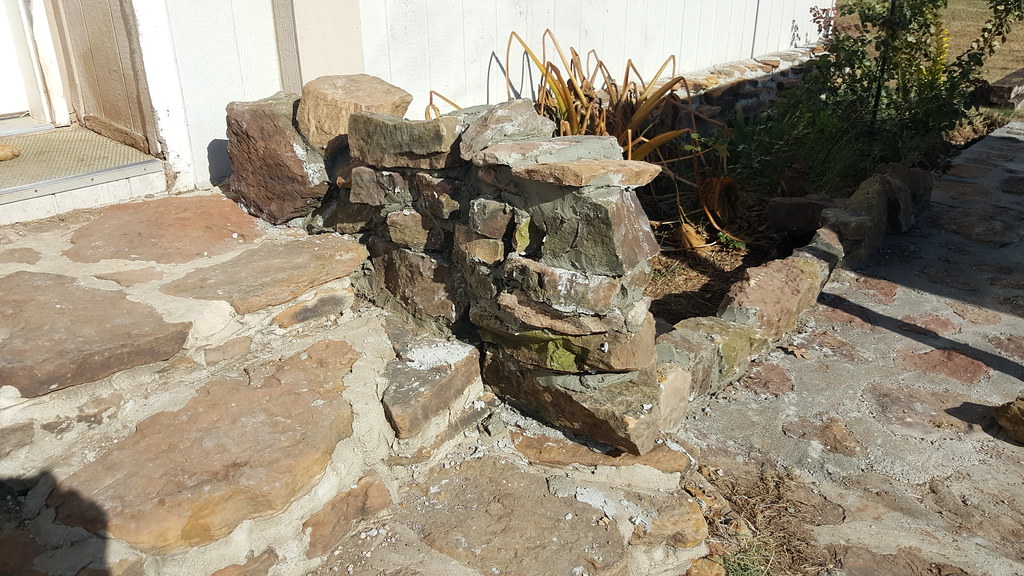
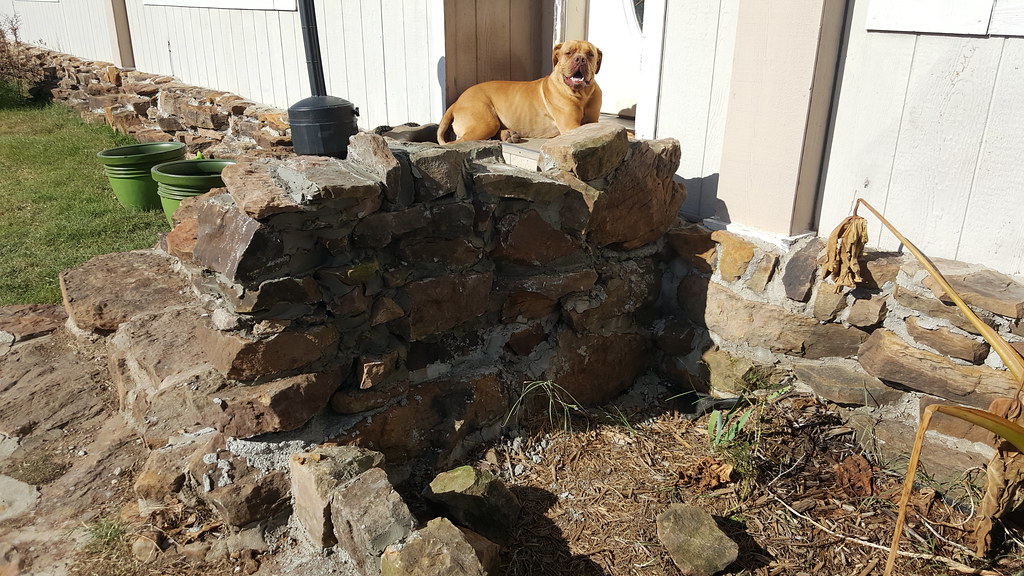
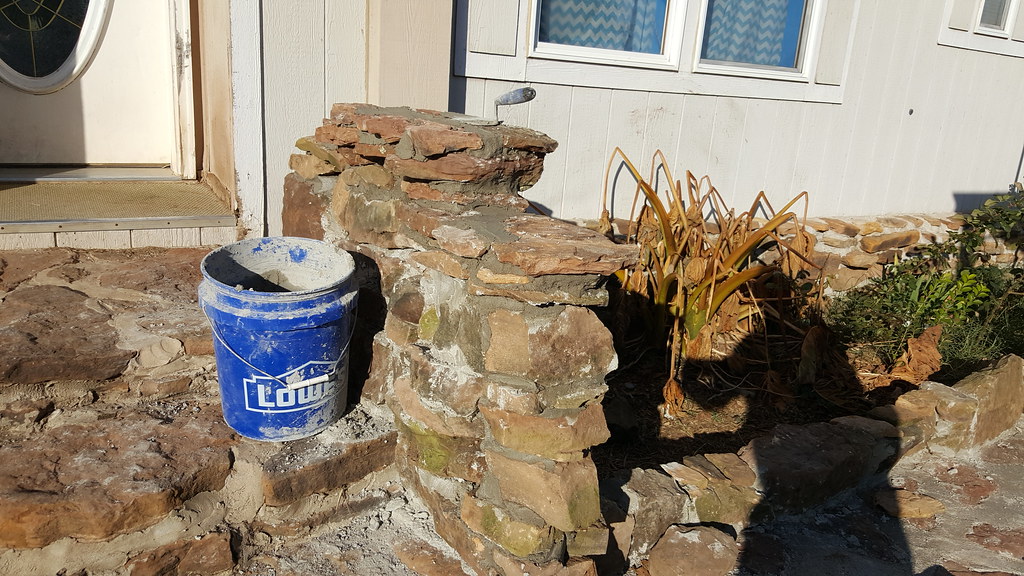
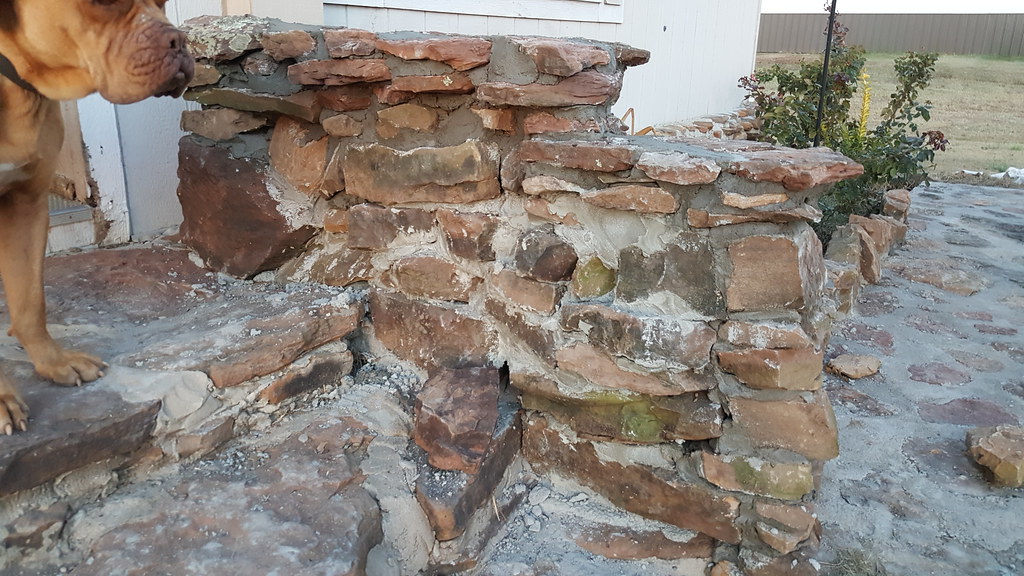
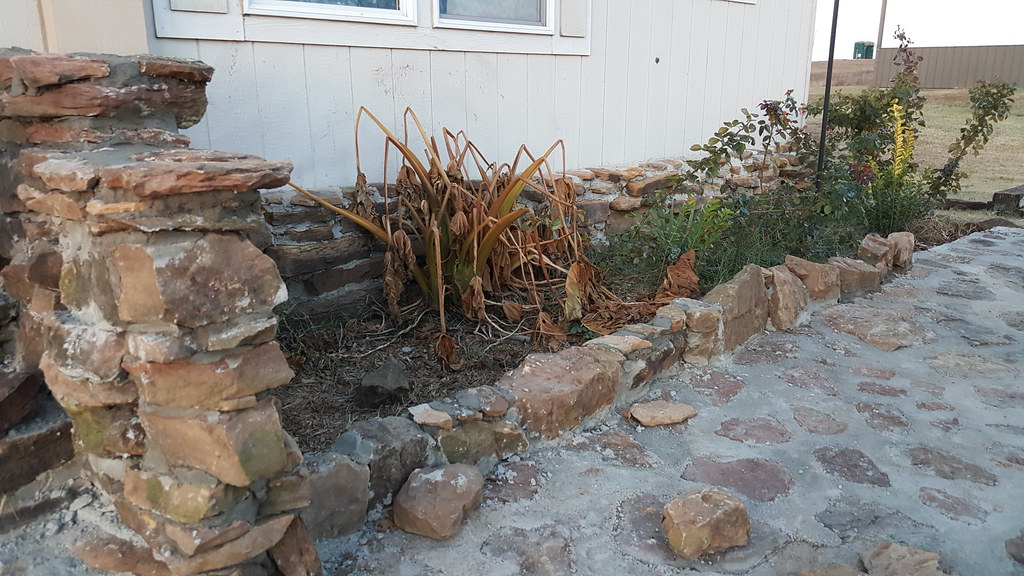
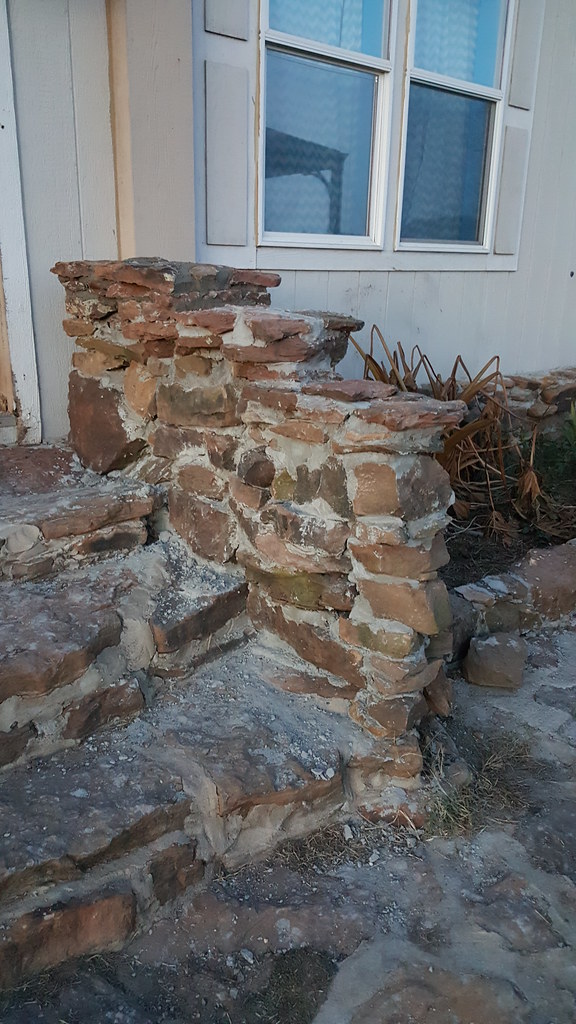
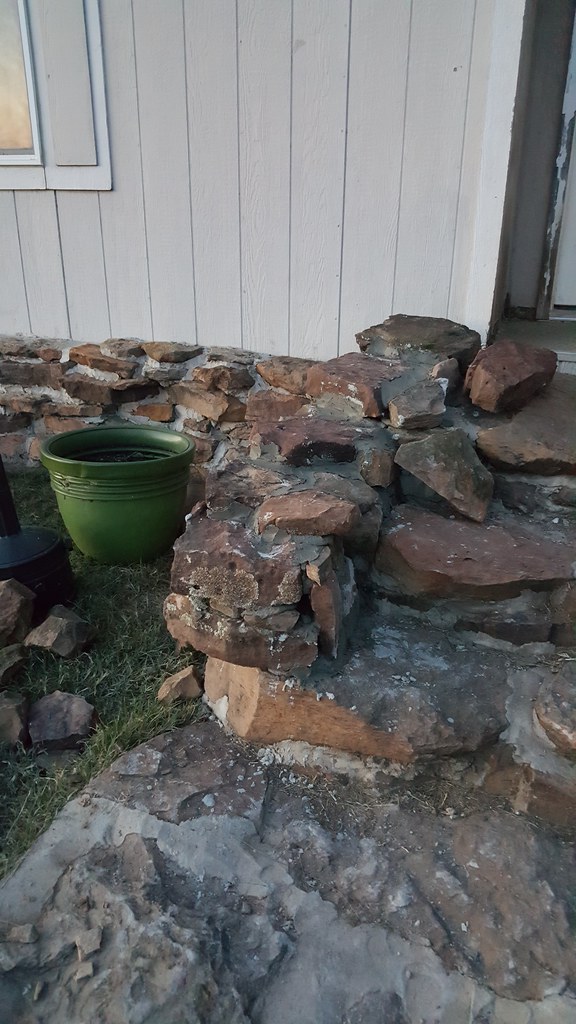
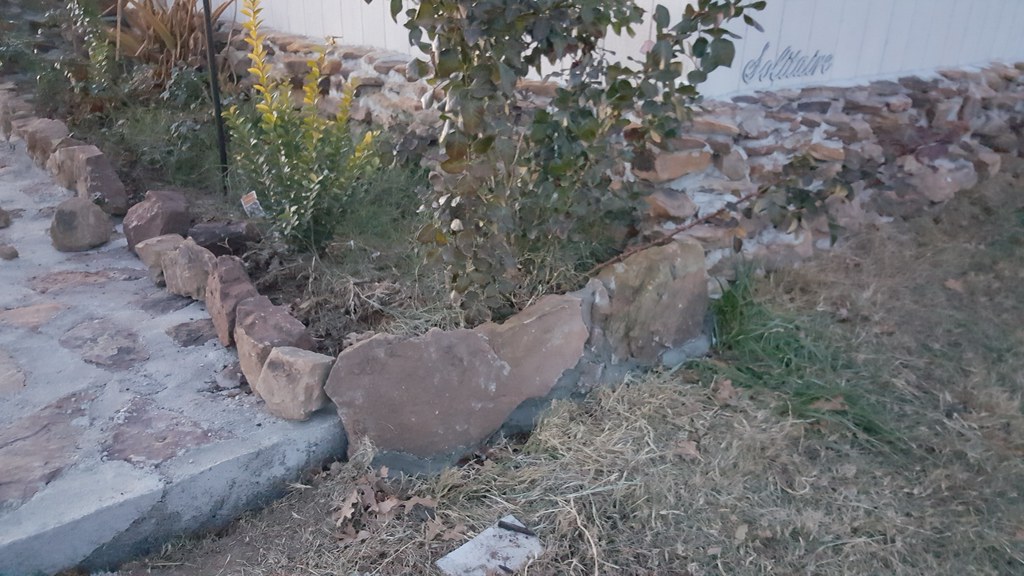
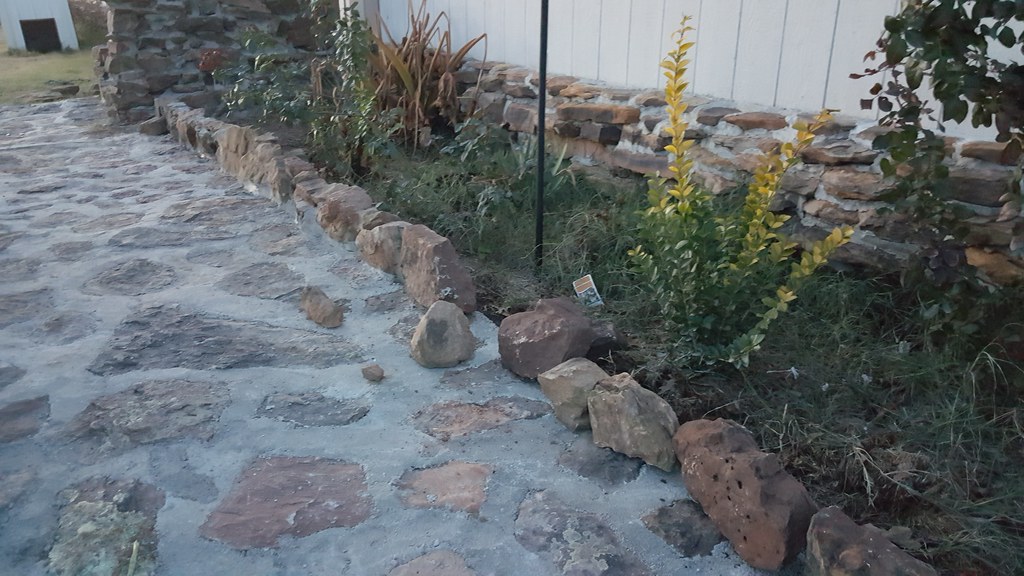
Congrats on your placings! The patio looks great! I like what you're doing with the fenders. With CF, do you use a resin like with fiberglass matte?
__________________
1968 Corvette 12v Cummins Compounds 47RH
1976 K30 CC SWB 12v 47RH
2000 Excursion VE 24v 47RH 4x4
1972 K30 Longhorn P-Pumped 24v 47RH Compounds
|
|
|
|
|
11-16-2016, 03:35 PM
|
#1062
|
Name: NakeDiesel
Title: Smoke'n in the Mud
Status: Not Here
Join Date: Jan 2010
Location: Hominy, OK
Member`s Gallery
Posts: 1,116
|
Thanks.
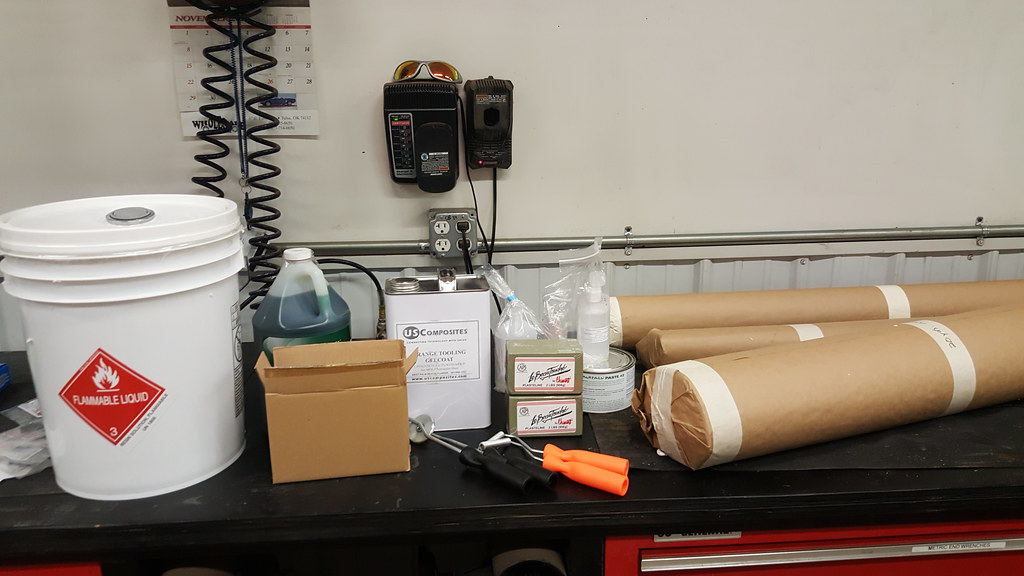
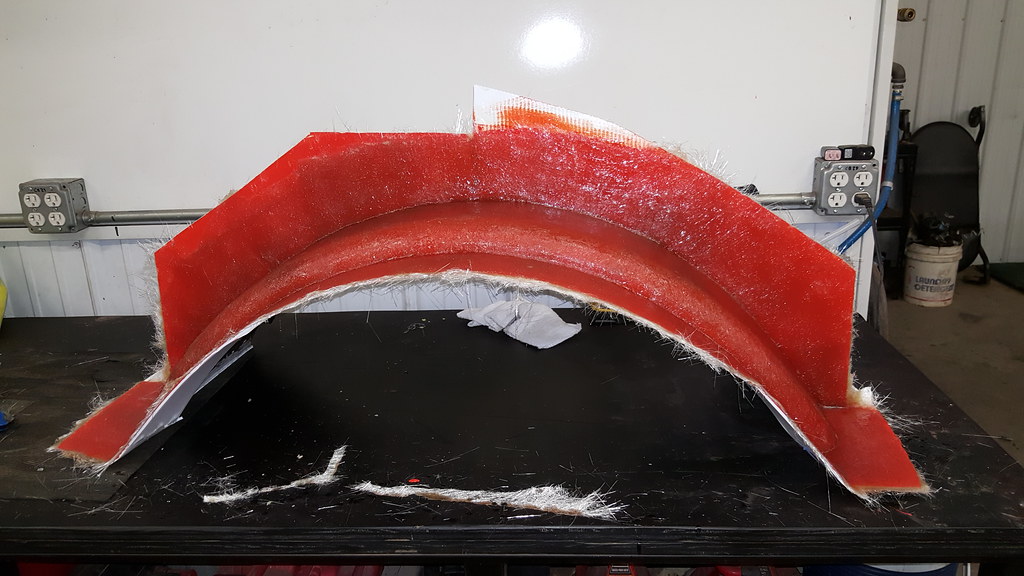
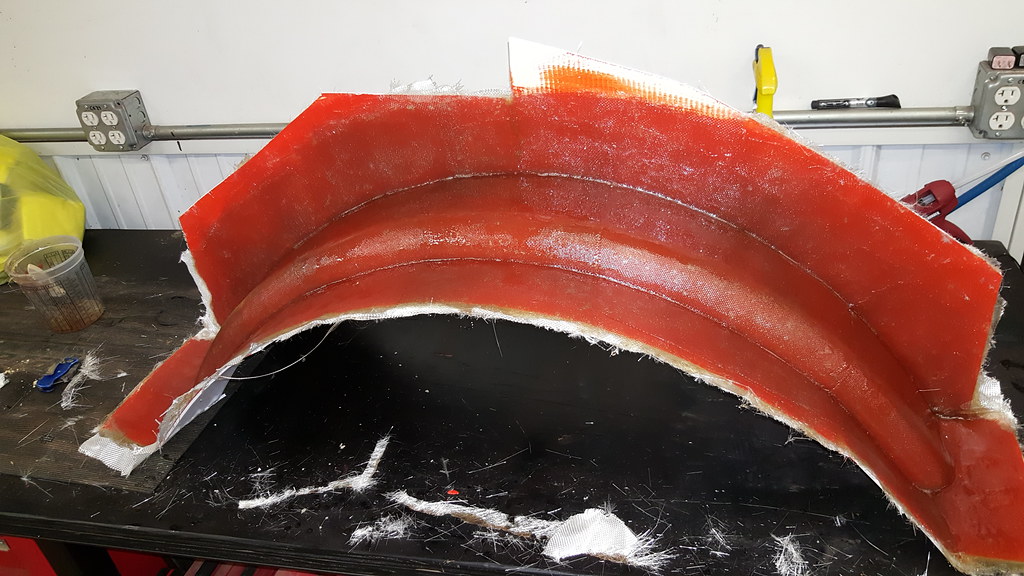
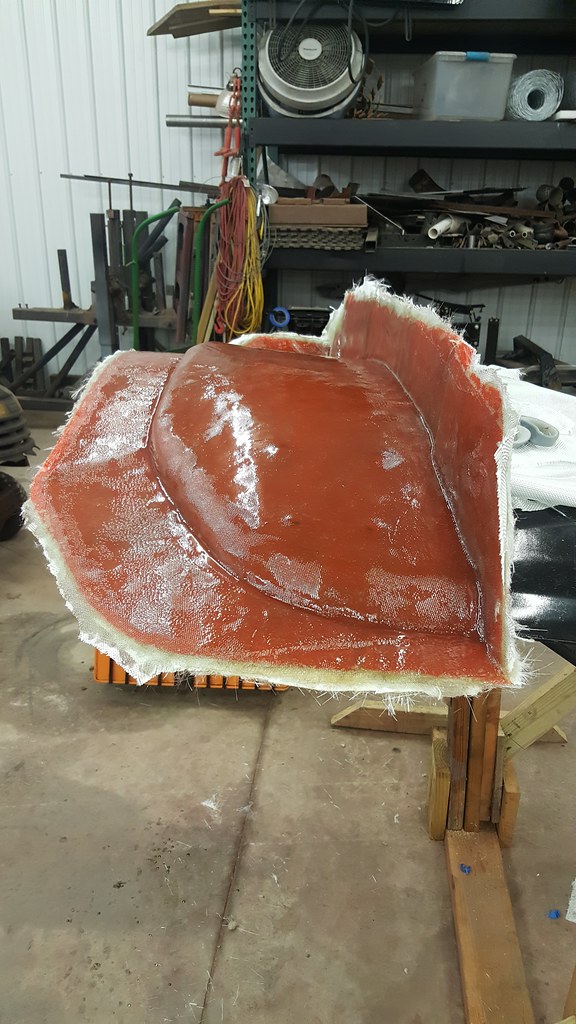
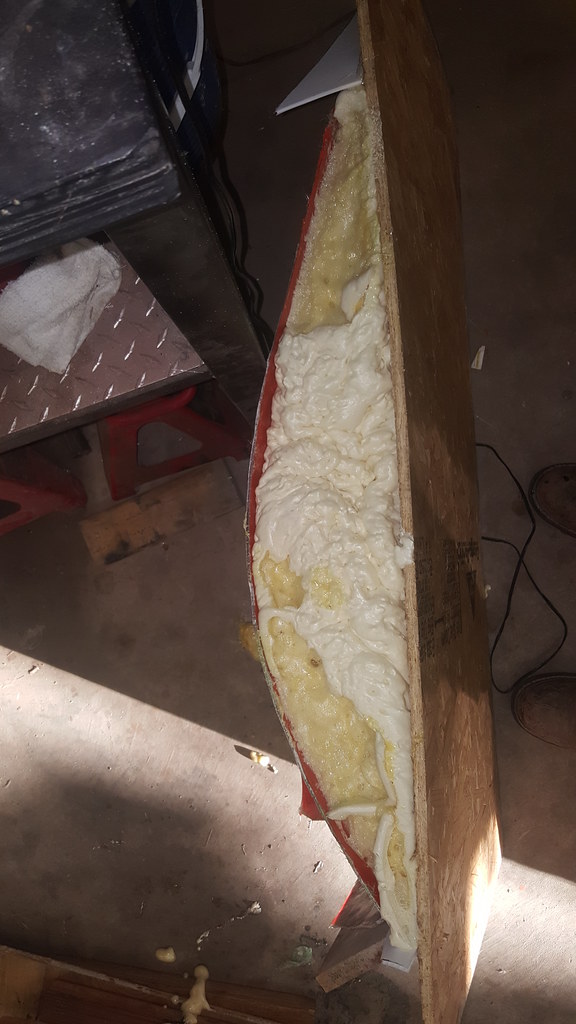
The first step I'm doing is to make molds for the CF parts. I will have to apply 3 or 4 coats of paste wax to the fenders and let each one dry, then two coats of PVA release. Once that's dry, then a coat of tooling gelcoat will be brushed on and let it get to the point where it's tacky. Once the gelcoat is ready, then I start in with layering in fiberglass with polyester resin till I have it thick enough to use as a mold.
Once I have the mold, for the fenders, I will have to do a little modification to them to create an inside lip and then I can begin making CF fenders off the mold.
You have to do the same paste wax and pva steps and then I will layup the CF dry, the peal ply, flow media and then the bagging material with sealant tape around the edge. Epoxy will be sucked into the mold from one end with a vacuum pump sucking on the other end with a catch can between the pump and mold...
It's going to be an interesting learning curve.
__________________
2005 Dodge Ram 3500 2x4 QC
1999 Dodge Ram 2500 4x4 QC
Coaltrain - 1946 Dodge Power Wagon powered by a little modified 12 valve.
Thanks to my sponsors: CP-Carrillo, Air Dog, Muldoons Diesel Performance, Power Driven Diesel, Diesel Performance Converters
|
|
|
|
|
11-16-2016, 03:52 PM
|
#1063
|
Name: DieselWrencher
Title: 6cyl Vette
Status: Not Here
Join Date: Dec 2006
Location: Mitchellville, Ia
Member`s Gallery
Posts: 2,886
|
Sounds interesting to me!
__________________
1968 Corvette 12v Cummins Compounds 47RH
1976 K30 CC SWB 12v 47RH
2000 Excursion VE 24v 47RH 4x4
1972 K30 Longhorn P-Pumped 24v 47RH Compounds
|
|
|
|
|
11-16-2016, 09:27 PM
|
#1064
|
Name: NakeDiesel
Title: Smoke'n in the Mud
Status: Not Here
Join Date: Jan 2010
Location: Hominy, OK
Member`s Gallery
Posts: 1,116
|
__________________
2005 Dodge Ram 3500 2x4 QC
1999 Dodge Ram 2500 4x4 QC
Coaltrain - 1946 Dodge Power Wagon powered by a little modified 12 valve.
Thanks to my sponsors: CP-Carrillo, Air Dog, Muldoons Diesel Performance, Power Driven Diesel, Diesel Performance Converters
|
|
|
|
|
11-18-2016, 06:09 AM
|
#1065
|
Name: kubotaorange76
Title: Too Much Time
Status: Not Here
Join Date: Aug 2006
Member`s Gallery
Posts: 309
|
I envy your work ethic
__________________
17' 6.7/6R140 CCLB
5.0, 6.6 & 4.9
|
|
|
|
|
11-20-2016, 07:16 PM
|
#1066
|
Name: NakeDiesel
Title: Smoke'n in the Mud
Status: Not Here
Join Date: Jan 2010
Location: Hominy, OK
Member`s Gallery
Posts: 1,116
|
__________________
2005 Dodge Ram 3500 2x4 QC
1999 Dodge Ram 2500 4x4 QC
Coaltrain - 1946 Dodge Power Wagon powered by a little modified 12 valve.
Thanks to my sponsors: CP-Carrillo, Air Dog, Muldoons Diesel Performance, Power Driven Diesel, Diesel Performance Converters
|
|
|
|
|
11-22-2016, 10:16 PM
|
#1067
|
Name: NakeDiesel
Title: Smoke'n in the Mud
Status: Not Here
Join Date: Jan 2010
Location: Hominy, OK
Member`s Gallery
Posts: 1,116
|
__________________
2005 Dodge Ram 3500 2x4 QC
1999 Dodge Ram 2500 4x4 QC
Coaltrain - 1946 Dodge Power Wagon powered by a little modified 12 valve.
Thanks to my sponsors: CP-Carrillo, Air Dog, Muldoons Diesel Performance, Power Driven Diesel, Diesel Performance Converters
|
|
|
|
|
11-23-2016, 05:44 AM
|
#1068
|
Name: jasonc
Title: Too Much Time
Status:
Here
Join Date: Nov 2009
Member`s Gallery
Posts: 4,412
|
You are a definite jack of all trades, I enjoy your updates.
|
|
|
|
|
11-23-2016, 06:33 AM
|
#1069
|
Name: Bodacious
Title: Comp Diesel Sponsor
Status: Not Here
Join Date: Jul 2013
Location: Weston, WV
Member`s Gallery
Posts: 2,177
|
Quote:
Originally Posted by jasonc

You are a definite jack of all trades, I enjoy your updates.
|
x2 on this plus getting it done!!!
__________________
"Careful who you argue with on the internet. Others might not know they are idiots."
|
|
|
|
|
11-23-2016, 08:22 AM
|
#1070
|
Name: NakeDiesel
Title: Smoke'n in the Mud
Status: Not Here
Join Date: Jan 2010
Location: Hominy, OK
Member`s Gallery
Posts: 1,116
|
Thanks, maybe not a master of most, but too cheap to pay someone else to do something I can atleast attempt to accomplish. I guess growing up money poor and having to do everything yourself just sticks with you even when your not considered poor anymore.
__________________
2005 Dodge Ram 3500 2x4 QC
1999 Dodge Ram 2500 4x4 QC
Coaltrain - 1946 Dodge Power Wagon powered by a little modified 12 valve.
Thanks to my sponsors: CP-Carrillo, Air Dog, Muldoons Diesel Performance, Power Driven Diesel, Diesel Performance Converters
|
|
|
|
|
11-25-2016, 08:23 PM
|
#1071
|
Name: NakeDiesel
Title: Smoke'n in the Mud
Status: Not Here
Join Date: Jan 2010
Location: Hominy, OK
Member`s Gallery
Posts: 1,116
|
__________________
2005 Dodge Ram 3500 2x4 QC
1999 Dodge Ram 2500 4x4 QC
Coaltrain - 1946 Dodge Power Wagon powered by a little modified 12 valve.
Thanks to my sponsors: CP-Carrillo, Air Dog, Muldoons Diesel Performance, Power Driven Diesel, Diesel Performance Converters
|
|
|
|
|
11-27-2016, 08:22 PM
|
#1072
|
Name: NakeDiesel
Title: Smoke'n in the Mud
Status: Not Here
Join Date: Jan 2010
Location: Hominy, OK
Member`s Gallery
Posts: 1,116
|
__________________
2005 Dodge Ram 3500 2x4 QC
1999 Dodge Ram 2500 4x4 QC
Coaltrain - 1946 Dodge Power Wagon powered by a little modified 12 valve.
Thanks to my sponsors: CP-Carrillo, Air Dog, Muldoons Diesel Performance, Power Driven Diesel, Diesel Performance Converters
|
|
|
|
|
11-29-2016, 09:20 PM
|
#1073
|
Name: NakeDiesel
Title: Smoke'n in the Mud
Status: Not Here
Join Date: Jan 2010
Location: Hominy, OK
Member`s Gallery
Posts: 1,116
|
__________________
2005 Dodge Ram 3500 2x4 QC
1999 Dodge Ram 2500 4x4 QC
Coaltrain - 1946 Dodge Power Wagon powered by a little modified 12 valve.
Thanks to my sponsors: CP-Carrillo, Air Dog, Muldoons Diesel Performance, Power Driven Diesel, Diesel Performance Converters
|
|
|
|
|
12-02-2016, 08:31 AM
|
#1074
|
Name: NakeDiesel
Title: Smoke'n in the Mud
Status: Not Here
Join Date: Jan 2010
Location: Hominy, OK
Member`s Gallery
Posts: 1,116
|
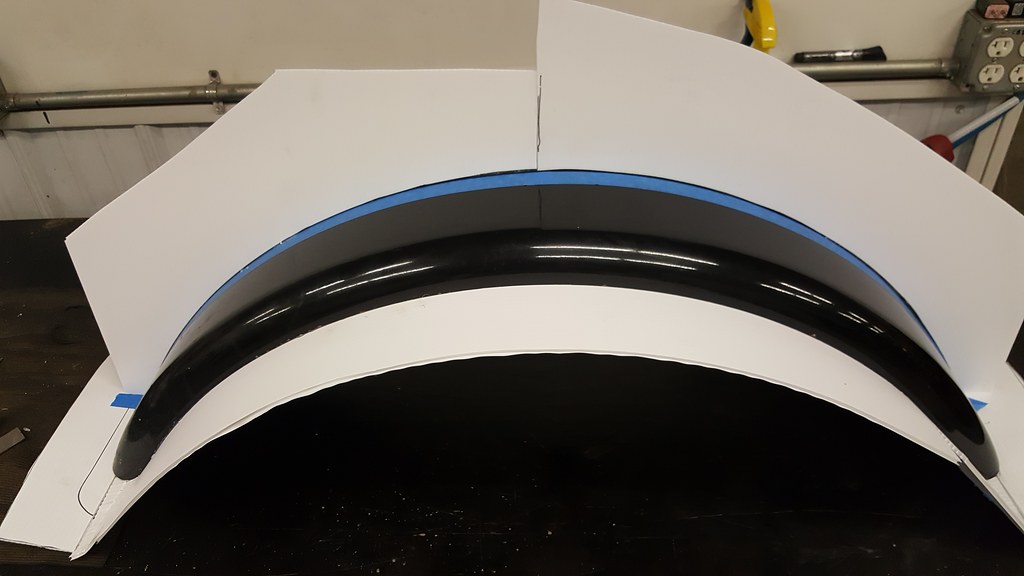
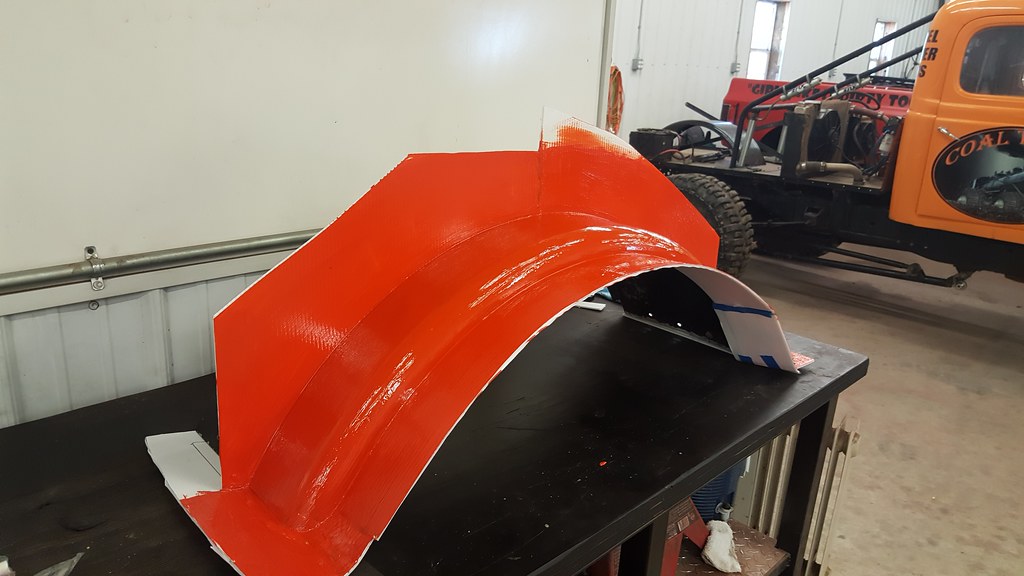
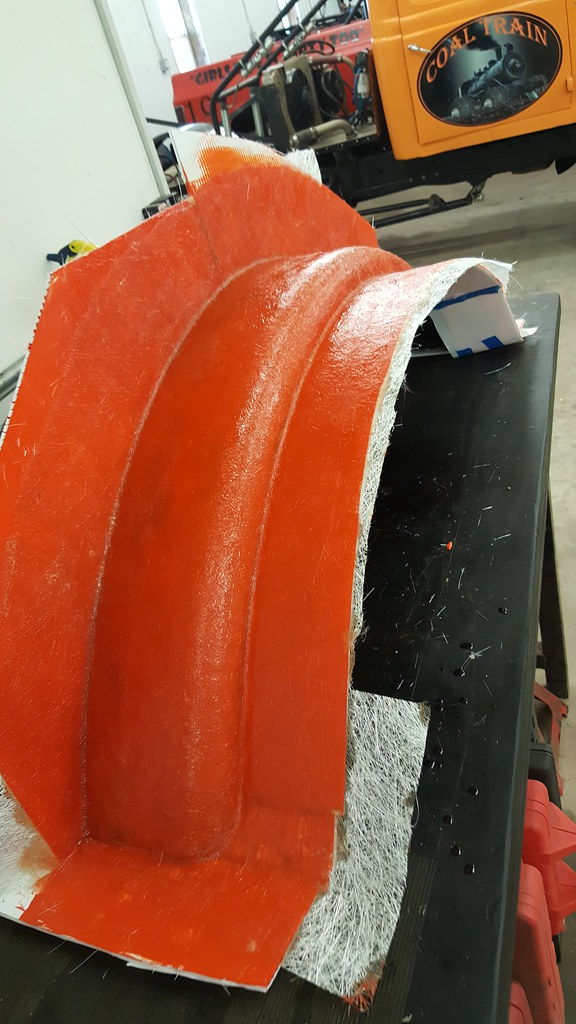
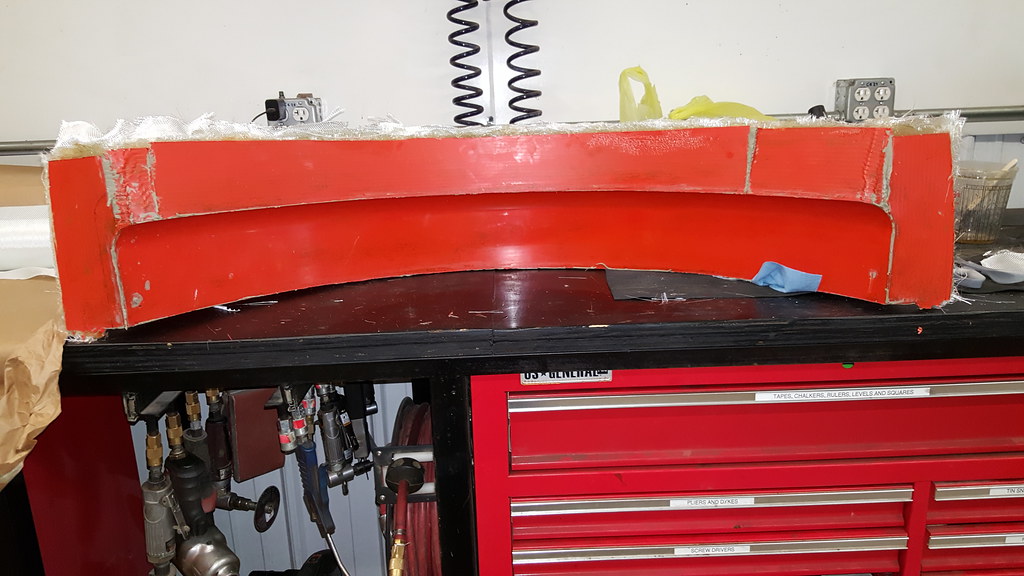
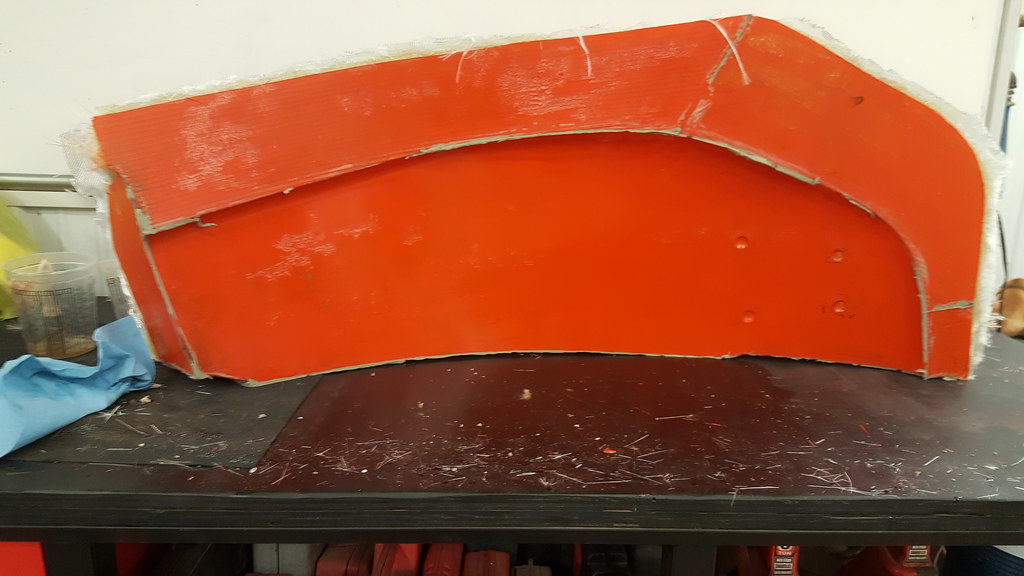
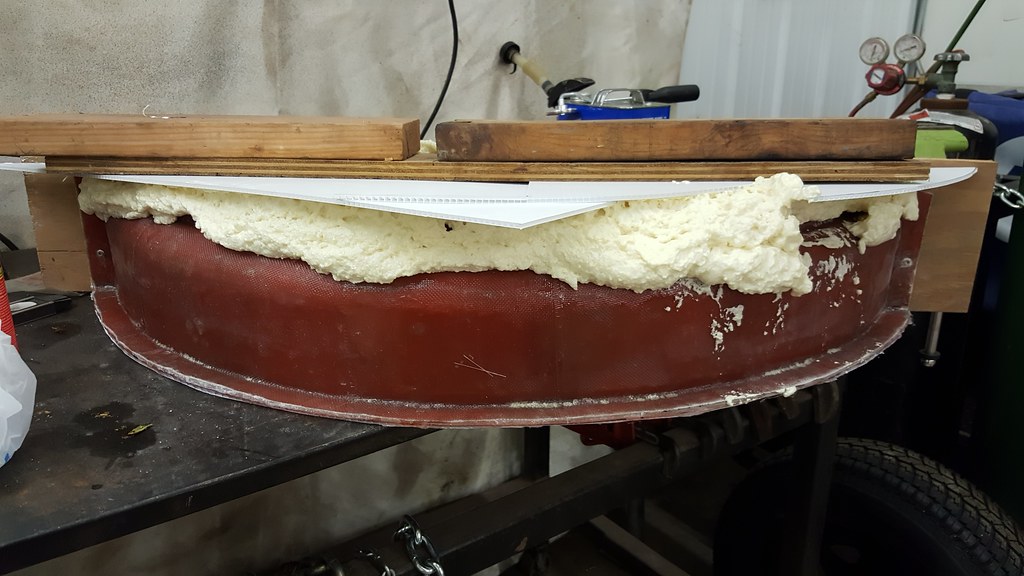
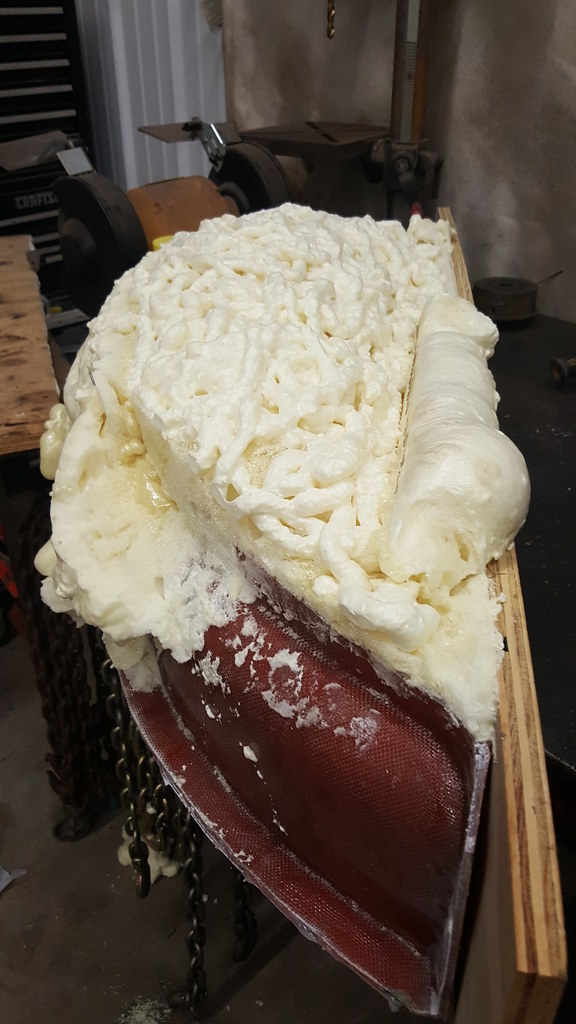
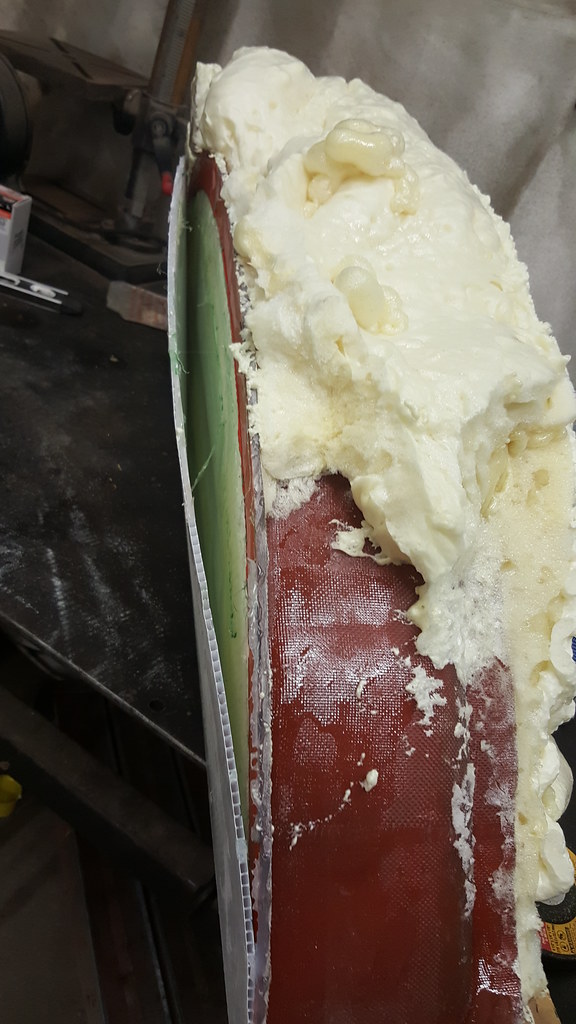
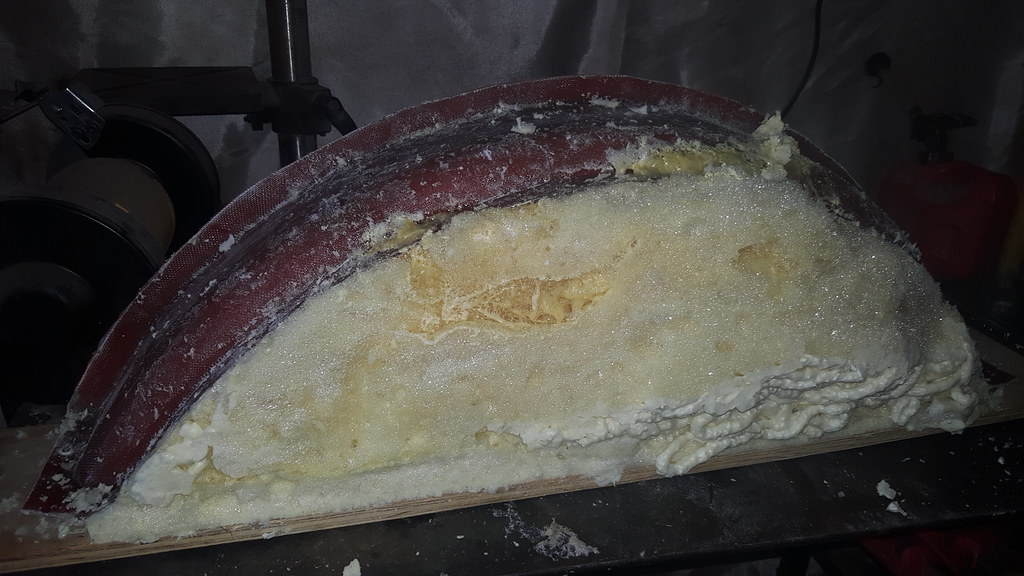
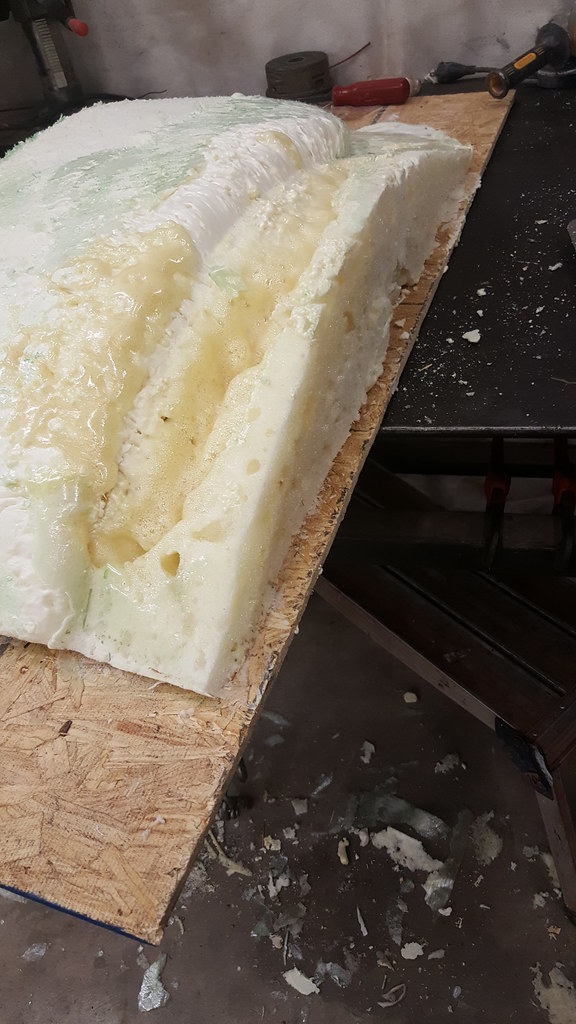
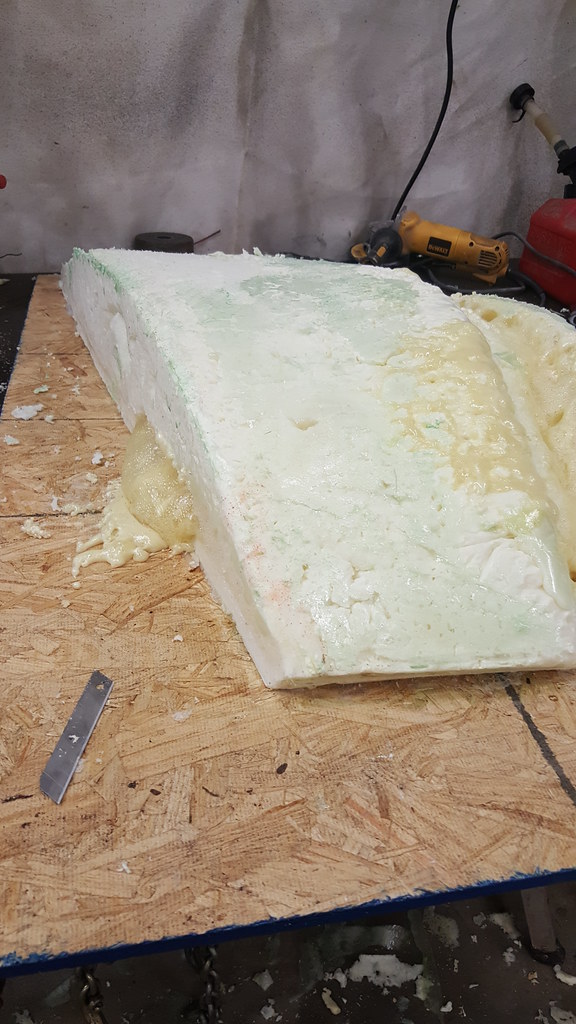
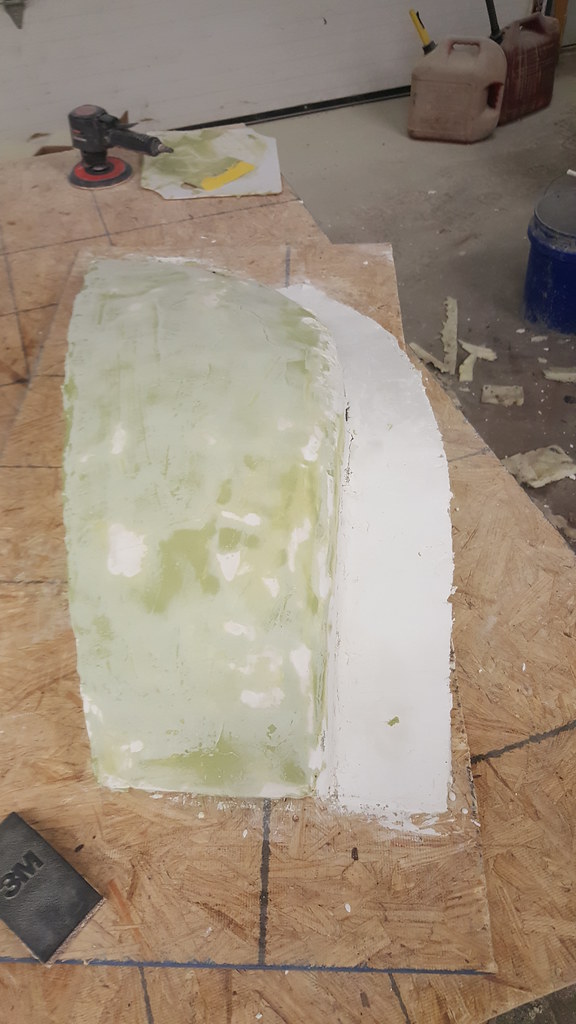
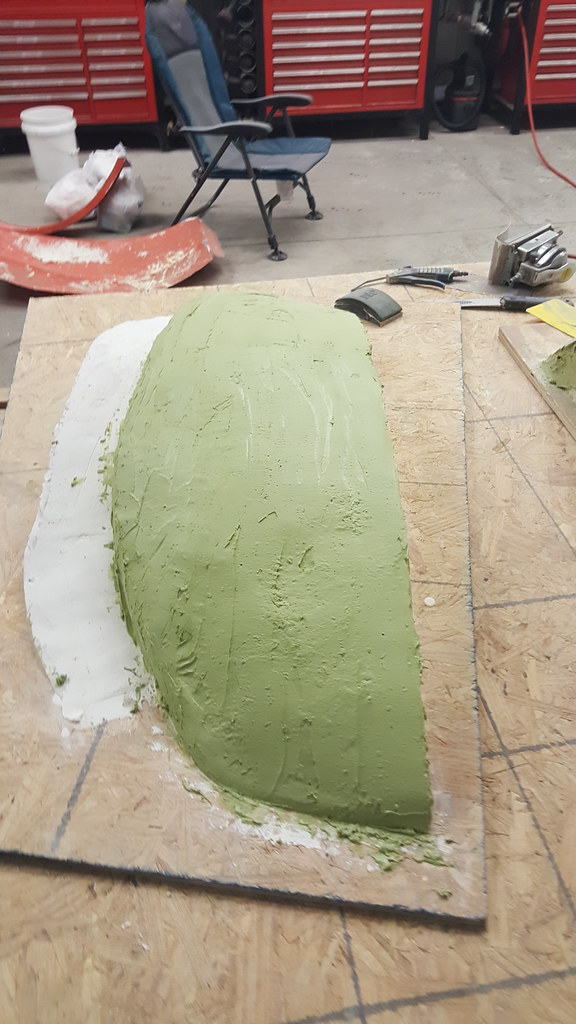
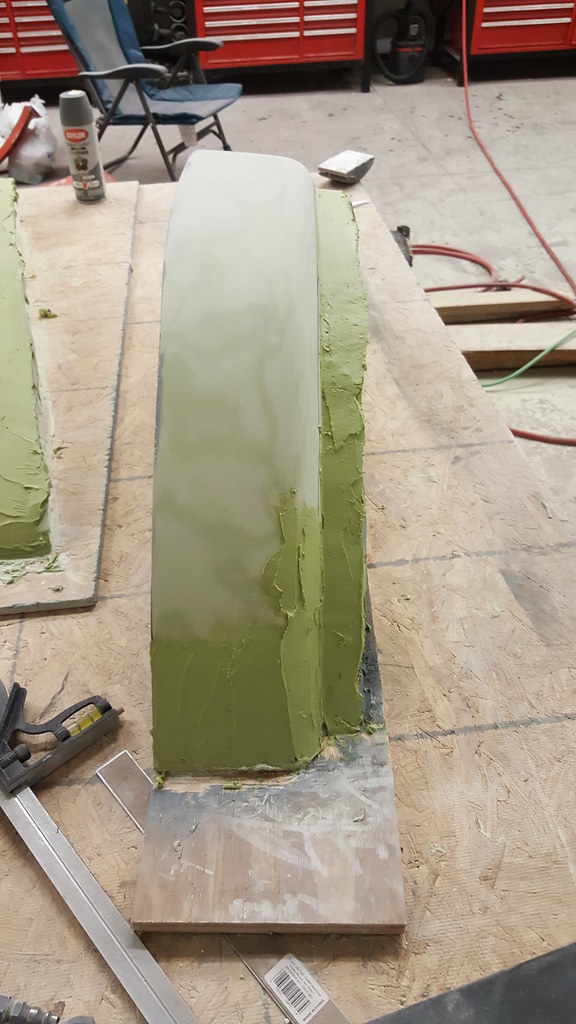
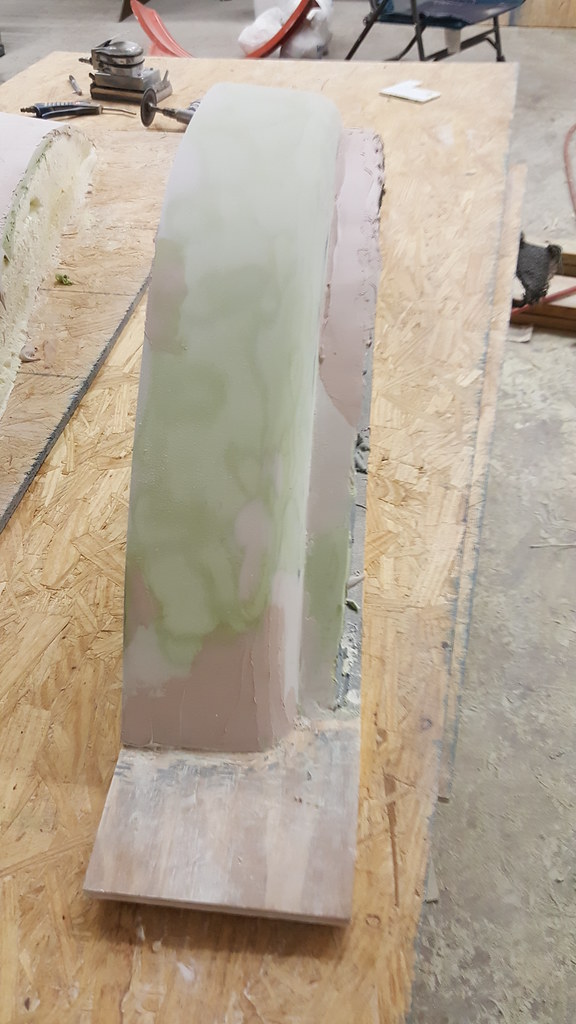
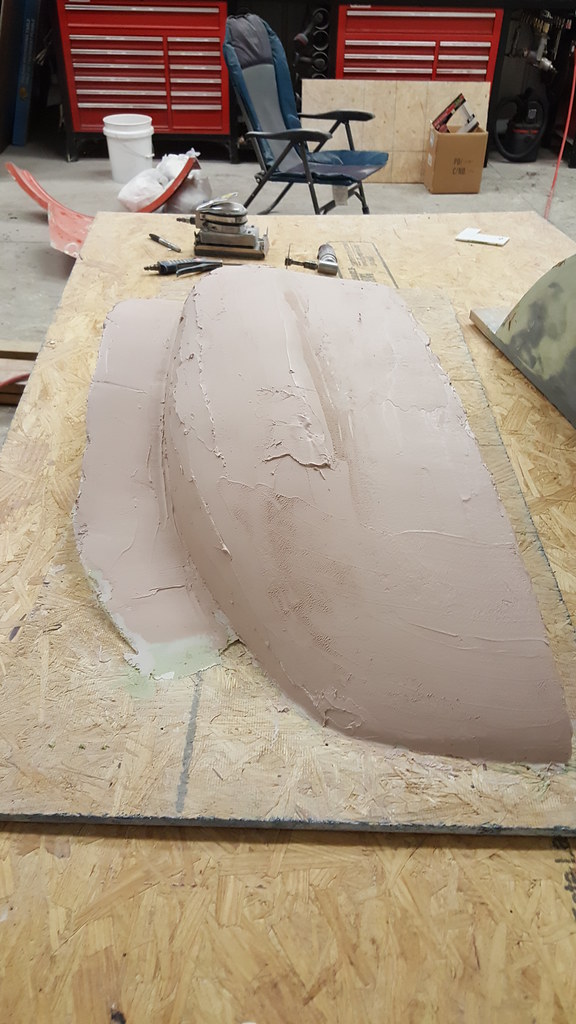
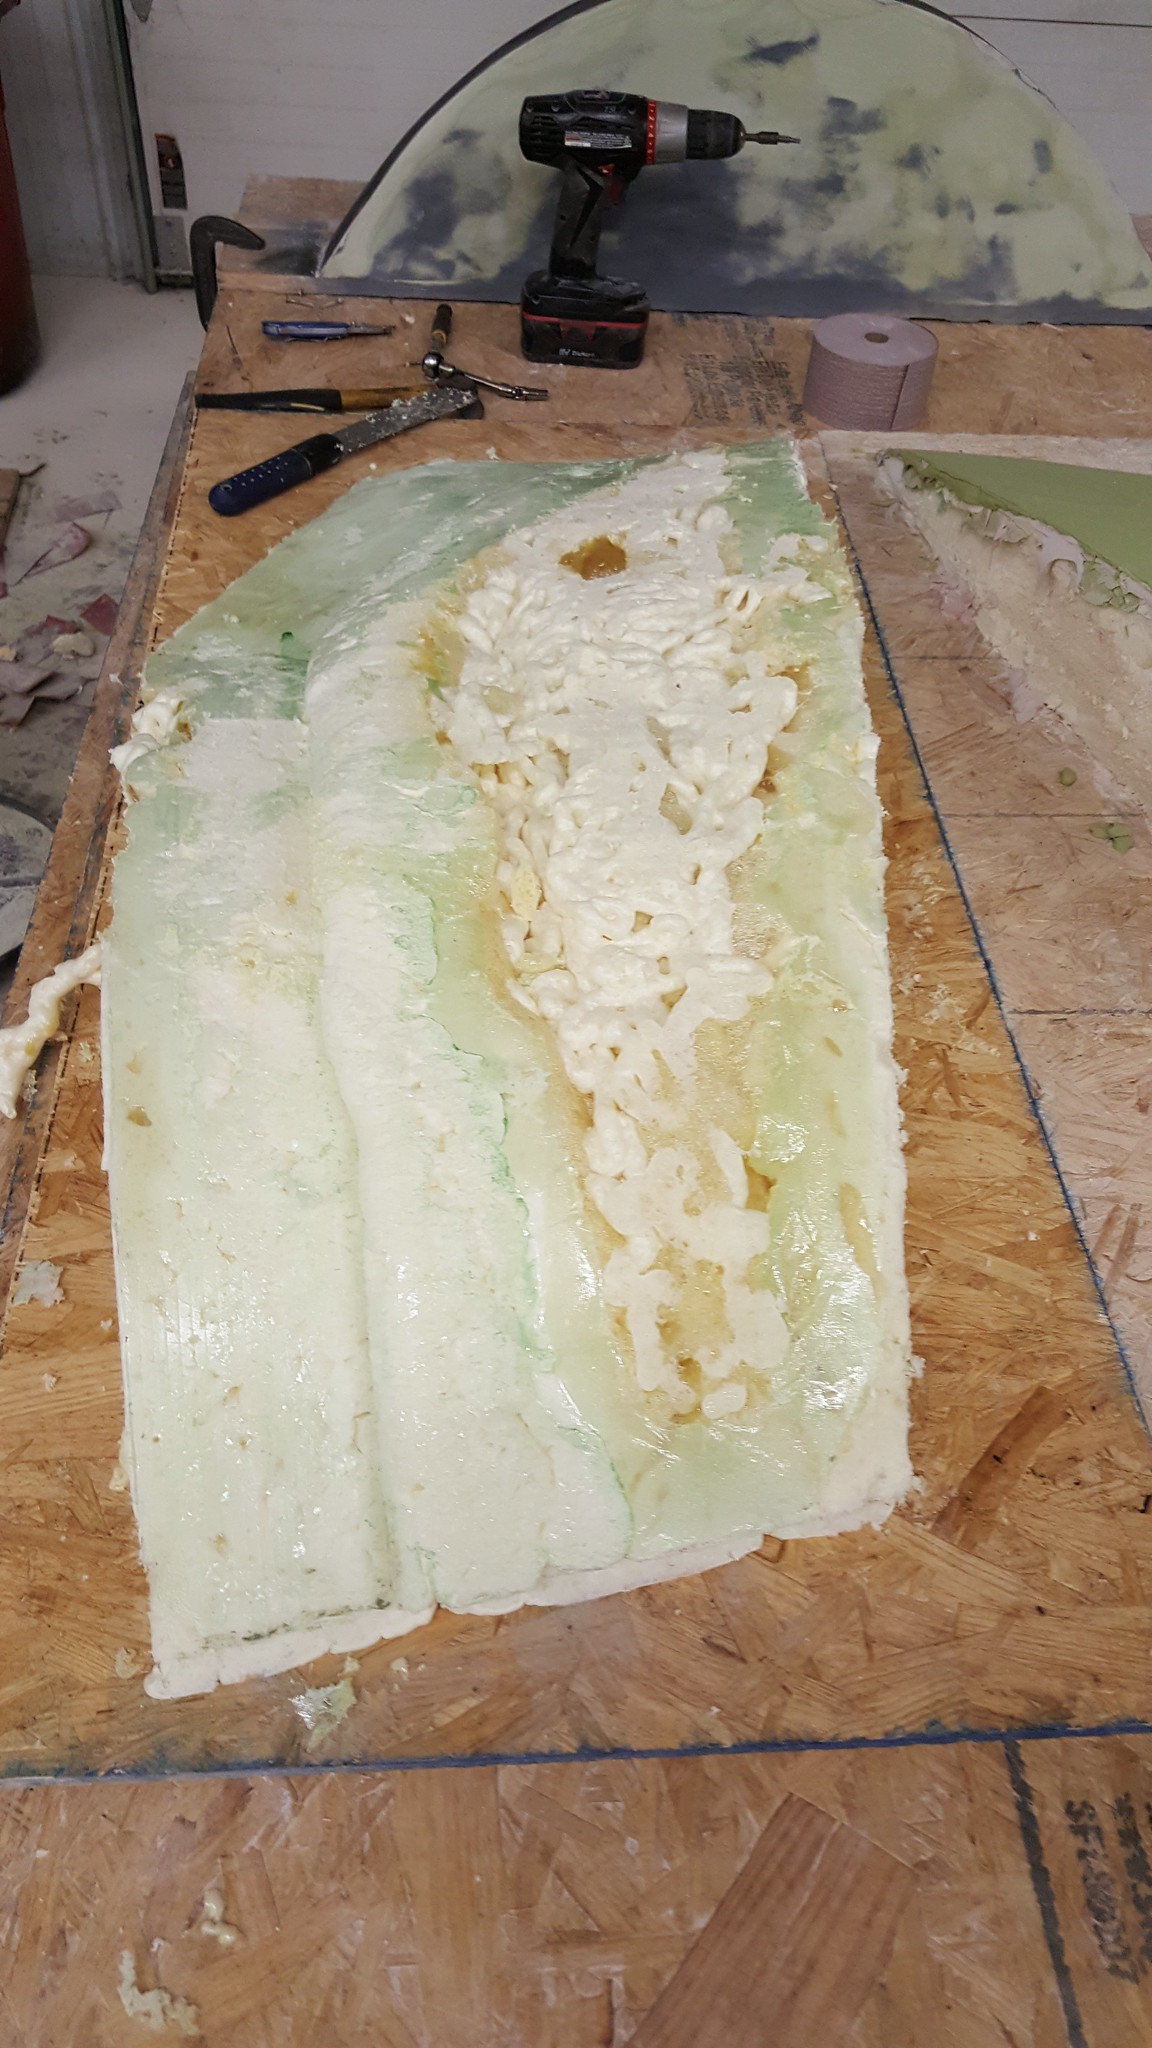
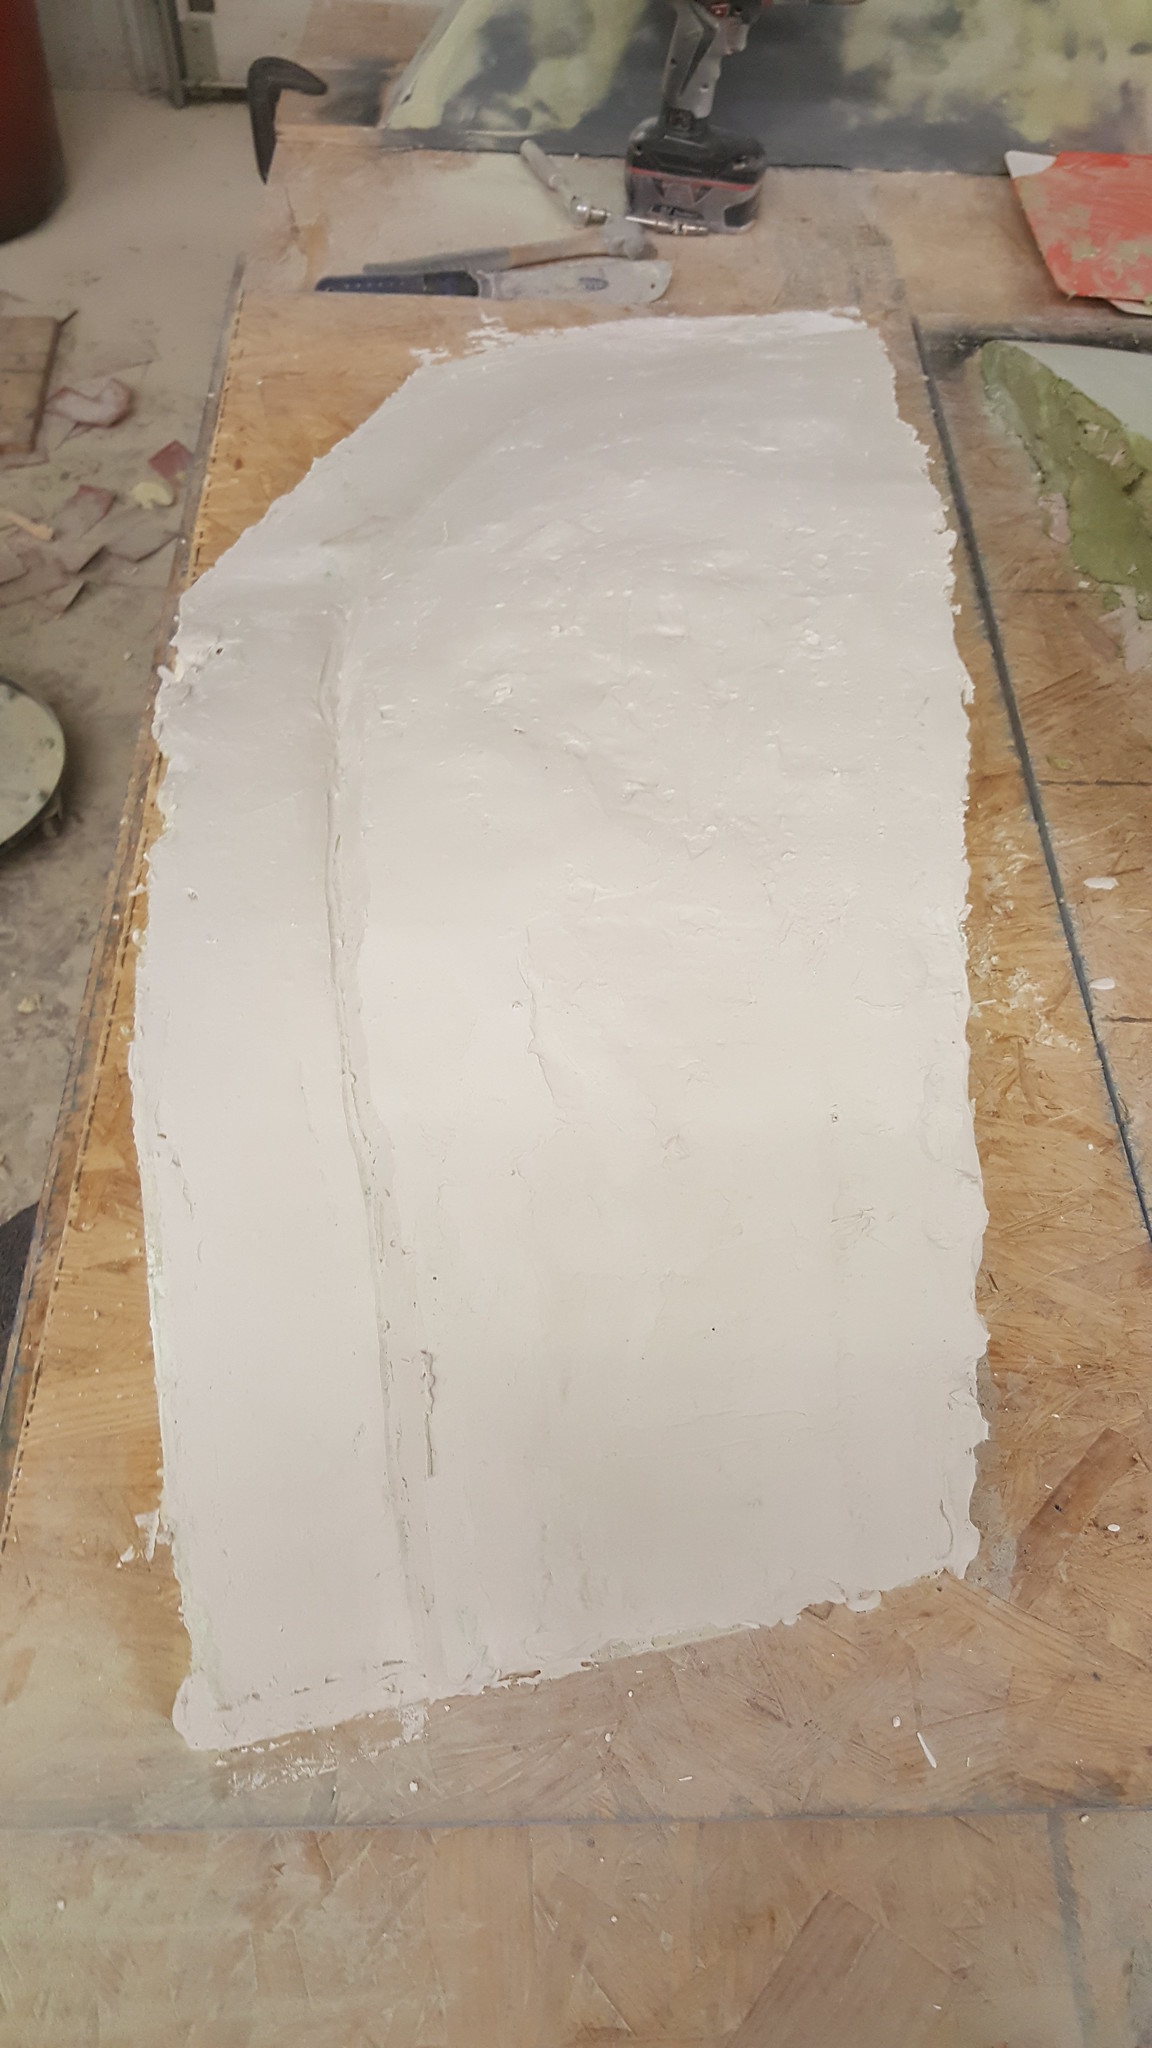
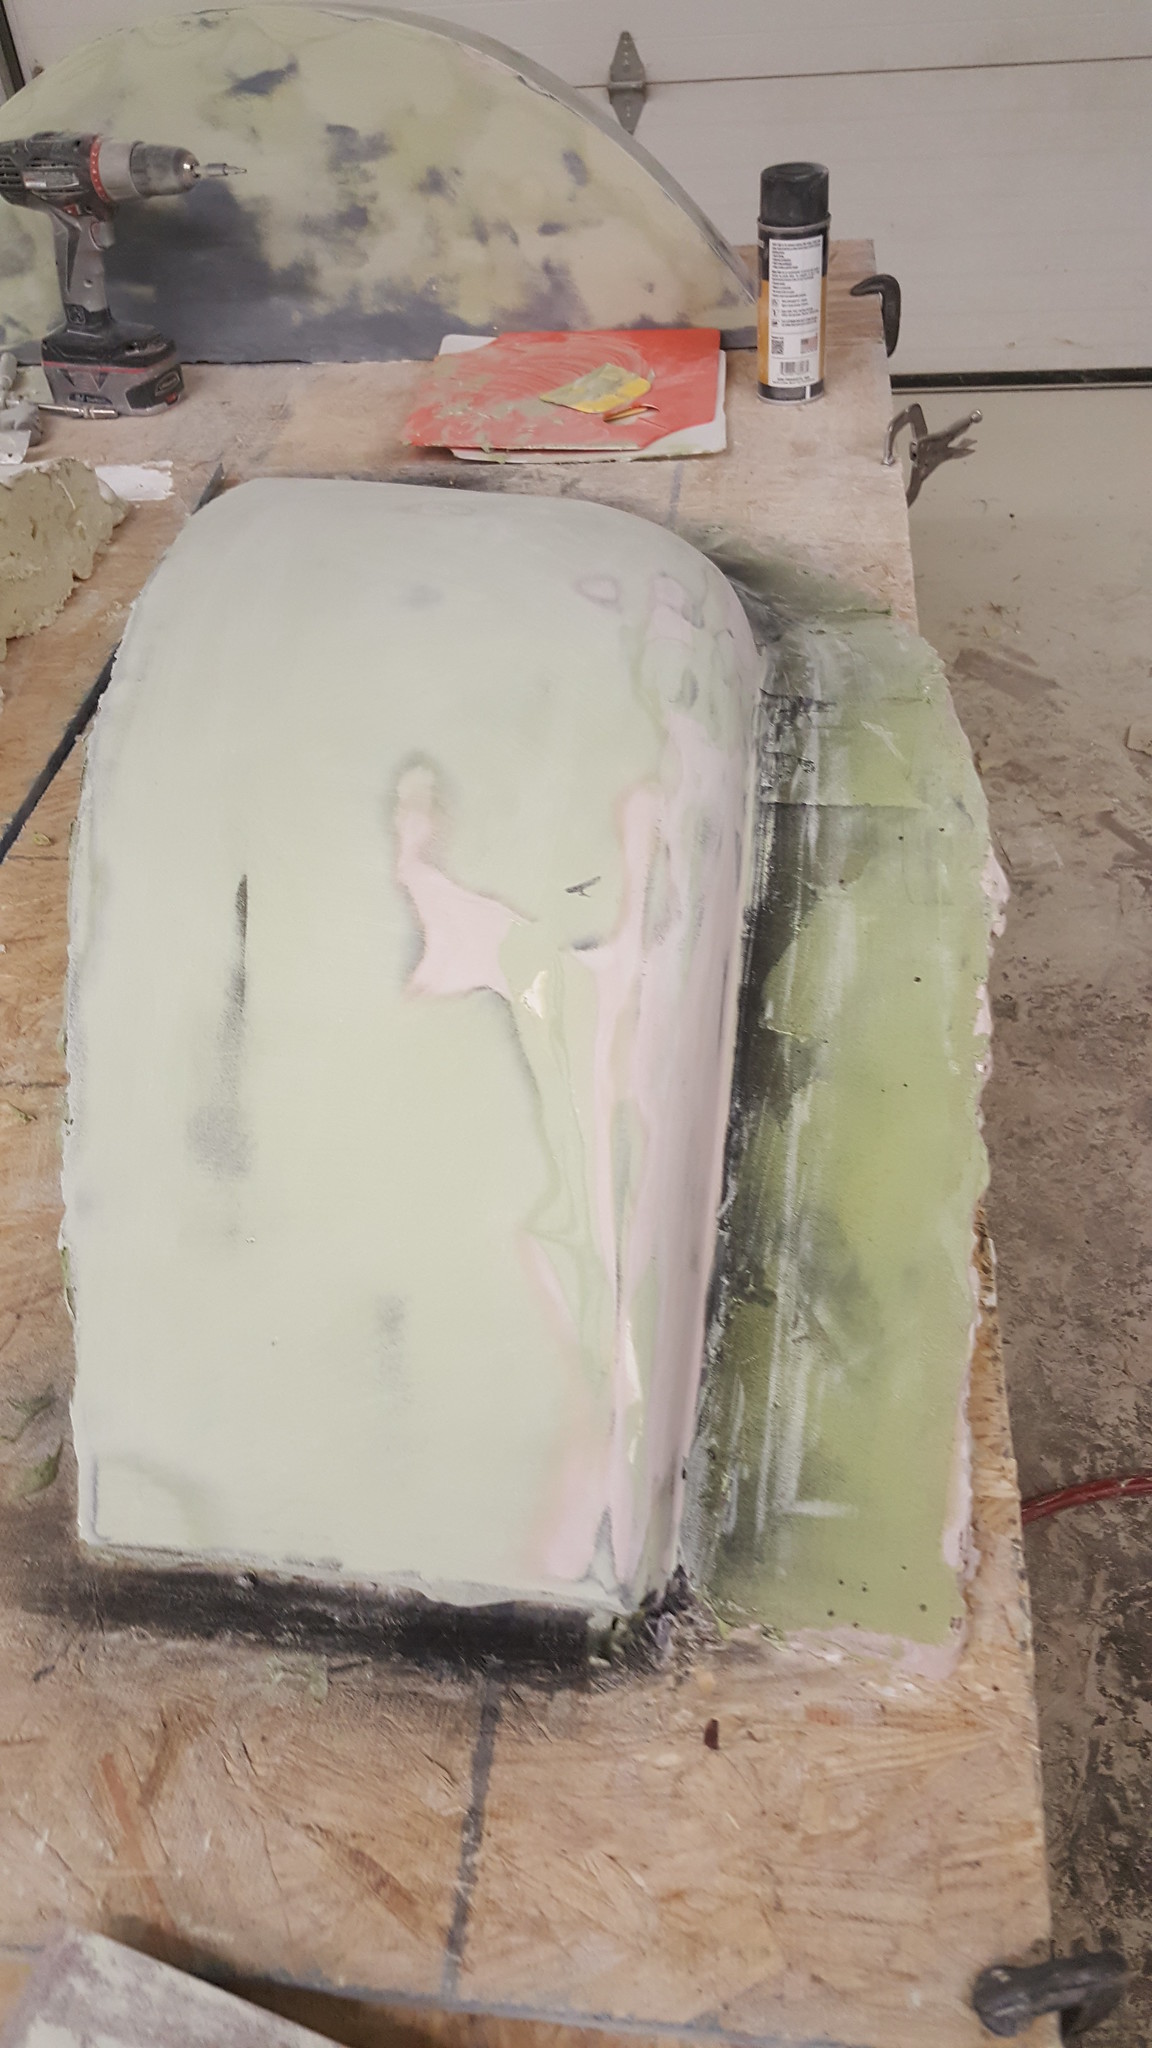
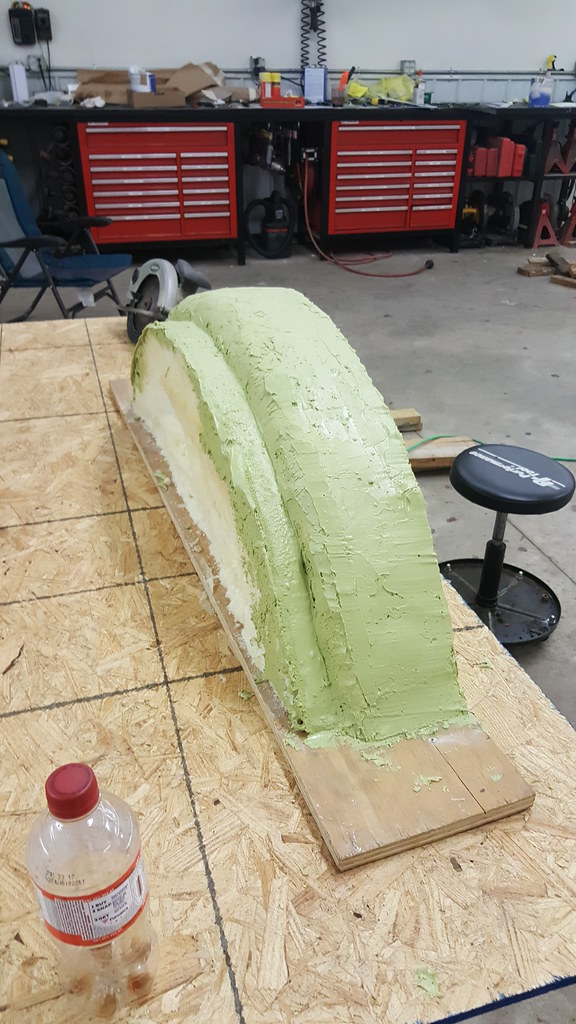
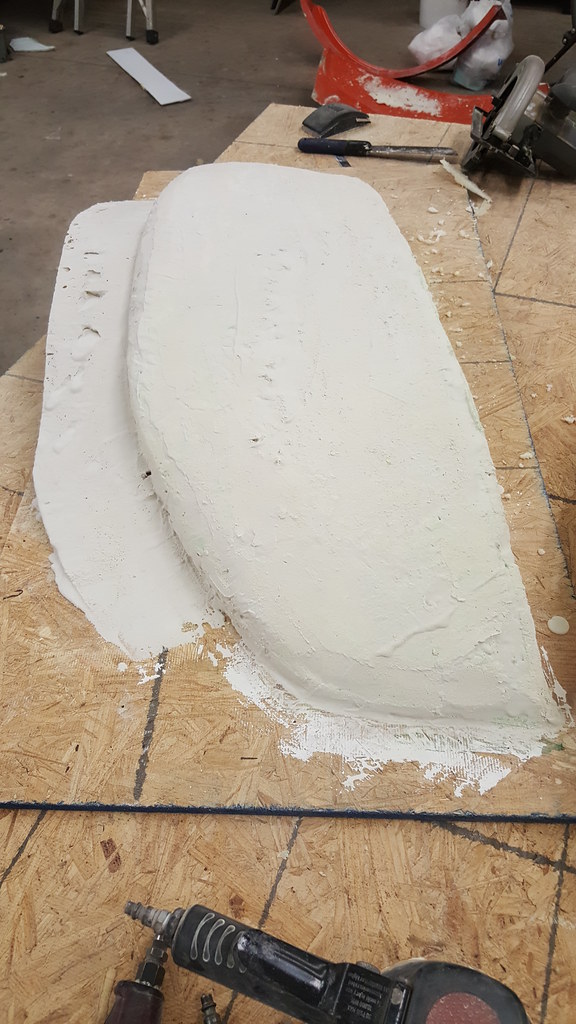
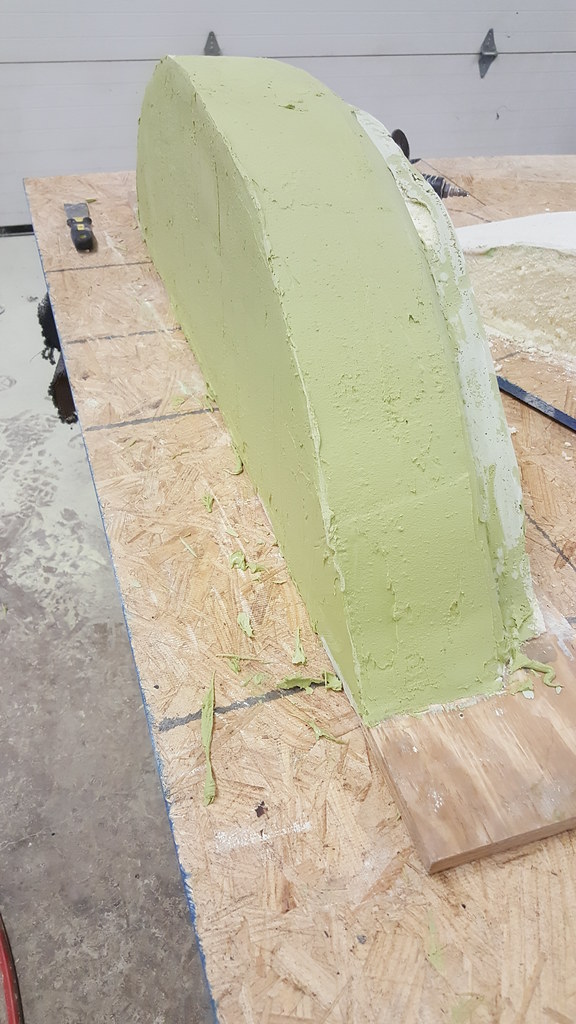
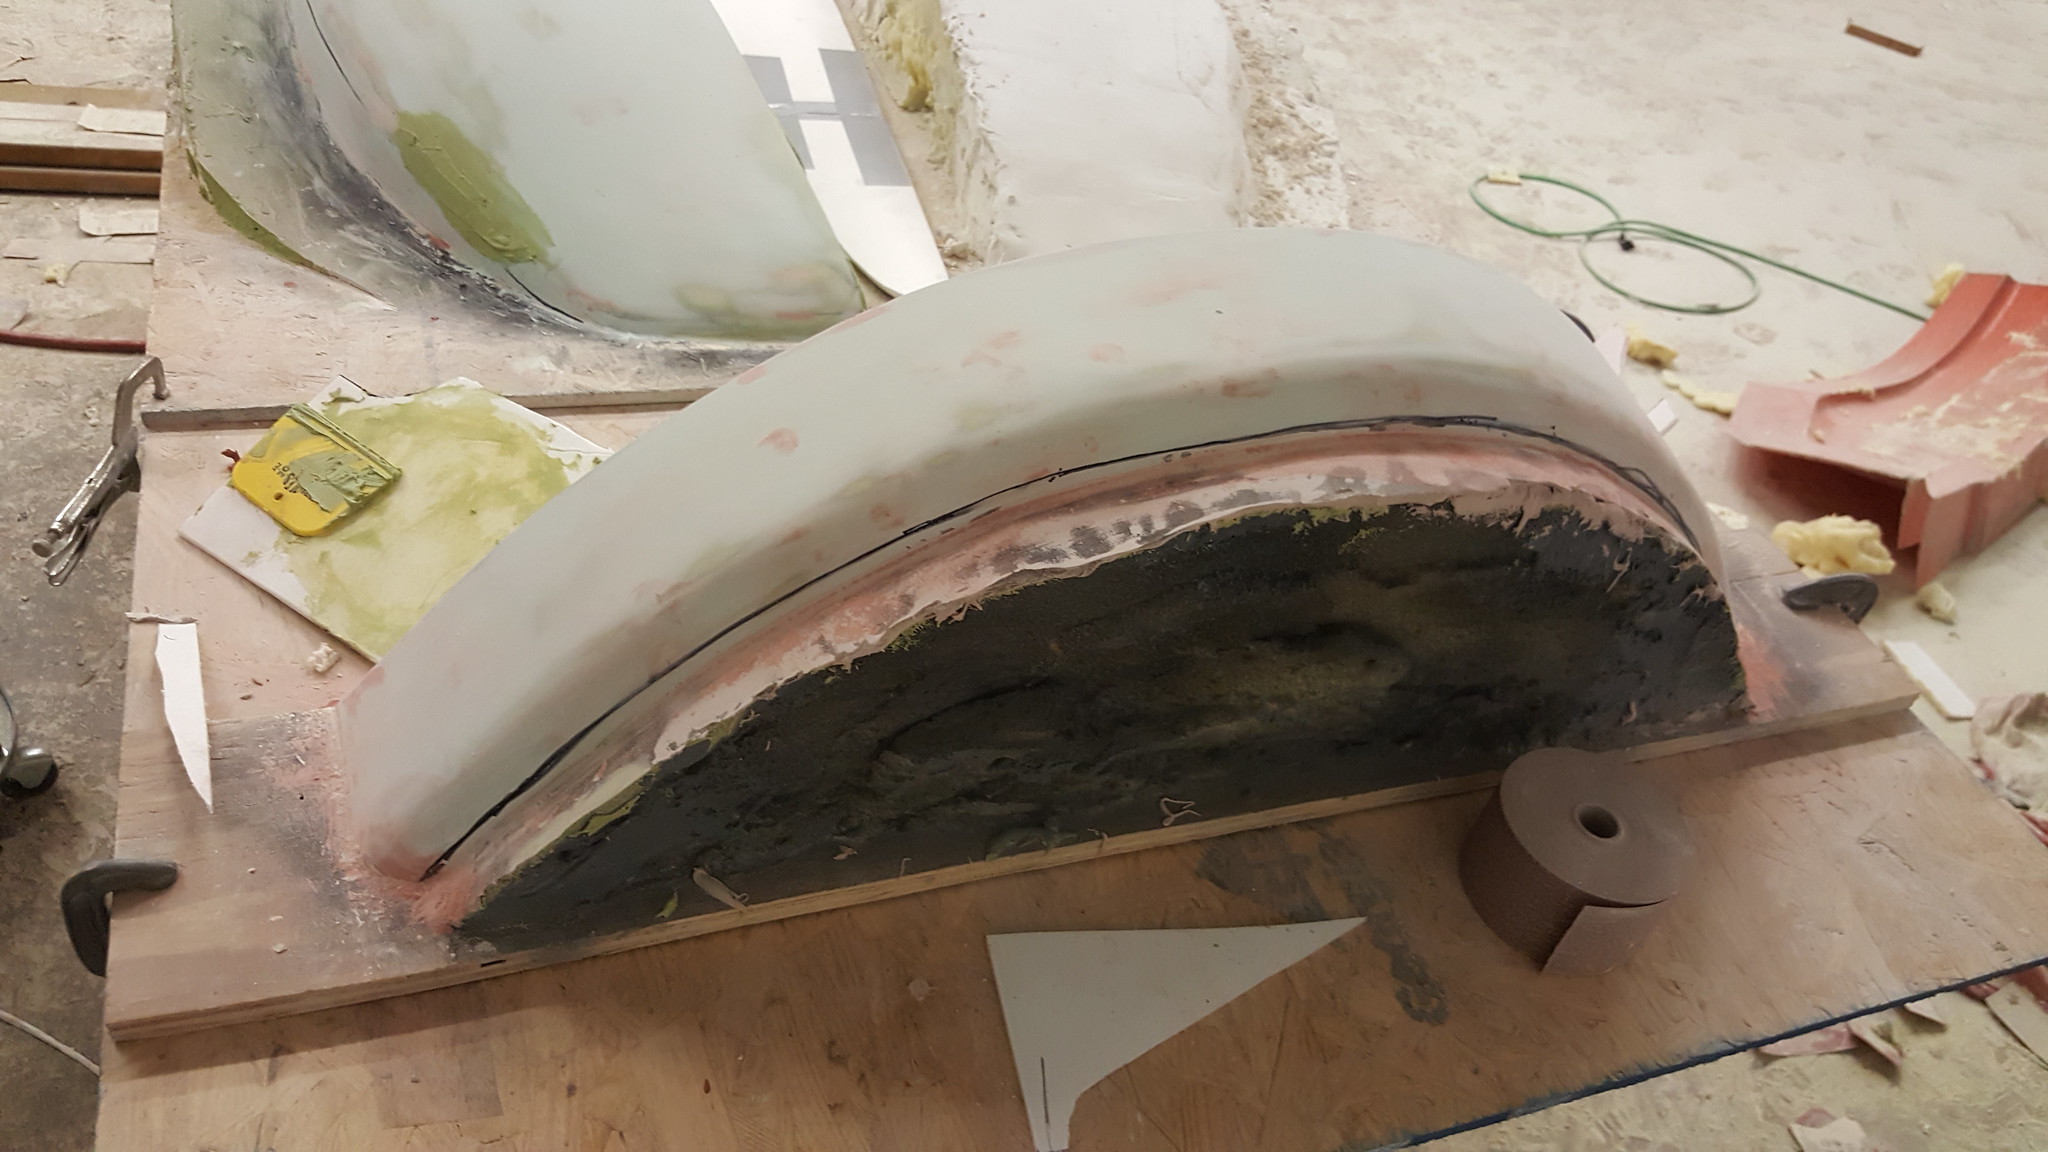
Been working on the fender molds and researching and ordering some parts for the truck. Found that the filler I'm using does eat into the polyurethane foam a bit, as the rear fender has about 4 areas where the filler sunk in. Been working those areas out and filling and rough smoothing with air power sanders to get it all level and a consistent profile. Hoping to have it where I can start with detailed filling and sanding in the next day or two.
I tried something different on the front fender I've made a foam mold of, I covered it in a couple of layers of plaster of paris before starting on the filler. I applied the first coat of filler to it last night before I had to run and take the wife to go see Trans Siberian Orchestra. Hopefully it works out with the plaster of paris separating the foam and filler. Waiting to make the other front fender till this test plays out.
On other fronts, ordered new weld in tube adapters for the longer front control arms, already have the dom tubing here at the shop that's left over from my track bars that I built last year. Looking at moving the front coil spring buckets 16" forward on the frame, and will have to move to full hydraulic steering so I'm trying to decide on the route to go with either buying a complete setup or piecing one together.
Planning on ordering new front springs from Dodge Offroad, a pair of their progressing 3" coils, waiting to hear back from them on which would be the right ones for the weight on the front of my truck, since it's not a standard application.
The front Bilstein 5160's are going to be sent to bilstein and get revalved to a 90/10 setup.
The p pump is getting turned into a 13mm pump and maxed out and balanced and will probably order a 1.10 ar housing for the s475.
Ordered a spool gun for my tweco 211i and got it in yesterday, need to pick up a bottle of argon and then I can start playing with aluminum mig welding to build the frame for the front one piece clip and possibly new mounts for all the bed components.
Also planning on changing gears from the 5.13's I'm running now to 6.17's to see if I can get the transmission to live. After talking with a few people I trust, we think that's the root cause, I jumped to too high of a ratio. Most gas fast trucks try to be around 9 to 1 overall diff + transfercase low range, my old setup with 3.55's and the np205 put me at 7:1 overall and the trans was living then.
__________________
2005 Dodge Ram 3500 2x4 QC
1999 Dodge Ram 2500 4x4 QC
Coaltrain - 1946 Dodge Power Wagon powered by a little modified 12 valve.
Thanks to my sponsors: CP-Carrillo, Air Dog, Muldoons Diesel Performance, Power Driven Diesel, Diesel Performance Converters
|
|
|
|
|
12-02-2016, 09:07 PM
|
#1075
|
Name: NakeDiesel
Title: Smoke'n in the Mud
Status: Not Here
Join Date: Jan 2010
Location: Hominy, OK
Member`s Gallery
Posts: 1,116
|
__________________
2005 Dodge Ram 3500 2x4 QC
1999 Dodge Ram 2500 4x4 QC
Coaltrain - 1946 Dodge Power Wagon powered by a little modified 12 valve.
Thanks to my sponsors: CP-Carrillo, Air Dog, Muldoons Diesel Performance, Power Driven Diesel, Diesel Performance Converters
|
|
|
|
|
12-04-2016, 09:15 PM
|
#1076
|
Name: NakeDiesel
Title: Smoke'n in the Mud
Status: Not Here
Join Date: Jan 2010
Location: Hominy, OK
Member`s Gallery
Posts: 1,116
|
__________________
2005 Dodge Ram 3500 2x4 QC
1999 Dodge Ram 2500 4x4 QC
Coaltrain - 1946 Dodge Power Wagon powered by a little modified 12 valve.
Thanks to my sponsors: CP-Carrillo, Air Dog, Muldoons Diesel Performance, Power Driven Diesel, Diesel Performance Converters
|
|
|
|
|
12-05-2016, 09:28 AM
|
#1077
|
Name: CorneliusRox
Title: Seasoned Rookie
Status: Not Here
Join Date: Dec 2012
Location: Detroit, MI
Member`s Gallery
Posts: 4,154
|
Man that's going to looks sweet. It's going to be so easy to make replacements too!
__________________
Corey - BSME '21 Tesla Model 3 Perf
'22 DMax AT4 2500
|
|
|
|
|
12-06-2016, 01:55 PM
|
#1078
|
Name: NakeDiesel
Title: Smoke'n in the Mud
Status: Not Here
Join Date: Jan 2010
Location: Hominy, OK
Member`s Gallery
Posts: 1,116
|
I hope so, ending up having a ton of time just in the fenders, starting to get ideas on how to make the rear bedsides and what I'm going to have to do to get a mold off the grill. Going to have to remove the bars sections and replace them with some either sheet metal or aluminum to fill it in and pull the mold on it.
__________________
2005 Dodge Ram 3500 2x4 QC
1999 Dodge Ram 2500 4x4 QC
Coaltrain - 1946 Dodge Power Wagon powered by a little modified 12 valve.
Thanks to my sponsors: CP-Carrillo, Air Dog, Muldoons Diesel Performance, Power Driven Diesel, Diesel Performance Converters
|
|
|
|
|
12-07-2016, 10:08 PM
|
#1079
|
Name: NakeDiesel
Title: Smoke'n in the Mud
Status: Not Here
Join Date: Jan 2010
Location: Hominy, OK
Member`s Gallery
Posts: 1,116
|
__________________
2005 Dodge Ram 3500 2x4 QC
1999 Dodge Ram 2500 4x4 QC
Coaltrain - 1946 Dodge Power Wagon powered by a little modified 12 valve.
Thanks to my sponsors: CP-Carrillo, Air Dog, Muldoons Diesel Performance, Power Driven Diesel, Diesel Performance Converters
|
|
|
|
|
12-10-2016, 08:29 PM
|
#1080
|
Name: NakeDiesel
Title: Smoke'n in the Mud
Status: Not Here
Join Date: Jan 2010
Location: Hominy, OK
Member`s Gallery
Posts: 1,116
|
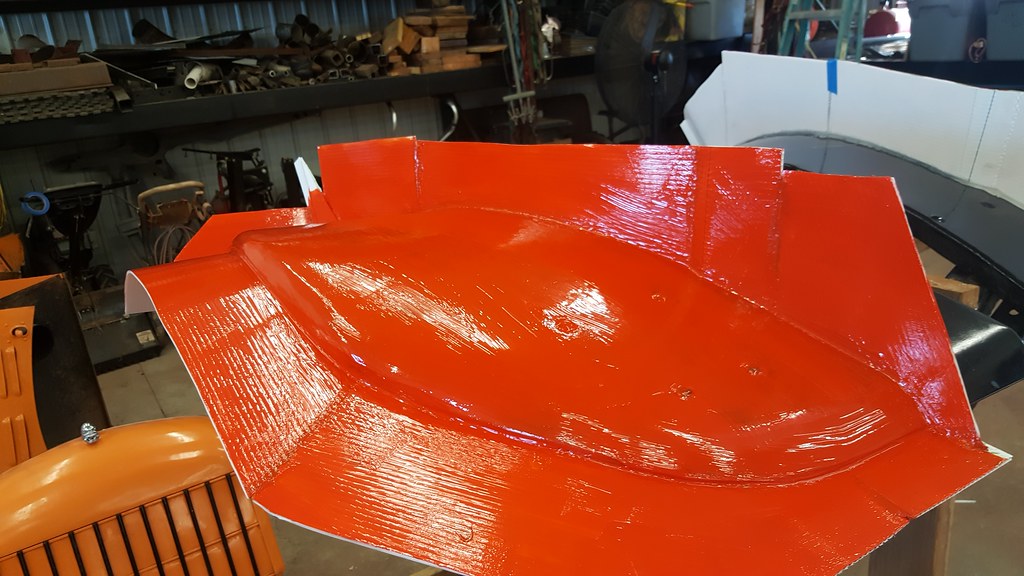
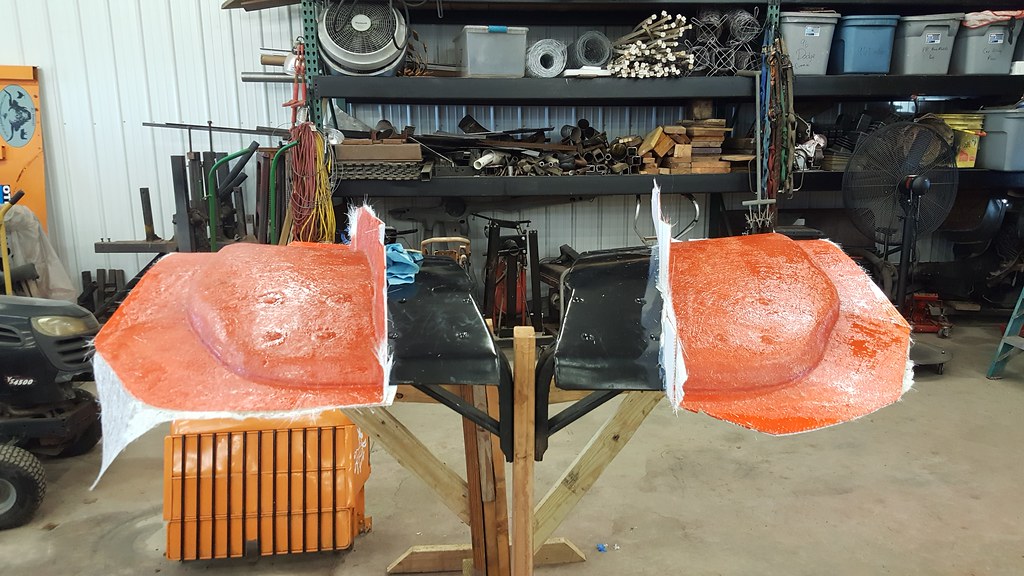
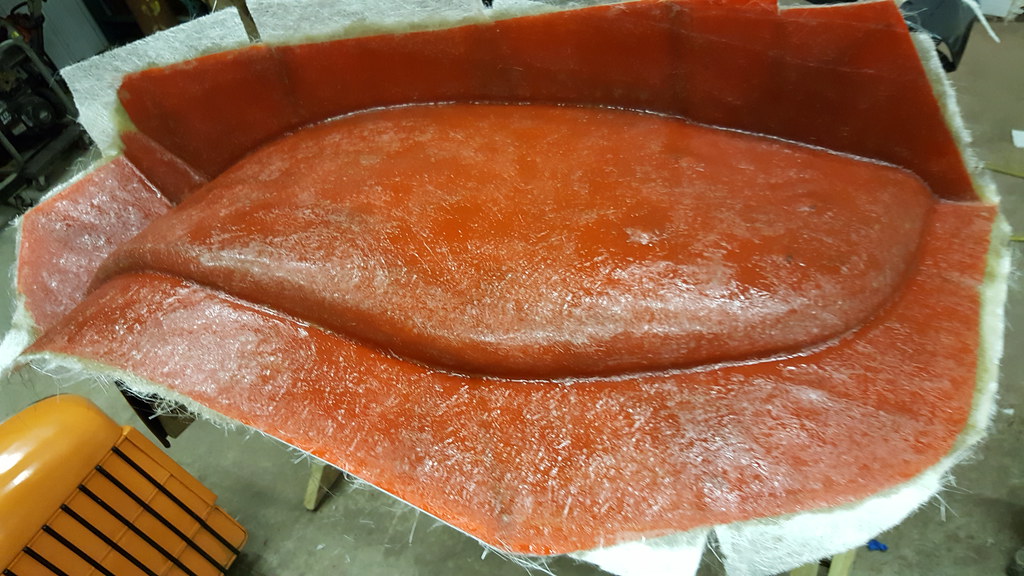
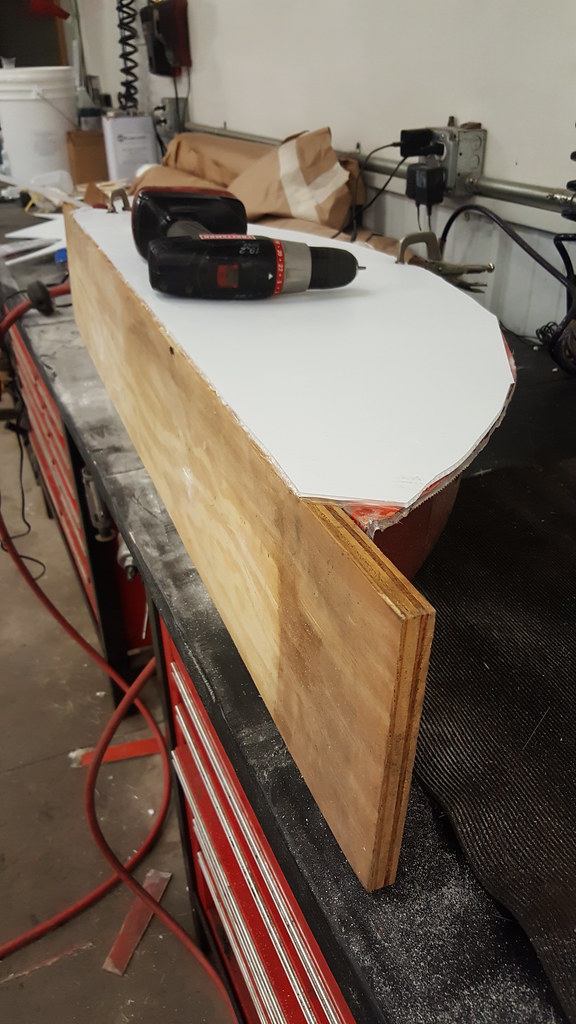
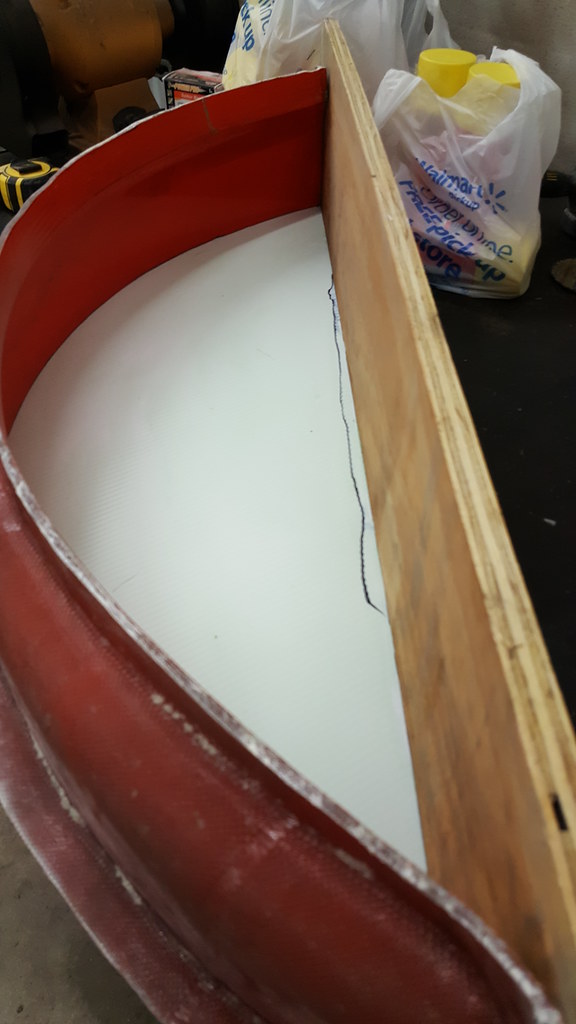
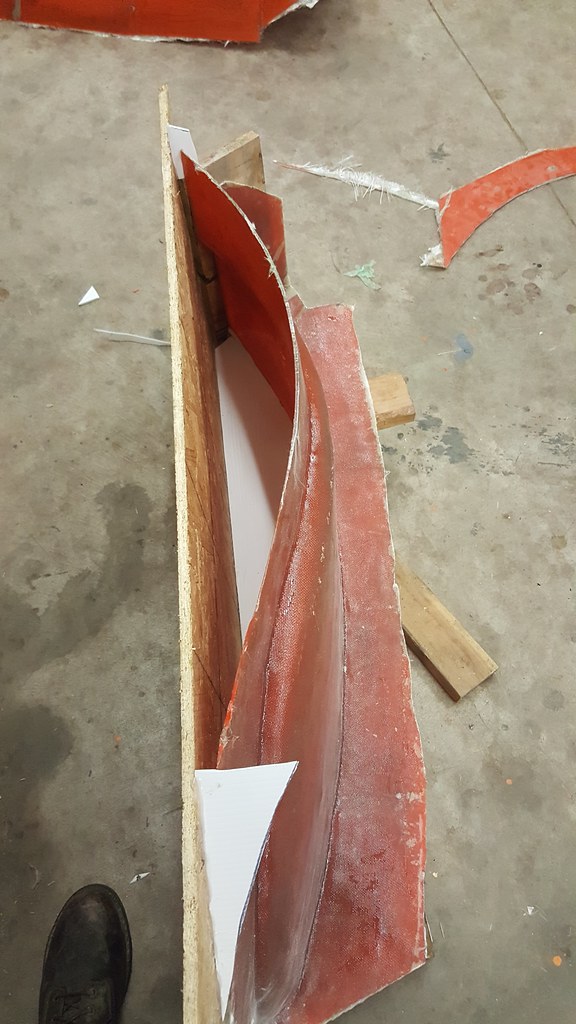
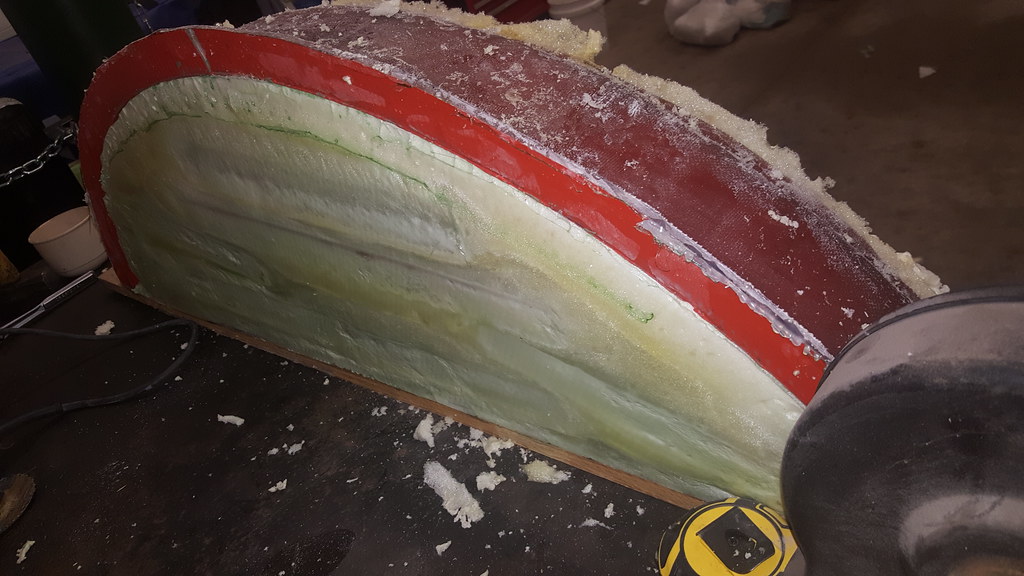
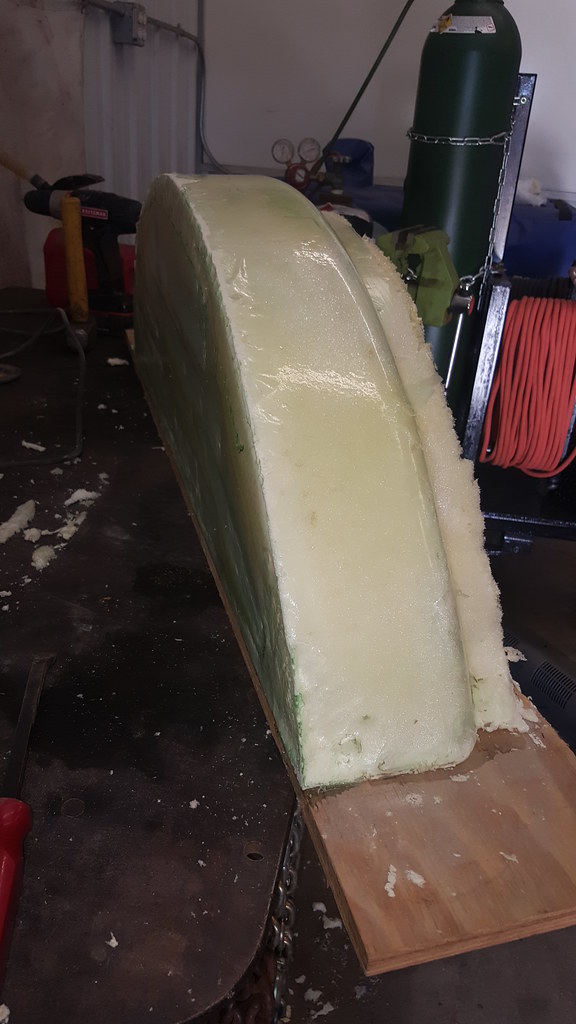
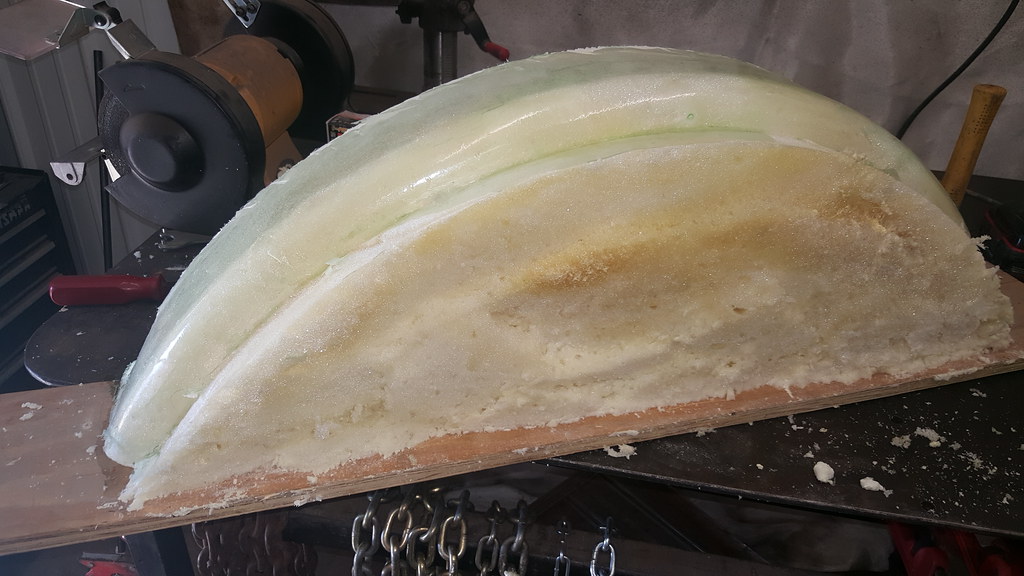
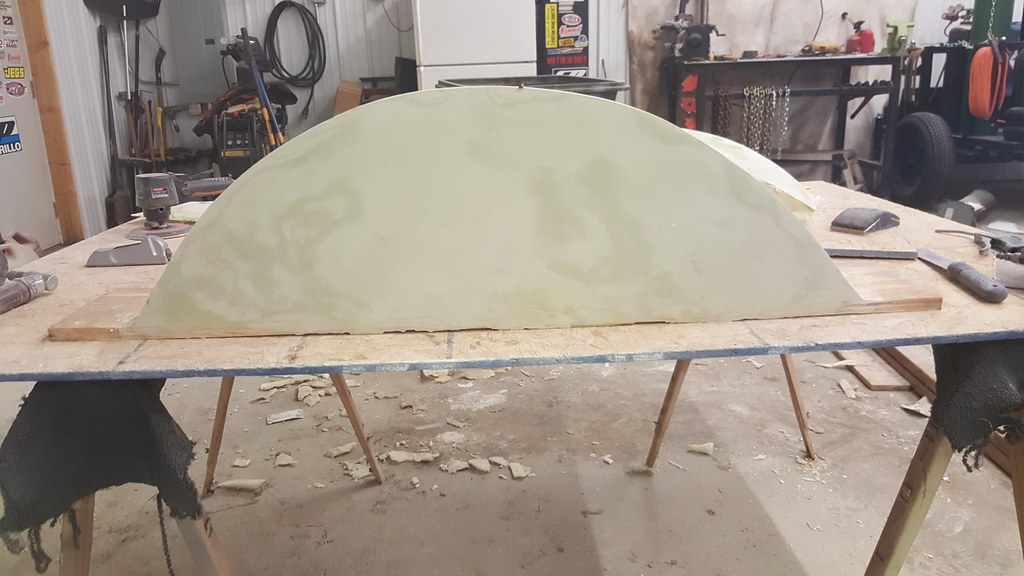
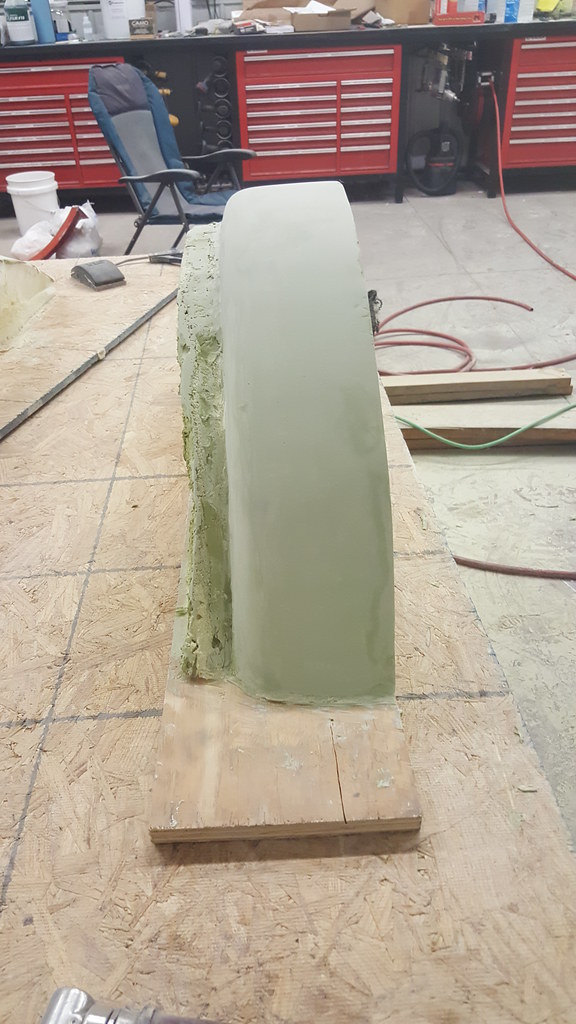
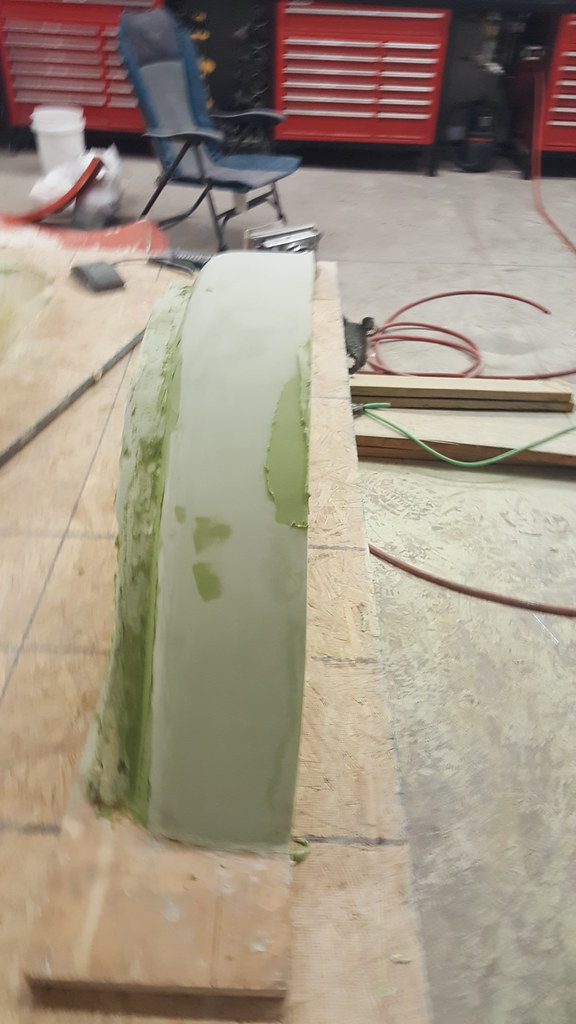
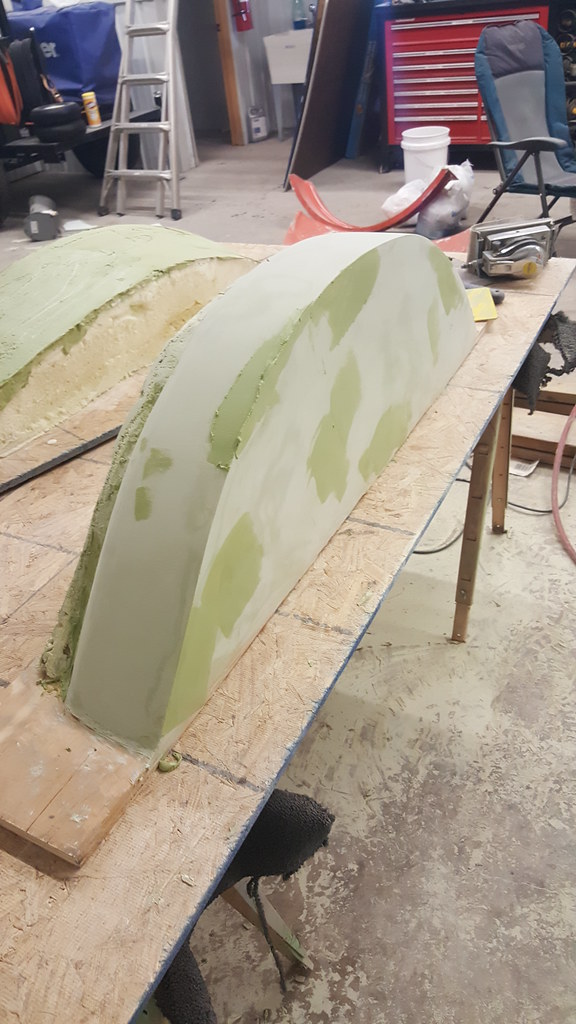
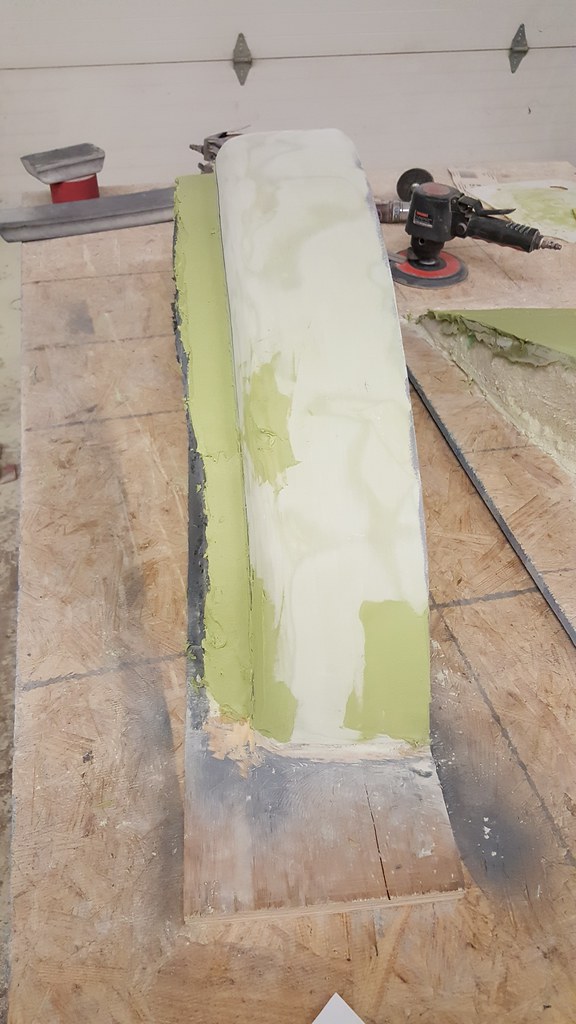
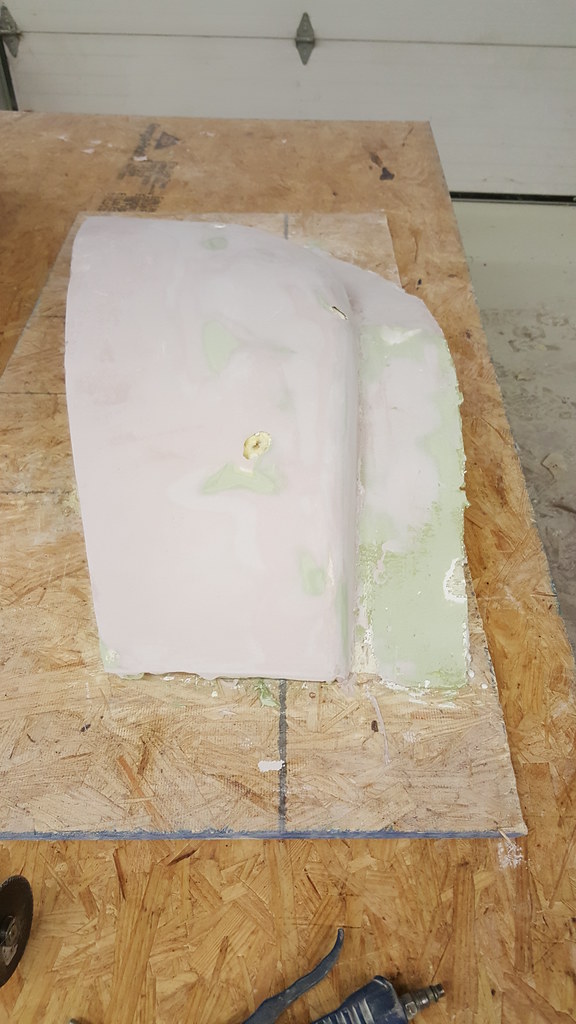
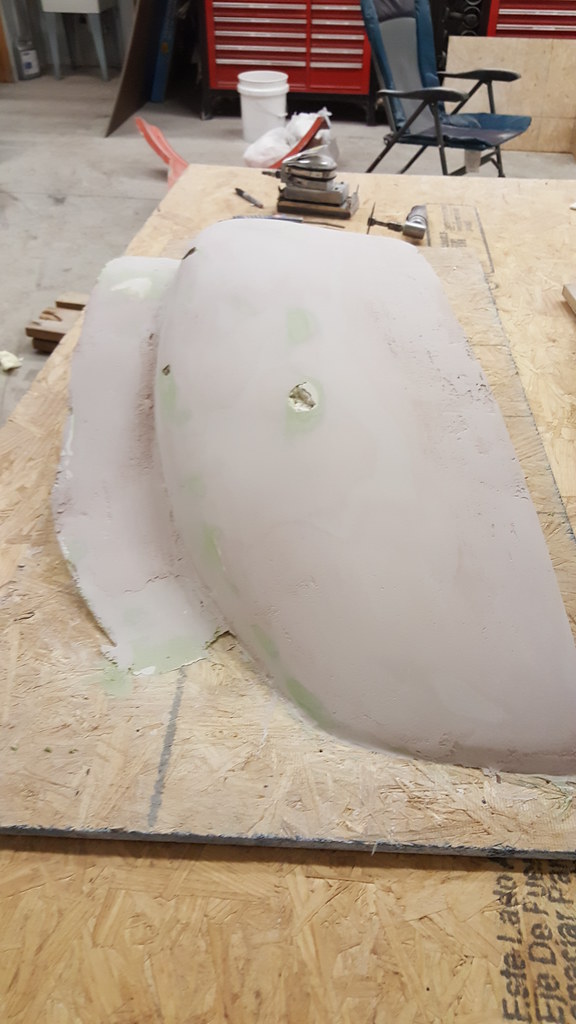
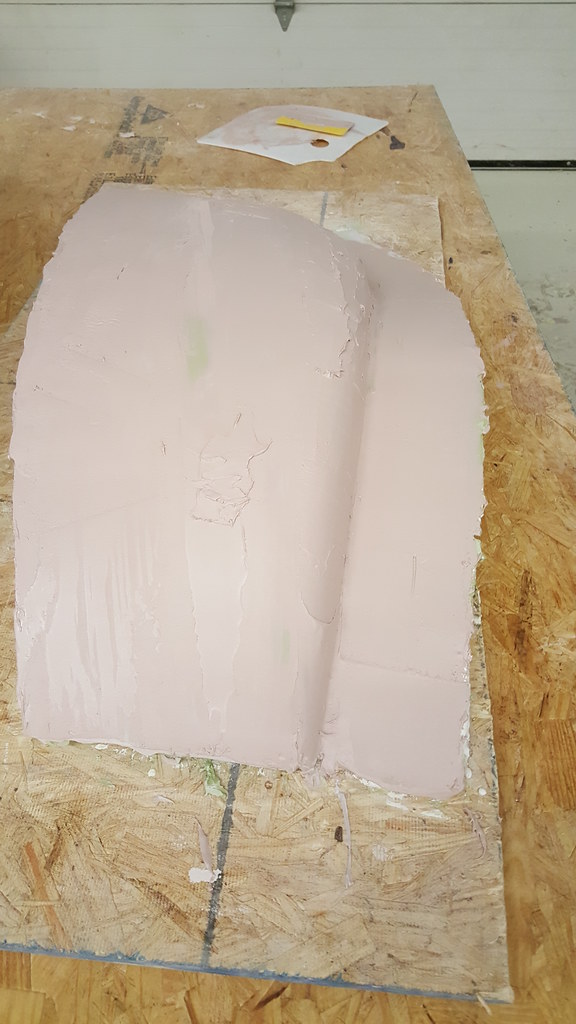
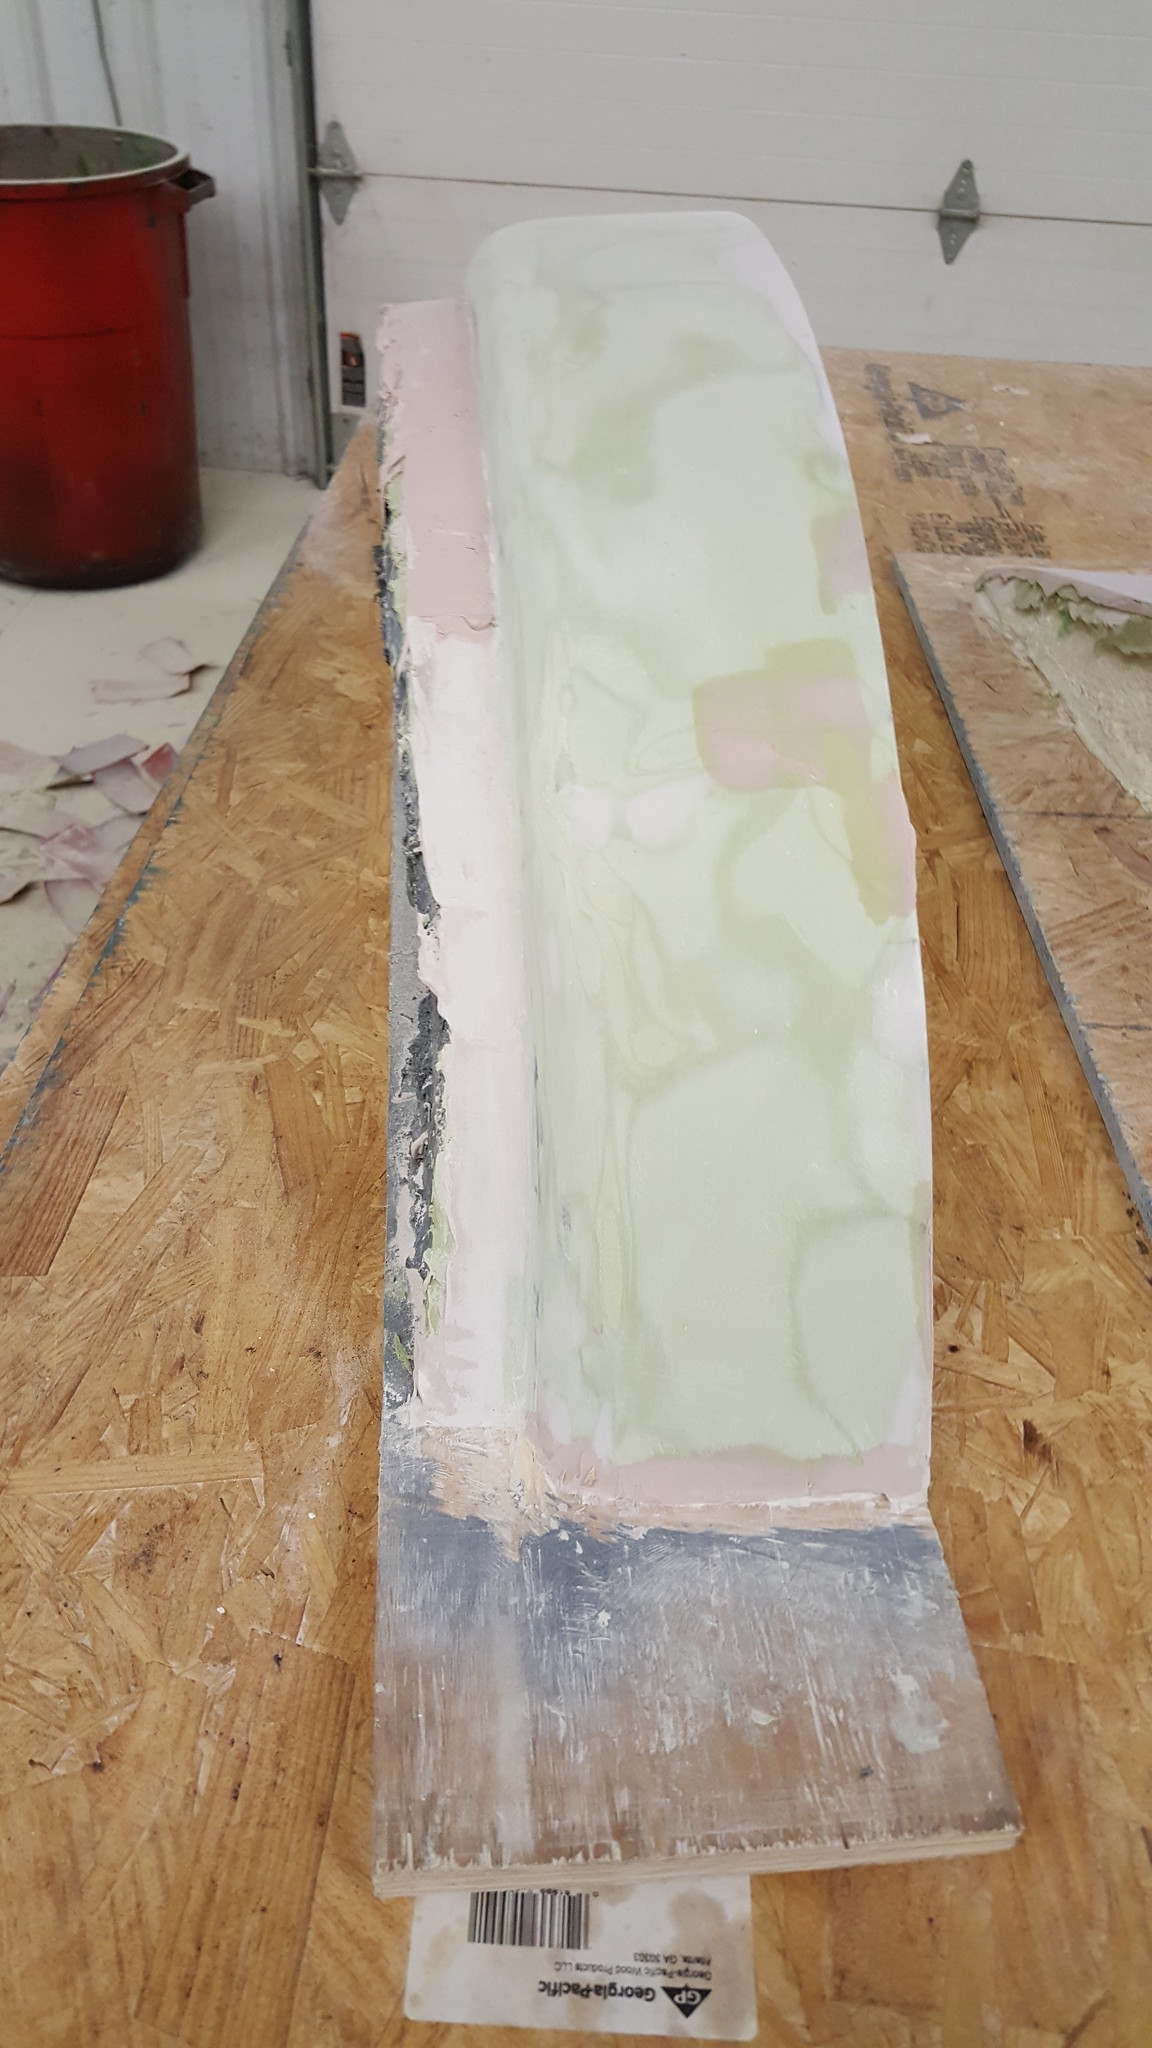
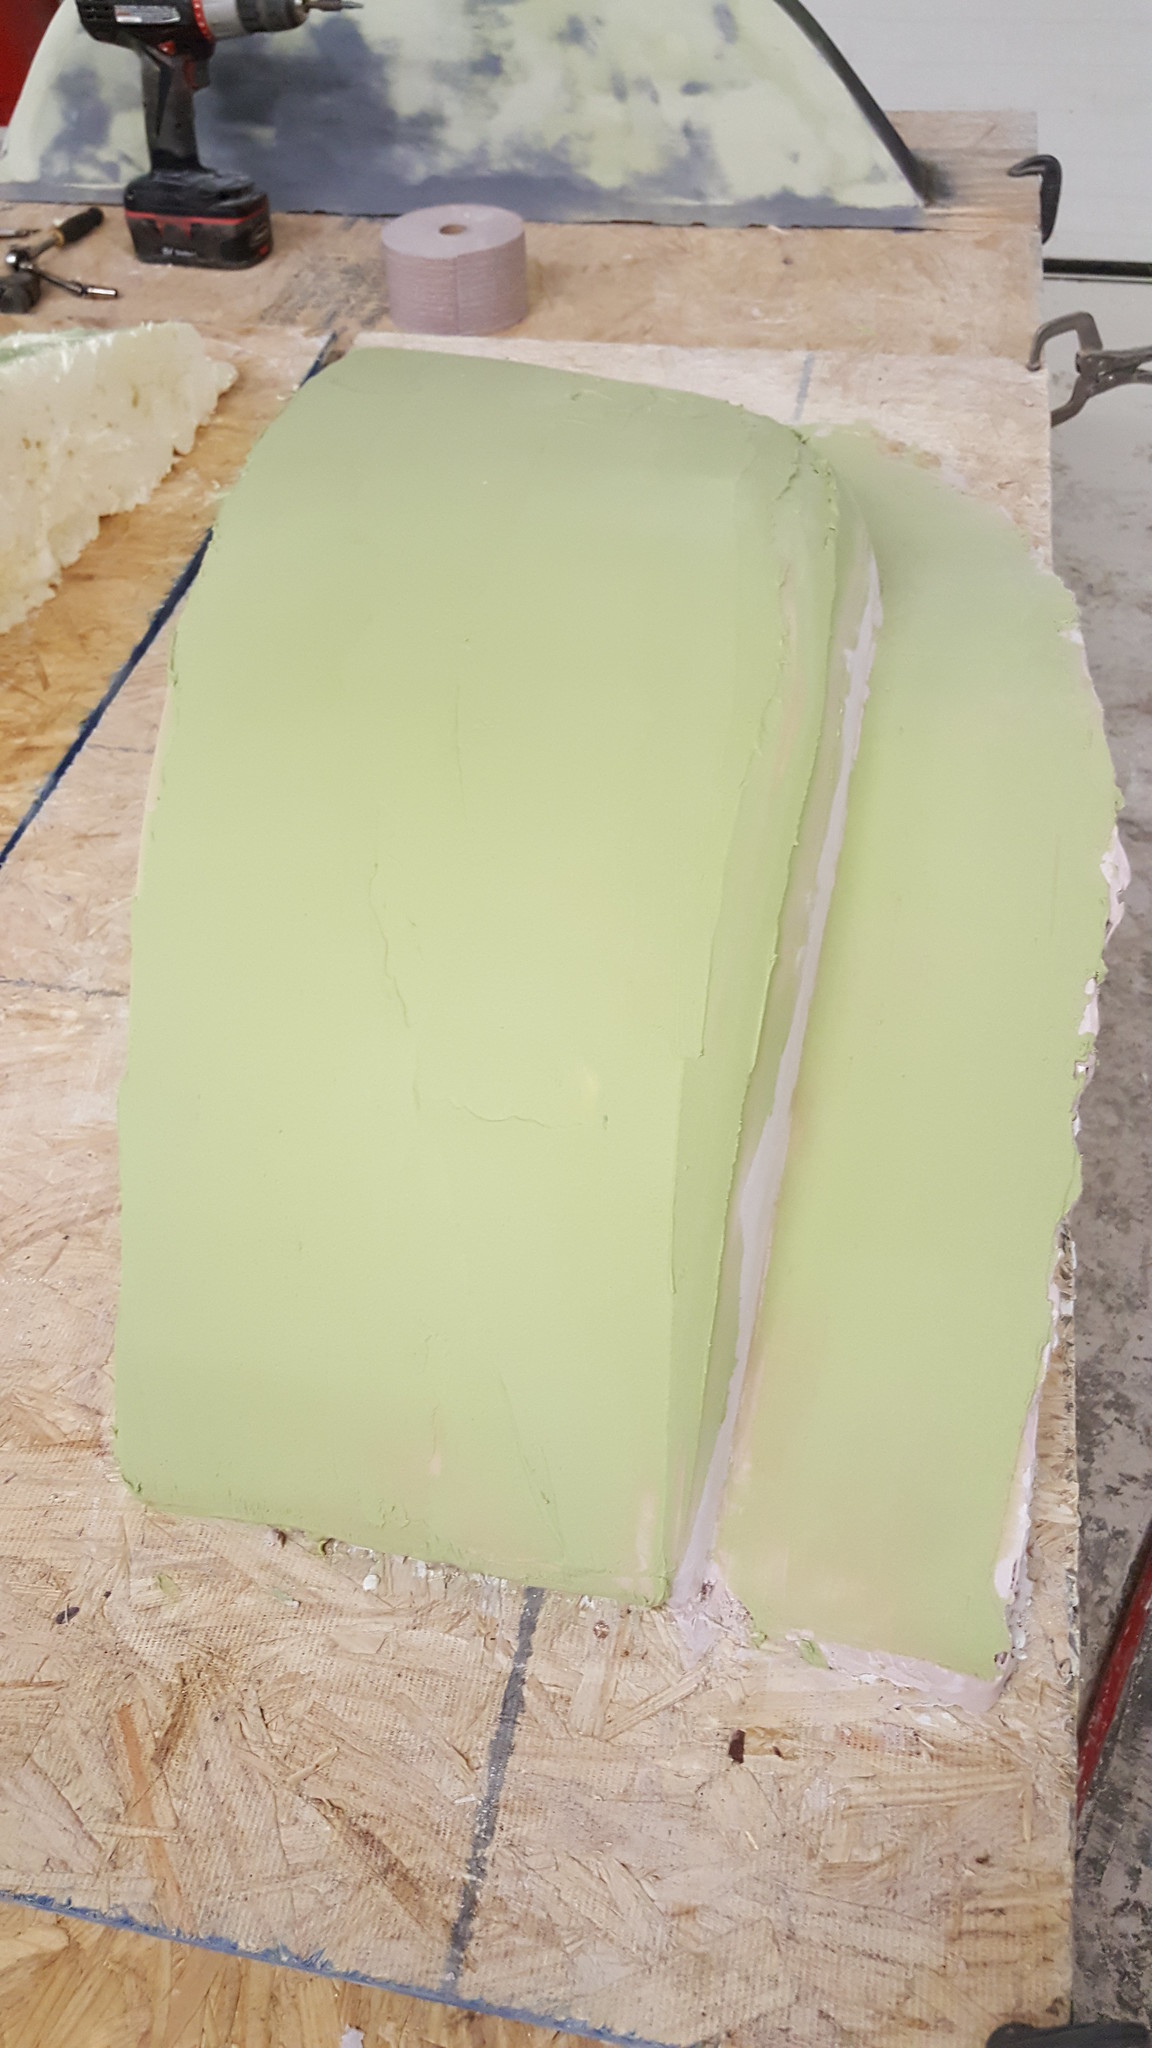
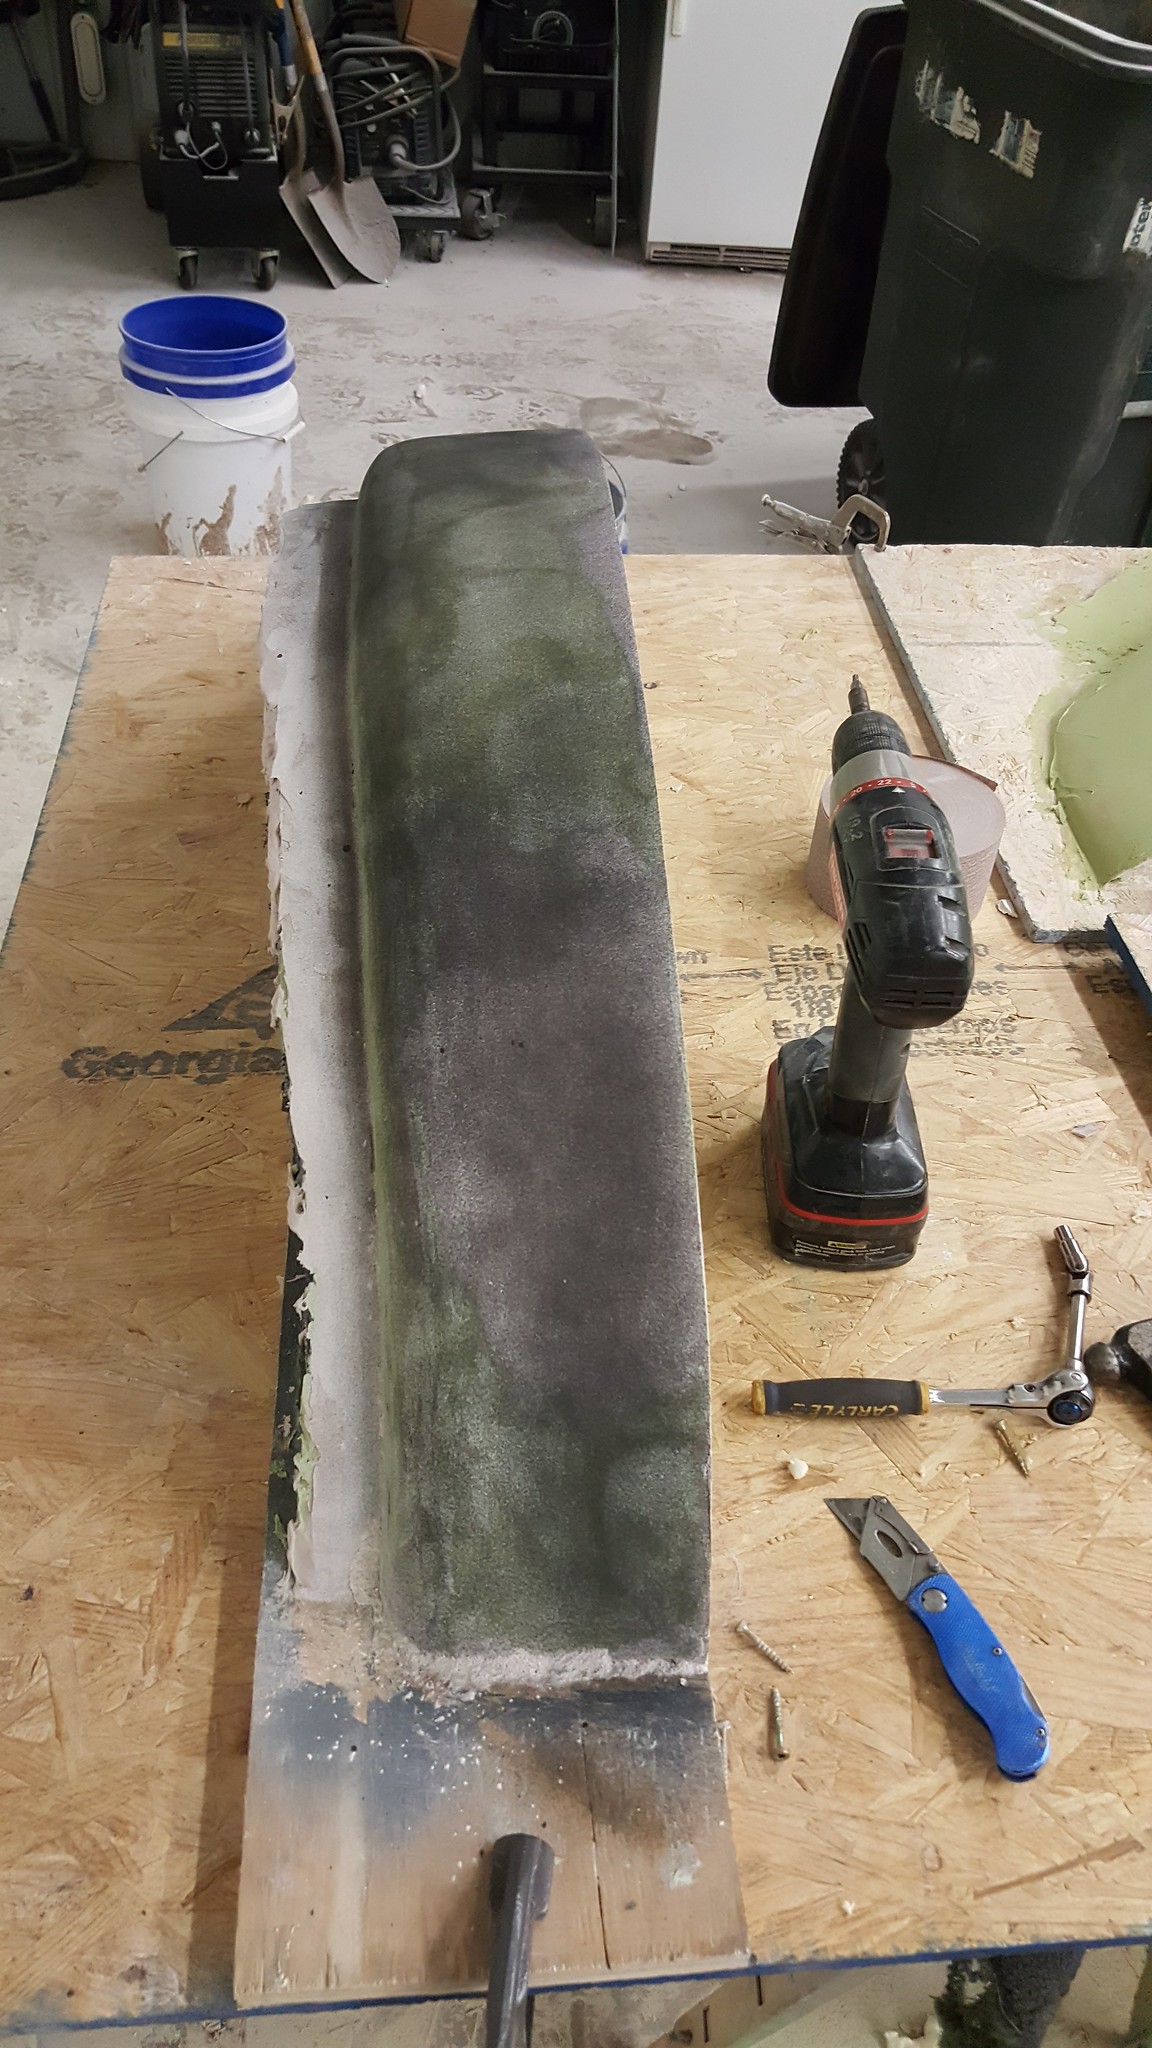
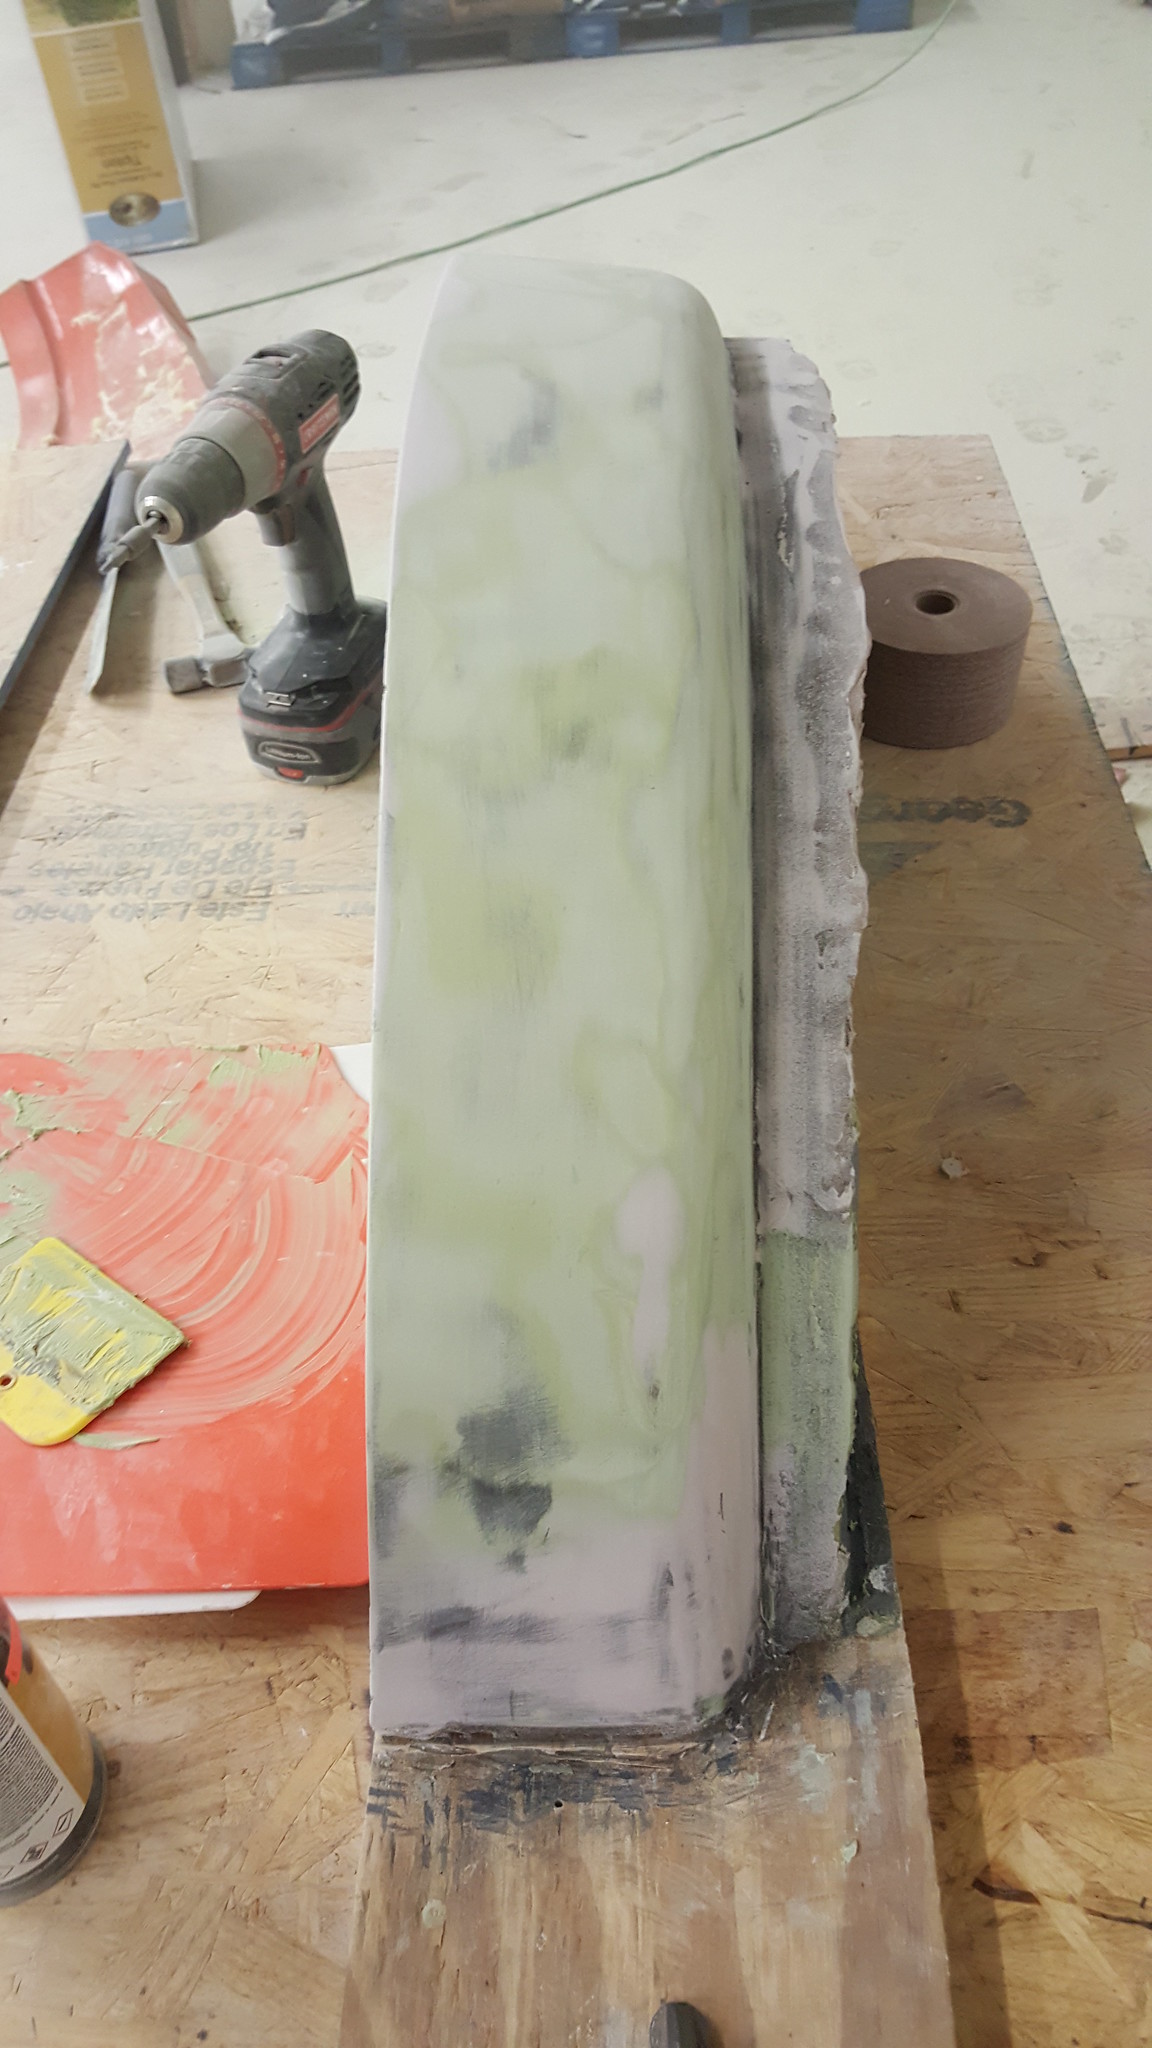
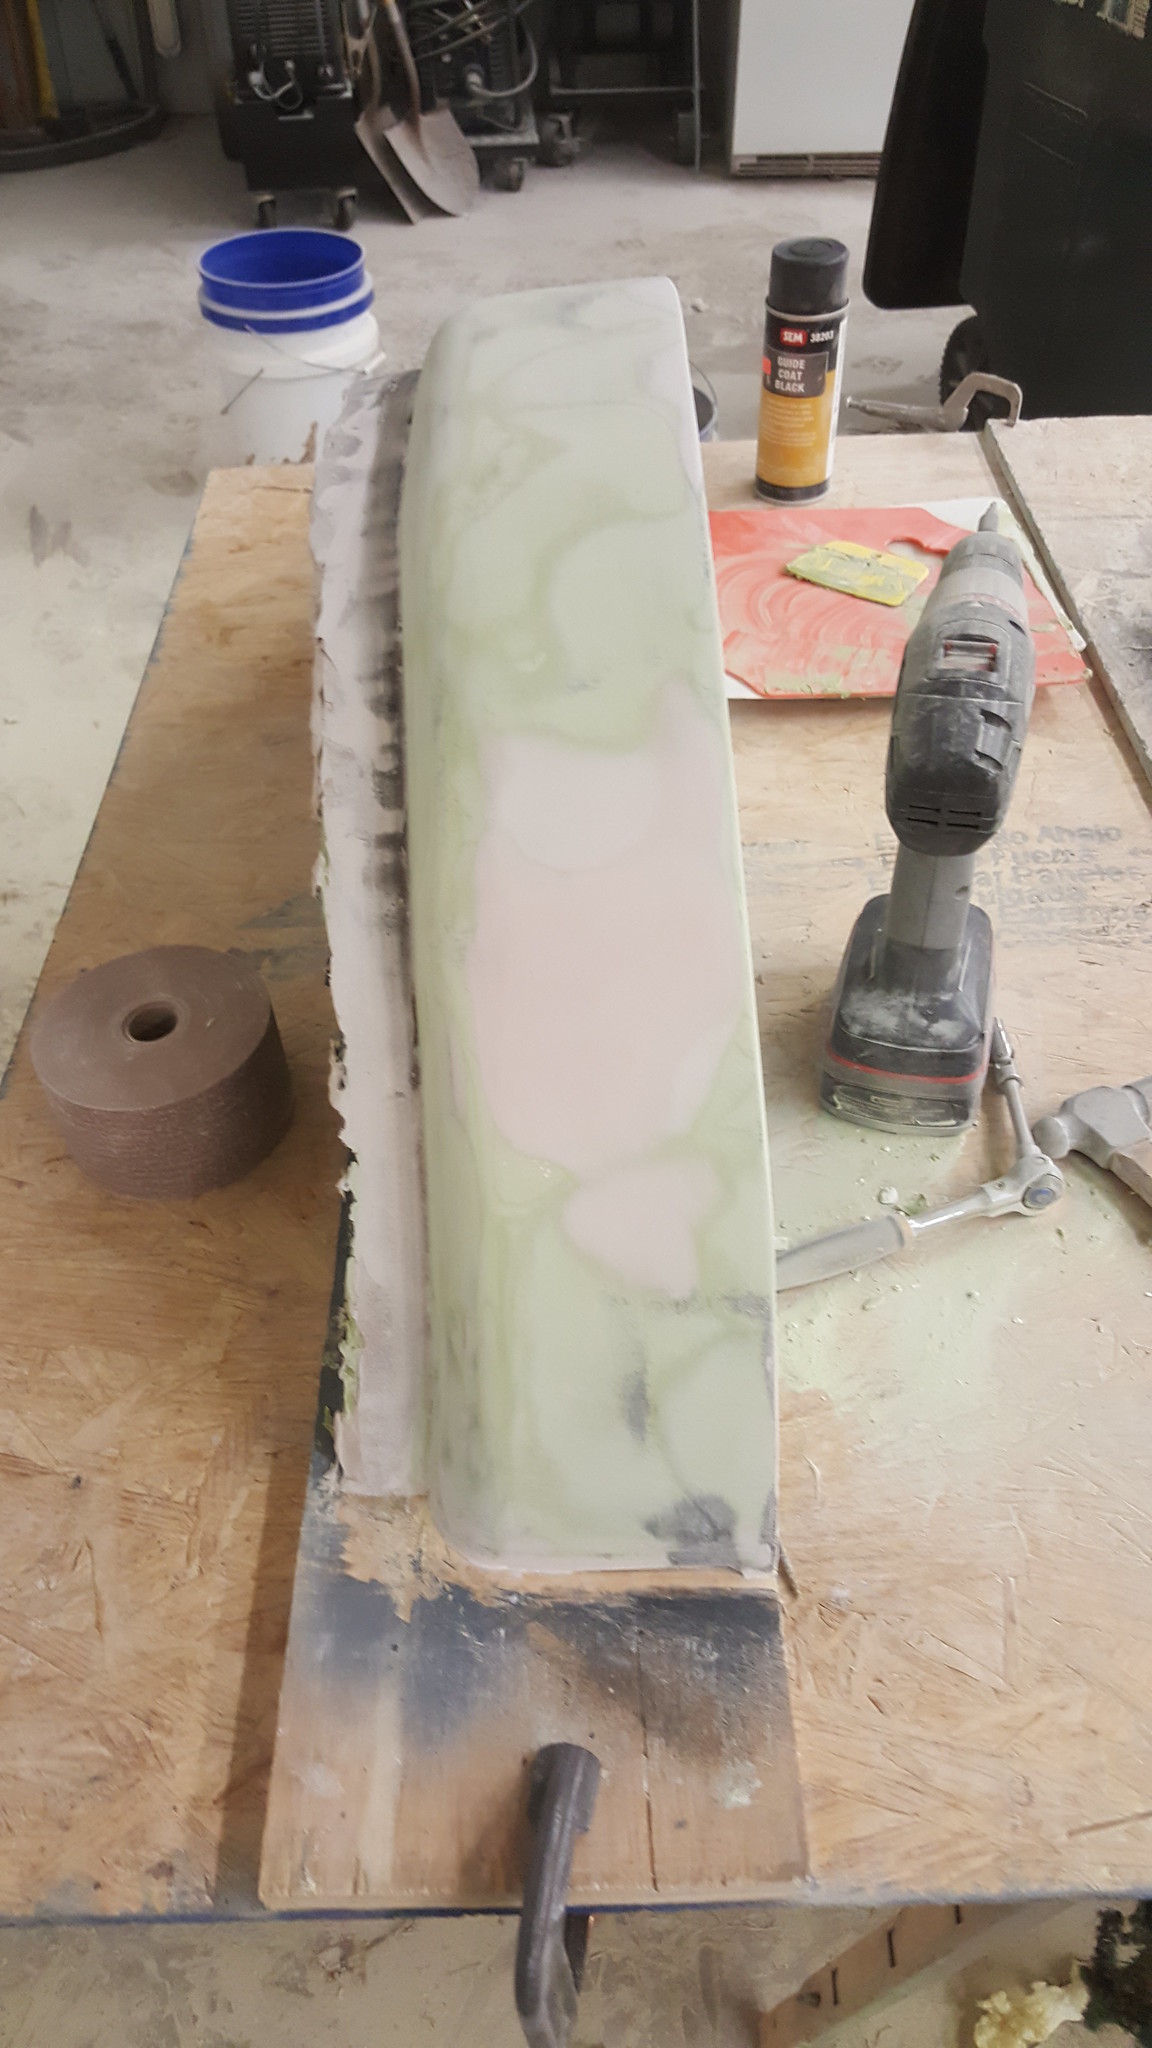
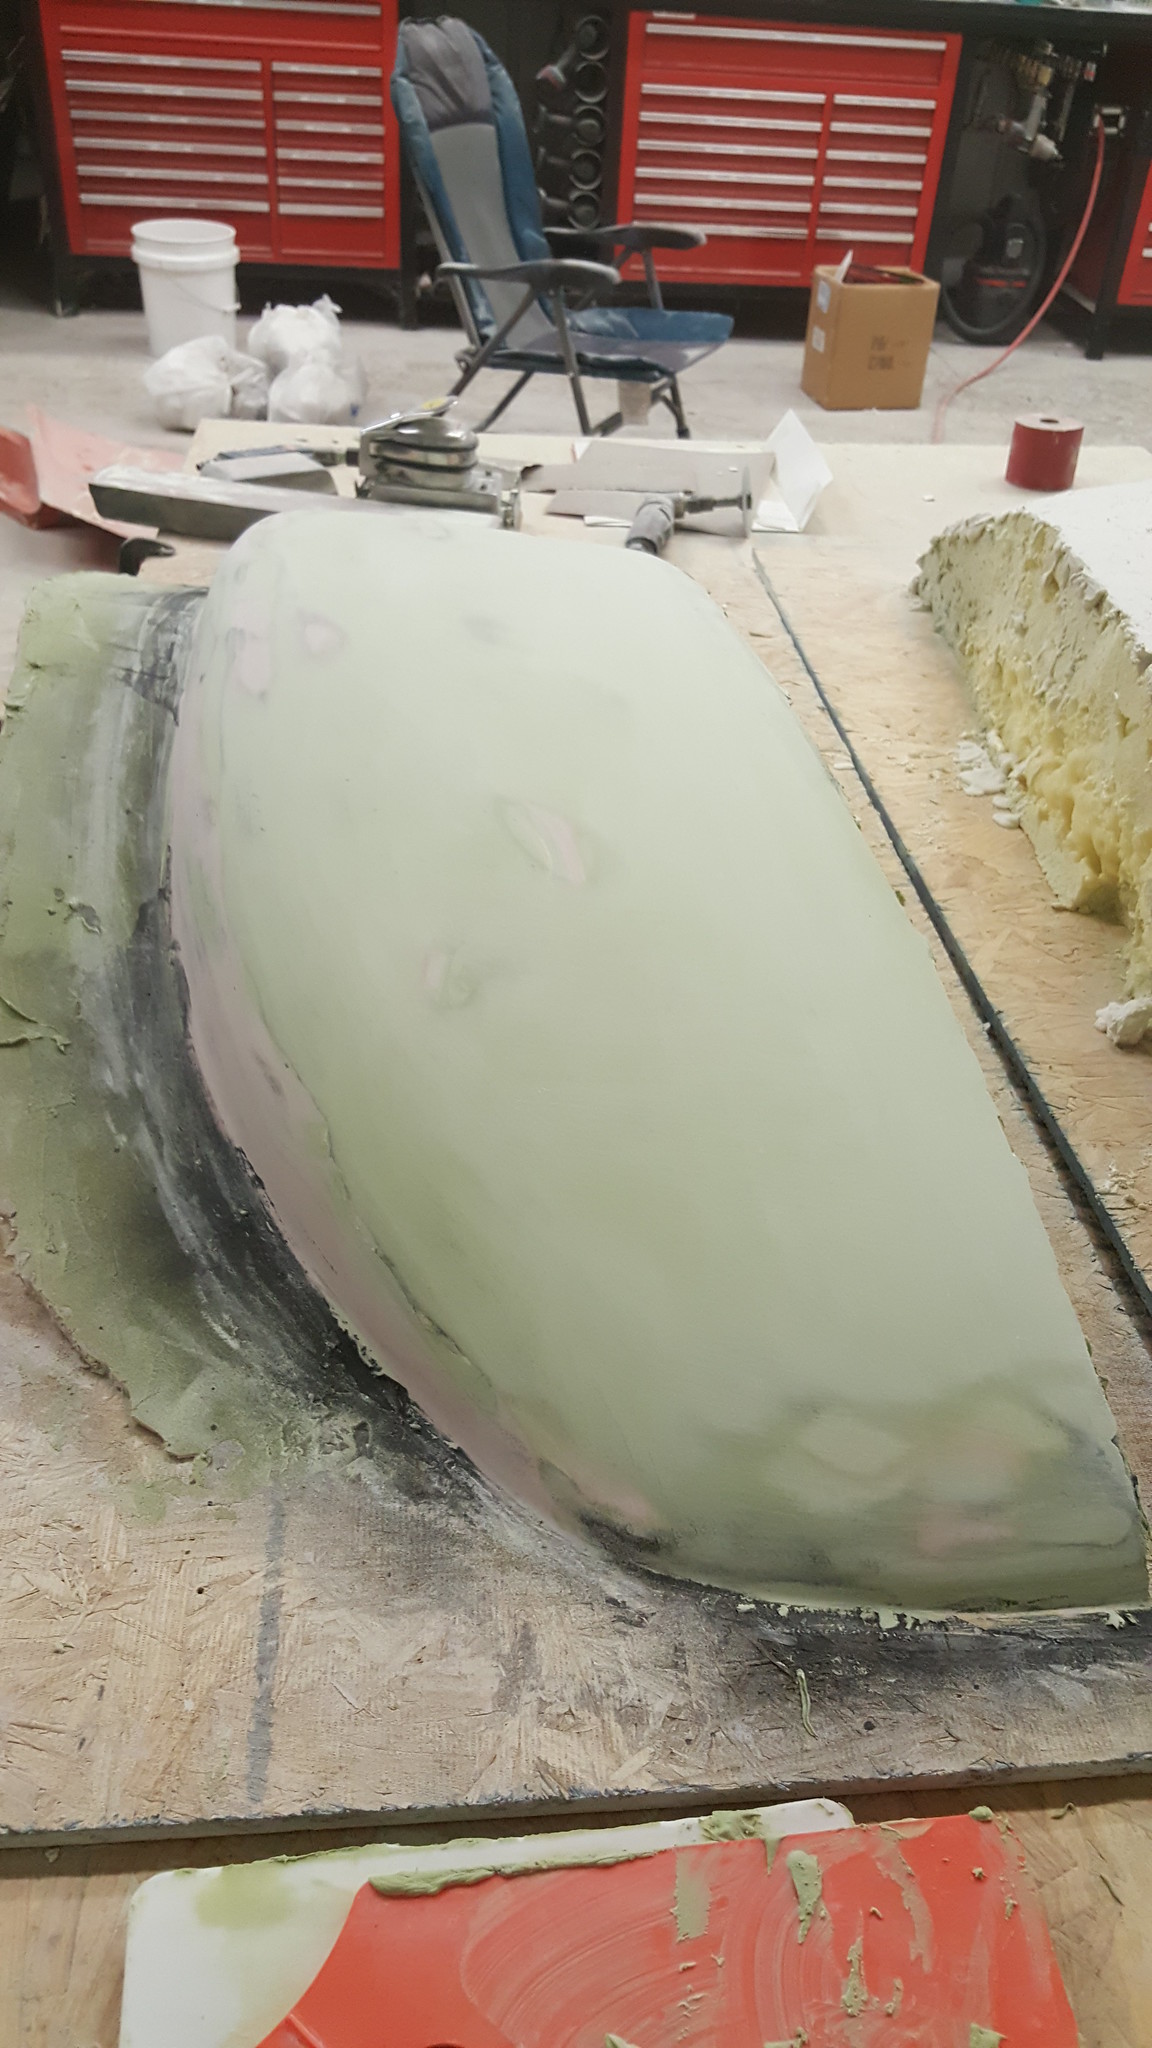
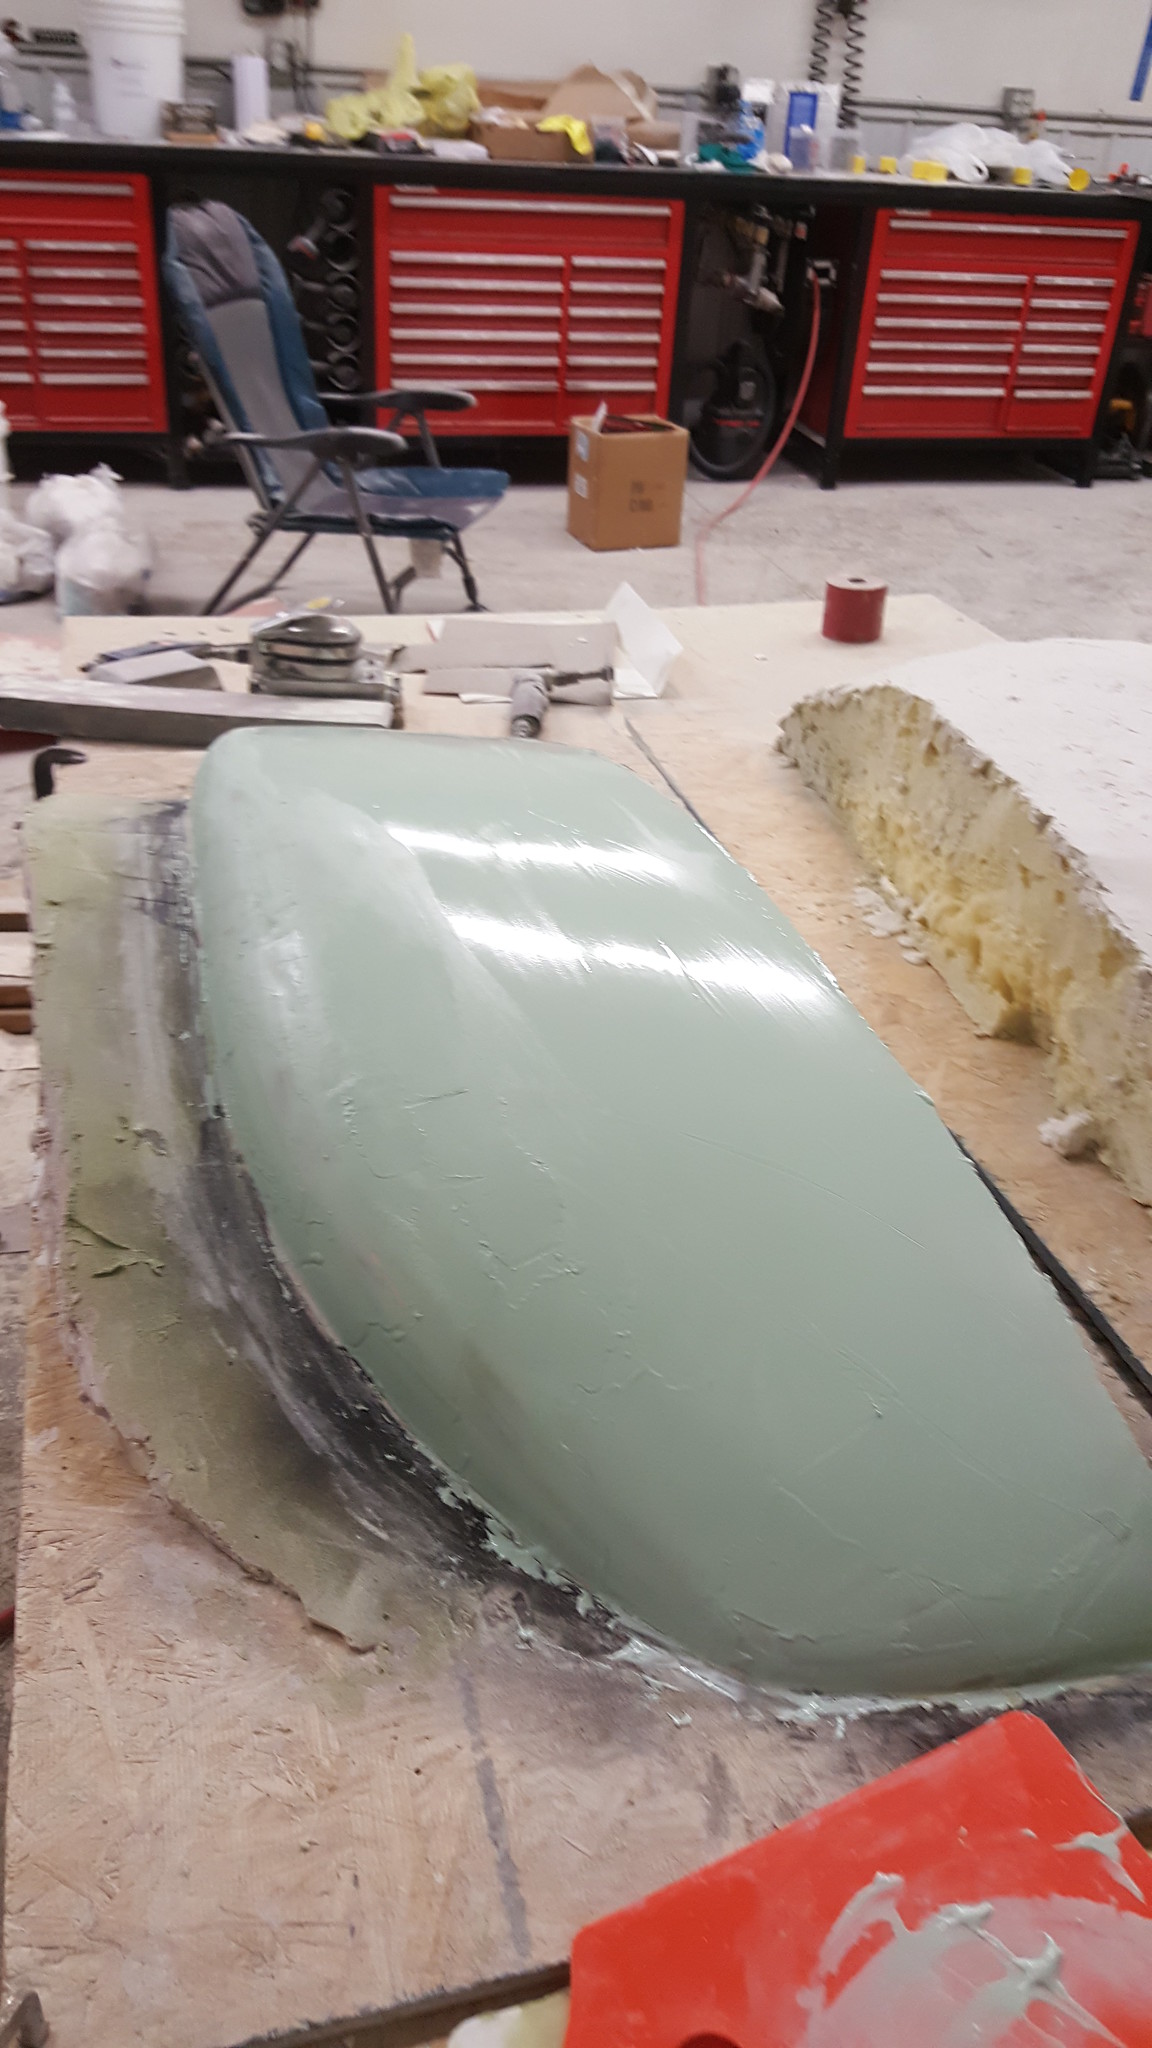
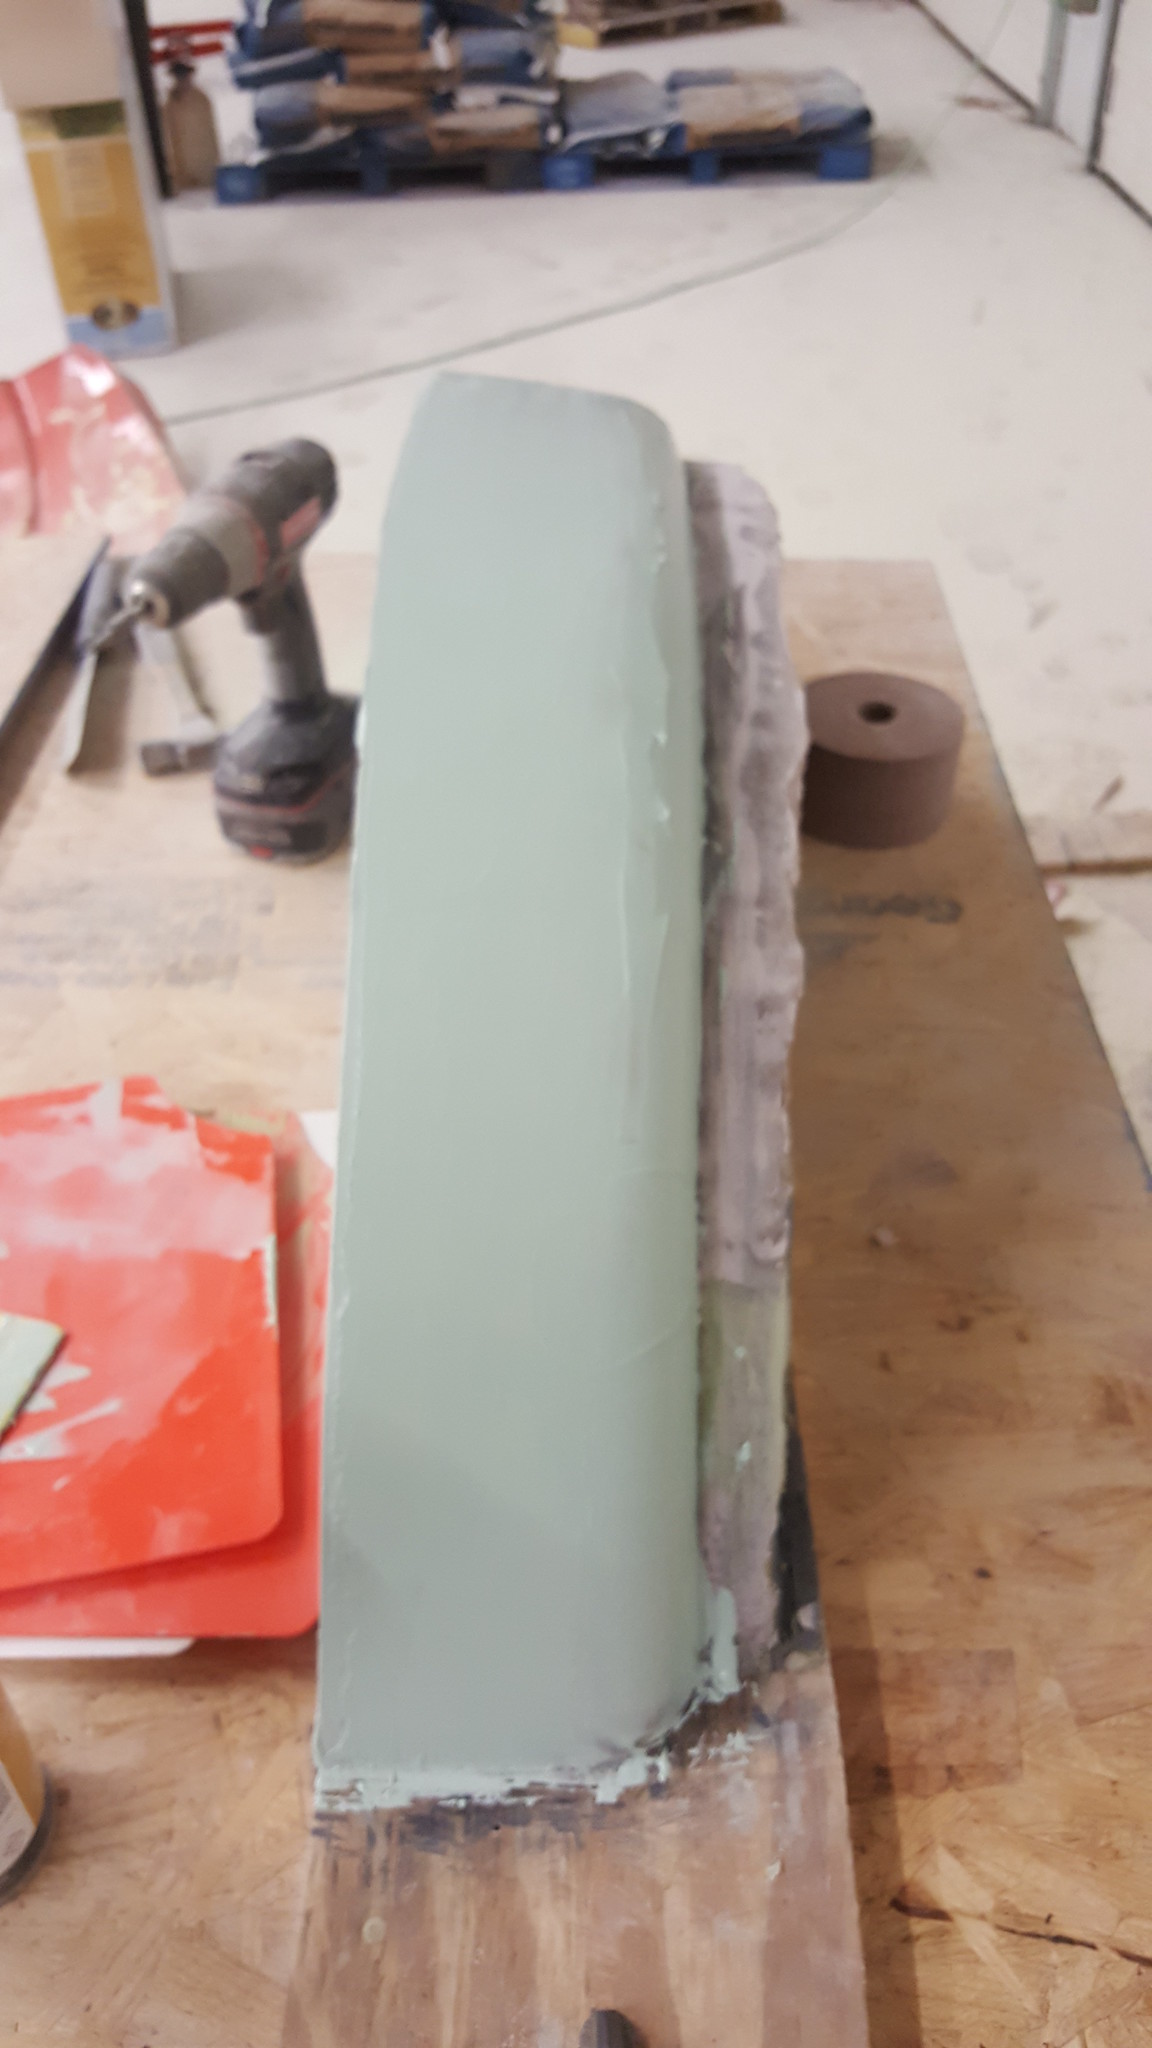
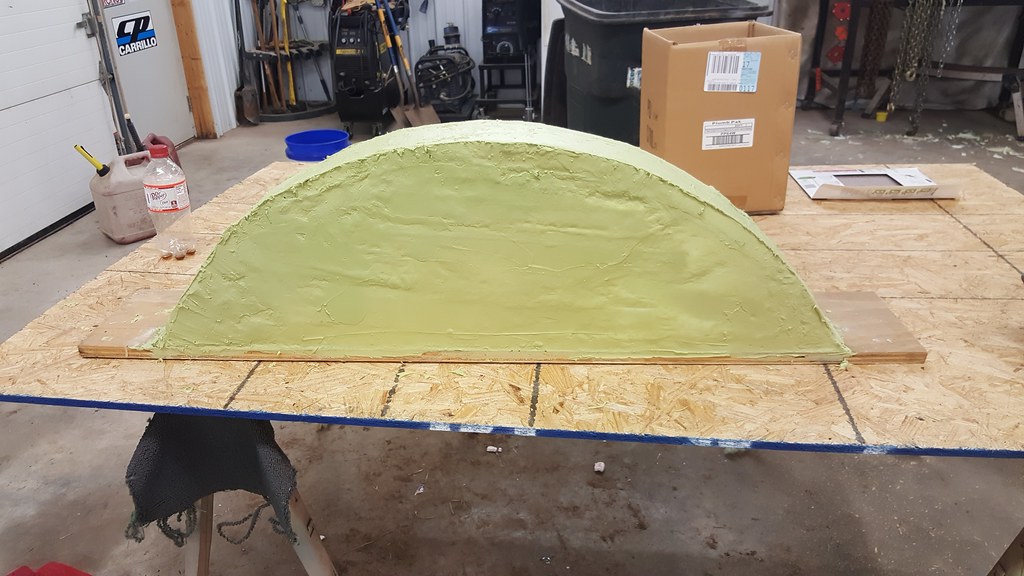
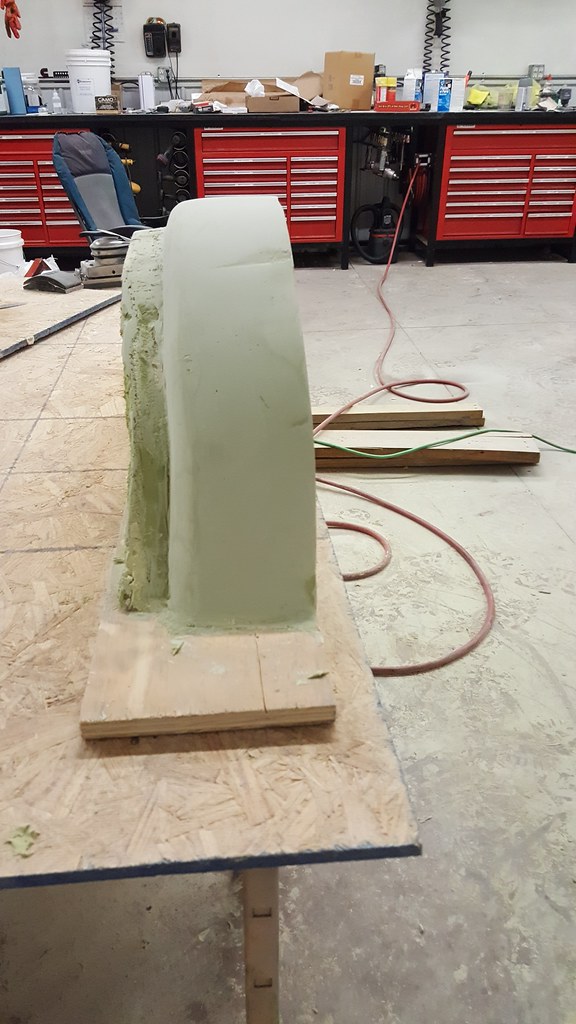
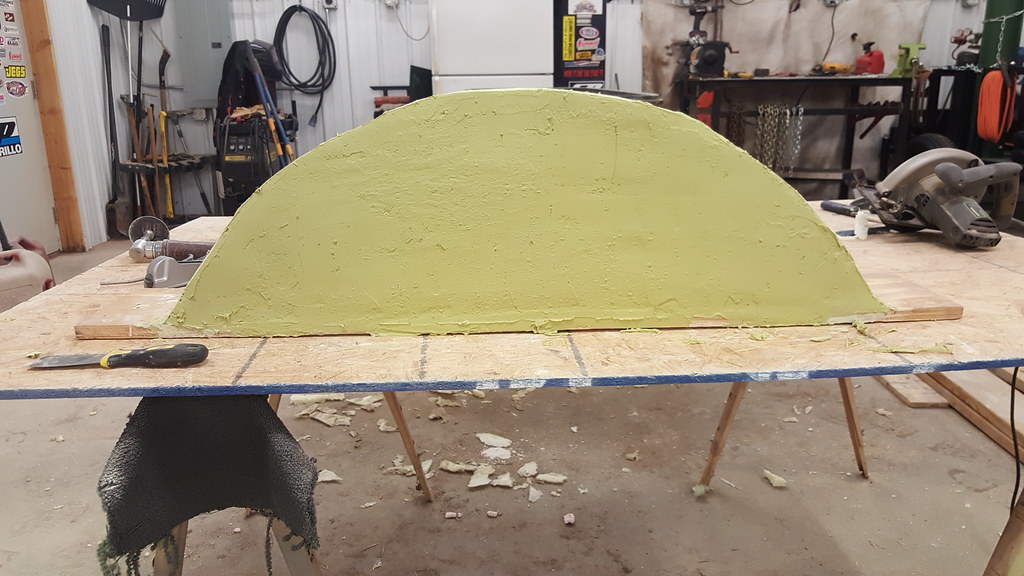
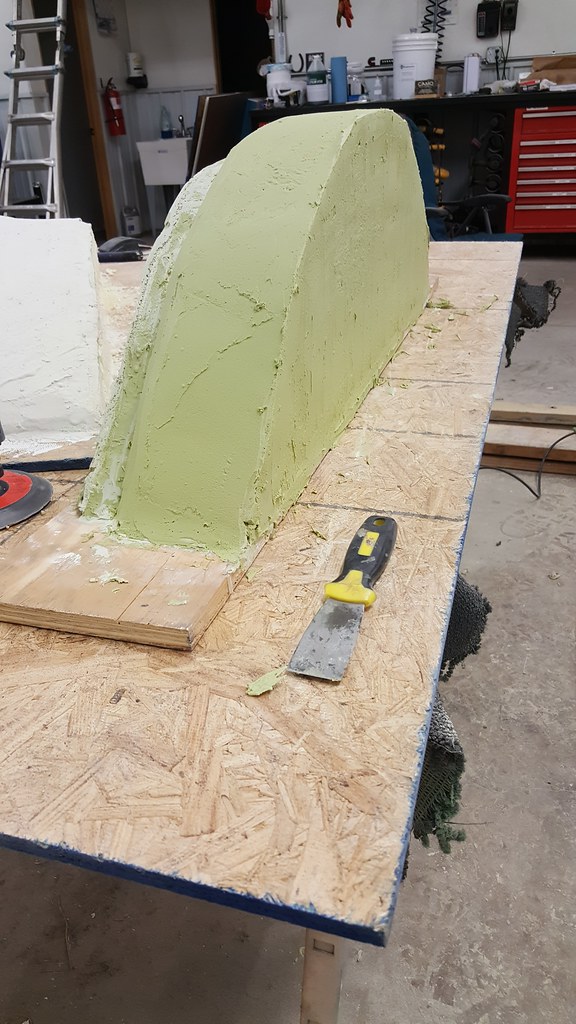
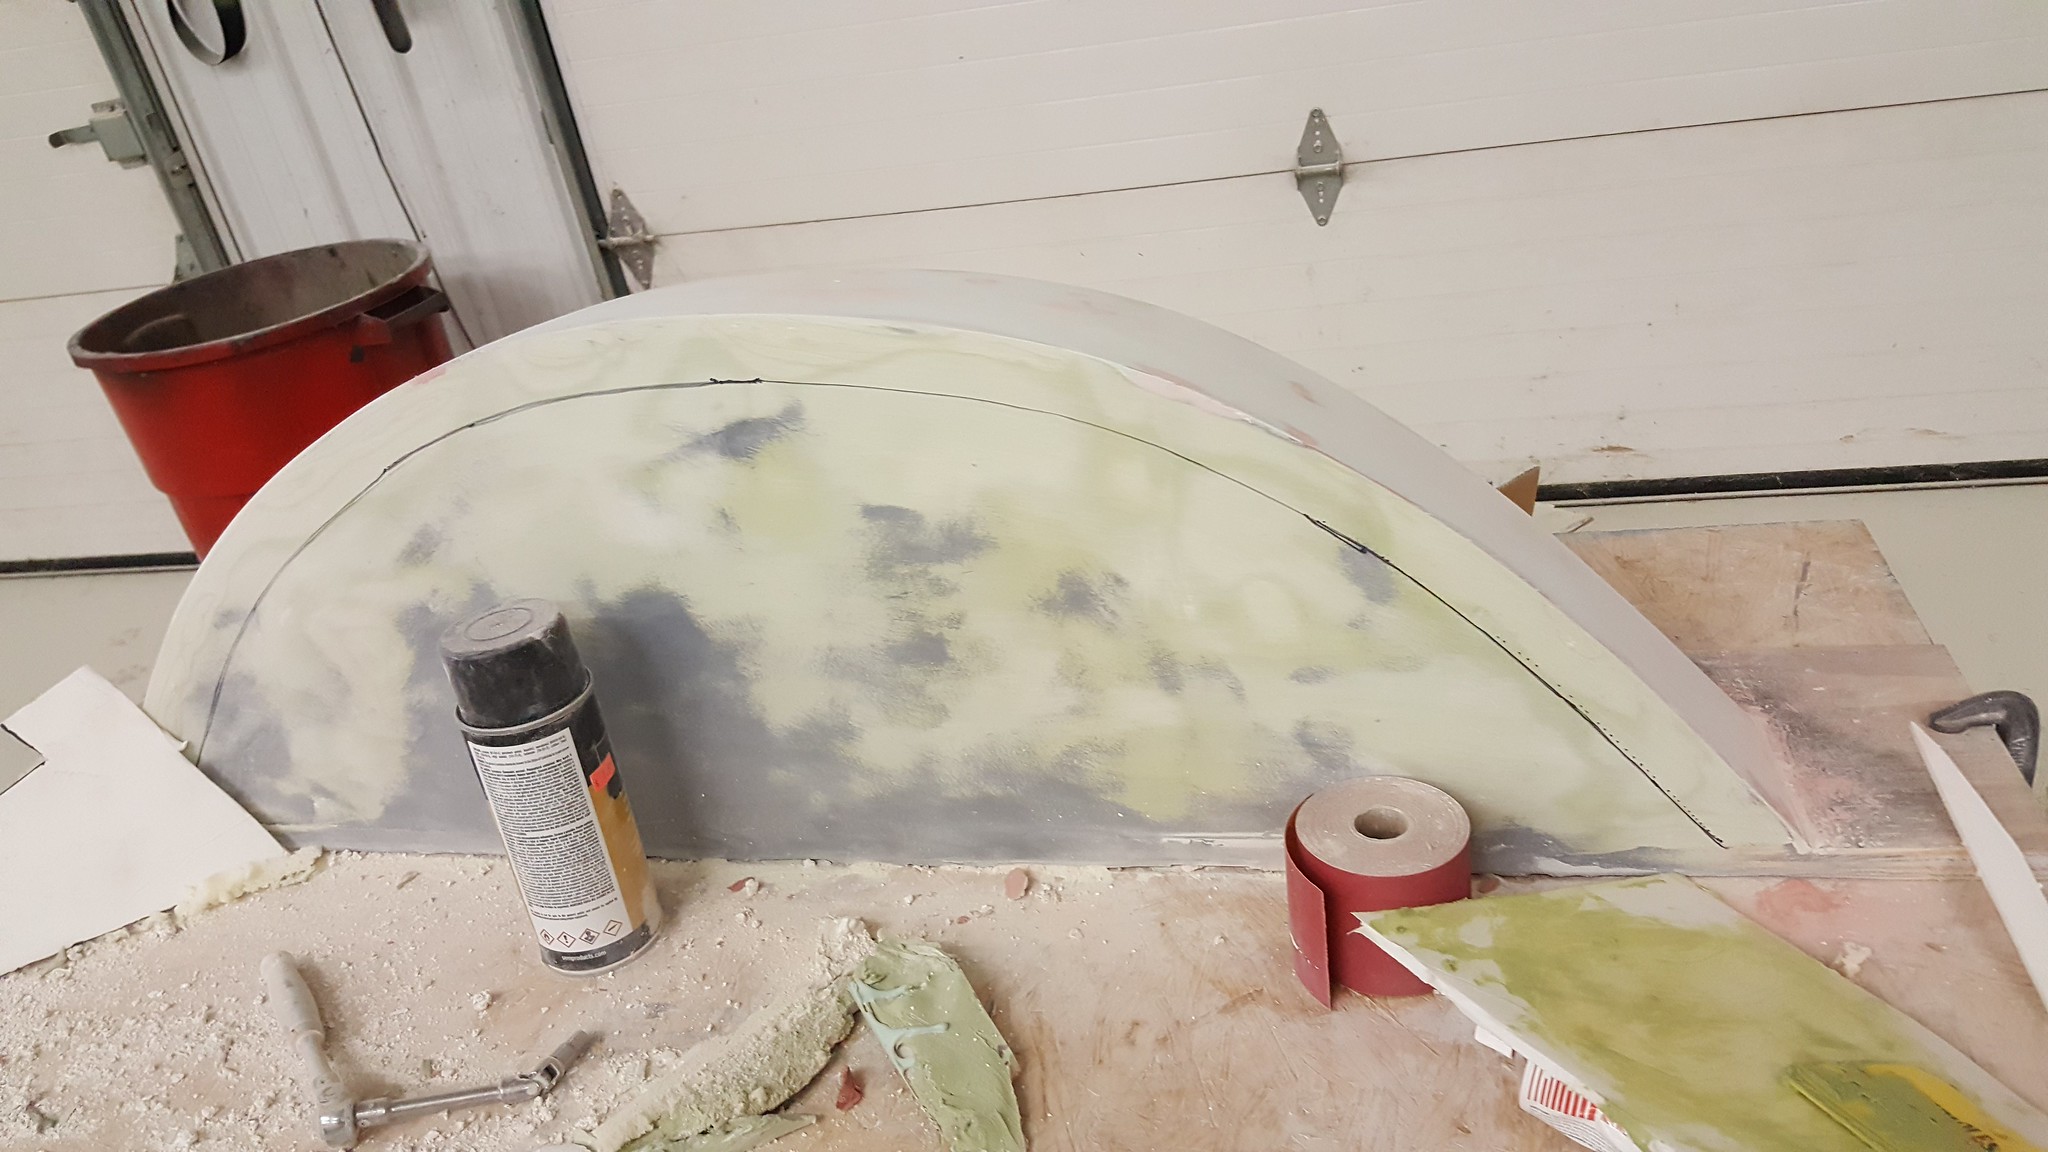
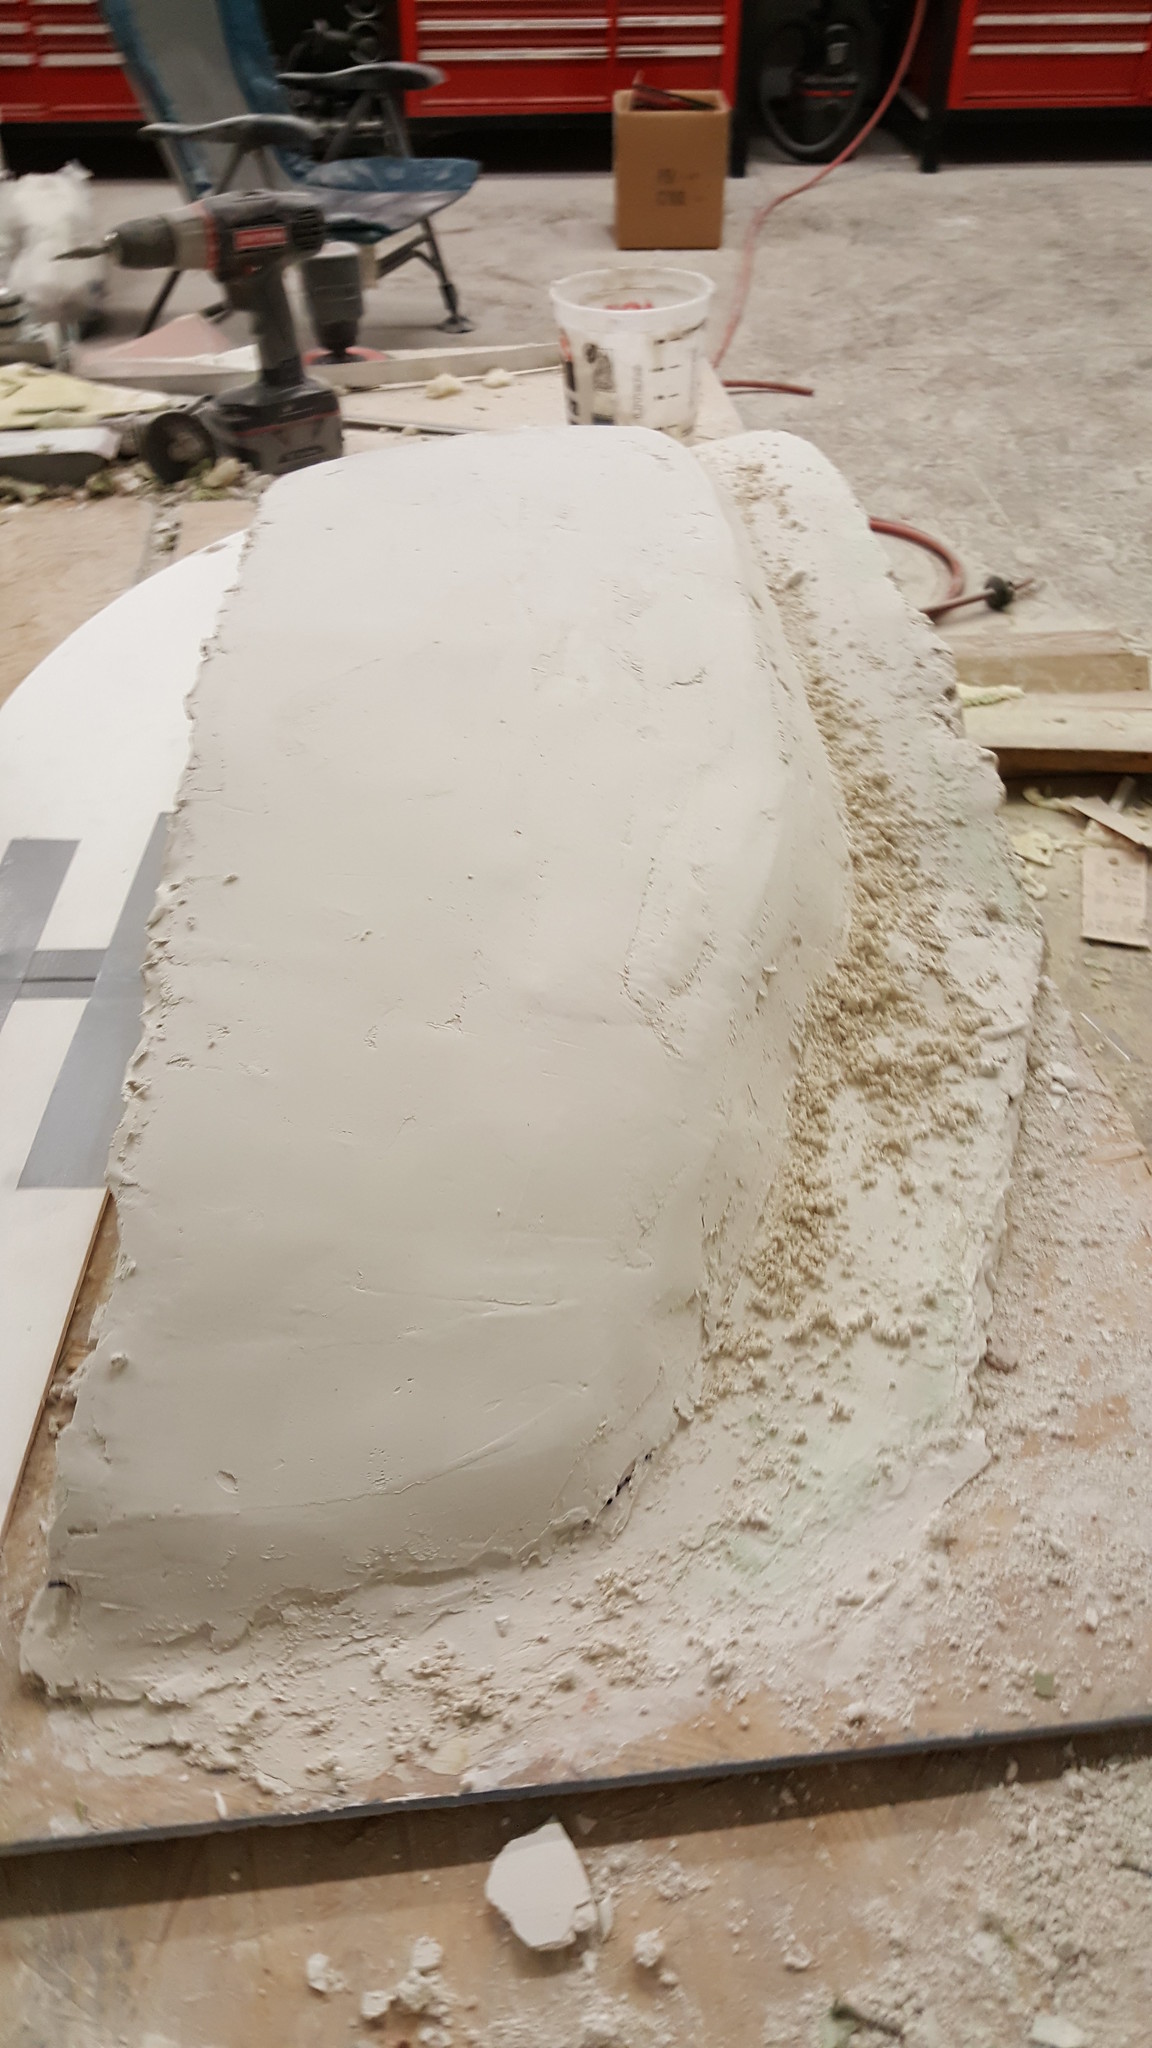
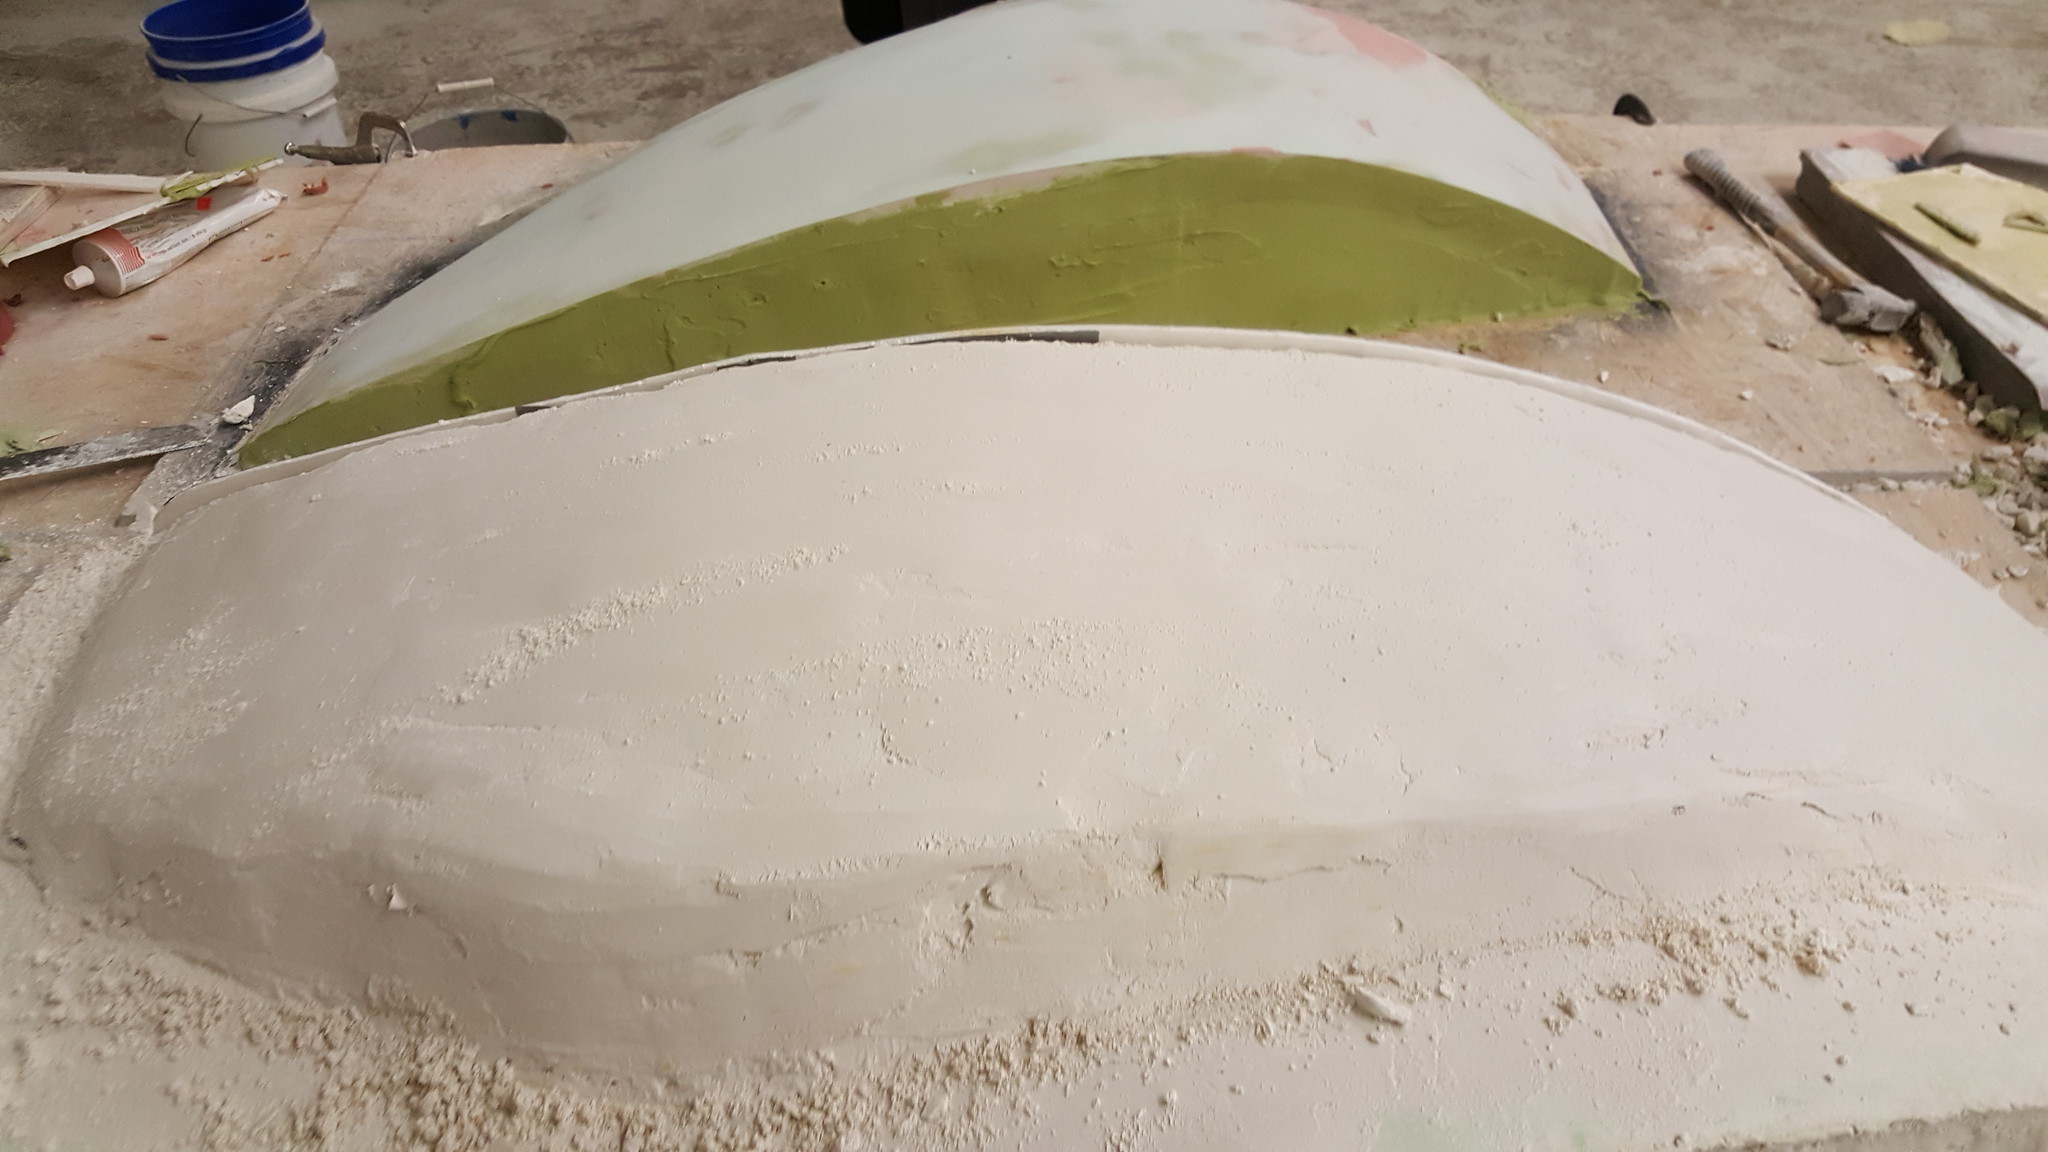
Still working on the fenders, the rear fender is pretty much ready for primer and cutting the grooves for the flanges to help hold them in place.
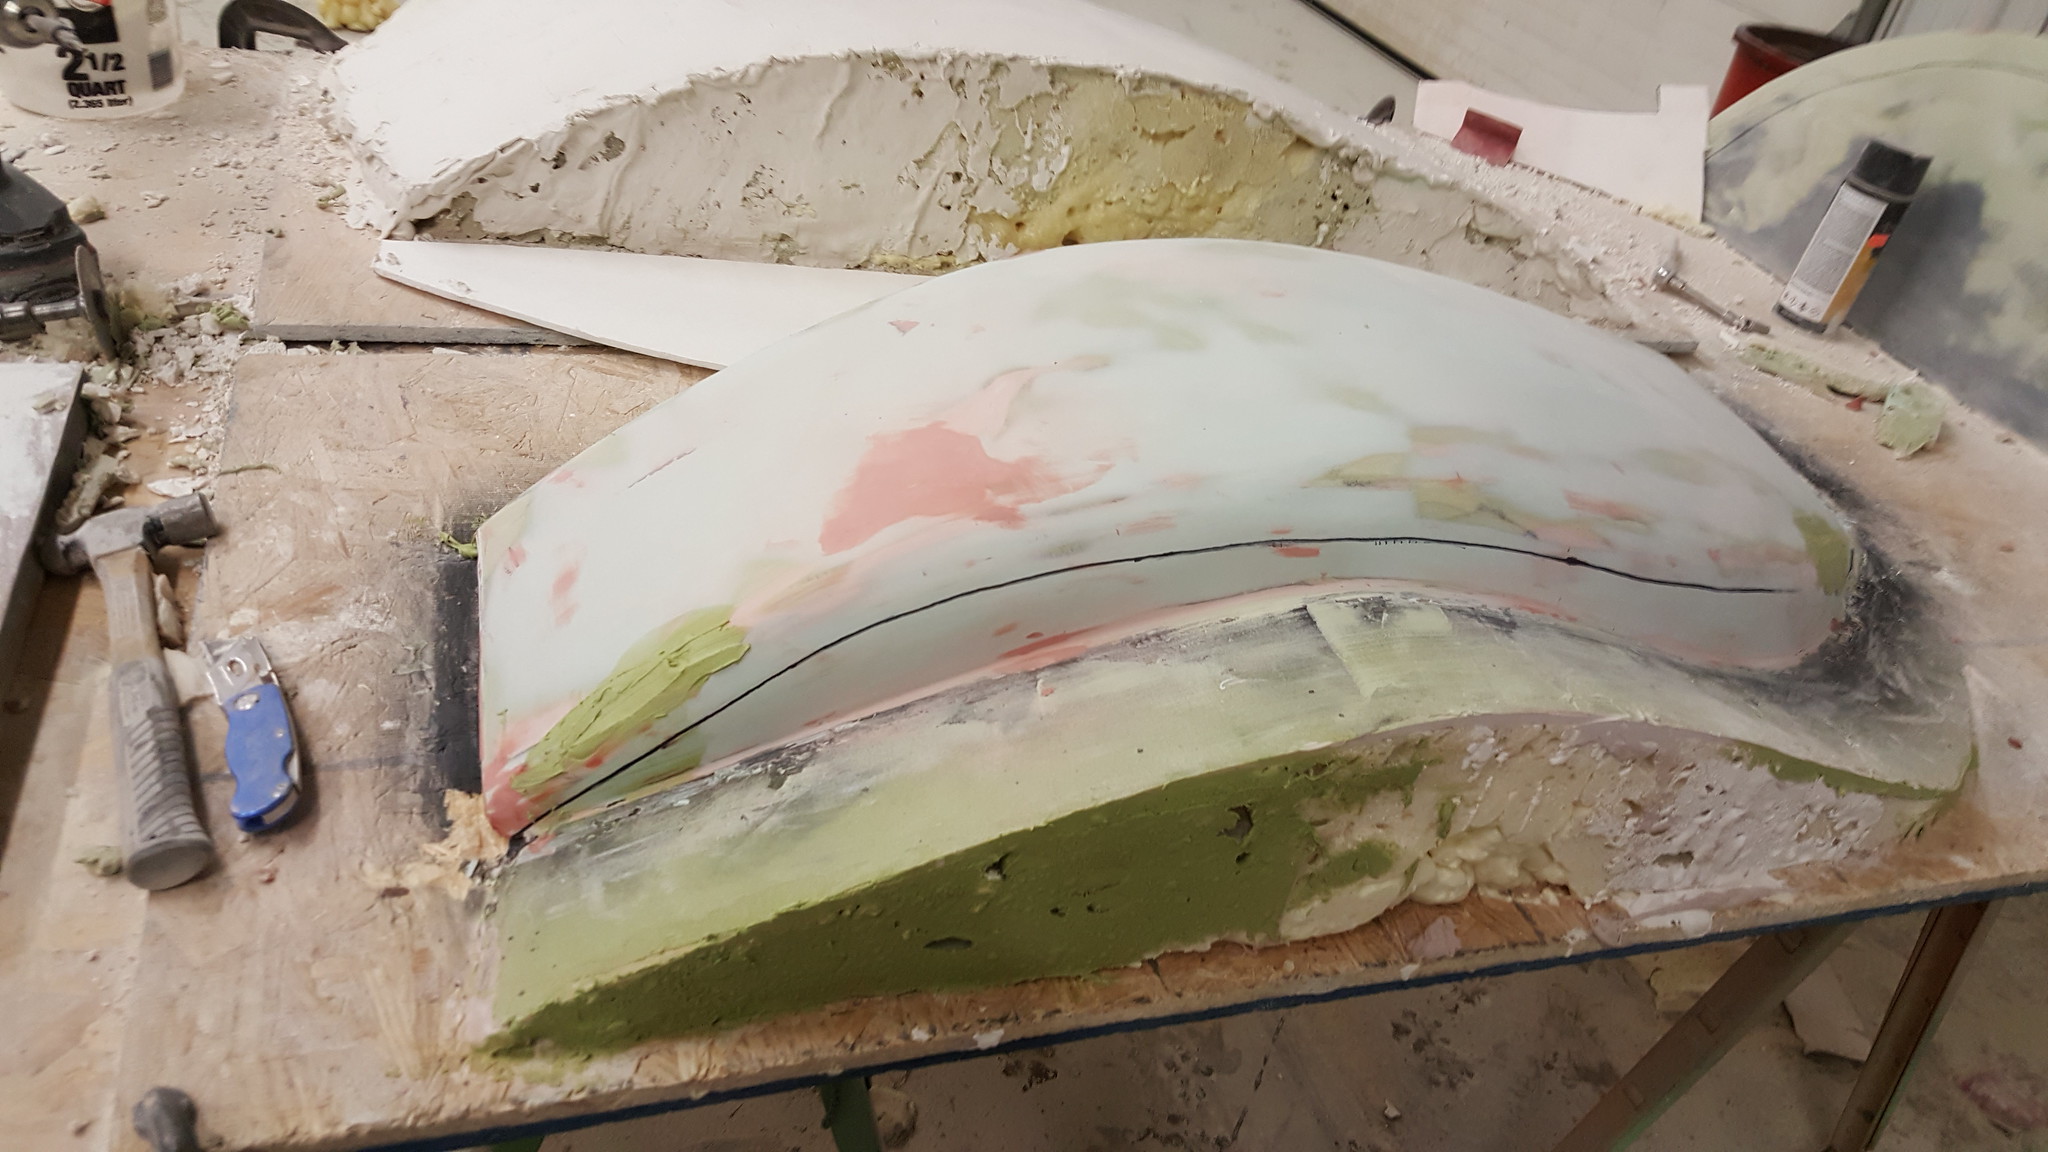
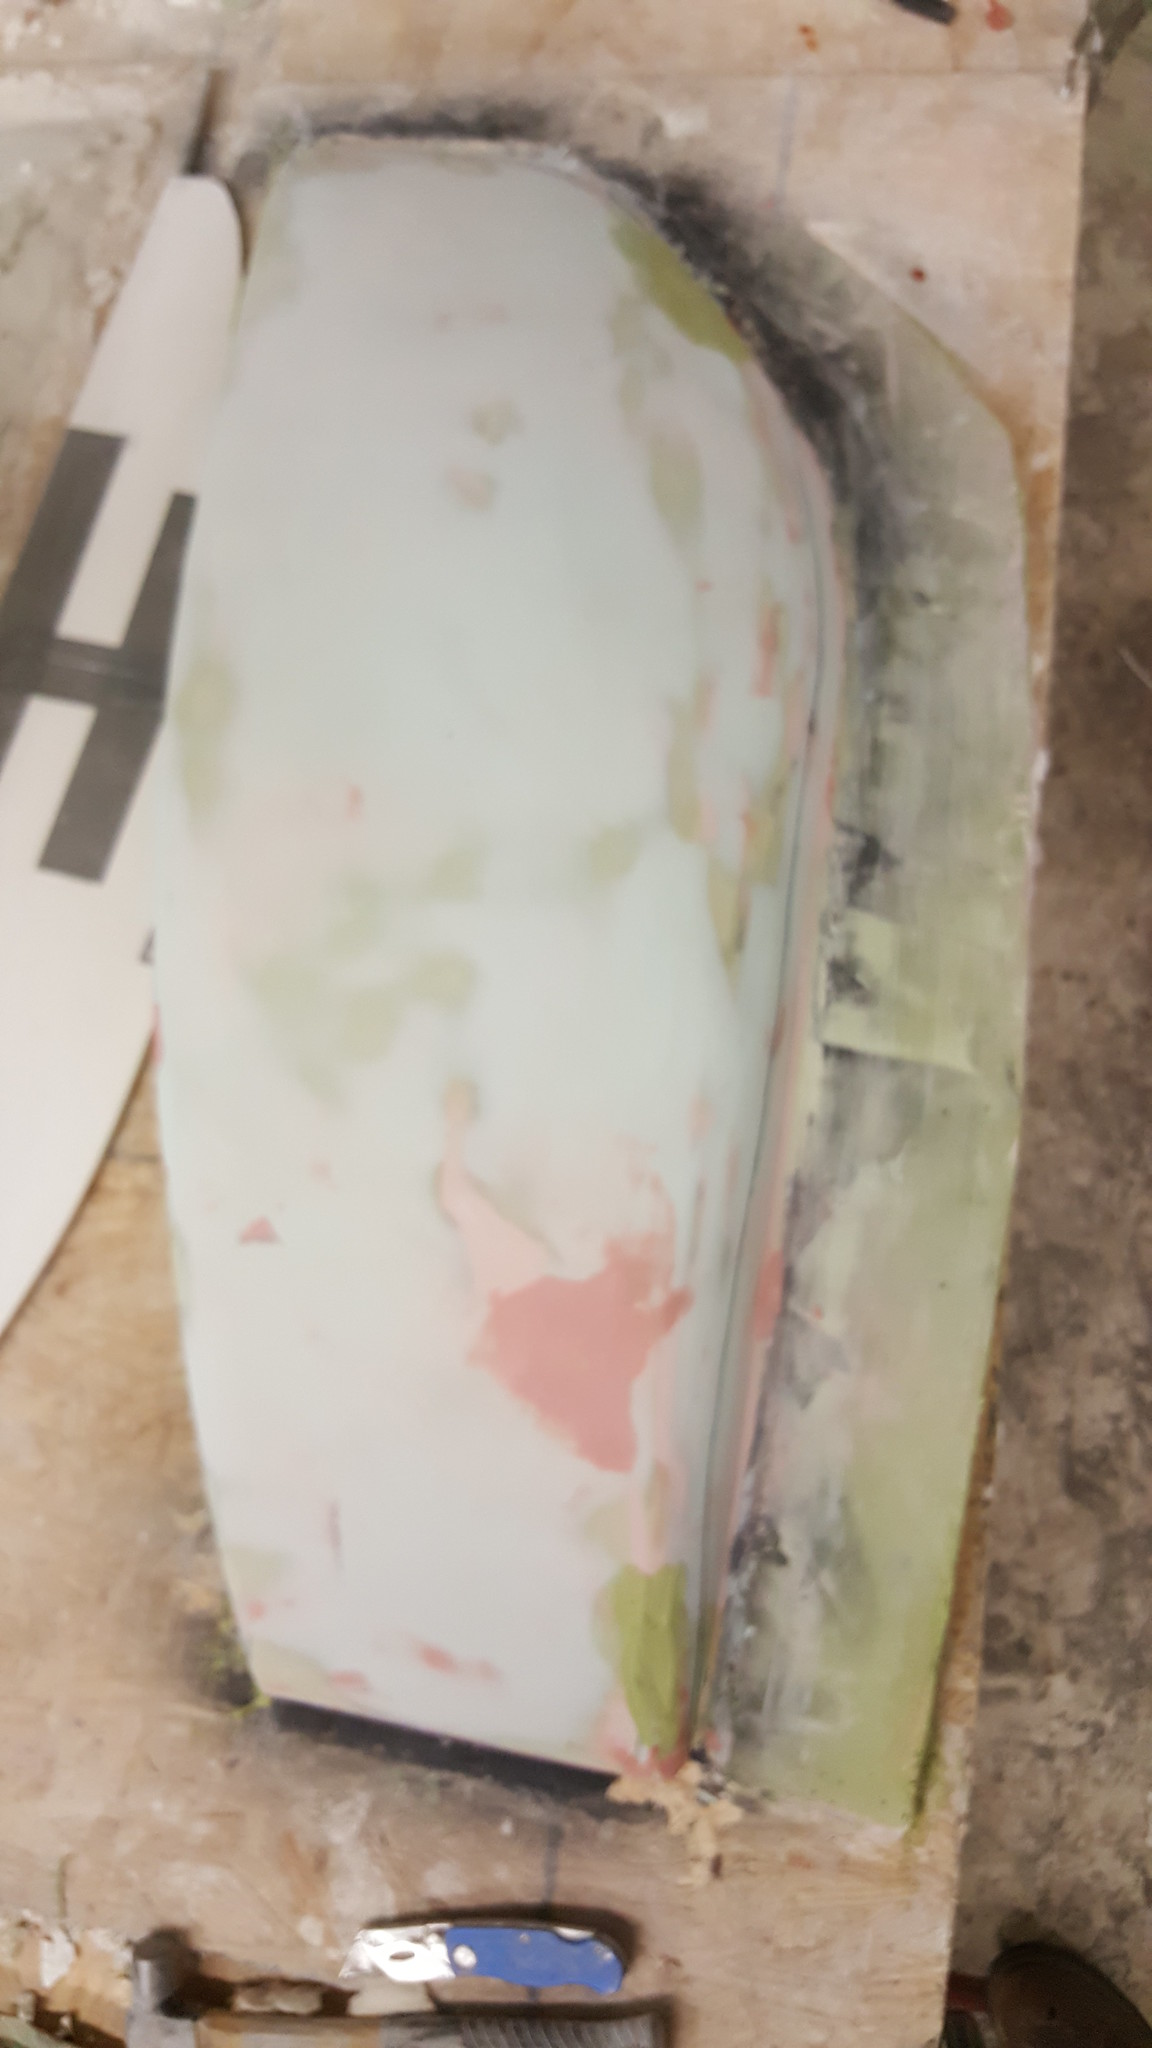
The first front fender is close, but I keep finding spots that I've made too thin with sanding and the filler has cracked, so I've been punching through those and digging a hole to fill up with filler and sand it back smooth. I've also started applying filler to the inside side of that fender and will sand it down smooth tomorrow and mark where the groove is going to be for the flange on that side.
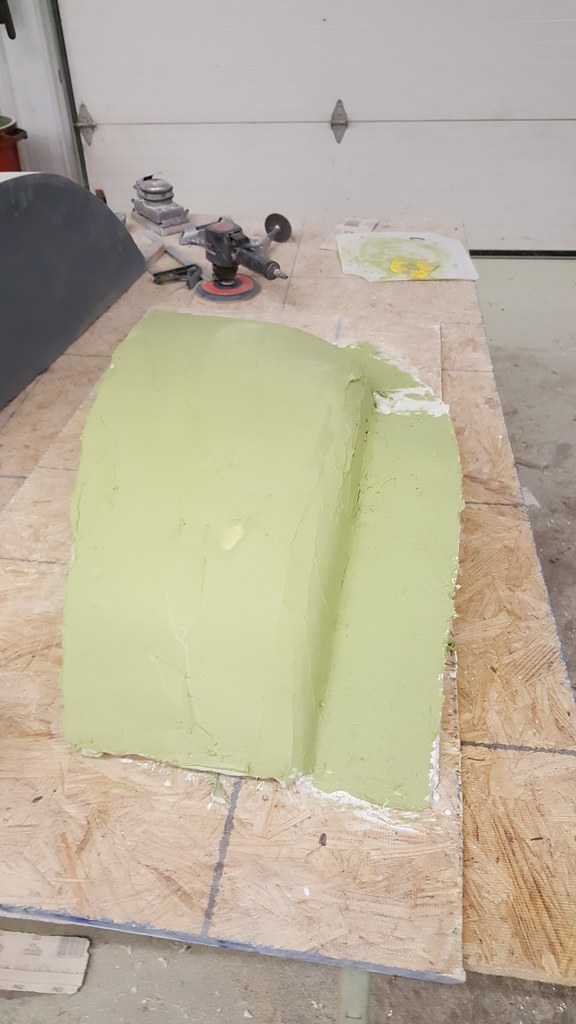
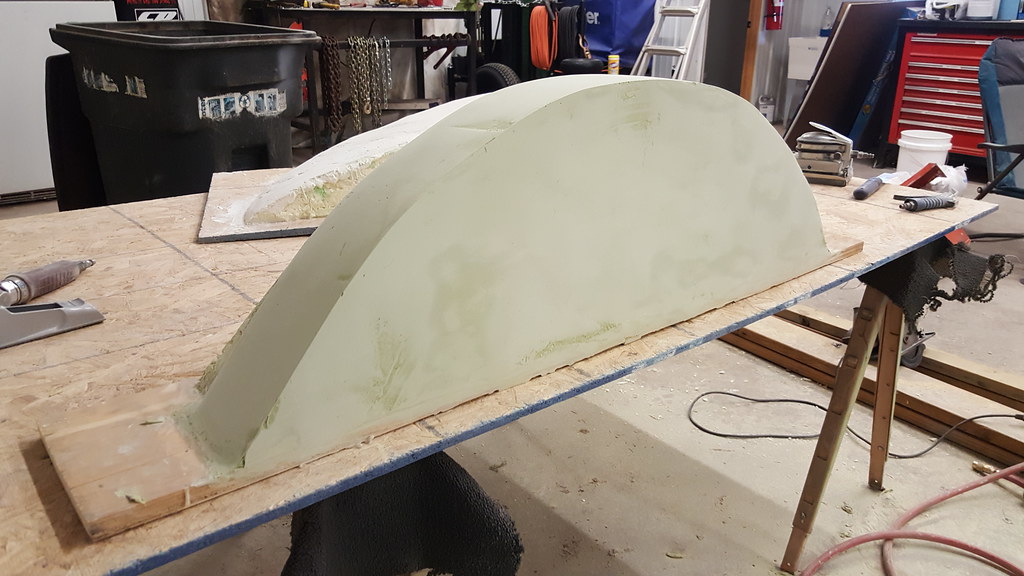
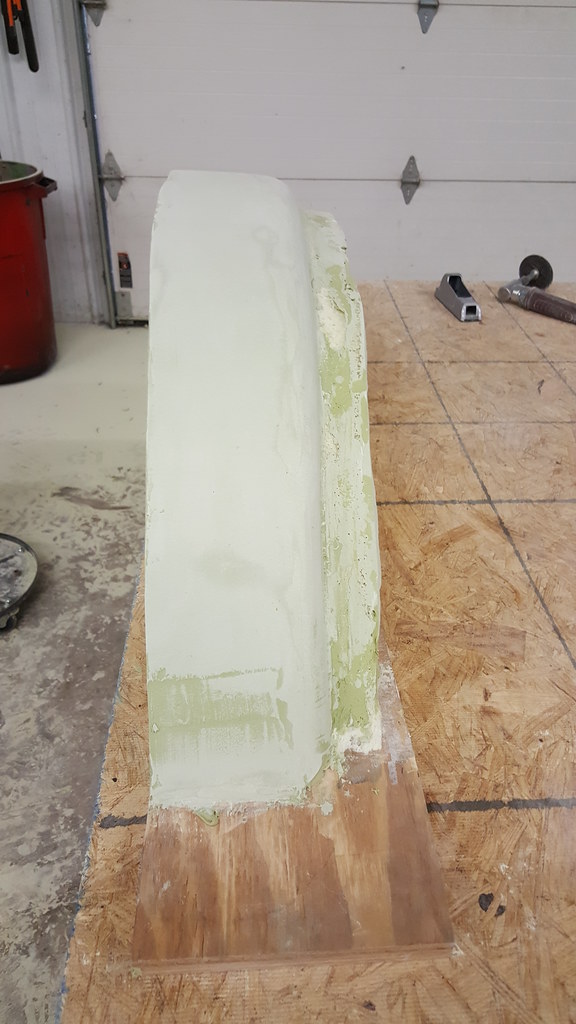
I cut a couple of profile templates for the completed fender to be able to gauge where I'm at on the other front fender, I've got it pretty close to the inside profile of the other fender now, so will start applying filler to it tomorrow.
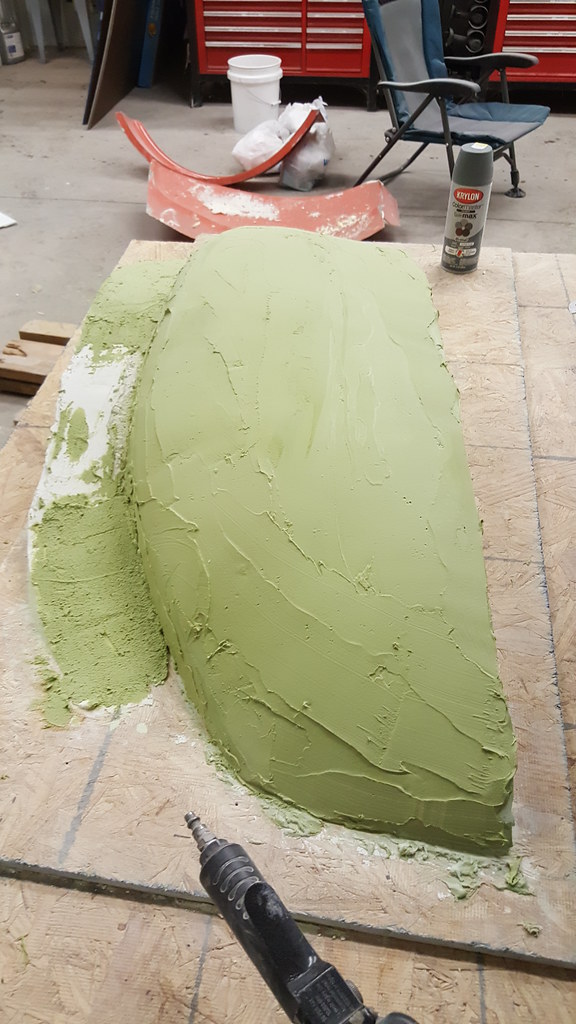
A used 4.56 and up carrier for the dana 60 arrived yesterday along with the weld in tube ends from ruff stuff for my new front longer control bars. Hoping to have the fenders finished by the time I start vacation on Weds, so I can get the dust cleaned up in the shop from all the sanding and get the transmission pulled out of the truck and start removing the front diff and begin moving the diff forward.
__________________
2005 Dodge Ram 3500 2x4 QC
1999 Dodge Ram 2500 4x4 QC
Coaltrain - 1946 Dodge Power Wagon powered by a little modified 12 valve.
Thanks to my sponsors: CP-Carrillo, Air Dog, Muldoons Diesel Performance, Power Driven Diesel, Diesel Performance Converters
|
|
|
|
 Posting Rules
|
You may not post new threads
You may not post replies
You may not post attachments
You may not edit your posts
HTML code is Off
|
|
|
All times are GMT -5. The time now is 10:14 AM.
|