Mikesmithdmax
New member
- Joined
- Jul 25, 2014
- Messages
- 52
Since the day I put the dual disk in this truck I hated the factory plastic clutch pedal assembly. I drove it around for a few months and it was miserable, this weekend it finally let go, the plastic mounting bracket that holds the pedal broke.
So instead of replacing it with another ****ty plastic pos I decided to fab up a steel one. I took a pedal assembly from an older chevy with hyd setup, the original duramax pedal is a 6:1 ratio, the new pedal is just shy of 7:1.
It was a pita getting the plastic assembly out, I had the whole dash apart pretty much, fuse boxes loose, lower dash panel off, left a/c vent and headlight switch loose and still had trouble until I figured out the two 10mm bolts that hold the small metal bracket on the plastic bucket were holding me up!
I trimmed up the mounting "bucket" from the doner truck quite abit, I cut the pedal off an inch below the master cylinder pin, I used 3/16 steel plate to make my mounting points adapt to the new bucket, and gusseted the front attachment point. Theys only 3x -15mm bolts that hold the assembly in place, 2x in front one on the top.
The main reason the factory setup is so prone to breakage is because the pedal is offset around 5" from the center line of the master cylinder, with a strong pressure plate the pedal would try to twist when I push on it. The new bucket remedied this "twisting" problem with its 4" long bushing made on the pedal arm, the plastic setup wasn't even that wide!
For the pedal arm I may have possibly went a lil overboard with the (beef) lol, I used 5/8 thick plate that was 1-1/2 wide, used this to get the offset correct, the only real obstical in my way was the fuse box in the floor. The pedal arm from the main pivot point to the fuse box is around 5", then i welded the plate at a 90* angle 5" over, then welded the remaining part of the doner pedal off the plate. I cut the offset plate an inch longer than needed so I could have 1/2 inch wide bead on the outsides. I ground 1/4" chamfers on the ends also, made a root pass on the tight chamfers, then 5-6 passes on each joint to the offset plate. I would have liked to use gussets on both joints but was only able to weld one on the top joint due to the fuse box being In the way. I feel pretty confident it'll never bend or break lol. Overkill I know, just didn't want a clutch pedal ruining a night at the track.
The next obstical was to figure out how to attach the master cylinder to the new bucket. The stock cyl is the "twist in" style, and it attached to the old plastic bucket. The doner bucket had 2x 5/16 studs to hold the cyl in place. Didn't want to use the smaller ms from the doner. I ended up cutting the round attachment point from the plastic bucket to use as nut I guess u would call it. Stuck the ms thru the fire wall and thru the new metal bucket and twisted the fastener ring on there, worked rather well, tightened up better than before.
For the push rod from the arm to the ms I used a 3/8 steel heim joint to the pedal arm, I cut the factory ms rod off 3" from the piston, and welded the two rods together.
Now I have a fully adjustable clutch pedal, it's 10x sturdier than the factory unit, I got lucky that the doner pedal had the same style pedal pad, took the rubber from the original and it was a perfect fit! Now the pedal is much easier to push, it ended up having an extra inch of travel witch helps a lot driving in traffic with the dual disk. The truck is far less grabby while trying to ease out from a stop. Before I could hardly push the pedal in with my hand, now it's gravy. Smooth as silk!
On the to-do list: need to weld in some travel stops, engaged and disengaged, next I need to wire in a safety switch, I have the one designed for the steel unit, hopefully I can rig it to work. If not I was thinking possibly using a brake light switch? Y'all have any ideas? No way the original switch can be used with the adjustable push rod I have now.
I took the cover off the clutch switch and bent the small contact strip so it completed the circut. Does this switch affect the fueling any in the tune? The throttle pedal seamed more "touchy" than before? I'm assuming because the ECM thinks the clutch is depressed? Or maybe it was just me lol idk
Obs pedal assembly on left, nbs pos plastic pedal arm left
[ame="http://s156.photobucket.com/user/mike199067/media/3DA3F8BD-77DF-402A-BC6E-150A7C7F78C3_zpsttk1xrl9.jpg.html"]3DA3F8BD-77DF-402A-BC6E-150A7C7F78C3_zpsttk1xrl9.jpg Photo by mike199067 | Photobucket[/ame]
[ame="http://s156.photobucket.com/user/mike199067/media/E005EFD7-5525-4DD9-A027-00E5A50ECD89_zpsofrcfgxz.jpg.html"]E005EFD7-5525-4DD9-A027-00E5A50ECD89_zpsofrcfgxz.jpg Photo by mike199067 | Photobucket[/ame]
[ame="http://s156.photobucket.com/user/mike199067/media/4D717ED3-B4C8-4F6A-9259-506BCD365368_zpsxuxejvab.jpg.html"]4D717ED3-B4C8-4F6A-9259-506BCD365368_zpsxuxejvab.jpg Photo by mike199067 | Photobucket[/ame]
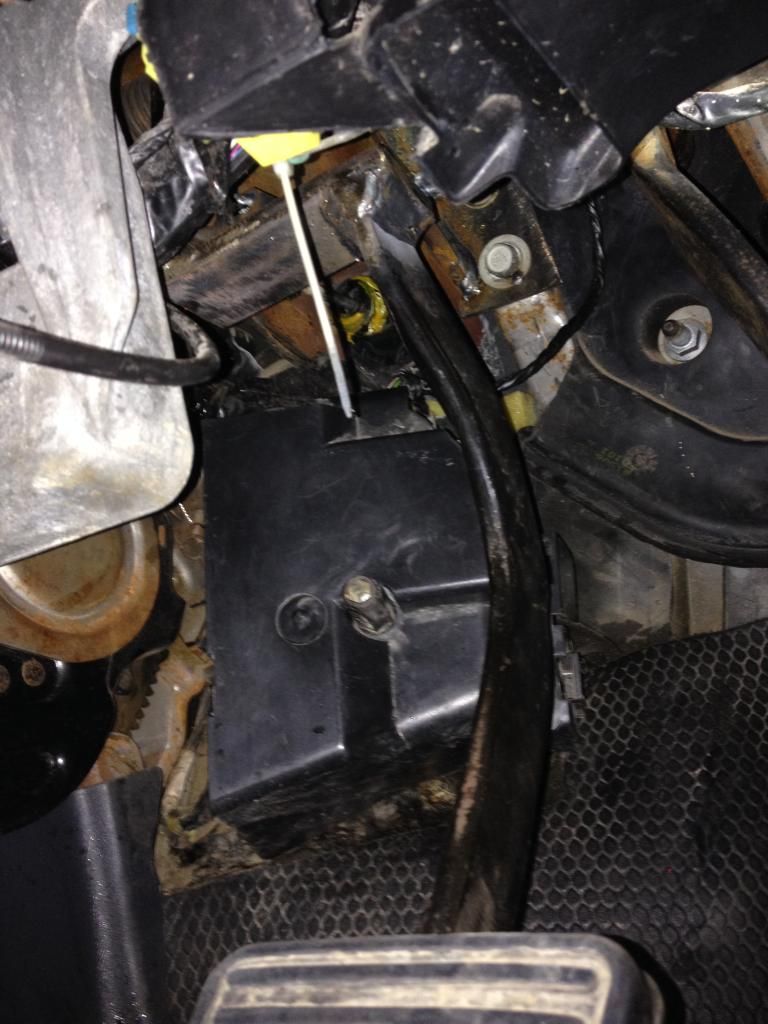
I'll get some better shots of the finished product in the daytime this week, last pic kinda makes it look hacked haha
So instead of replacing it with another ****ty plastic pos I decided to fab up a steel one. I took a pedal assembly from an older chevy with hyd setup, the original duramax pedal is a 6:1 ratio, the new pedal is just shy of 7:1.
It was a pita getting the plastic assembly out, I had the whole dash apart pretty much, fuse boxes loose, lower dash panel off, left a/c vent and headlight switch loose and still had trouble until I figured out the two 10mm bolts that hold the small metal bracket on the plastic bucket were holding me up!
I trimmed up the mounting "bucket" from the doner truck quite abit, I cut the pedal off an inch below the master cylinder pin, I used 3/16 steel plate to make my mounting points adapt to the new bucket, and gusseted the front attachment point. Theys only 3x -15mm bolts that hold the assembly in place, 2x in front one on the top.
The main reason the factory setup is so prone to breakage is because the pedal is offset around 5" from the center line of the master cylinder, with a strong pressure plate the pedal would try to twist when I push on it. The new bucket remedied this "twisting" problem with its 4" long bushing made on the pedal arm, the plastic setup wasn't even that wide!
For the pedal arm I may have possibly went a lil overboard with the (beef) lol, I used 5/8 thick plate that was 1-1/2 wide, used this to get the offset correct, the only real obstical in my way was the fuse box in the floor. The pedal arm from the main pivot point to the fuse box is around 5", then i welded the plate at a 90* angle 5" over, then welded the remaining part of the doner pedal off the plate. I cut the offset plate an inch longer than needed so I could have 1/2 inch wide bead on the outsides. I ground 1/4" chamfers on the ends also, made a root pass on the tight chamfers, then 5-6 passes on each joint to the offset plate. I would have liked to use gussets on both joints but was only able to weld one on the top joint due to the fuse box being In the way. I feel pretty confident it'll never bend or break lol. Overkill I know, just didn't want a clutch pedal ruining a night at the track.
The next obstical was to figure out how to attach the master cylinder to the new bucket. The stock cyl is the "twist in" style, and it attached to the old plastic bucket. The doner bucket had 2x 5/16 studs to hold the cyl in place. Didn't want to use the smaller ms from the doner. I ended up cutting the round attachment point from the plastic bucket to use as nut I guess u would call it. Stuck the ms thru the fire wall and thru the new metal bucket and twisted the fastener ring on there, worked rather well, tightened up better than before.
For the push rod from the arm to the ms I used a 3/8 steel heim joint to the pedal arm, I cut the factory ms rod off 3" from the piston, and welded the two rods together.
Now I have a fully adjustable clutch pedal, it's 10x sturdier than the factory unit, I got lucky that the doner pedal had the same style pedal pad, took the rubber from the original and it was a perfect fit! Now the pedal is much easier to push, it ended up having an extra inch of travel witch helps a lot driving in traffic with the dual disk. The truck is far less grabby while trying to ease out from a stop. Before I could hardly push the pedal in with my hand, now it's gravy. Smooth as silk!
On the to-do list: need to weld in some travel stops, engaged and disengaged, next I need to wire in a safety switch, I have the one designed for the steel unit, hopefully I can rig it to work. If not I was thinking possibly using a brake light switch? Y'all have any ideas? No way the original switch can be used with the adjustable push rod I have now.
I took the cover off the clutch switch and bent the small contact strip so it completed the circut. Does this switch affect the fueling any in the tune? The throttle pedal seamed more "touchy" than before? I'm assuming because the ECM thinks the clutch is depressed? Or maybe it was just me lol idk
Obs pedal assembly on left, nbs pos plastic pedal arm left
[ame="http://s156.photobucket.com/user/mike199067/media/3DA3F8BD-77DF-402A-BC6E-150A7C7F78C3_zpsttk1xrl9.jpg.html"]3DA3F8BD-77DF-402A-BC6E-150A7C7F78C3_zpsttk1xrl9.jpg Photo by mike199067 | Photobucket[/ame]
[ame="http://s156.photobucket.com/user/mike199067/media/E005EFD7-5525-4DD9-A027-00E5A50ECD89_zpsofrcfgxz.jpg.html"]E005EFD7-5525-4DD9-A027-00E5A50ECD89_zpsofrcfgxz.jpg Photo by mike199067 | Photobucket[/ame]
[ame="http://s156.photobucket.com/user/mike199067/media/4D717ED3-B4C8-4F6A-9259-506BCD365368_zpsxuxejvab.jpg.html"]4D717ED3-B4C8-4F6A-9259-506BCD365368_zpsxuxejvab.jpg Photo by mike199067 | Photobucket[/ame]
I'll get some better shots of the finished product in the daytime this week, last pic kinda makes it look hacked haha
Last edited: