
LOGANSTANFORTH
WORKIN' MAN'S DOLLAR
After getting all the parts after i came back to iraq last time.....this time at home i finally got it installed.....first let me tell you some quick things i learned.....
HERE IS THE TOP 11 THINGS I LEARNED WHILE INSTALLING MY EMS FREE SPIN HUB KIT.
1. axle dust shields are in the same box as the wheel bearings and seals, not in the box with the dust seals like they should be, dont make the same mistake i did and get half the hub installed and find them cause you thought they was part of the hub seal......go to #5 for further instruction on this problem.......
2. Dana 60 axles need a case spreader or a 6 foot prybar to get the differential out, i suggest the case spreader, but the 6 foot pry bar works if you take the axle completely out like i did, if not for the differential being stuck i wouldnt of took the axle out......
3. just cause they send you 2 different spider gear cross pin bolts dosent mean you will use either one, my trucks cross pin had a roll pin in it and was a real pain to get out, this is only a problem if stepping up to 35 spline axles as they require new spider gears, you will reuse your factory cross pin and not the new one they send you with the new gears......
4. power wash your axle really good before pulling anything out, especially the axle tubes or you will be cleaning bearings and races later, ask me how i know this tiny jewel of info.....
5. once the spindles are bolted on, they are almost impossible to get the bolts off cause of the way they are installed, i had to buy 4 new Nylocks cause of this.....
6. if you install MOOG greasable upper ball joints, grease them and take the zerks out before installing the 35 Spline axle shafts, cause the zerks will hit the ears on the 1480 u-joints and you will have to cut the zerk in half and seal it with RTV like i had to do......
7. you dont use all of the parts supplied with the lock outs, trust me, it really screwed me up, the stub axles are for a 1989 and newer Dana 60 Ford axle and dont require the inner retainer ring like the old 78-79 axles do, i wasted 30 minutes figuring this out......
8. dont bother trying to take the hub apart if stepping up to 35 spline axles like me, take the 4 bolts out of the back of the hub and pull everything as one unit, that big nut in the middle of the unit bearing does nothing but lock it to the axle, dont waste your time with the big nut, just go for the 4 small bolts that hold the hub on......
9. dont let your idiot brother put a castle nut on 2 threads and try and drive a tie rod out of the passenger side steering arm with a hammer, it will cost you 116.00 dollars to fix that problem, ask me how i know.....
10. you HAVE to remove the differential to pull out all the old seals, no way around it, so please revert back to #2 for further instructions on this.....
11. dont waste your money on the "delete kit" for the CAD, its a flat piece of steel with 4 holes drilled in it and a gasket to bolt over the hole where the CAD goes, it cost me like 90 bucks, make it at home......
NOW, YOU ASK YOURSELF, WAS THIS WORTH IT......YES, EVEN THOUGH I WONT BE DRIVING THE TRUCK FOR ANOTHER 10 MONTHS UNTIL I COME HOME NEXT APRIL, I AM HAPPY ITS DONE.....
here are the pictures.....
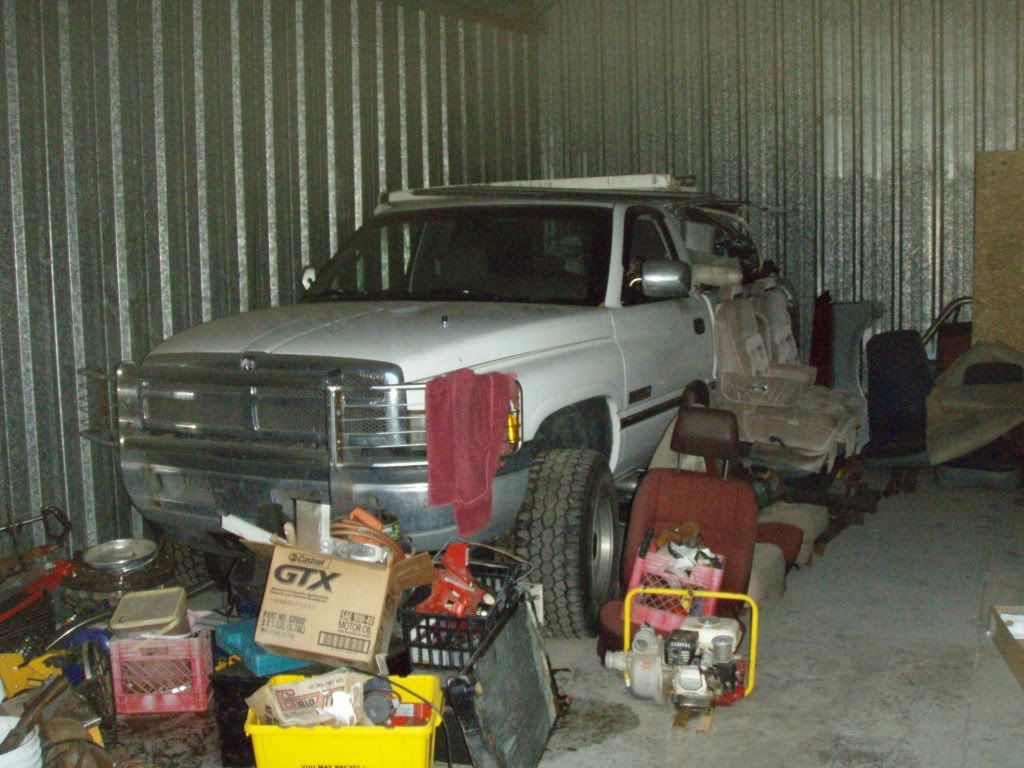
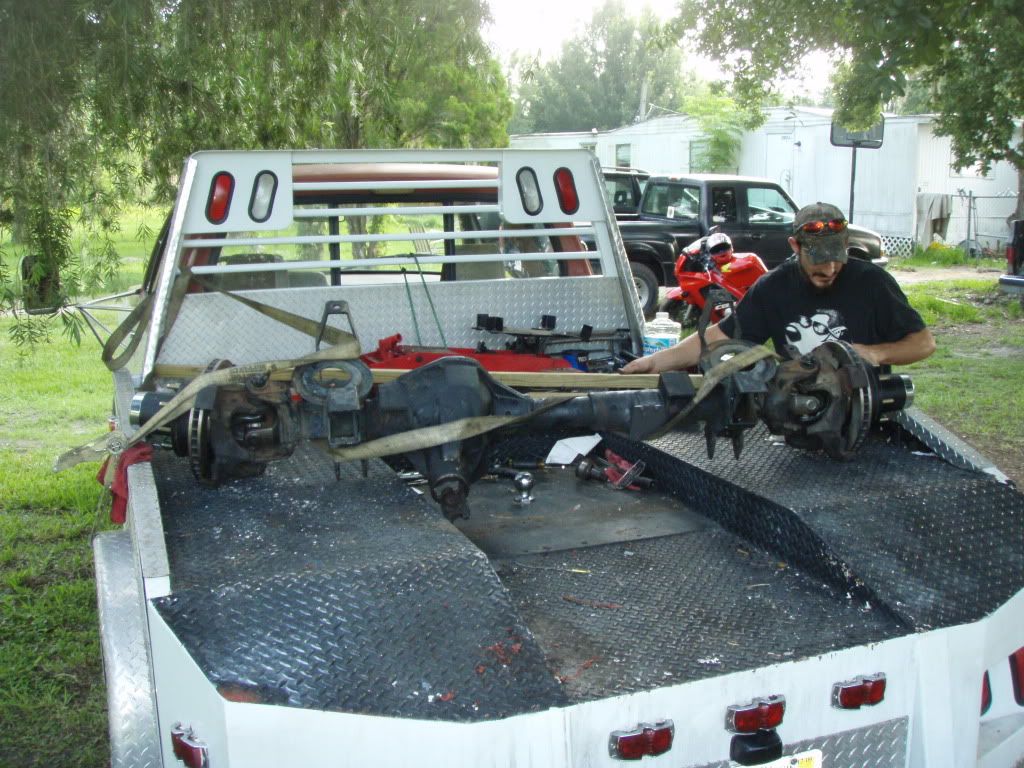
this is my truck as i found it in my storage building, this was my dad and brothers doing, not mine.....we cleaned the stuff out in front of it, jumped the battery and moved it around diagonally so it would be easier to work on.....the truck has developed a pretty substantial tranny leak but thats no big deal, it'll get fixed.....I dropped off my new 35 spline axles to have u-joints put in them before i started on this and in about 45minutes the driveline shop had them done, for both SPICER u-joints installed it was 110 bucks, which was the best deal in town, the shop was Central Florida Driveline in Lakeland Florida, located on Combee Rd. and also in Orlando.....i assembled this whole axle on the back of my 93 truck on its Western Hauler flatbed.......
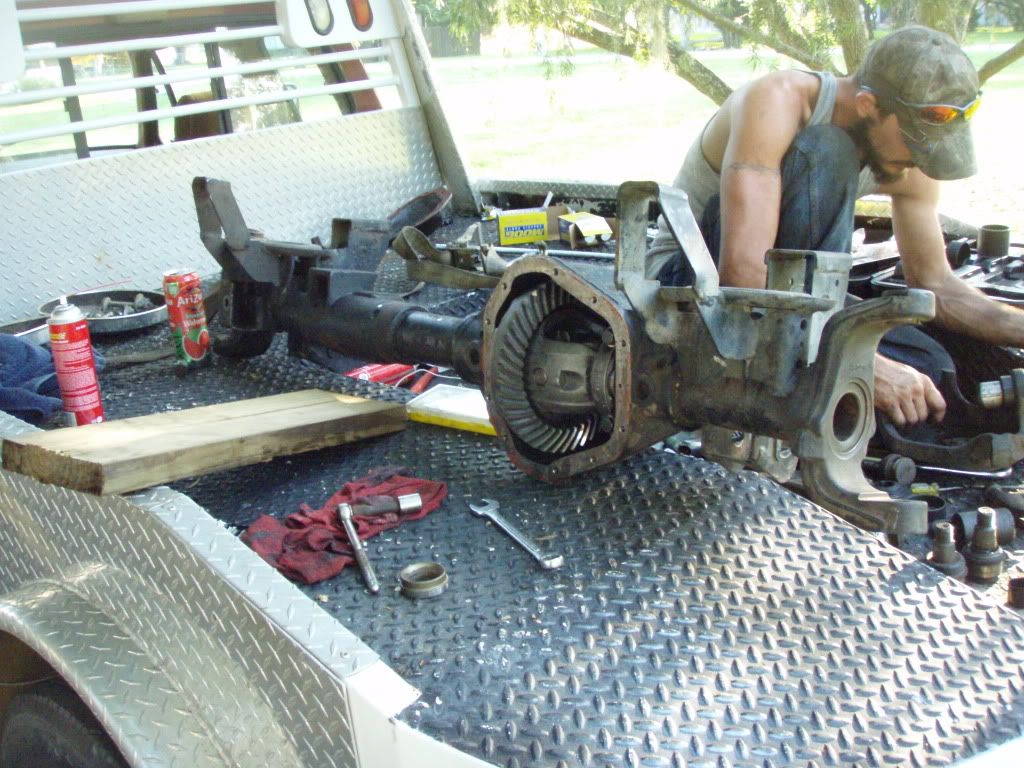
So me and my neighbor Cricket pulled the front axle out from under the truck, i pay Cricket 8 bucks an hour and he will work most men to death and dont complain or whine, he just works.....it was fairly easy cause it was a southern truck, had been apart a little over a year ago and i had a electric impact, dont waste your time on using hand tools, an impact is the only way to go, it took us all of 25 minutes to get the axle down, before we took it out though we drained all the fluids, pulled the axles and hubs off, pulled the CAD unit, and dropped the spindles, so all we were working with was the housing and differential, that makes for a light weight, easy to handle axle.......like stated above in my list, just take the 4 bolts out of the back of the hubs and pull the axles and unit bearings as 1 unit, its soooooo much easier than trying to get that nut off, make sure you remove all of your old axle seals when you get the differential out, the new seals are custom made and held in by RTV sealant, SOOOOOO much easier to work with and it lets you decide how much gear oil you want in your axle, the can be installed 3/4 inch from the end of the axle tube all the way up to 3/4 of an inch from the differential, i installed mine 3 inches down each axle tube from the differential, later on when i do my locker and gears im going to pop them out and put a set near the end of the axle tubes, these are nice for you off-roaders too cause you can install a set near the diff to seal in the oil and a set near the ends of the axle tubes to keep dirt and mud out of the axles, these are the same type NASCAR uses.....this picture is of the axle after i pulled the differential out, cleaned the bearings and races, and installed the new axle seals......now i had to use a hammer, a block of wood and some wheel bearing grease to get this bad boy back in cause i didnt have a case spreader to do it.....FUN FUN FUN.....
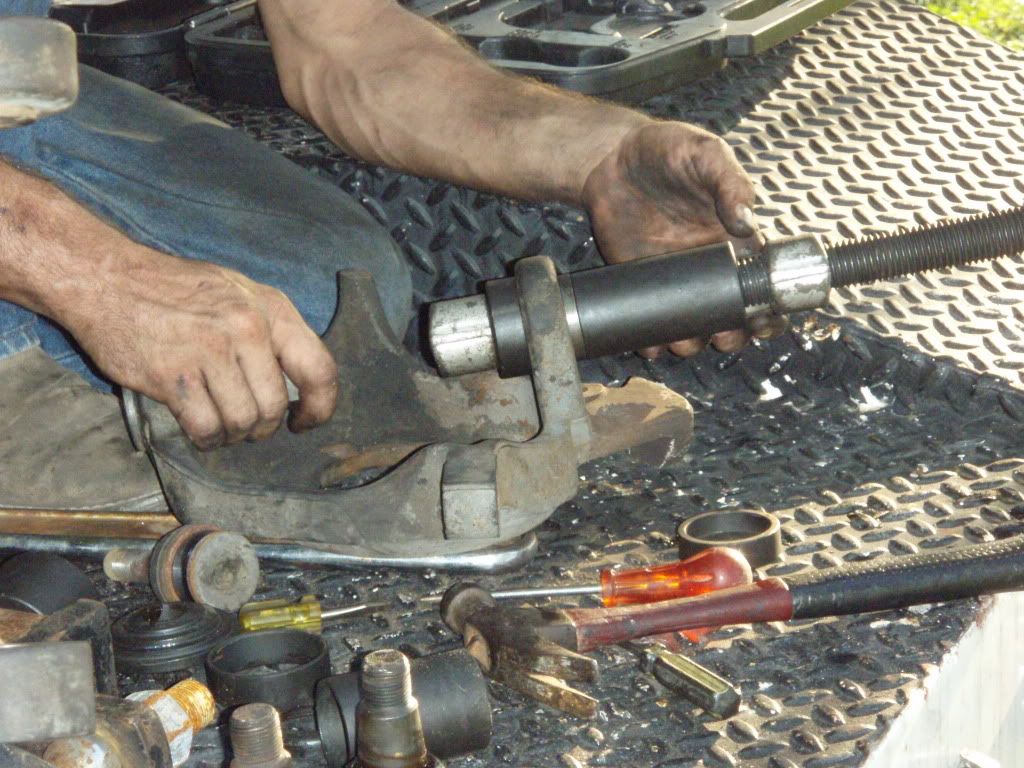
This is us pressing out the ball joints, and like i said, if you plan on using the greasable MOOG's, take the grease fittings out before you install the axles, they came right out and went right in since we was using an impact, i put a light dap of grease on them before the new ones were installed so they would go in easier, and they did, make sure you get them seated good enough to get the snap rings on the lower joints.....
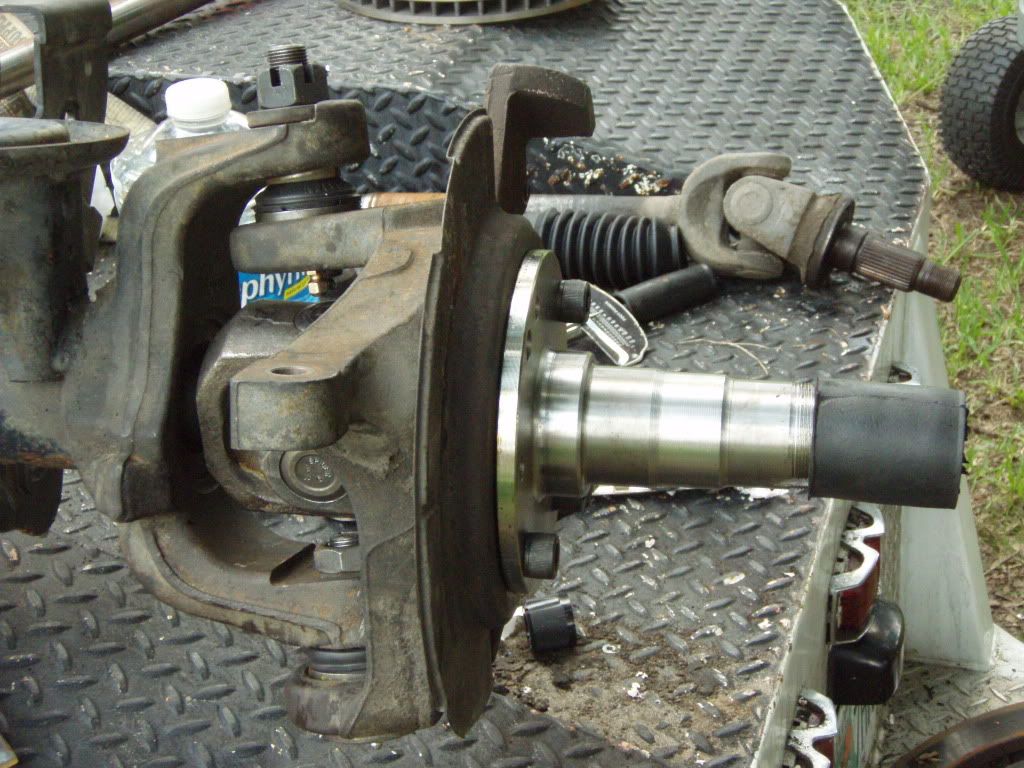
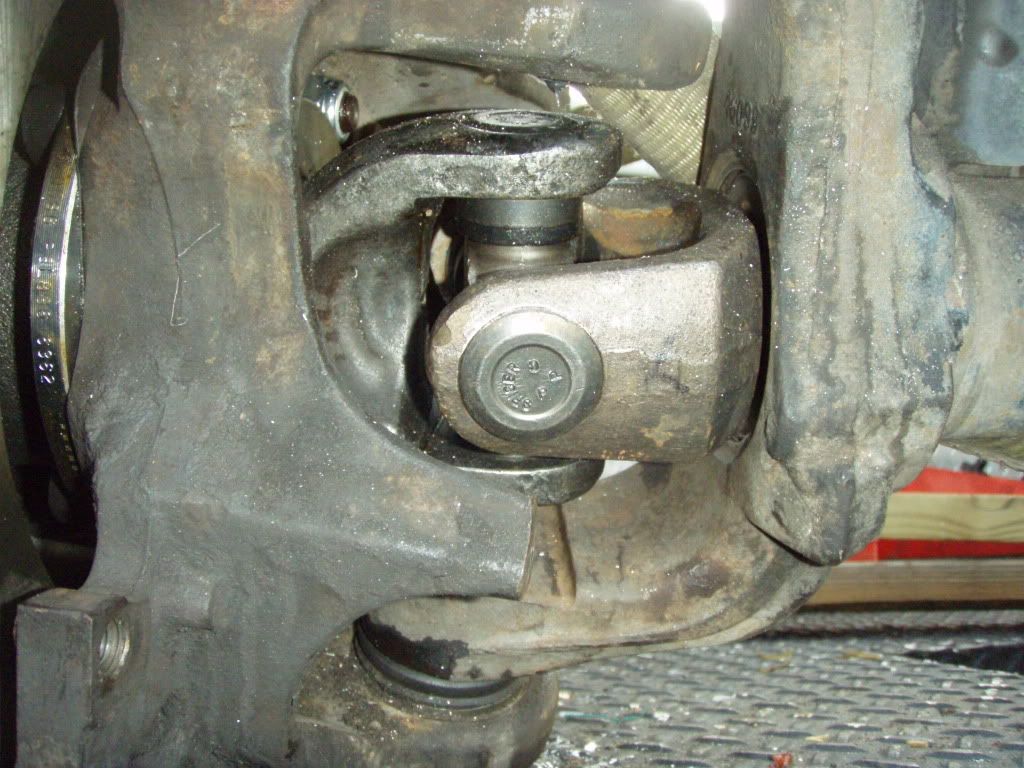
This is the axle with the new spindle and axles installed, you got to put the dust cover down over the stub axle, then the three piece seal, one piece installs on next to the dust cover, one installs on top of that and the final one installs in the back of the spindle, then slip it into the axle housing, be careful not to push or ruin the axle seals you have already installed, i waited a little bit to let the RTV setup so the seals would be in good, NOW READ THIS CAREFULLY , MAKE SURE YOU HAVE EVERYTHING INSTALLED CORRECTLY OR YOU WILL BE HATING LIFE TRYING TO GET THESE BOLTS OUT AFTER INSTALLING THEM, TRUST ME, I HAD TO DO THIS ON ONE SIDE AND IT WAS MISERABLE, ITS ALMOST DOWN RIGHT IMPOSSIBLE TO GET THEM BACK OFF, now install the spindle lining up the 4 big holes and install your bolts with the supplied Nylocks and some red loc-tite, i used the imapct and a 7/8 wrench to do this, its definately a tight fit getting in there with the wrench but you cant use a socket on them cause of the inner lip of the new spindle is in the way......also as you can see in this picture, the evil grease zerk fittings, now in the picture below this one you cant see one anymore, thats because i cut it off and sealed it with RTV sealant, that is the little black glob you see above the u-joint cap.....
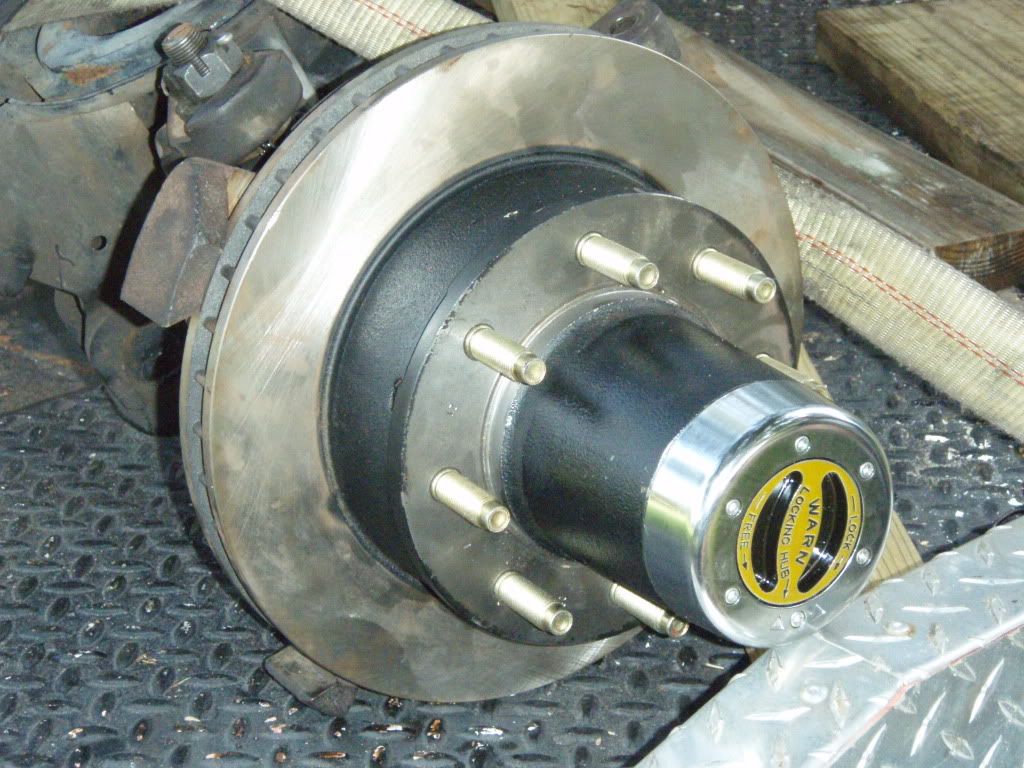
this is the lockout installed, i wasnt going to bore you with step by step pictures on how to install the hubs, plus my hands were covered in wheel bearing grease, first you grease everything really good, packing all the bearings, then you install the inner wheel bearing into the hub, its easy, just grease it and set it on the race, NOW be gentle with this part, you either need a seal driver or a 2X6 block of wood, i used the wood, drive the new wheel seal into the back of the hub, then slip it onto the new spindle, now install the outter bearing onto the spindle and push it in as far as it will go, now you will install the bearing adjuster, lock ring, and lock nut, its simple, run the adjuster nut down til you get a good feel on the wheel bearing (the adjuster nut has a small locking tab on it, not to tight and not to loose, i prefer mine a little tighter cause they will loosen as they wear, now install the lock ring, you may have to tighten or loosen the adjuster nut to get the locking tab to line up with the locking ring, once you get it in correctly install your lock nut and tighten it down til its snug, now for all of this you will either need a 4 prong hub socket you can buy atmost part stores or you can use a hammer and screw driver, i used the hammer and screw driver, now you need to install the splined drive flange part of the lockout, it just slips in, next you need to install the BIG lock ring, i had to use a pair of pliers to push it in but it went, that is pretty common when doing Dana 60's, next i installed the outter snap ring on the end of the stub axle then put the lock-out dial and spring in and tightened down the 6 small bolts......
this is the axle all completed and ready to be installed, NOW LISTEN CAREFULLY, your stock axle vent is at the CAD unit and their CAD delete plate has a place for the axle vent in it, BUT i installed my axle seals before the CAD so there is no way to vent the axle unless you want to drill a hole in the housing or in your differential cover and install a vent, so i did neither and i just drilled a very tiny hole in the top right of the cover and im going to use that as a vent because i have a nice shiny new aluminum cover from Pro Comp that im going to use but my dad has to drill and tap it for a vent so for right now the tiny hole in the stock differential cover will have to work i guess.....
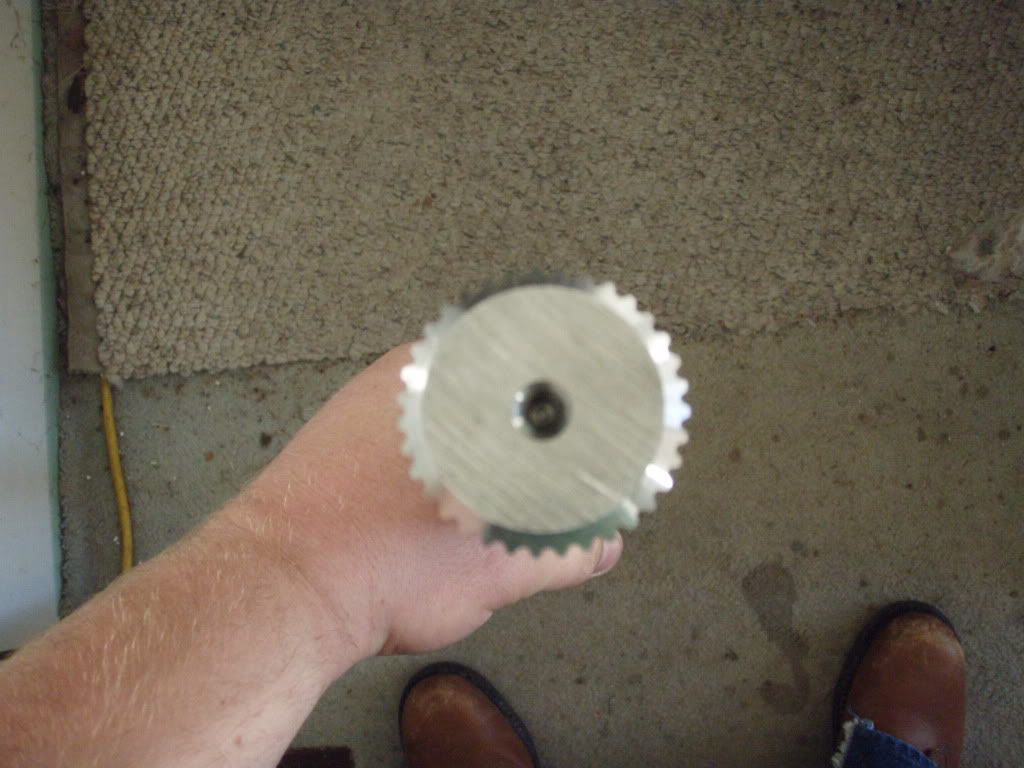
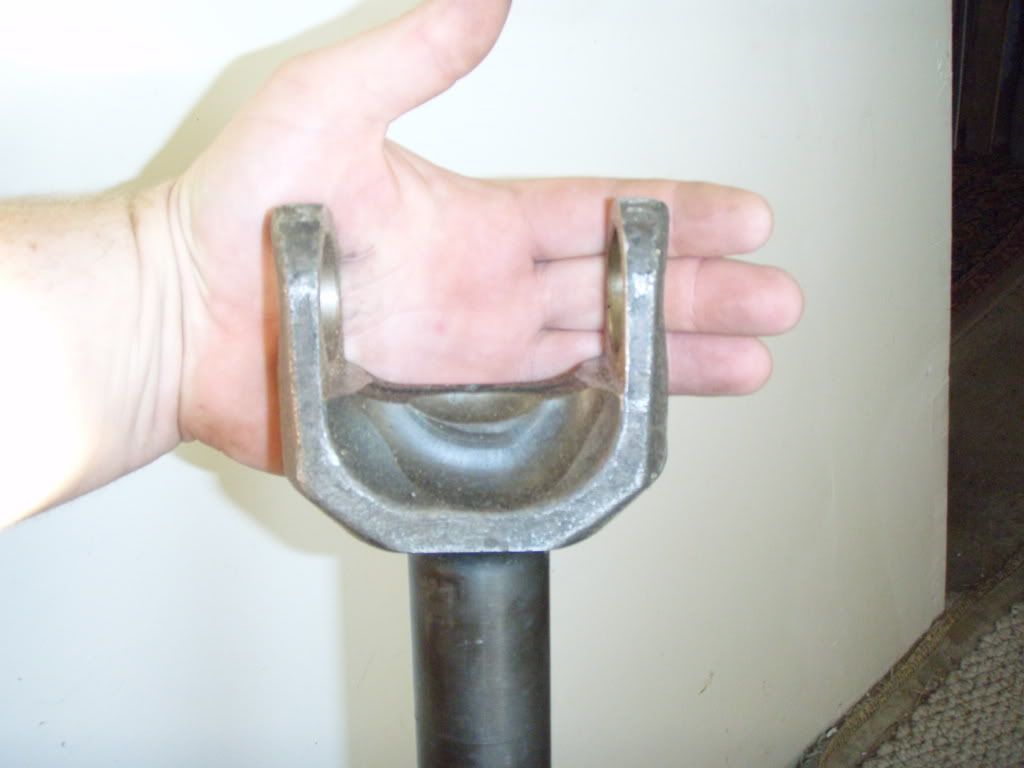
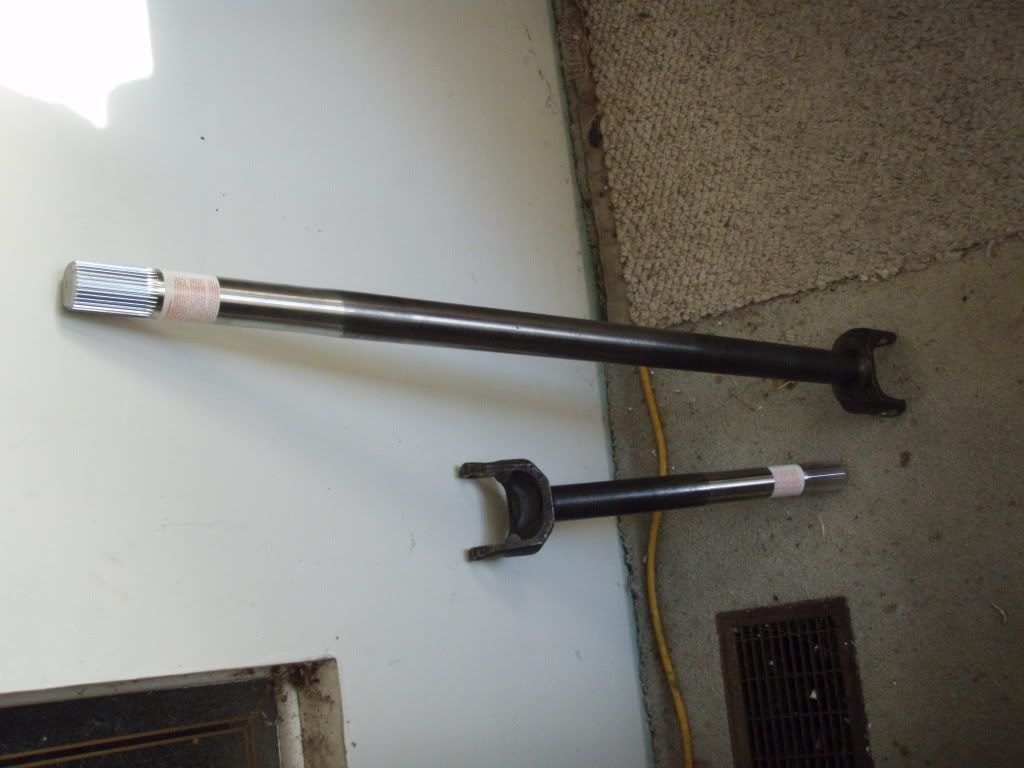
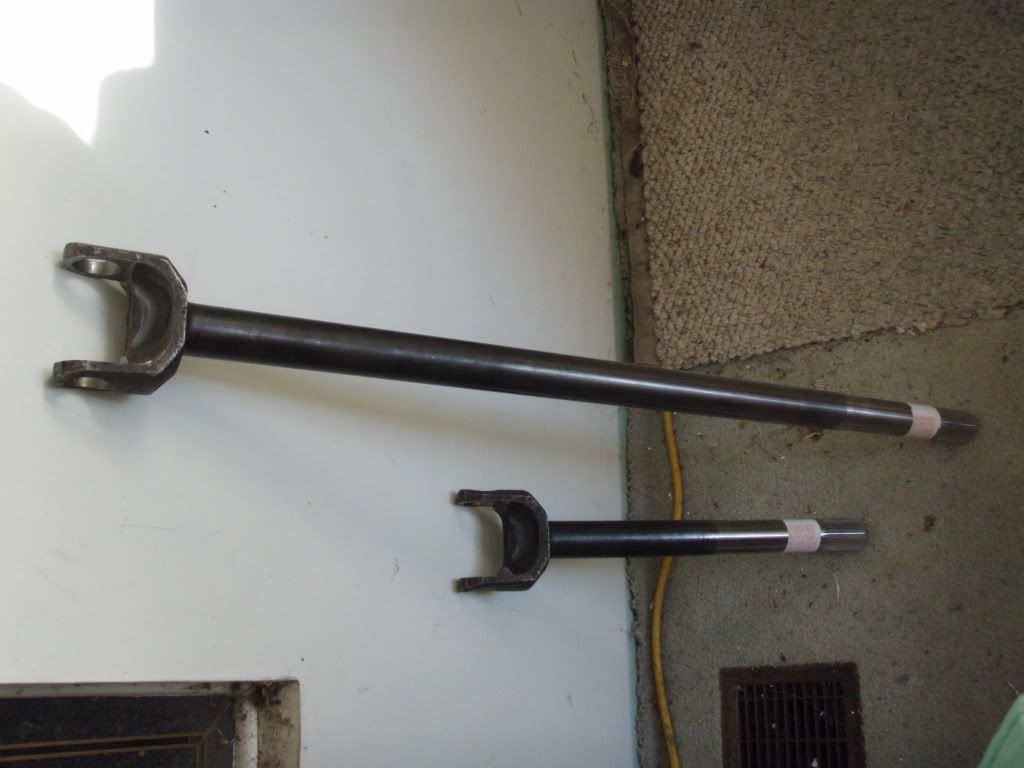
here are some more pics i took back in january or the inner 35 Spline Moser shafts....
THANKS TO EMS OFFROAD, MOSER, CENTRAL FLORIDA DRIVESHAFT, AND MY LOCAL ADVANCE AUTOPARTS.....
HERE IS THE TOP 11 THINGS I LEARNED WHILE INSTALLING MY EMS FREE SPIN HUB KIT.
1. axle dust shields are in the same box as the wheel bearings and seals, not in the box with the dust seals like they should be, dont make the same mistake i did and get half the hub installed and find them cause you thought they was part of the hub seal......go to #5 for further instruction on this problem.......
2. Dana 60 axles need a case spreader or a 6 foot prybar to get the differential out, i suggest the case spreader, but the 6 foot pry bar works if you take the axle completely out like i did, if not for the differential being stuck i wouldnt of took the axle out......
3. just cause they send you 2 different spider gear cross pin bolts dosent mean you will use either one, my trucks cross pin had a roll pin in it and was a real pain to get out, this is only a problem if stepping up to 35 spline axles as they require new spider gears, you will reuse your factory cross pin and not the new one they send you with the new gears......
4. power wash your axle really good before pulling anything out, especially the axle tubes or you will be cleaning bearings and races later, ask me how i know this tiny jewel of info.....
5. once the spindles are bolted on, they are almost impossible to get the bolts off cause of the way they are installed, i had to buy 4 new Nylocks cause of this.....
6. if you install MOOG greasable upper ball joints, grease them and take the zerks out before installing the 35 Spline axle shafts, cause the zerks will hit the ears on the 1480 u-joints and you will have to cut the zerk in half and seal it with RTV like i had to do......
7. you dont use all of the parts supplied with the lock outs, trust me, it really screwed me up, the stub axles are for a 1989 and newer Dana 60 Ford axle and dont require the inner retainer ring like the old 78-79 axles do, i wasted 30 minutes figuring this out......
8. dont bother trying to take the hub apart if stepping up to 35 spline axles like me, take the 4 bolts out of the back of the hub and pull everything as one unit, that big nut in the middle of the unit bearing does nothing but lock it to the axle, dont waste your time with the big nut, just go for the 4 small bolts that hold the hub on......
9. dont let your idiot brother put a castle nut on 2 threads and try and drive a tie rod out of the passenger side steering arm with a hammer, it will cost you 116.00 dollars to fix that problem, ask me how i know.....
10. you HAVE to remove the differential to pull out all the old seals, no way around it, so please revert back to #2 for further instructions on this.....
11. dont waste your money on the "delete kit" for the CAD, its a flat piece of steel with 4 holes drilled in it and a gasket to bolt over the hole where the CAD goes, it cost me like 90 bucks, make it at home......
NOW, YOU ASK YOURSELF, WAS THIS WORTH IT......YES, EVEN THOUGH I WONT BE DRIVING THE TRUCK FOR ANOTHER 10 MONTHS UNTIL I COME HOME NEXT APRIL, I AM HAPPY ITS DONE.....
here are the pictures.....
this is my truck as i found it in my storage building, this was my dad and brothers doing, not mine.....we cleaned the stuff out in front of it, jumped the battery and moved it around diagonally so it would be easier to work on.....the truck has developed a pretty substantial tranny leak but thats no big deal, it'll get fixed.....I dropped off my new 35 spline axles to have u-joints put in them before i started on this and in about 45minutes the driveline shop had them done, for both SPICER u-joints installed it was 110 bucks, which was the best deal in town, the shop was Central Florida Driveline in Lakeland Florida, located on Combee Rd. and also in Orlando.....i assembled this whole axle on the back of my 93 truck on its Western Hauler flatbed.......
So me and my neighbor Cricket pulled the front axle out from under the truck, i pay Cricket 8 bucks an hour and he will work most men to death and dont complain or whine, he just works.....it was fairly easy cause it was a southern truck, had been apart a little over a year ago and i had a electric impact, dont waste your time on using hand tools, an impact is the only way to go, it took us all of 25 minutes to get the axle down, before we took it out though we drained all the fluids, pulled the axles and hubs off, pulled the CAD unit, and dropped the spindles, so all we were working with was the housing and differential, that makes for a light weight, easy to handle axle.......like stated above in my list, just take the 4 bolts out of the back of the hubs and pull the axles and unit bearings as 1 unit, its soooooo much easier than trying to get that nut off, make sure you remove all of your old axle seals when you get the differential out, the new seals are custom made and held in by RTV sealant, SOOOOOO much easier to work with and it lets you decide how much gear oil you want in your axle, the can be installed 3/4 inch from the end of the axle tube all the way up to 3/4 of an inch from the differential, i installed mine 3 inches down each axle tube from the differential, later on when i do my locker and gears im going to pop them out and put a set near the end of the axle tubes, these are nice for you off-roaders too cause you can install a set near the diff to seal in the oil and a set near the ends of the axle tubes to keep dirt and mud out of the axles, these are the same type NASCAR uses.....this picture is of the axle after i pulled the differential out, cleaned the bearings and races, and installed the new axle seals......now i had to use a hammer, a block of wood and some wheel bearing grease to get this bad boy back in cause i didnt have a case spreader to do it.....FUN FUN FUN.....
This is us pressing out the ball joints, and like i said, if you plan on using the greasable MOOG's, take the grease fittings out before you install the axles, they came right out and went right in since we was using an impact, i put a light dap of grease on them before the new ones were installed so they would go in easier, and they did, make sure you get them seated good enough to get the snap rings on the lower joints.....
This is the axle with the new spindle and axles installed, you got to put the dust cover down over the stub axle, then the three piece seal, one piece installs on next to the dust cover, one installs on top of that and the final one installs in the back of the spindle, then slip it into the axle housing, be careful not to push or ruin the axle seals you have already installed, i waited a little bit to let the RTV setup so the seals would be in good, NOW READ THIS CAREFULLY , MAKE SURE YOU HAVE EVERYTHING INSTALLED CORRECTLY OR YOU WILL BE HATING LIFE TRYING TO GET THESE BOLTS OUT AFTER INSTALLING THEM, TRUST ME, I HAD TO DO THIS ON ONE SIDE AND IT WAS MISERABLE, ITS ALMOST DOWN RIGHT IMPOSSIBLE TO GET THEM BACK OFF, now install the spindle lining up the 4 big holes and install your bolts with the supplied Nylocks and some red loc-tite, i used the imapct and a 7/8 wrench to do this, its definately a tight fit getting in there with the wrench but you cant use a socket on them cause of the inner lip of the new spindle is in the way......also as you can see in this picture, the evil grease zerk fittings, now in the picture below this one you cant see one anymore, thats because i cut it off and sealed it with RTV sealant, that is the little black glob you see above the u-joint cap.....
this is the lockout installed, i wasnt going to bore you with step by step pictures on how to install the hubs, plus my hands were covered in wheel bearing grease, first you grease everything really good, packing all the bearings, then you install the inner wheel bearing into the hub, its easy, just grease it and set it on the race, NOW be gentle with this part, you either need a seal driver or a 2X6 block of wood, i used the wood, drive the new wheel seal into the back of the hub, then slip it onto the new spindle, now install the outter bearing onto the spindle and push it in as far as it will go, now you will install the bearing adjuster, lock ring, and lock nut, its simple, run the adjuster nut down til you get a good feel on the wheel bearing (the adjuster nut has a small locking tab on it, not to tight and not to loose, i prefer mine a little tighter cause they will loosen as they wear, now install the lock ring, you may have to tighten or loosen the adjuster nut to get the locking tab to line up with the locking ring, once you get it in correctly install your lock nut and tighten it down til its snug, now for all of this you will either need a 4 prong hub socket you can buy atmost part stores or you can use a hammer and screw driver, i used the hammer and screw driver, now you need to install the splined drive flange part of the lockout, it just slips in, next you need to install the BIG lock ring, i had to use a pair of pliers to push it in but it went, that is pretty common when doing Dana 60's, next i installed the outter snap ring on the end of the stub axle then put the lock-out dial and spring in and tightened down the 6 small bolts......
this is the axle all completed and ready to be installed, NOW LISTEN CAREFULLY, your stock axle vent is at the CAD unit and their CAD delete plate has a place for the axle vent in it, BUT i installed my axle seals before the CAD so there is no way to vent the axle unless you want to drill a hole in the housing or in your differential cover and install a vent, so i did neither and i just drilled a very tiny hole in the top right of the cover and im going to use that as a vent because i have a nice shiny new aluminum cover from Pro Comp that im going to use but my dad has to drill and tap it for a vent so for right now the tiny hole in the stock differential cover will have to work i guess.....
here are some more pics i took back in january or the inner 35 Spline Moser shafts....
THANKS TO EMS OFFROAD, MOSER, CENTRAL FLORIDA DRIVESHAFT, AND MY LOCAL ADVANCE AUTOPARTS.....