93 Chevy RCSB Pro-Street Build

This is one of a few build up’s of mine that has been going on for what seems to be a very long time in the making. I picked up the diesel bug back in 2002 when diesel for me was all about towing heavy loads with my trailers and reading up on how to modify them for more power and torque. I wanted to build my own diesel powered race truck since 2008/2009 after going too and reading about events like TS performance and Schied etc. Like most on here time and money was always the big hold up for me. At this point this build is not sponsored in anyway except some great pricing on parts I need from my friends at Beans Diesel and Jeff at Mumau Diesel. Both just happen to be site sponsors too.


In early spring of 2011 I was ready and dead set on building a competitive pro street truck knowing it wouldn’t be done anytime soon and I would only be able to work on it when time and money allowed it too. This is only one of many modified trucks I currently own and support. A select few of my employee's and myself work on them for a hobby during the off peak season for us. Like most on here I’m constantly making changes looking for improvements and modify everything I own for max output and efficiency. Like some on here it’s just a bad habit since I was a small kid. My Dad always said to me since I can remember modifying my first beater go cart."Son…..you can’t fix it if it isn't broke". So……..I bought a broke truck that needs fixing: evil


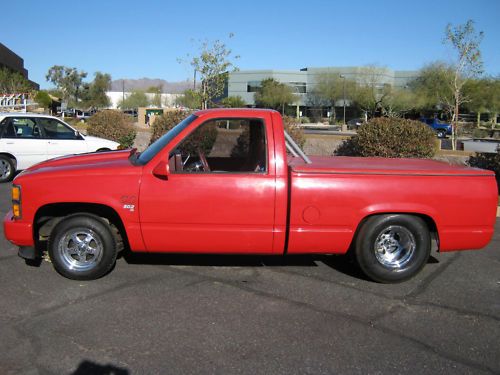
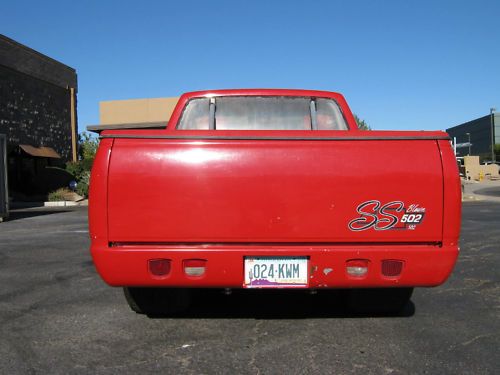
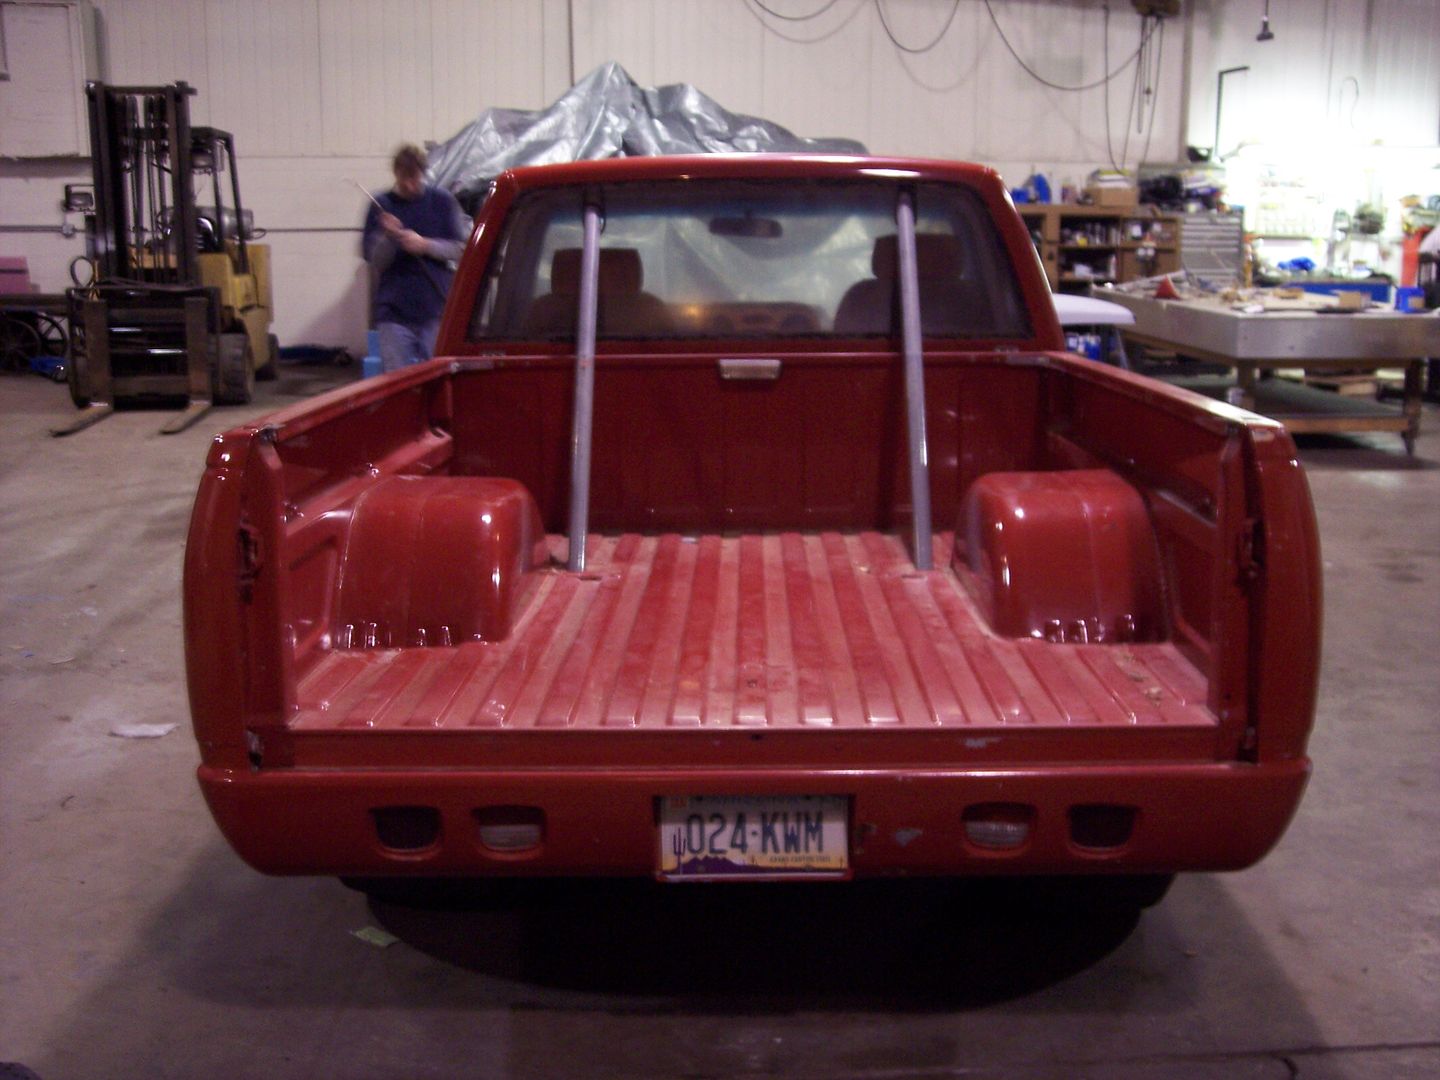
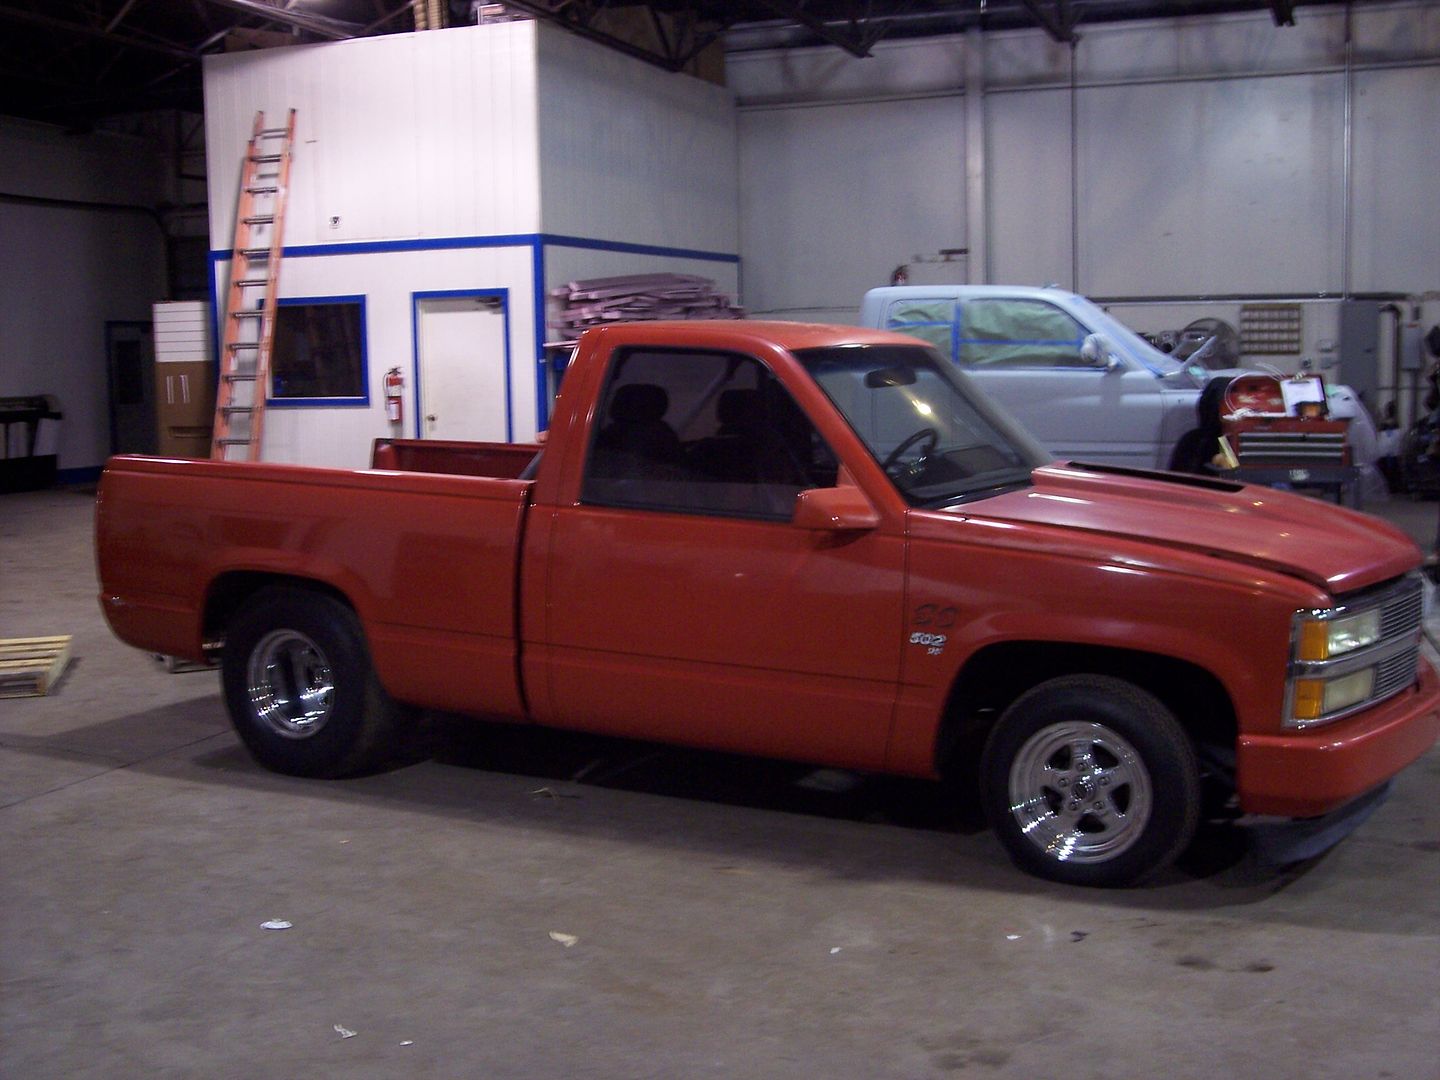
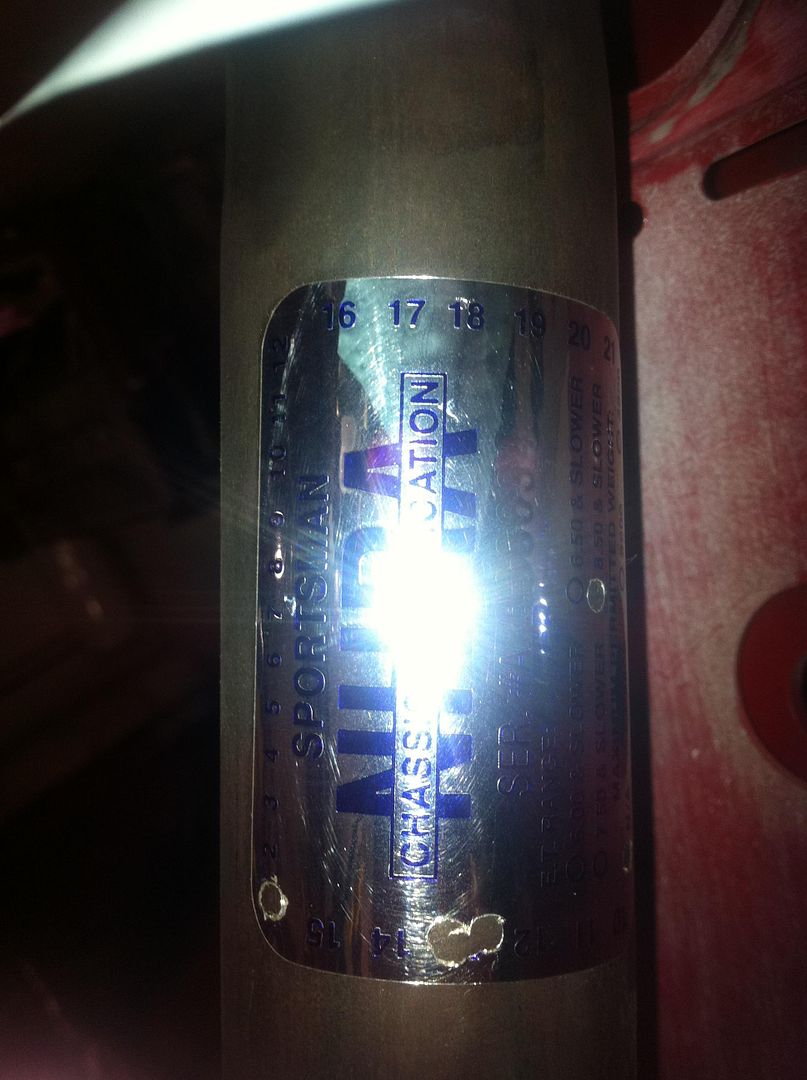
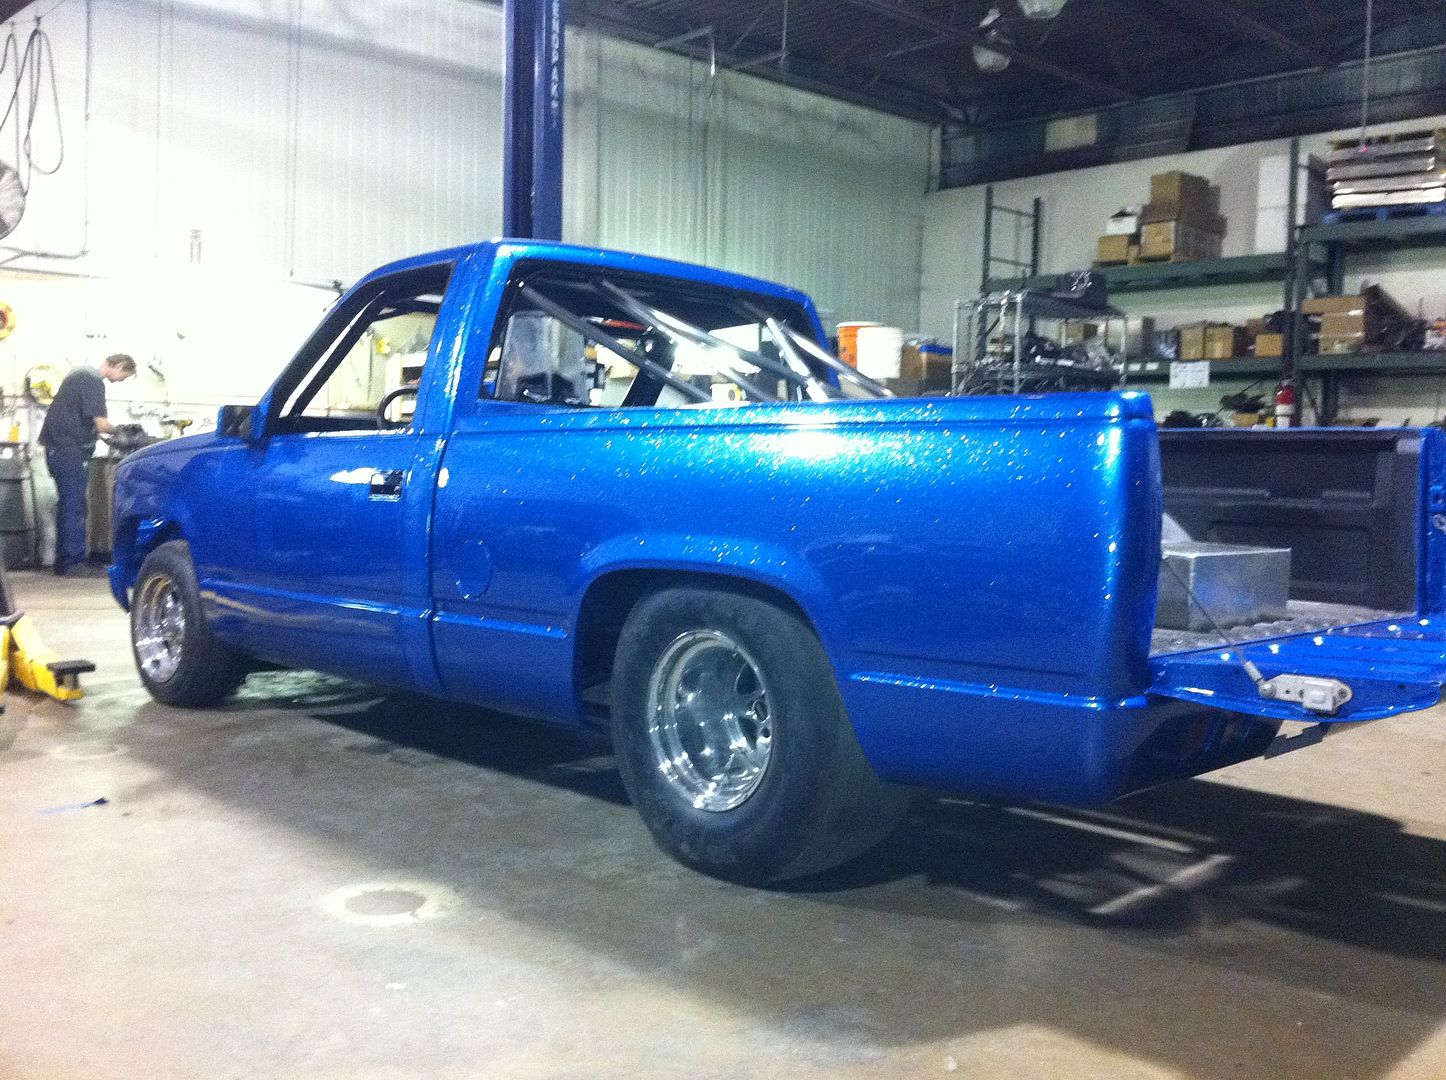
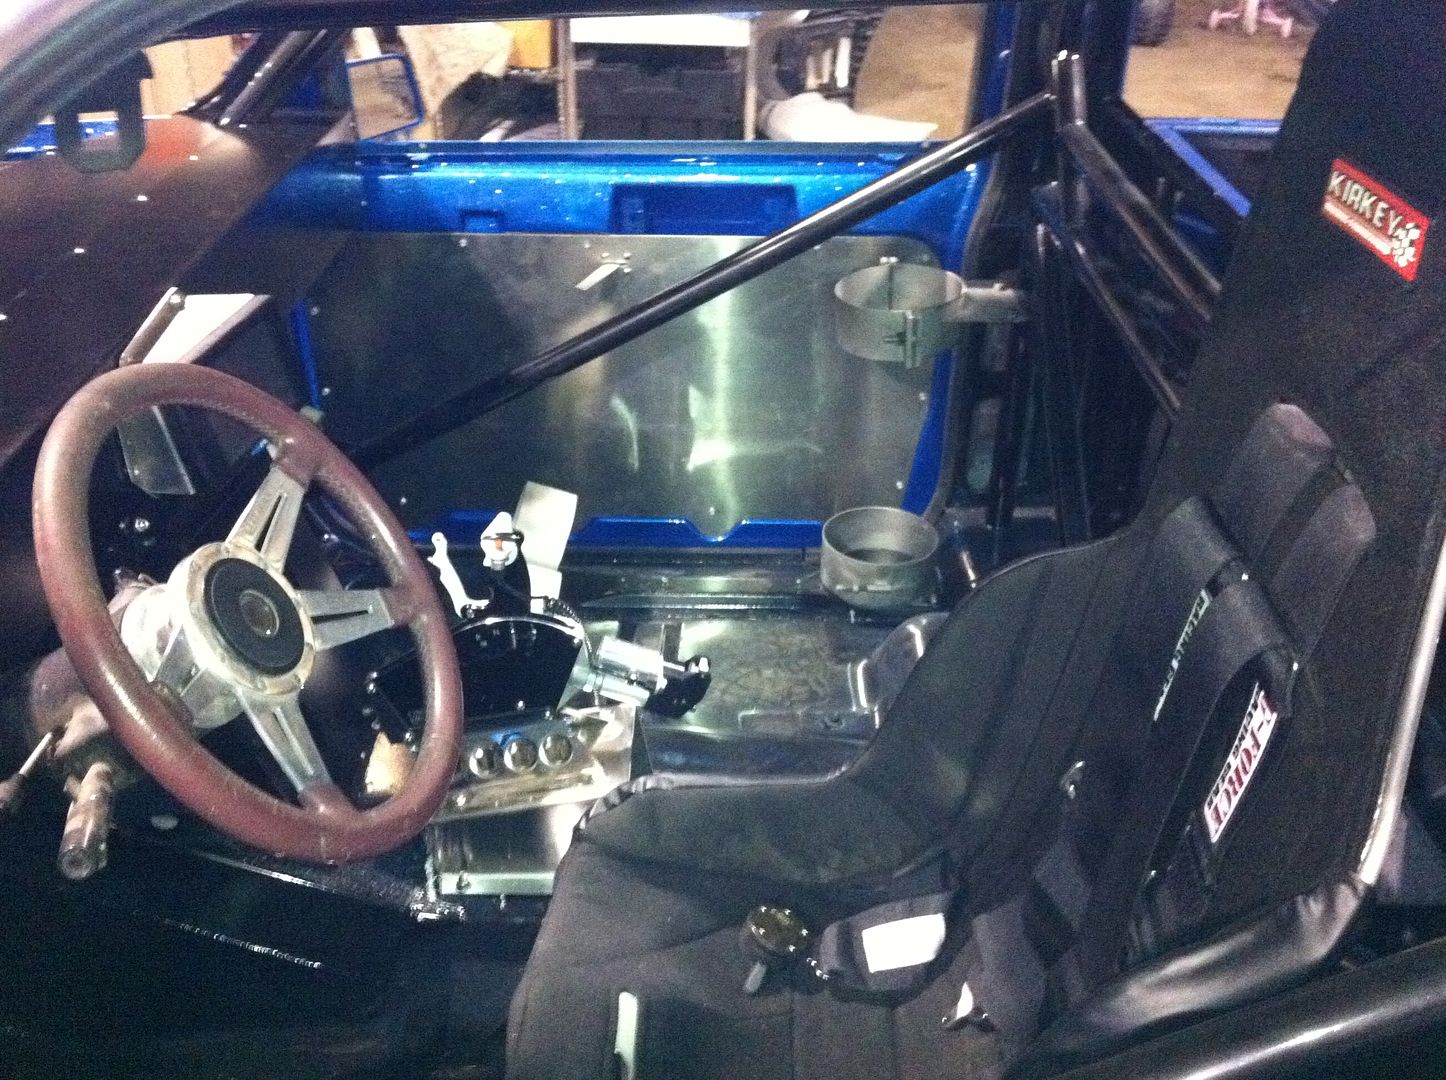
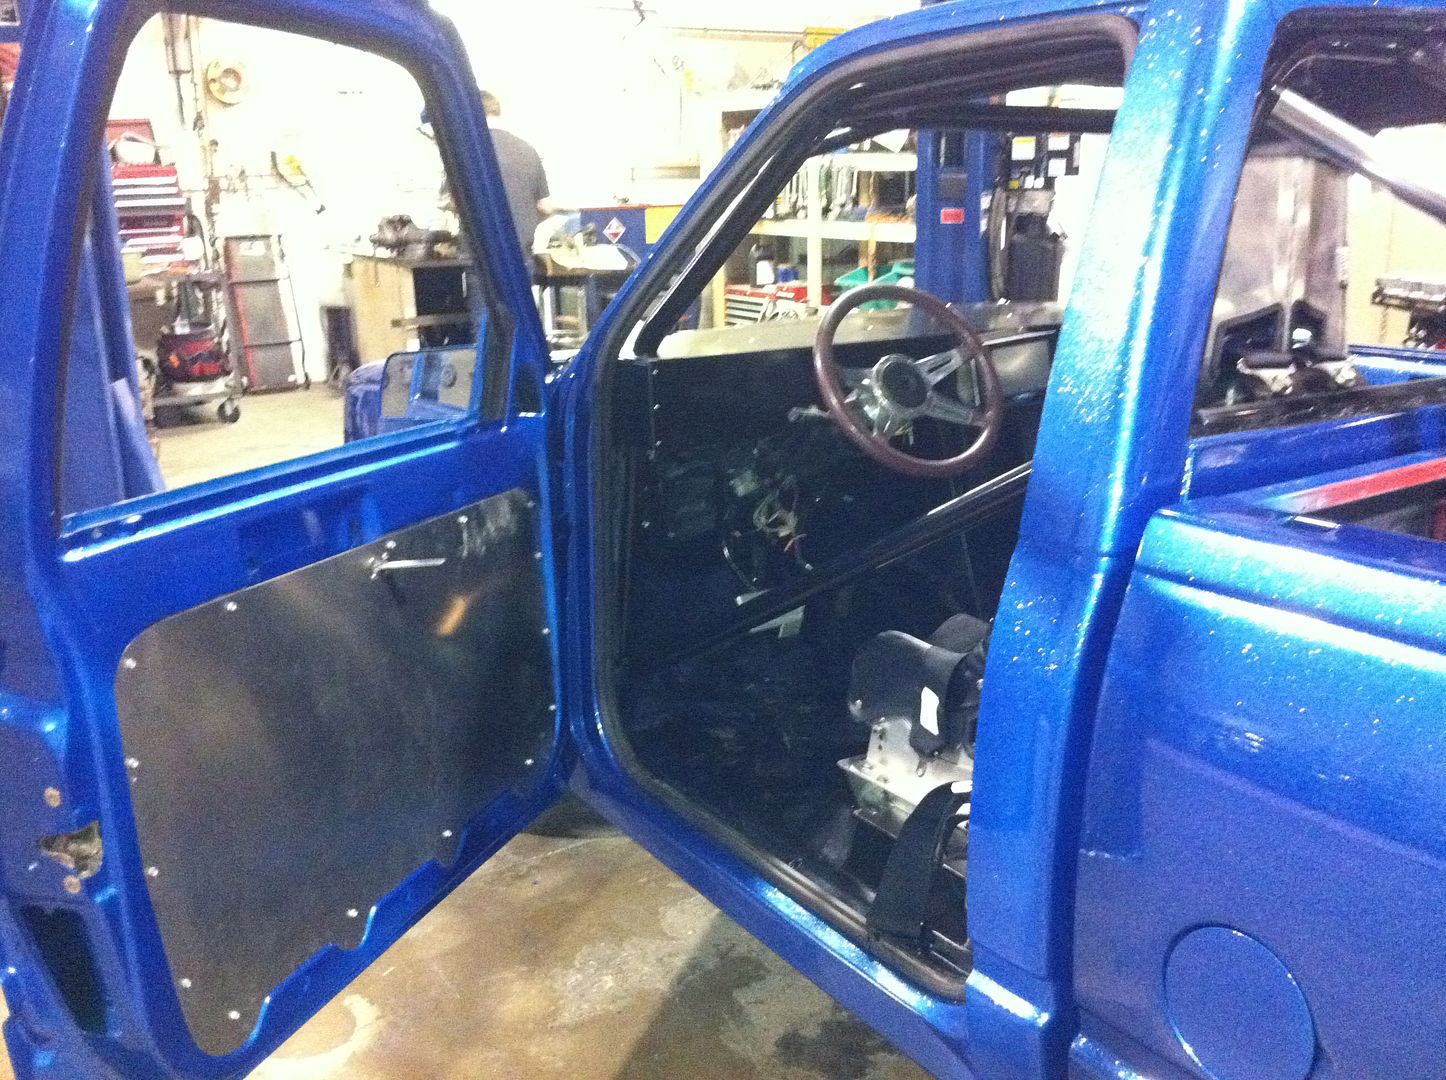
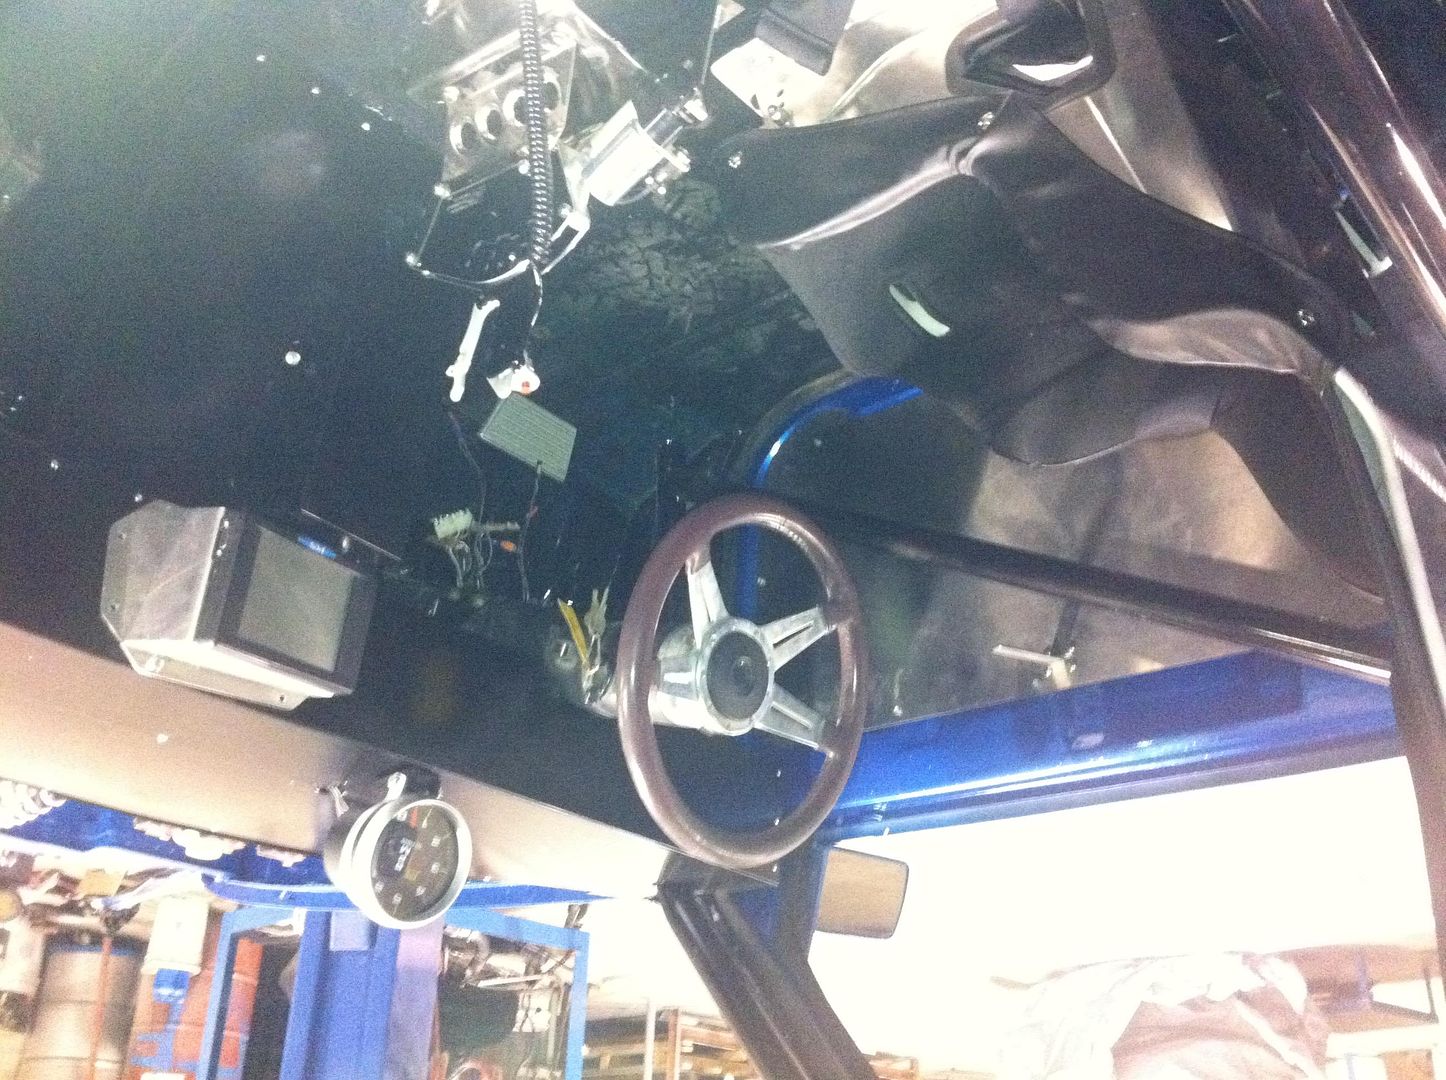
The hunt for a chassis or truck to build was on. Few months later I found a super clean 93 Chevy 454 SS roller with 51,251 original miles. It was a one owner from Arizona back in the summer of 2011. Prior the owner had a 502 big block blower motor, roll bar and a Morrison back half 4 link kit that the owner had receipts showing what he spent in the chassis and roll bar work which he kept calling it a cage. I thought it was a good deal and a quick start to swap in a Cummins. I was hoping not to have to go thru building the chassis ground up as I know that was only extra time. Well that didn’t work out so well for me. The fabrication work done by the race shop was complete chit. Ray Charles could have welded better than this PRO race car shop IMO. My fault for not getting better pictures as the seller was always too far from the truck or a potential buyer was looking to get it. LOL.


Here is how I bought the roller that I was going to throw a built motor and trans and start racing. I still laugh about how dumb I was to think that's all it was going to take maybe one winter with the small details and ready for spring. LOL


CFIS8lg2kKGrHqJiwE1L6DqfsBNUHLbN7Yg_12_zpsf53d5b7f.jpg
[/URL]


CFIS6MwEWkKGrHqRhE0fgDjE7jBNUHLU5RC_12_zps9af5f07c.jpg
[/URL]


CFIS2RQmkKGrHqJhgE0fnpVpE0BNUHLKSH6_12_zpsca40ffd0.jpg
[/URL]


101_9907_zpsf1fc91ef.jpg
[/URL]


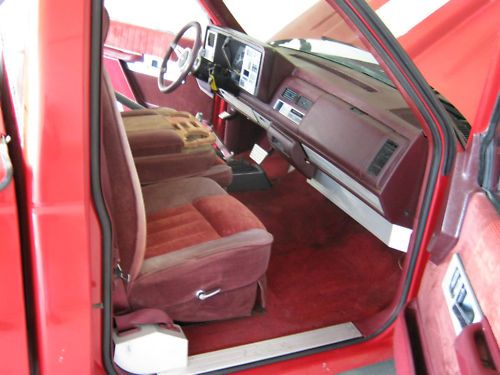
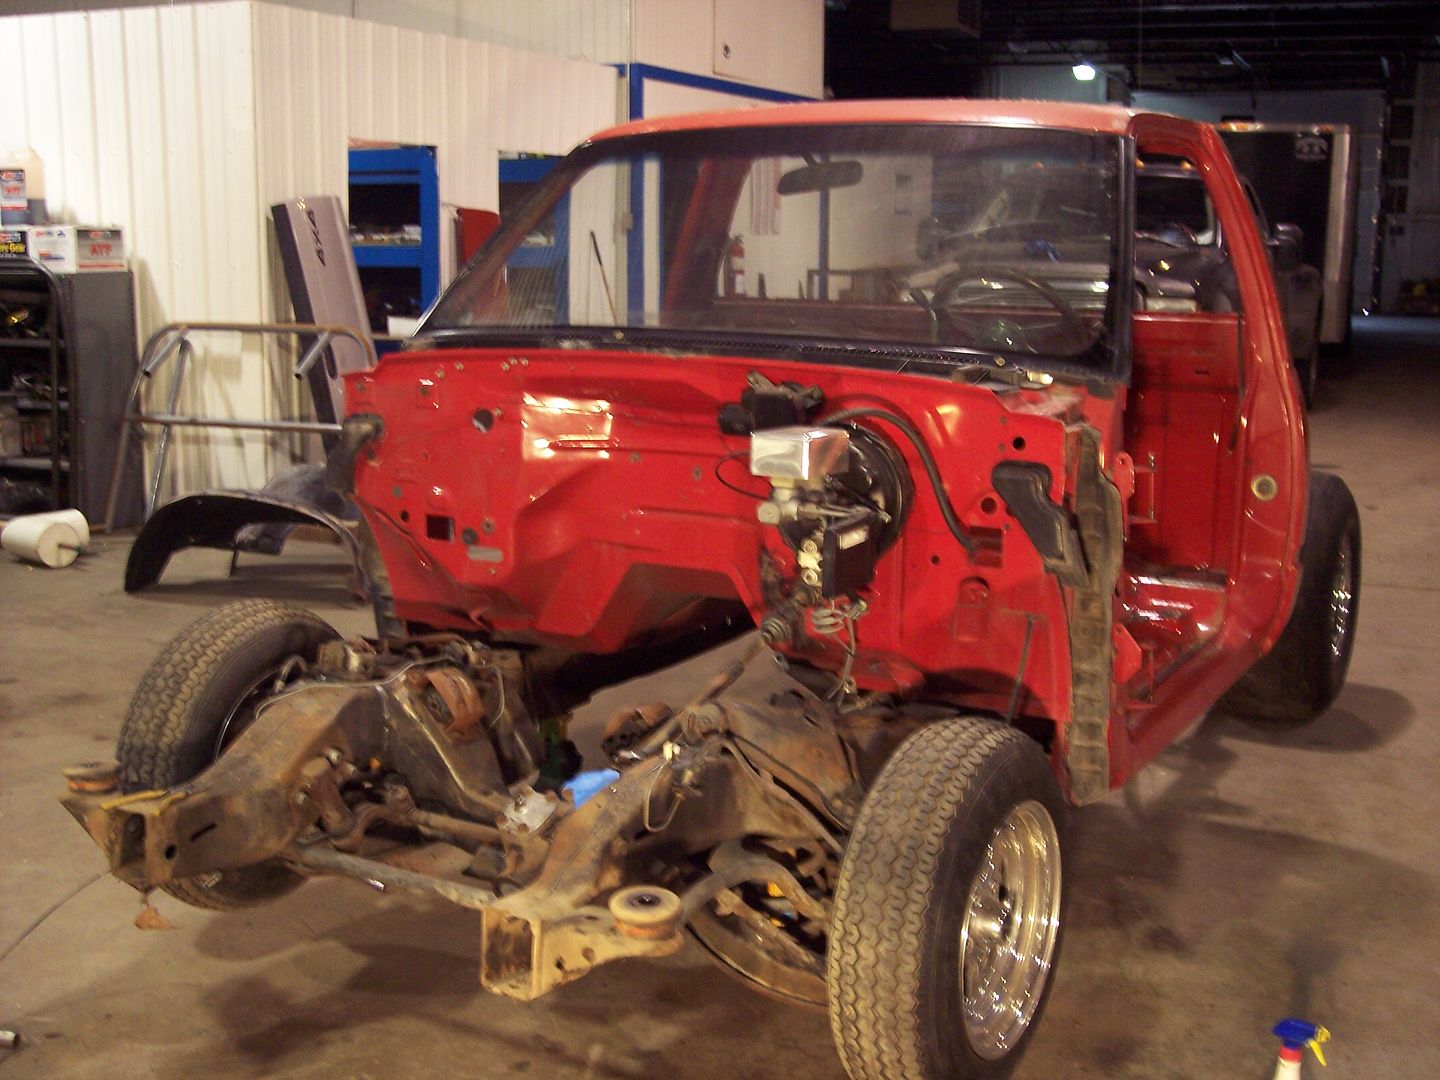
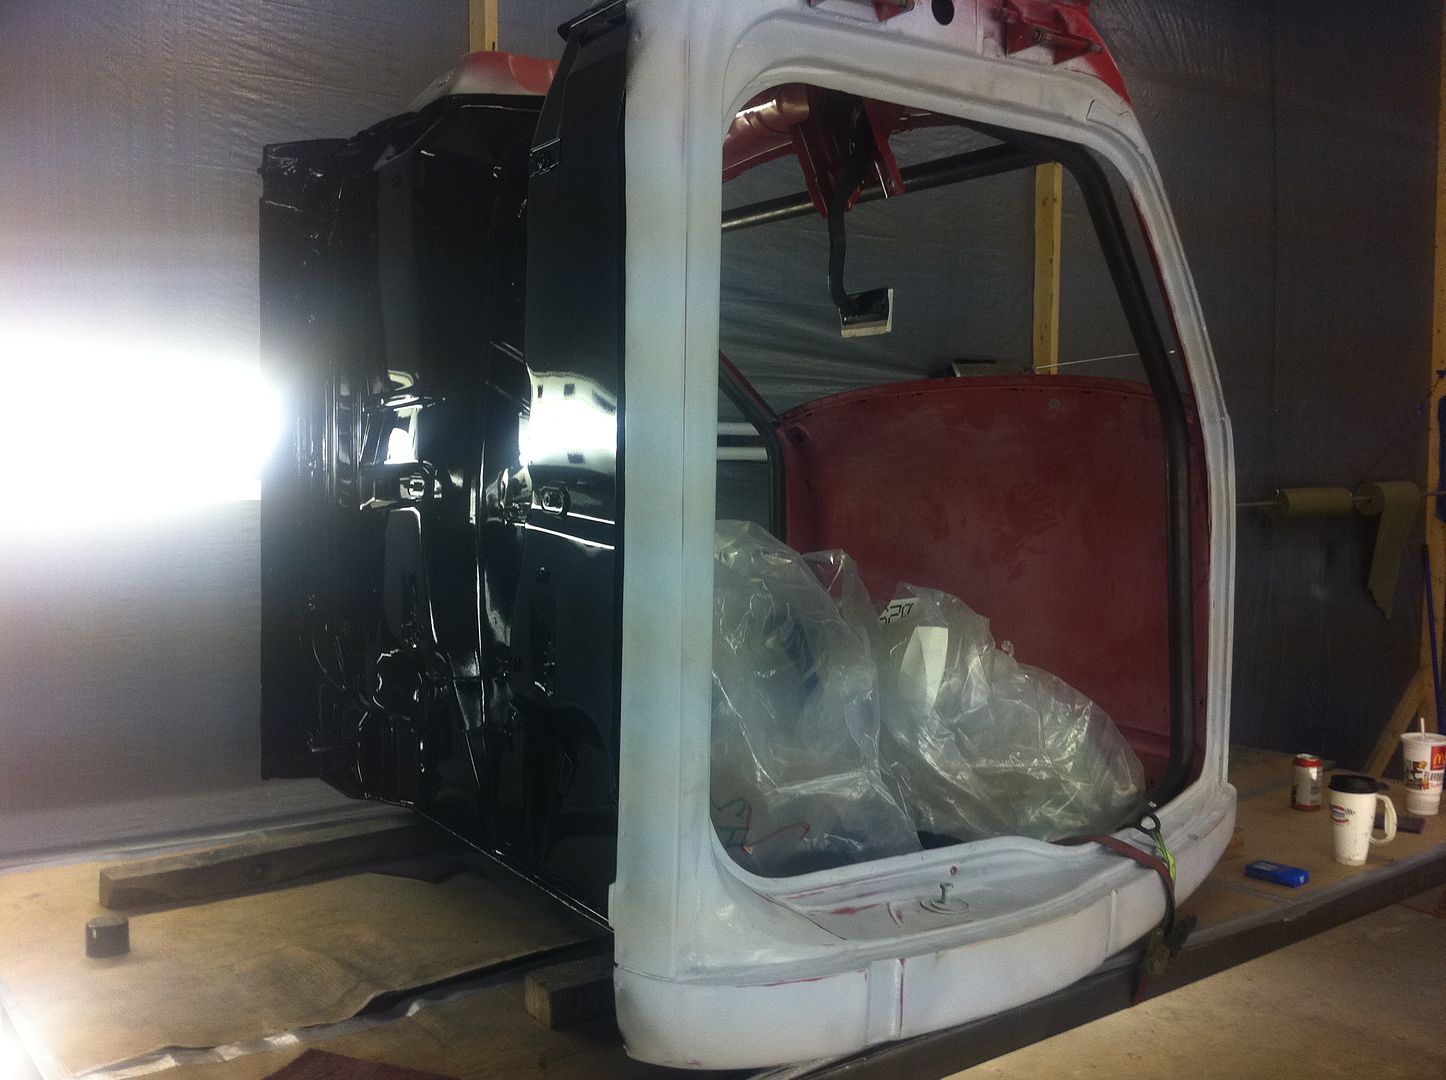
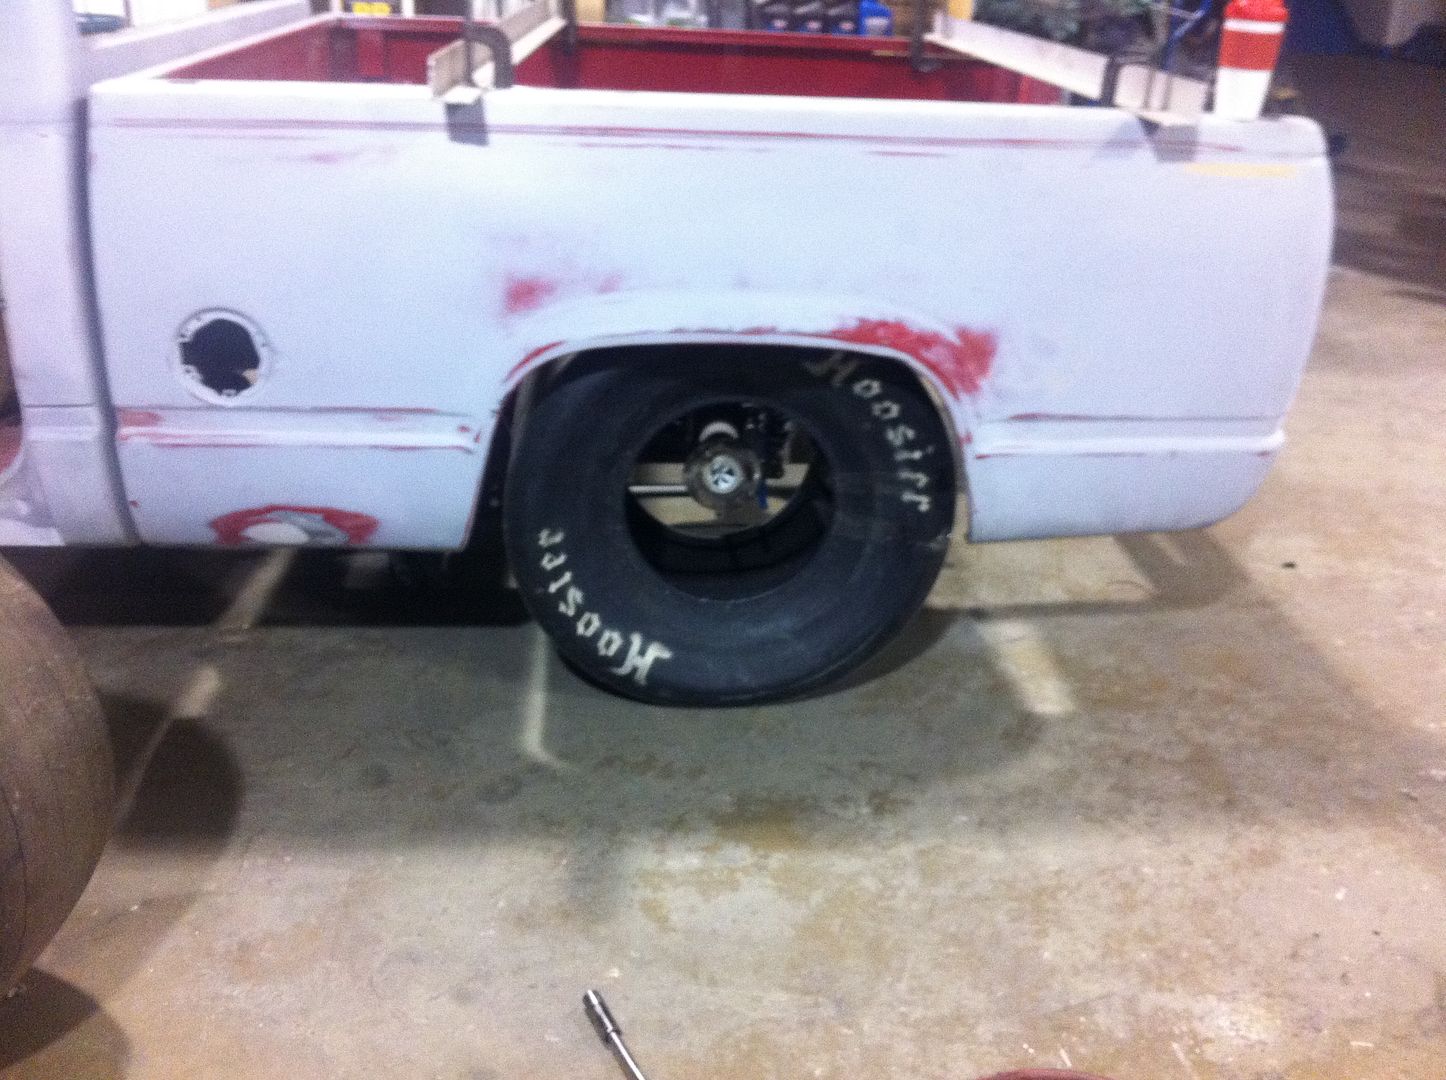
As you can see the body was in real good shape not a hint of rust and straight for the most part. Transport truck did a little damage to the bed being the truck is so low it hit during loading or unloading. Good starter package I thought.


101_9908_zpsc355eb7b.jpg
[/URL]


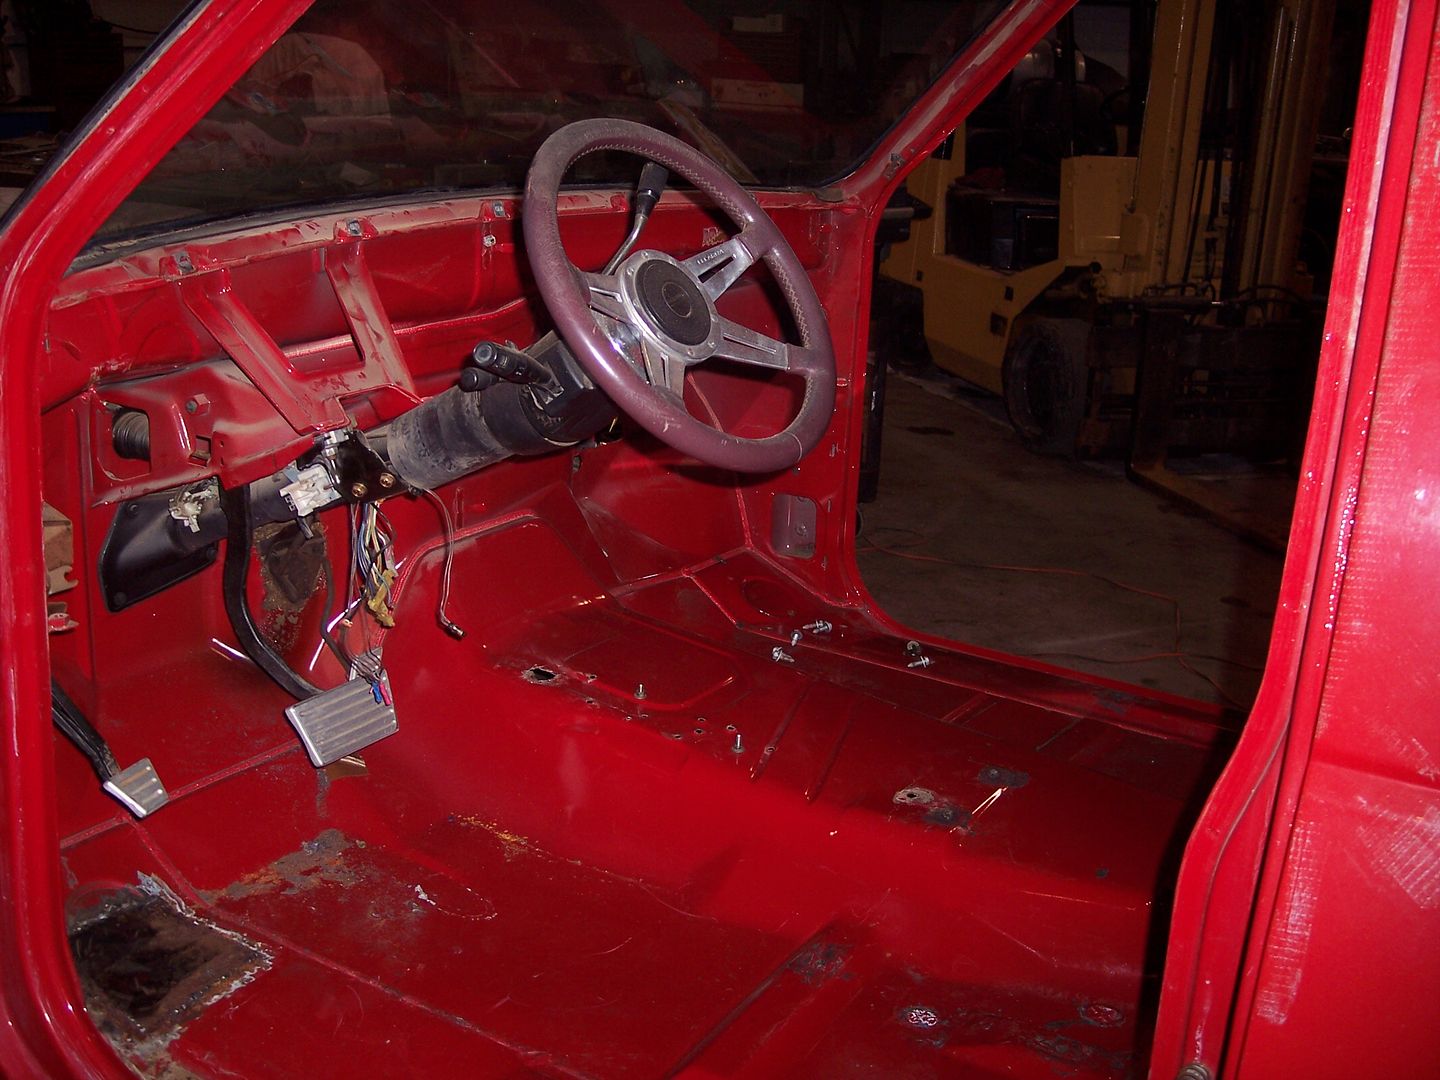
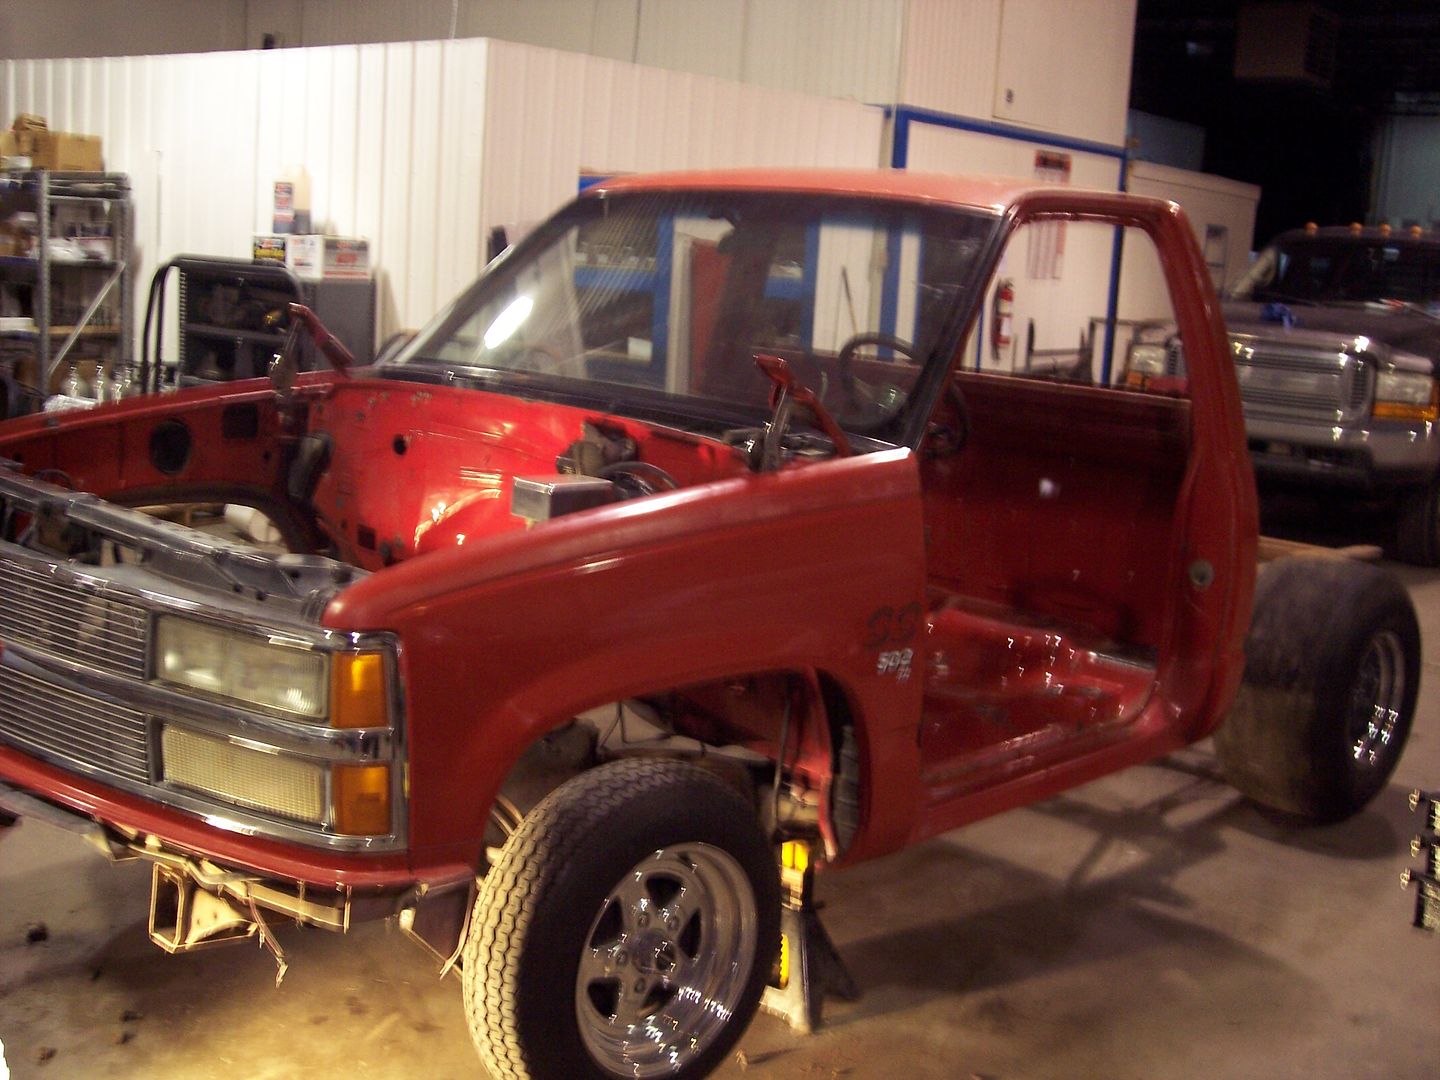
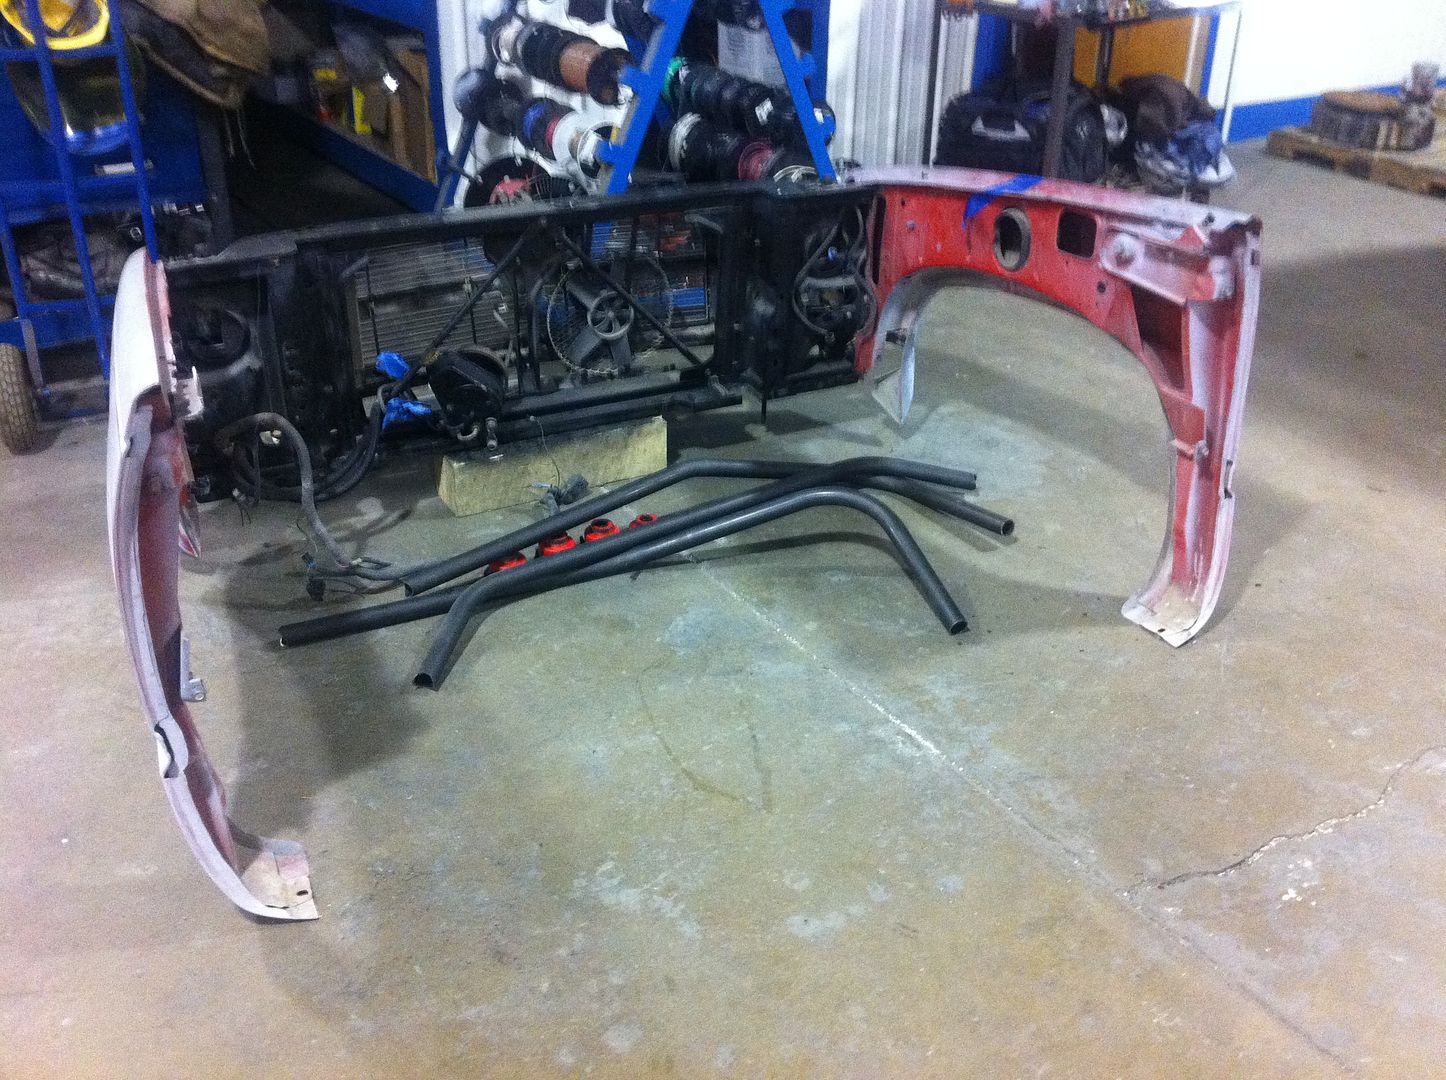
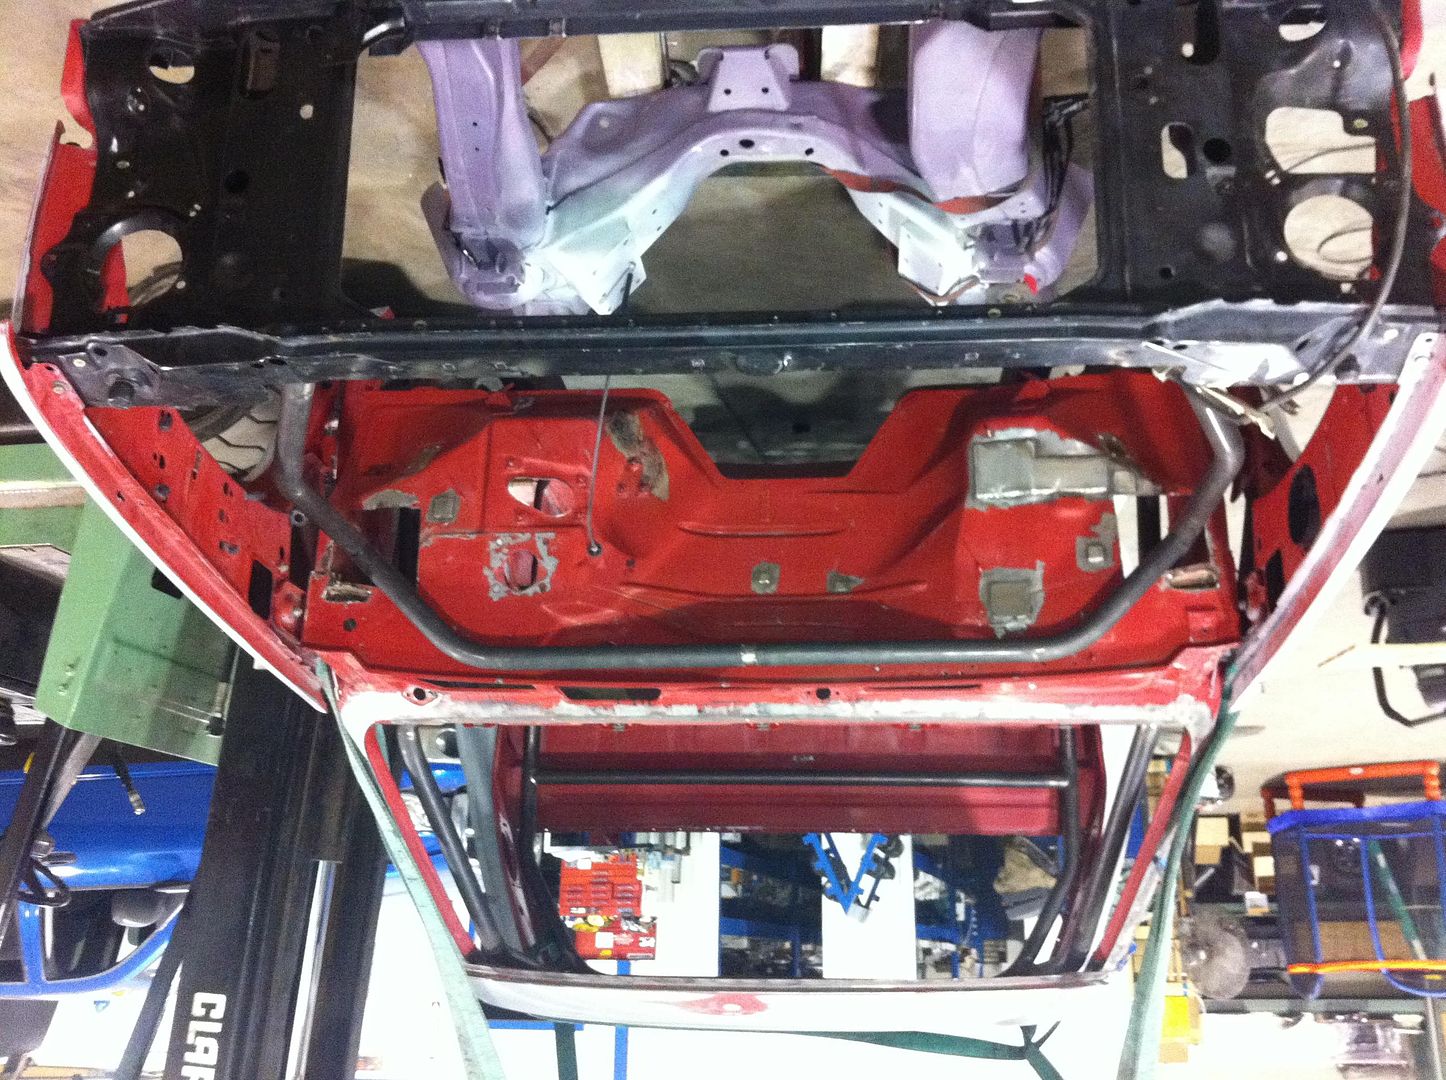
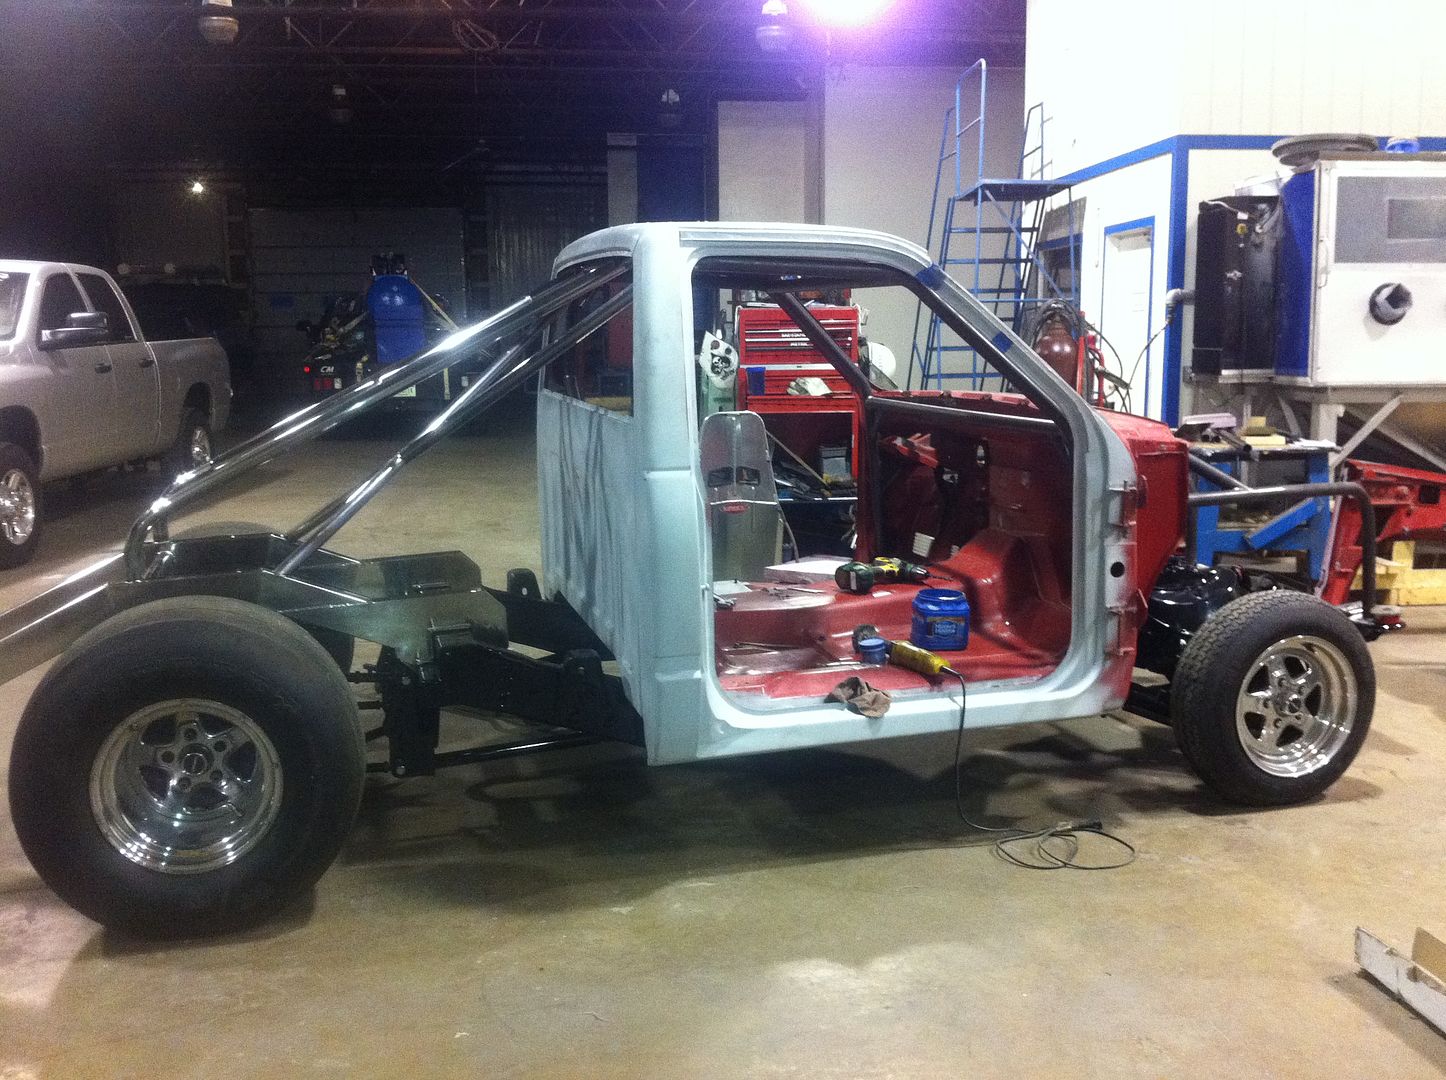
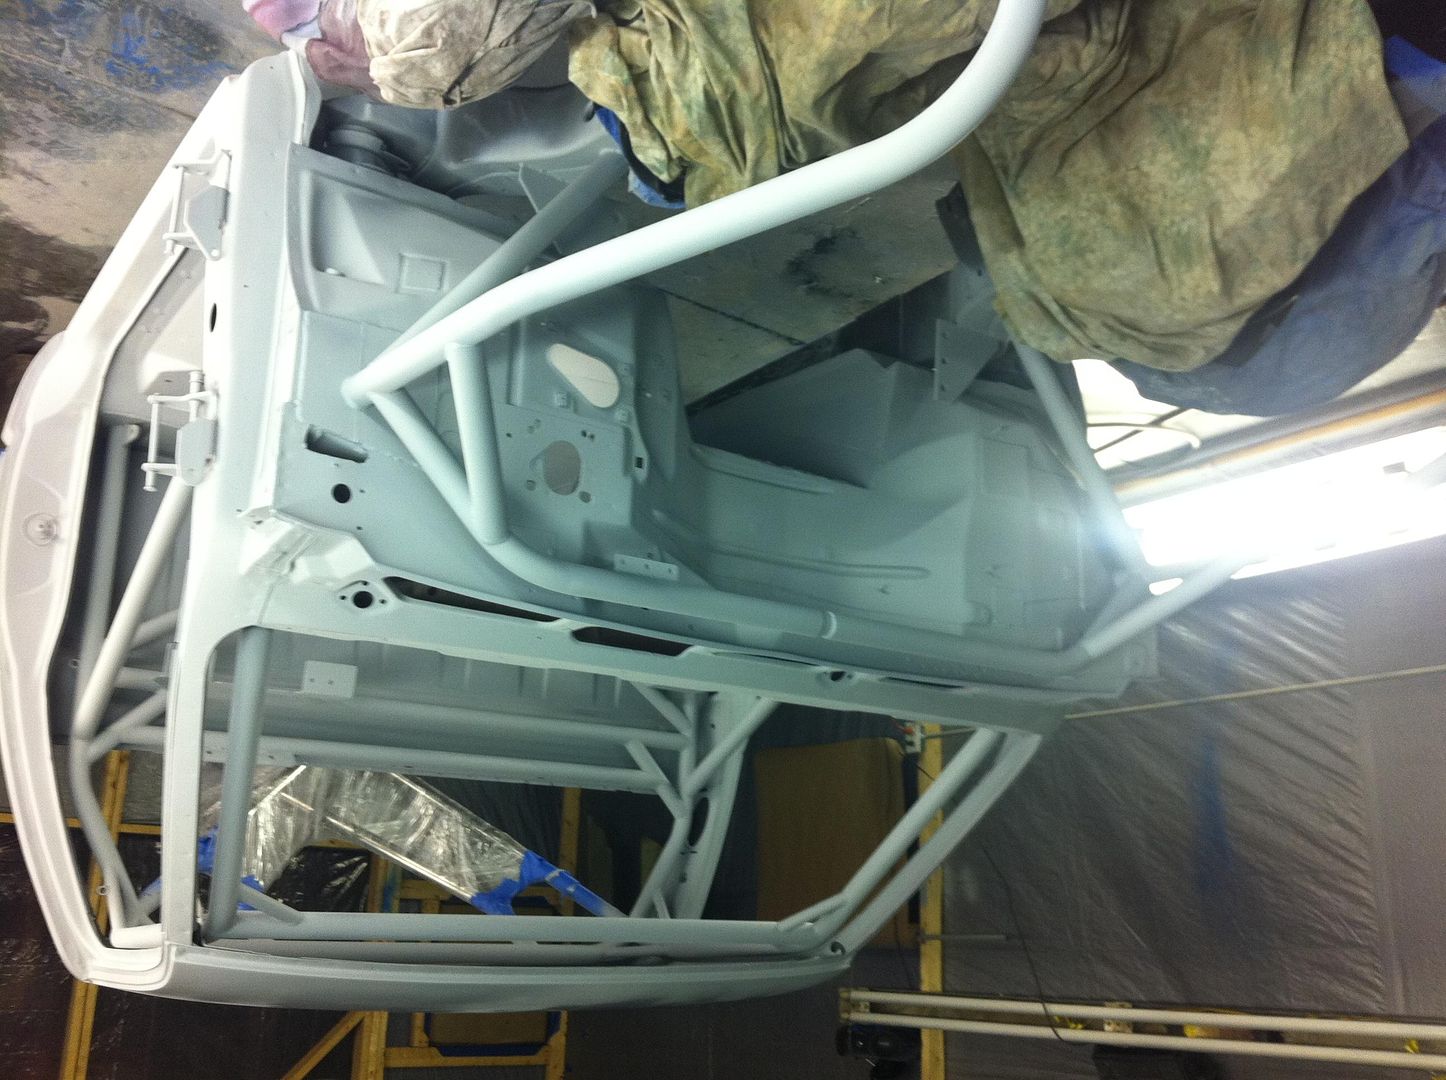
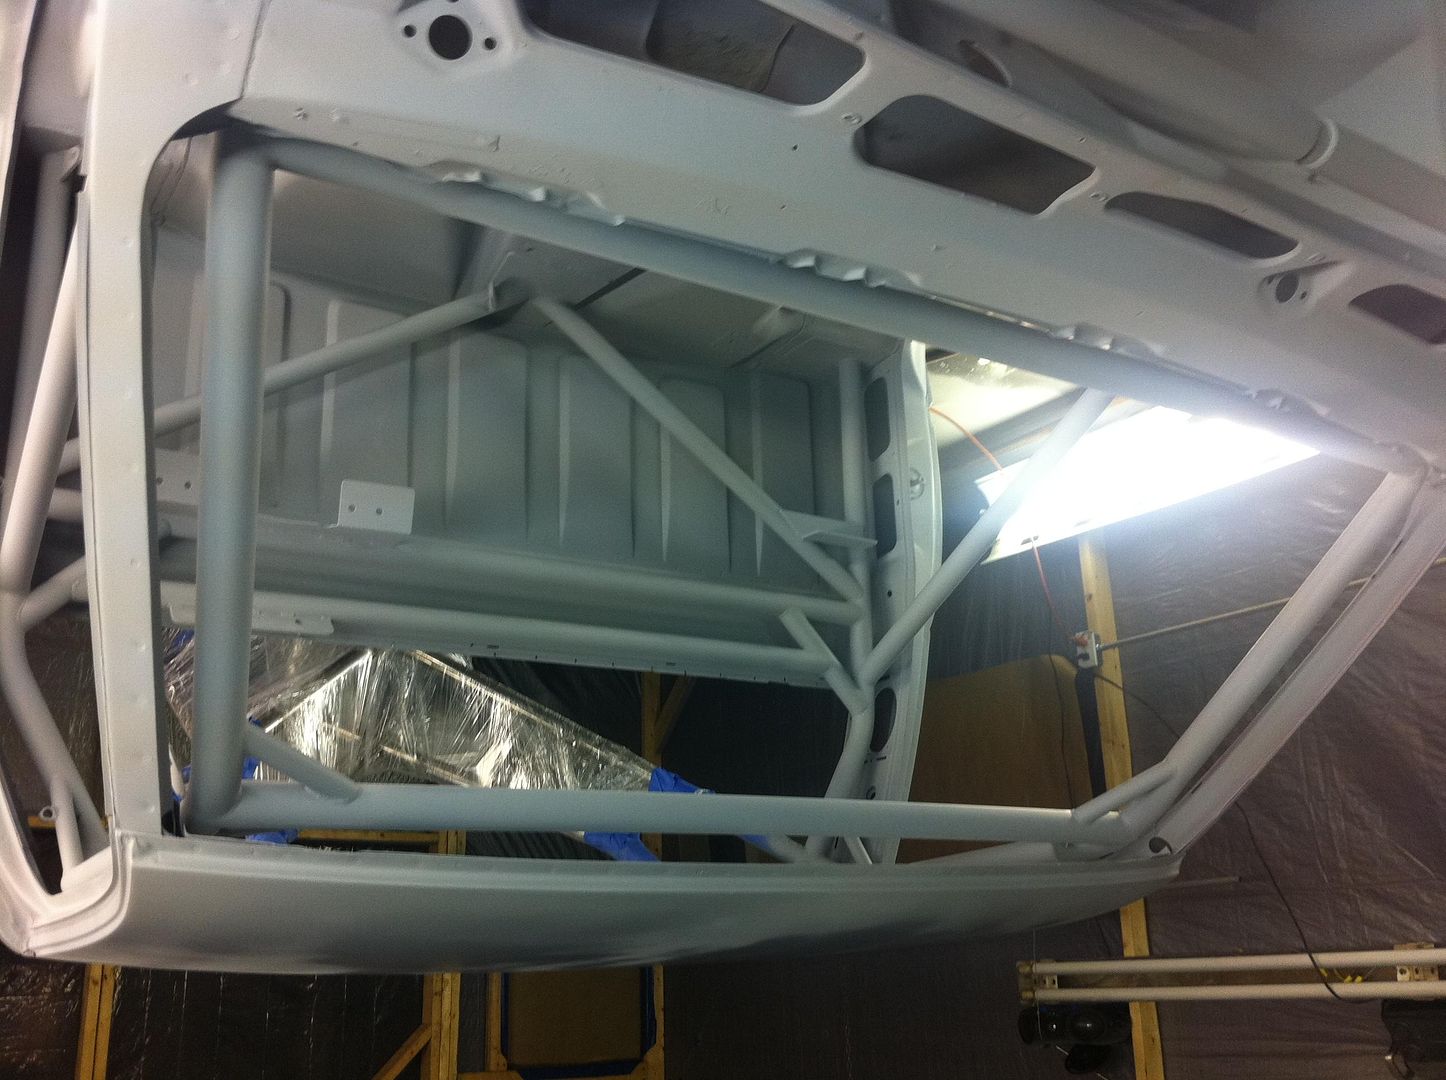
After review of the chassis and wanting to go faster before it was even built I decided to strip it down and start over. So basically I bought an expensive body with some parts I could reuse. The tear down begins.

101_9972_zps16ce5118.jpg
[/URL]


101_9968_zps26b06bbb.jpg
[/URL]


101_9970_zpseb86ba19.jpg
[/URL]


101_9942_zps5a9094a2.jpg
[/URL]


101_9928_zpsd38f85b6.jpg
[/URL]


IMG_1342_zps62065113.jpg
[/URL]


101_9980_zps94fbdacd.jpg
[/URL]


IMG_1375_zps6390adf6.jpg
[/URL]


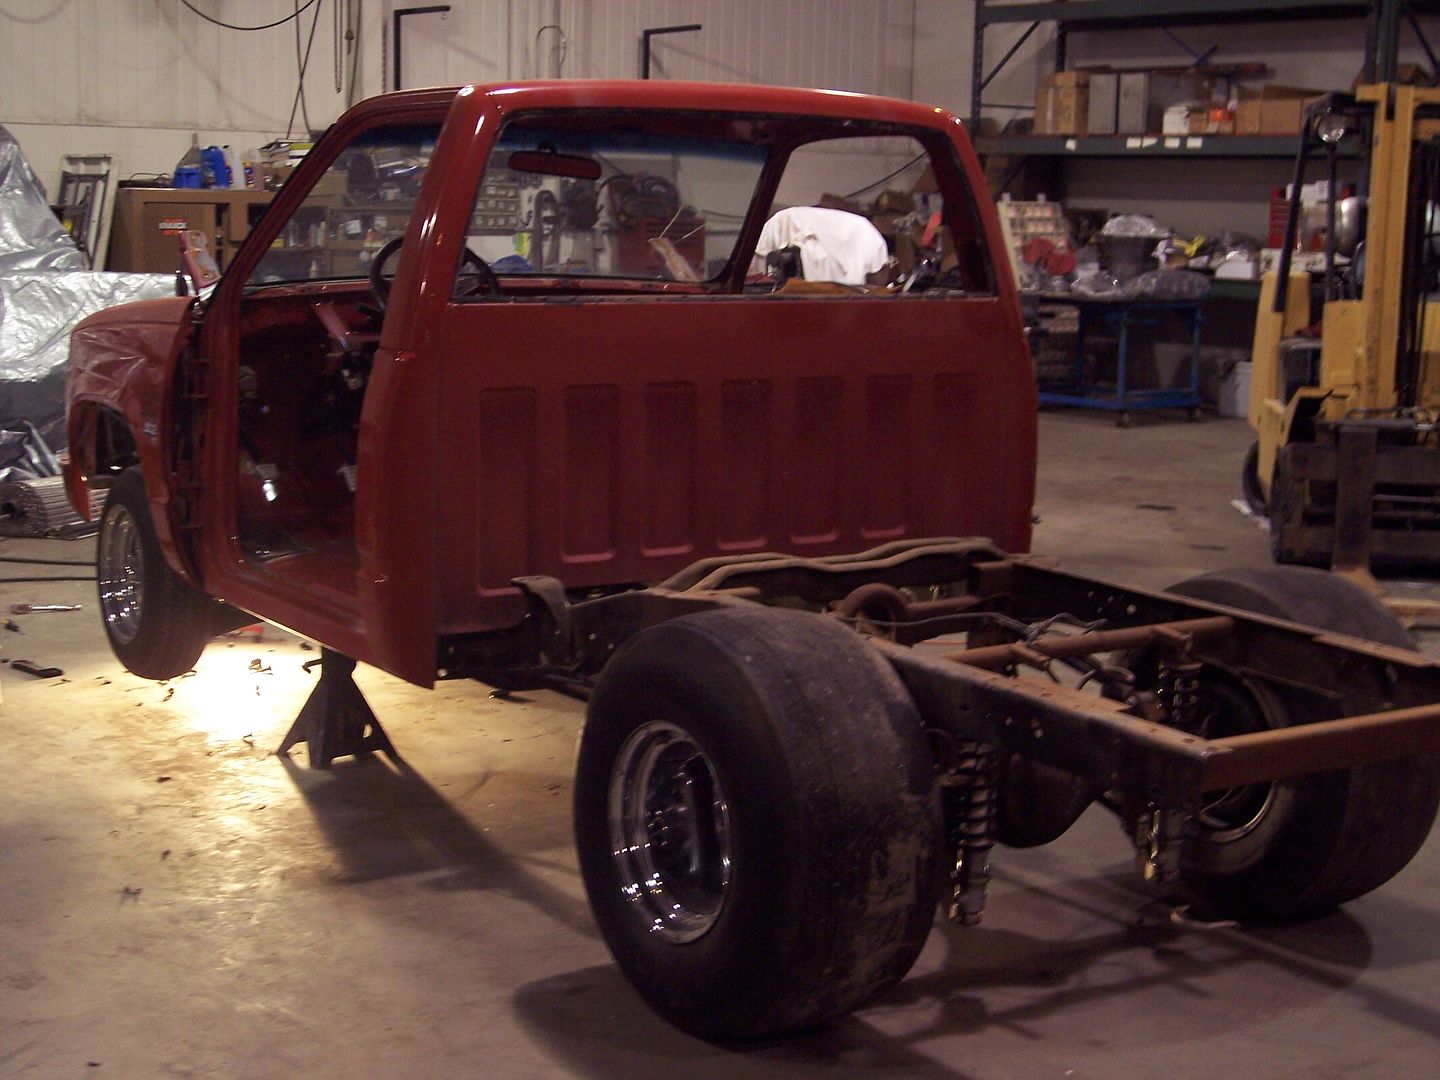
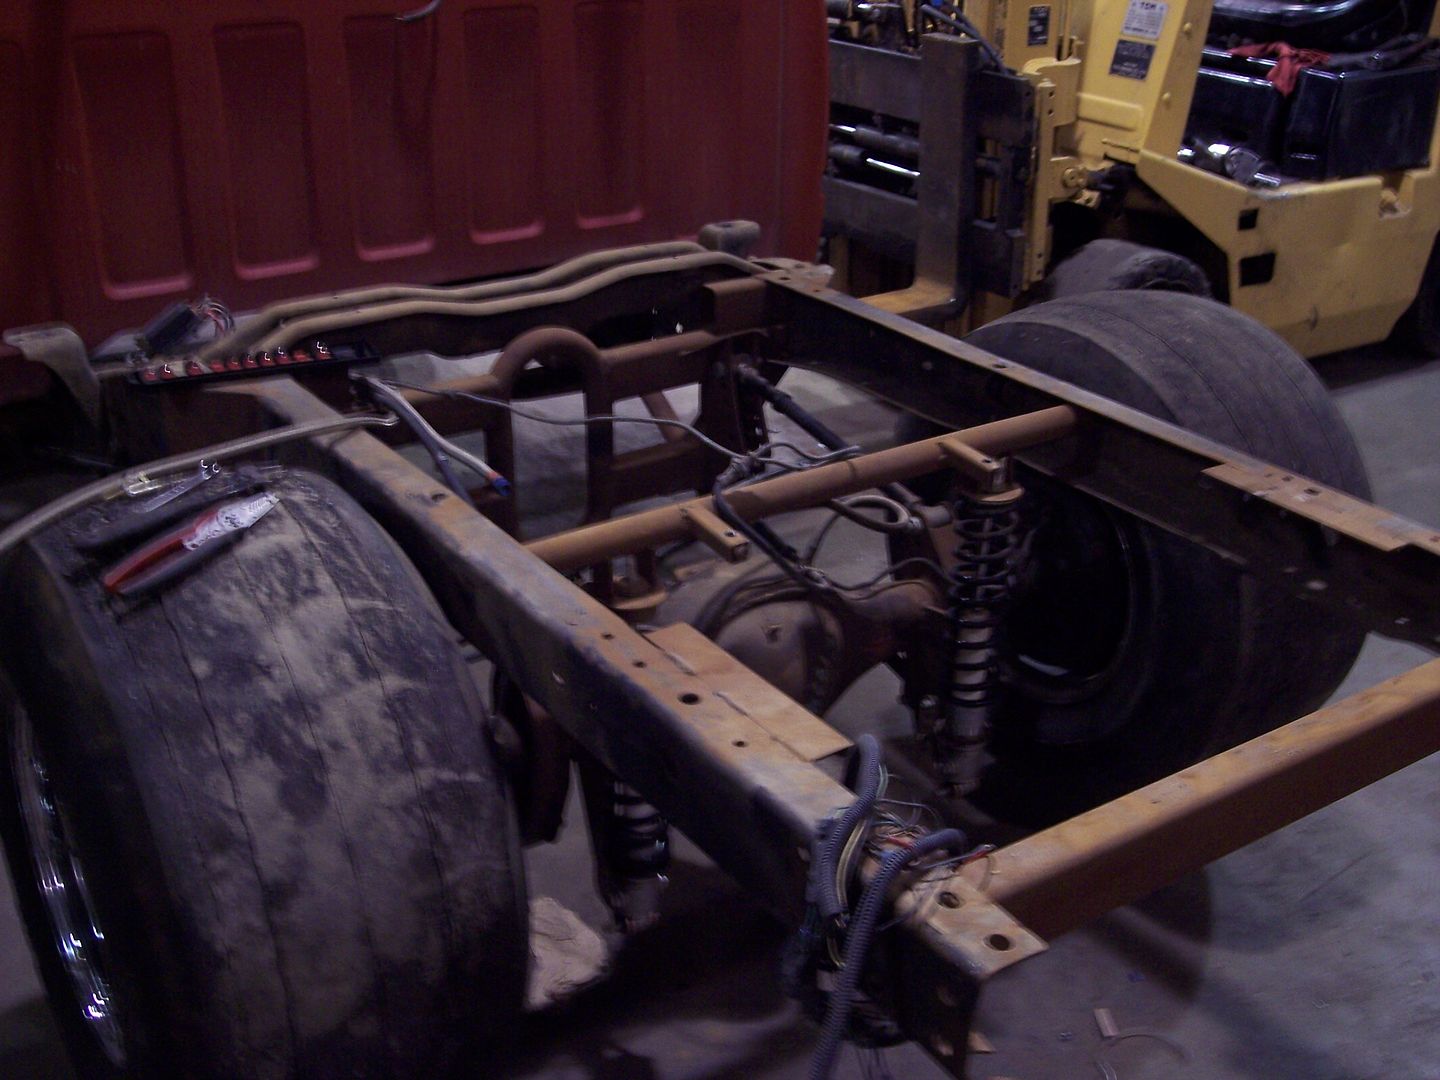
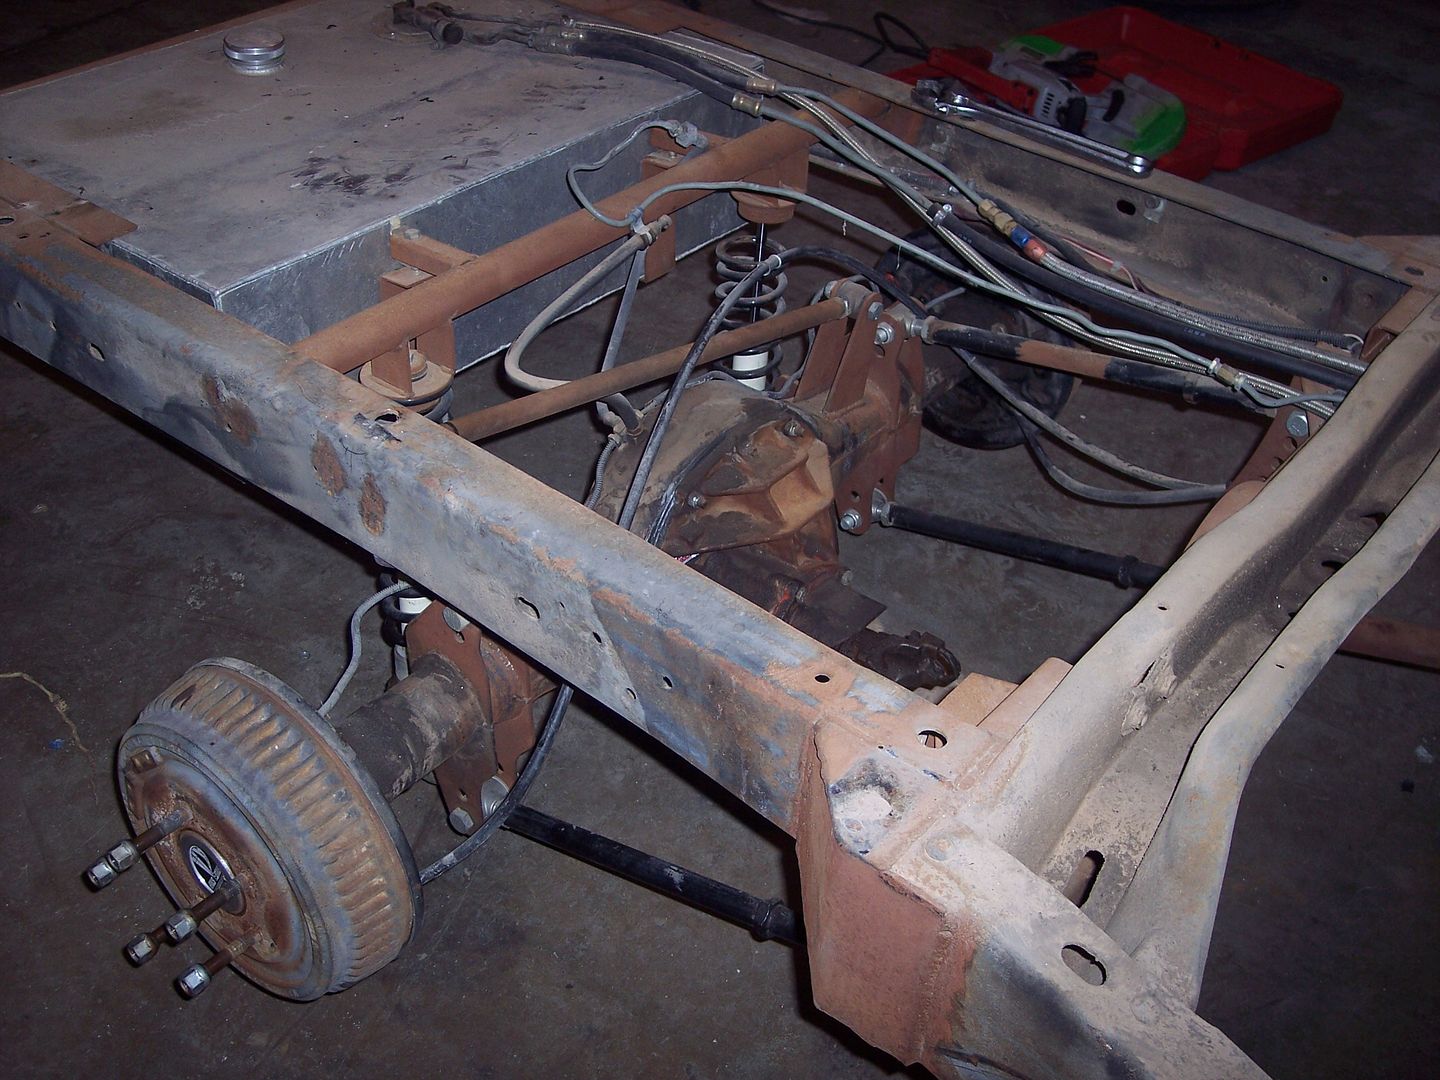
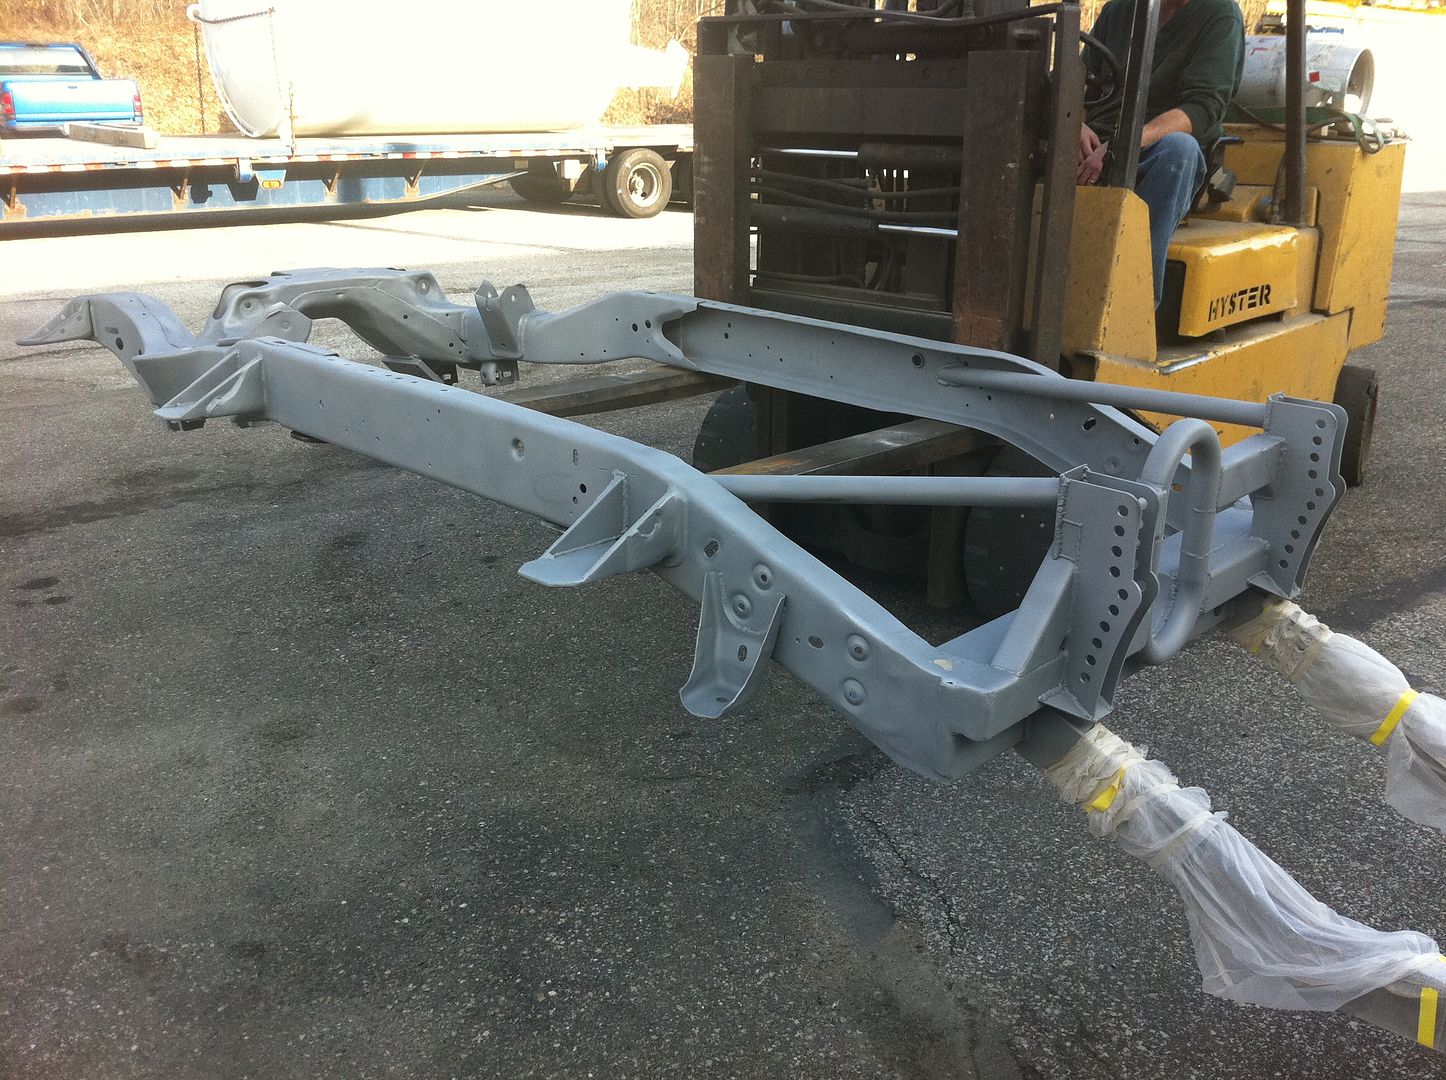
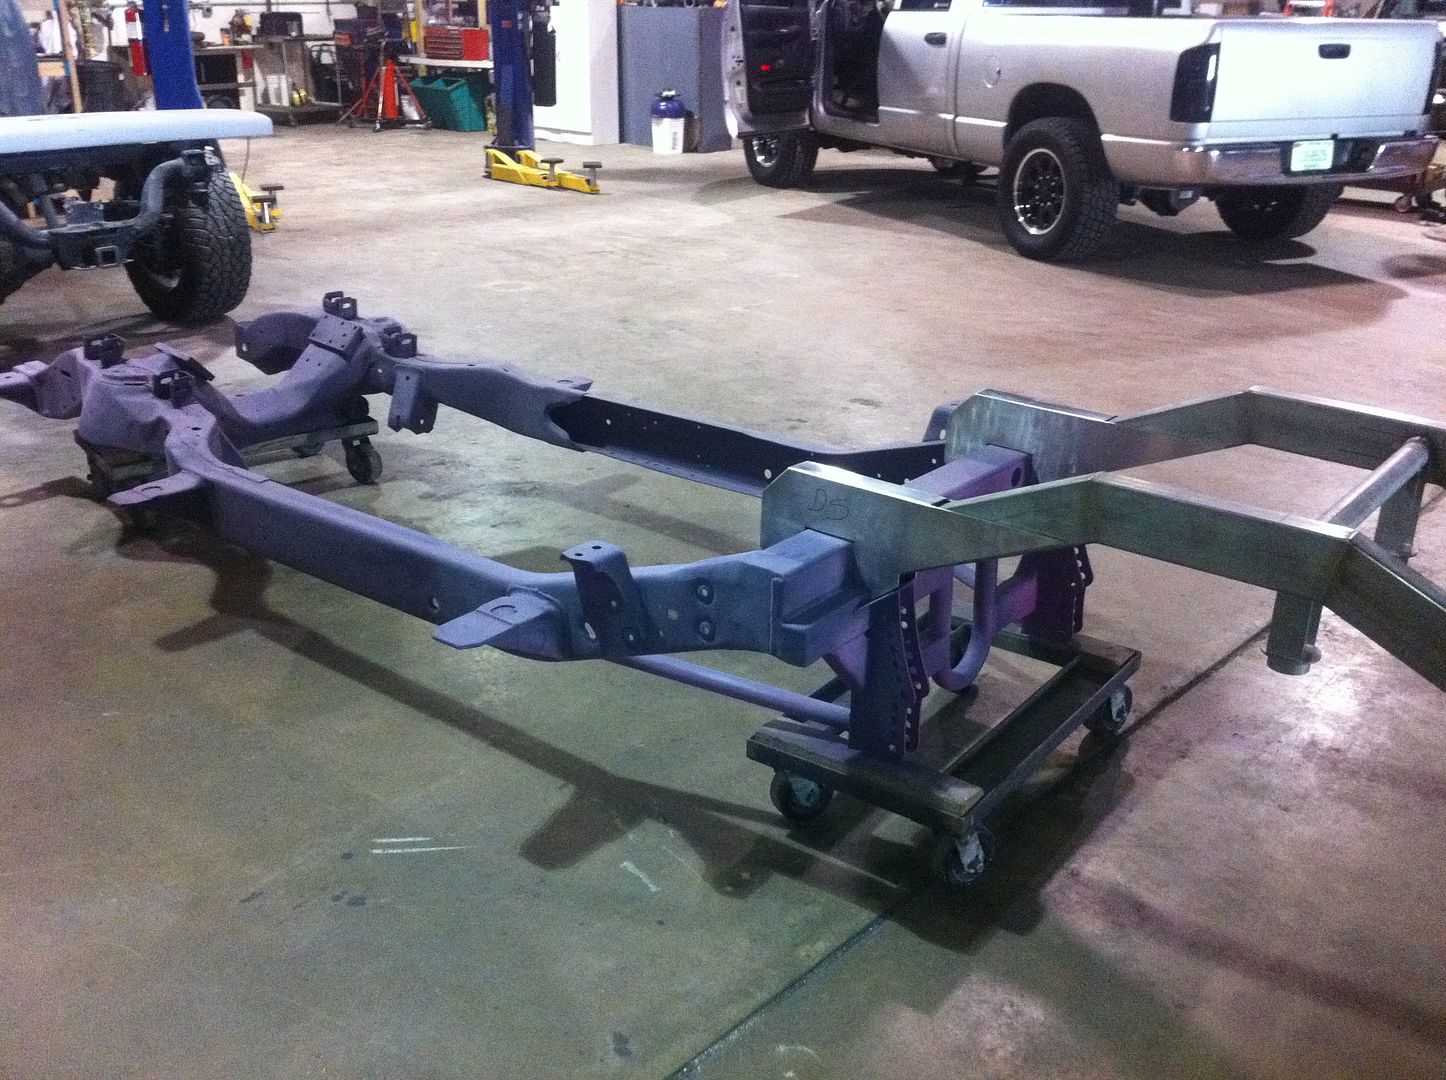
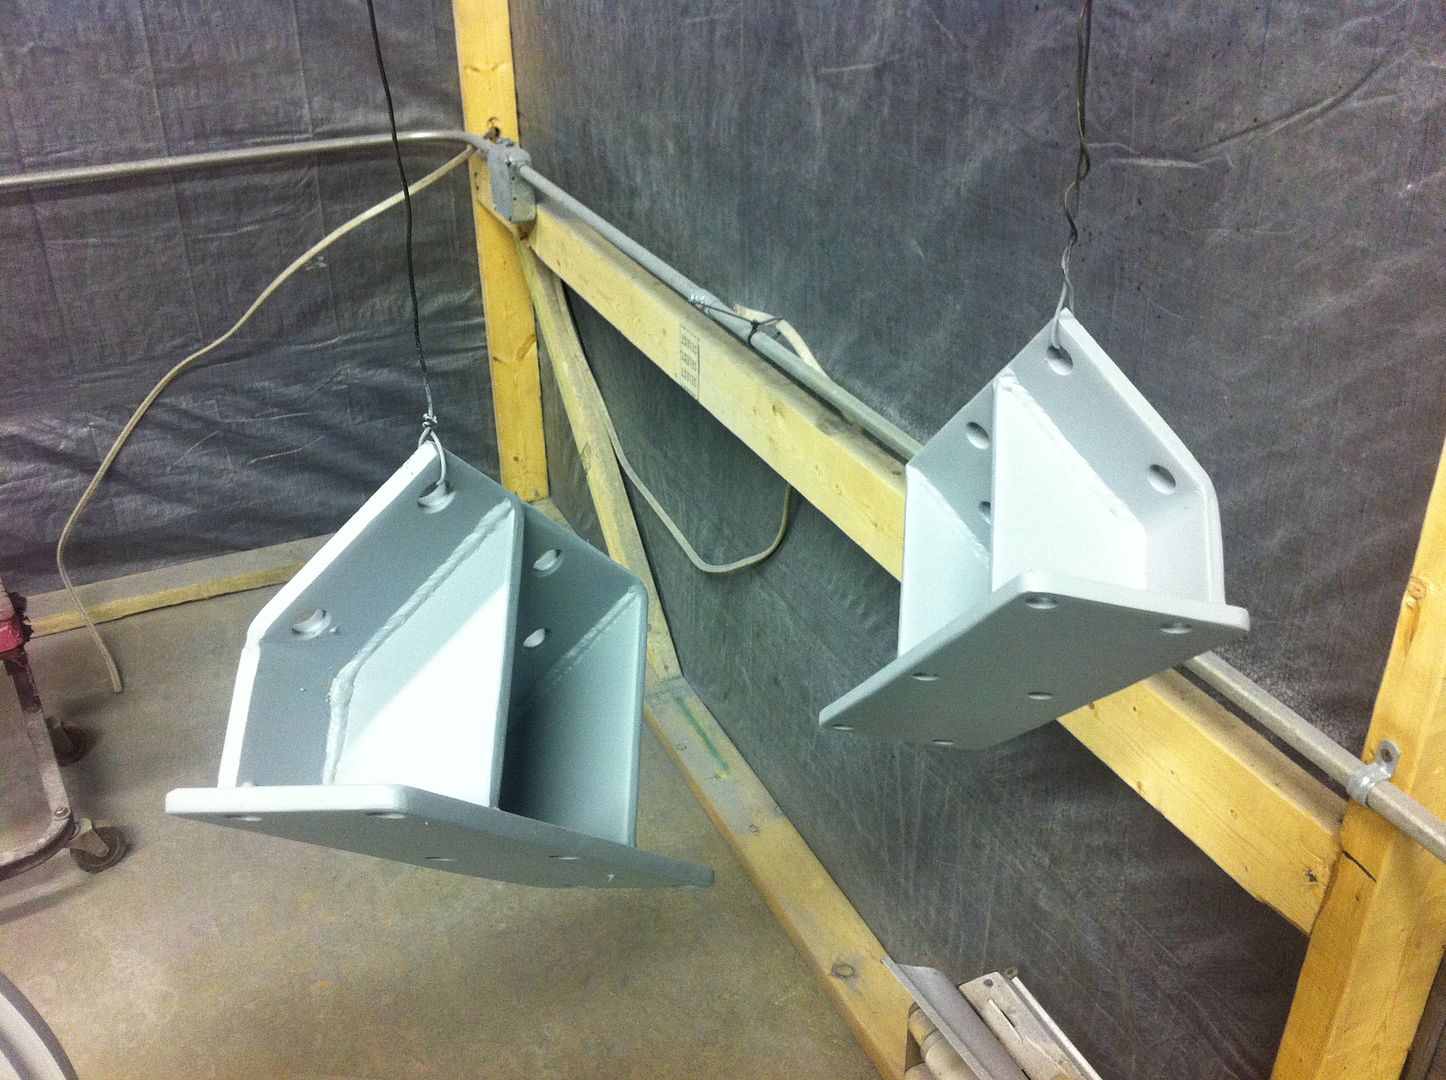
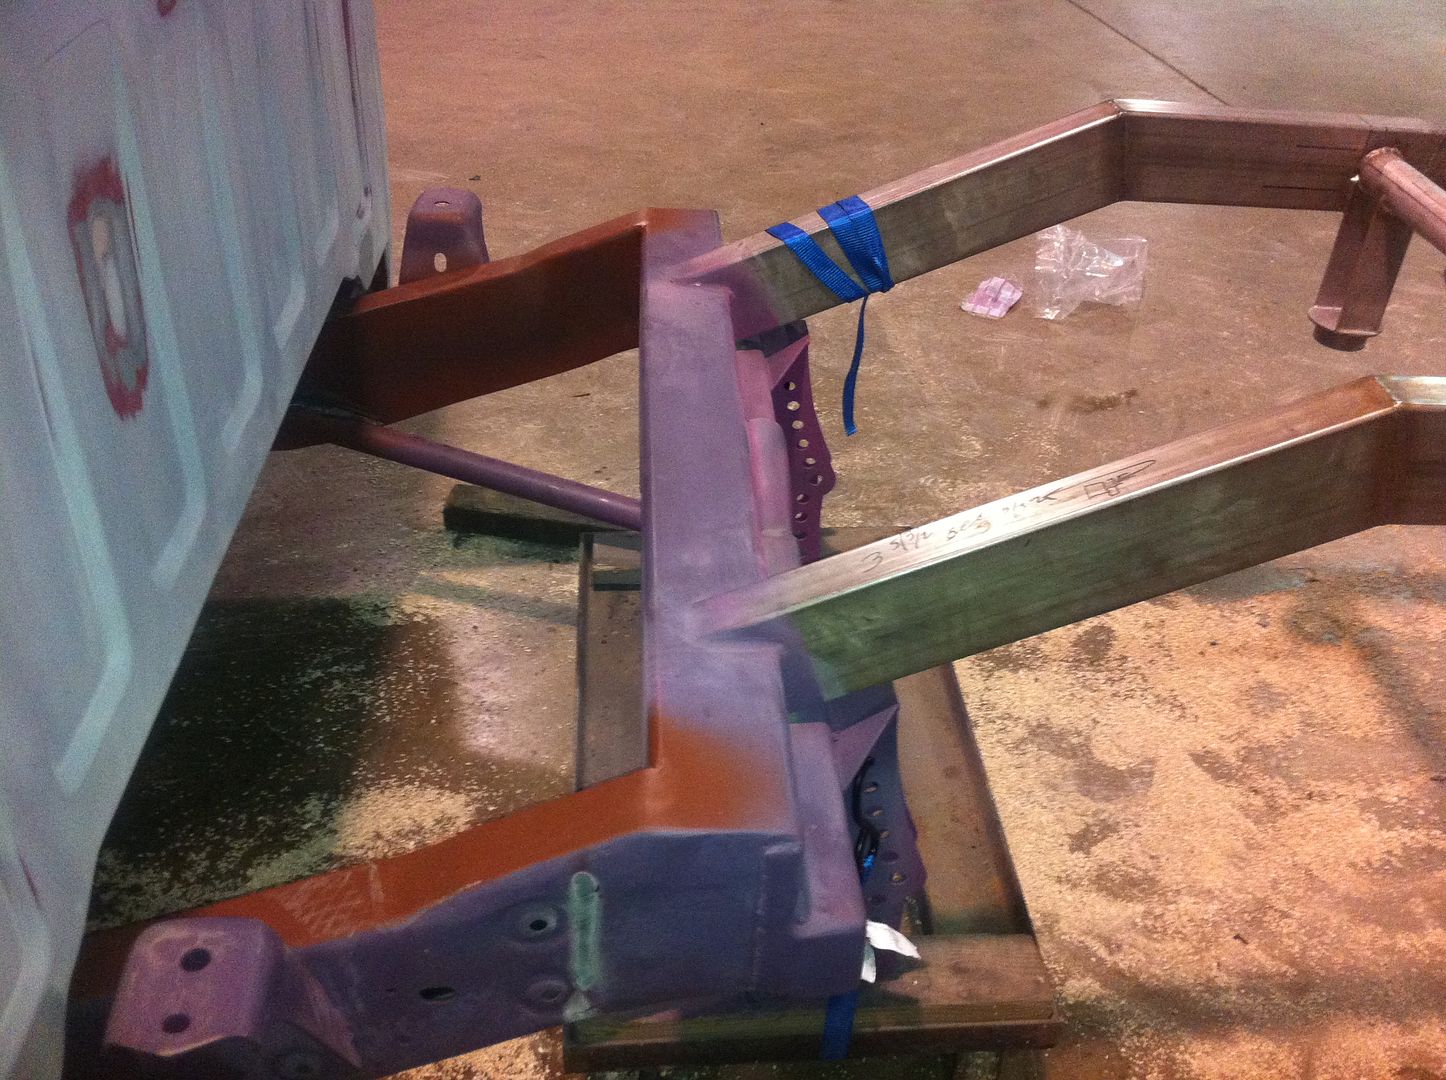
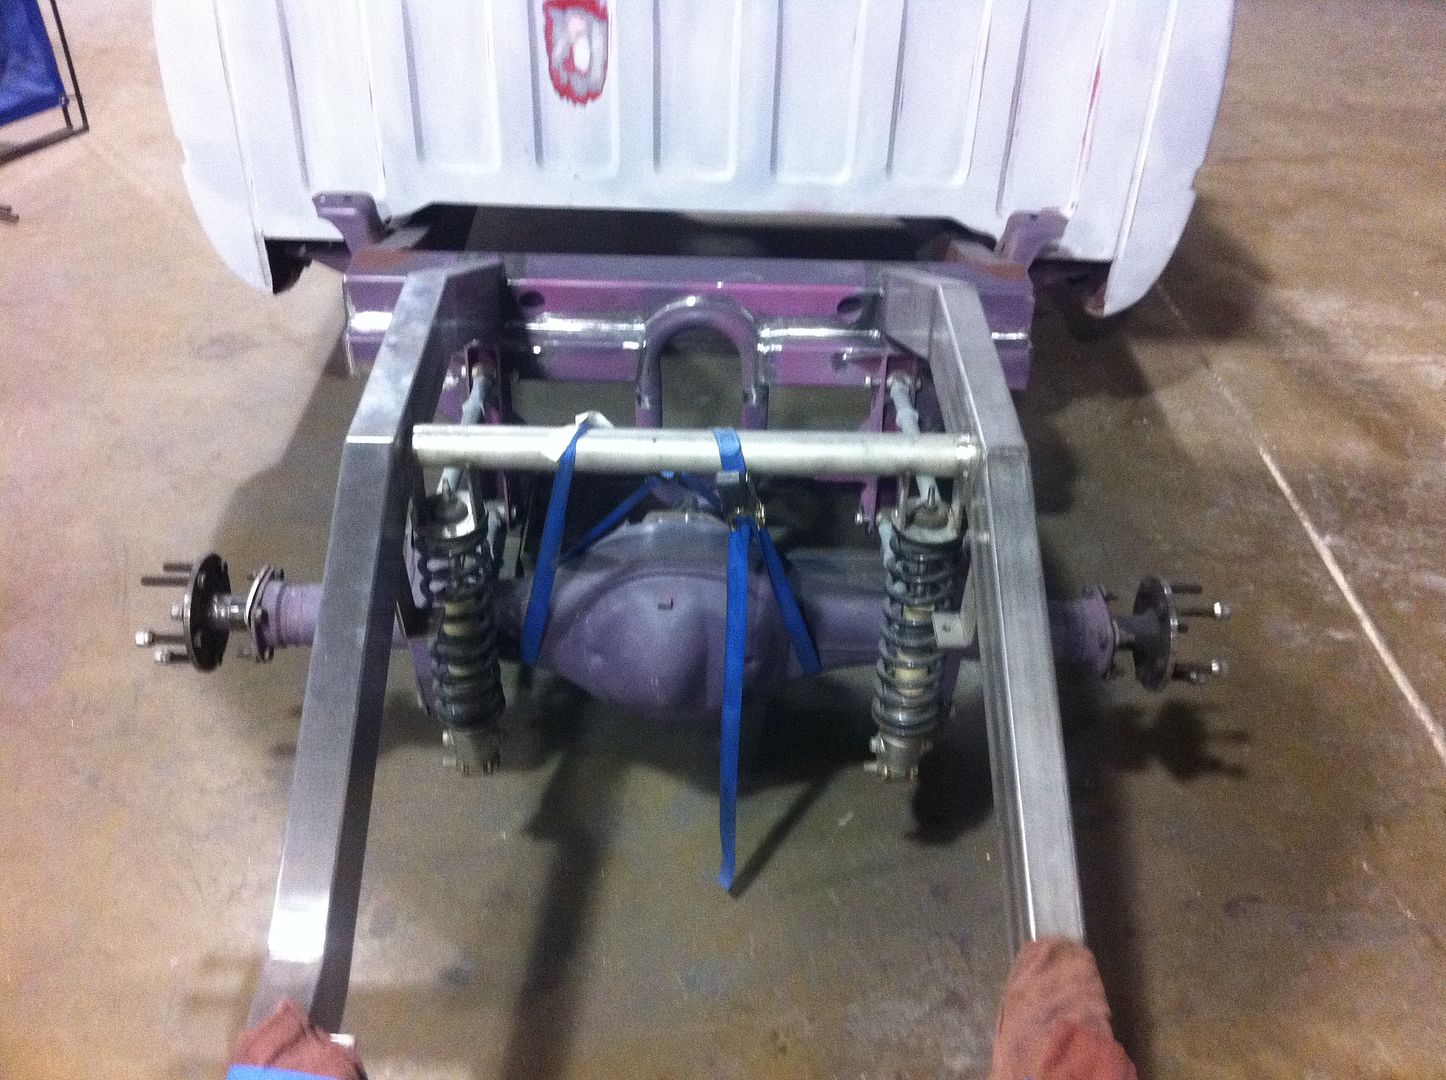
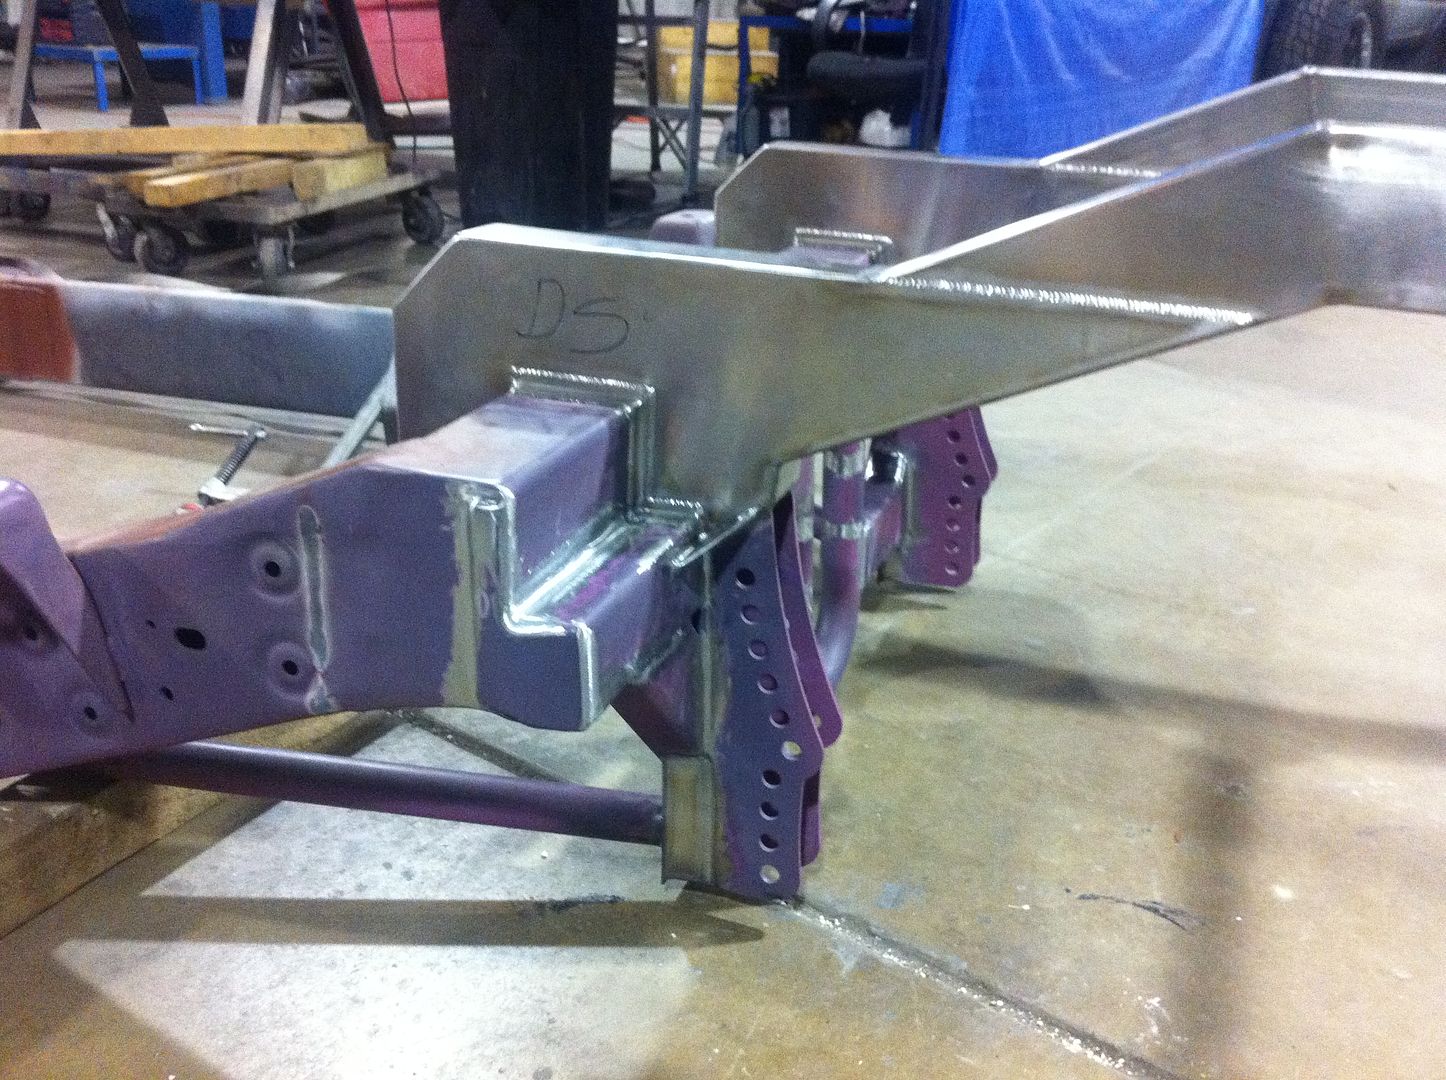
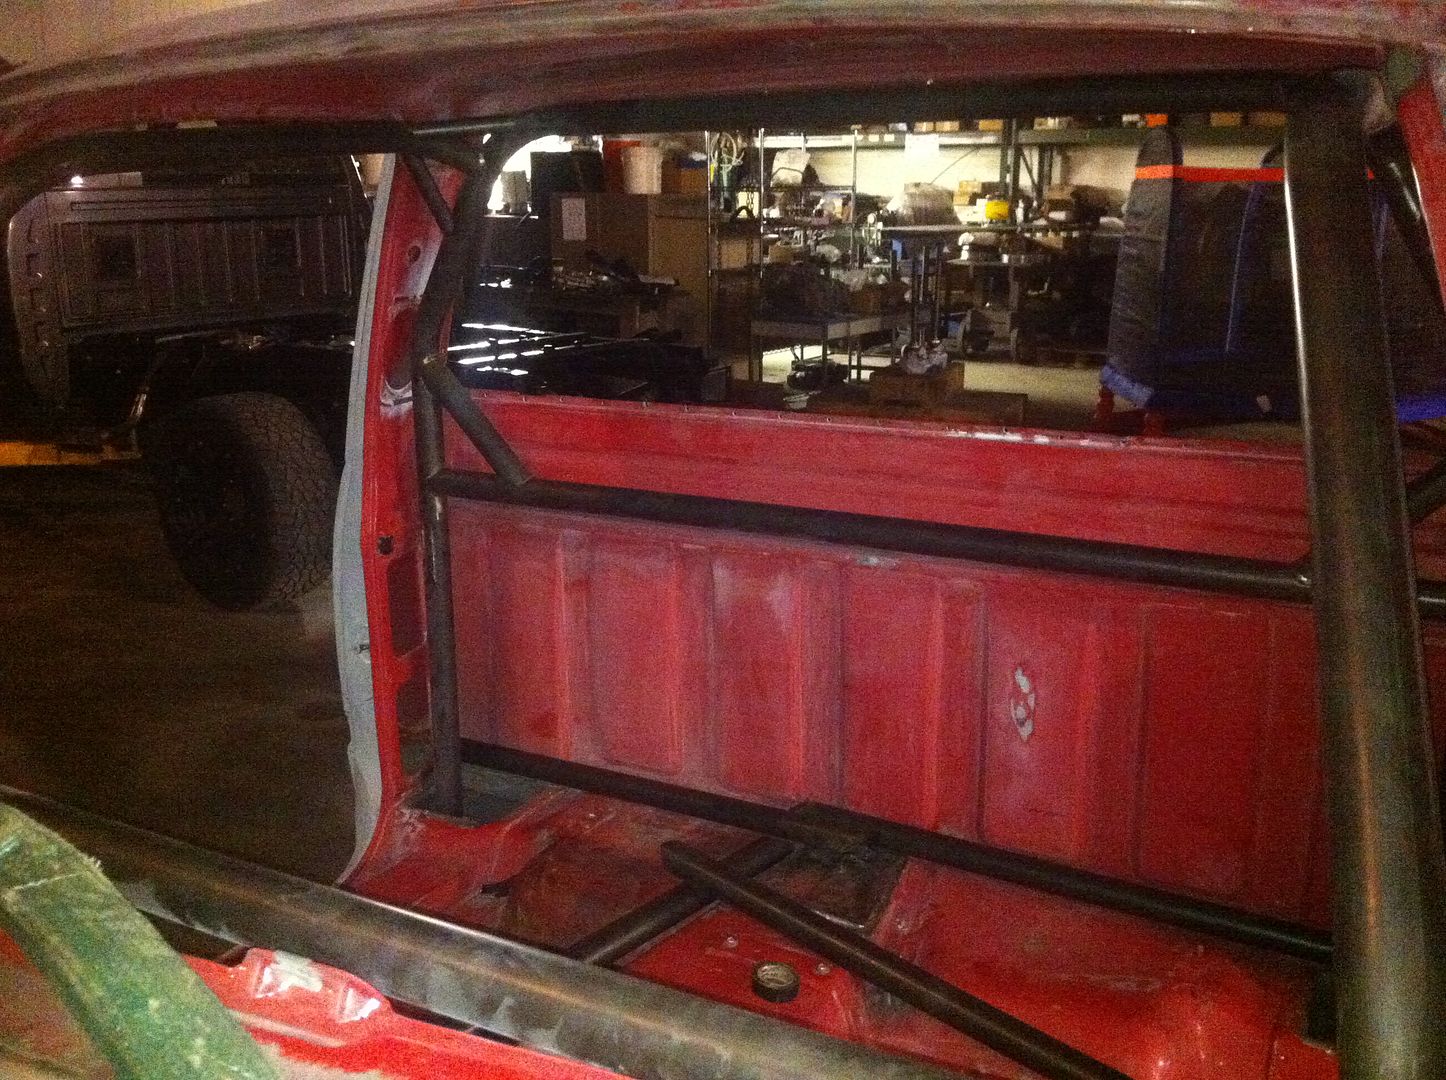
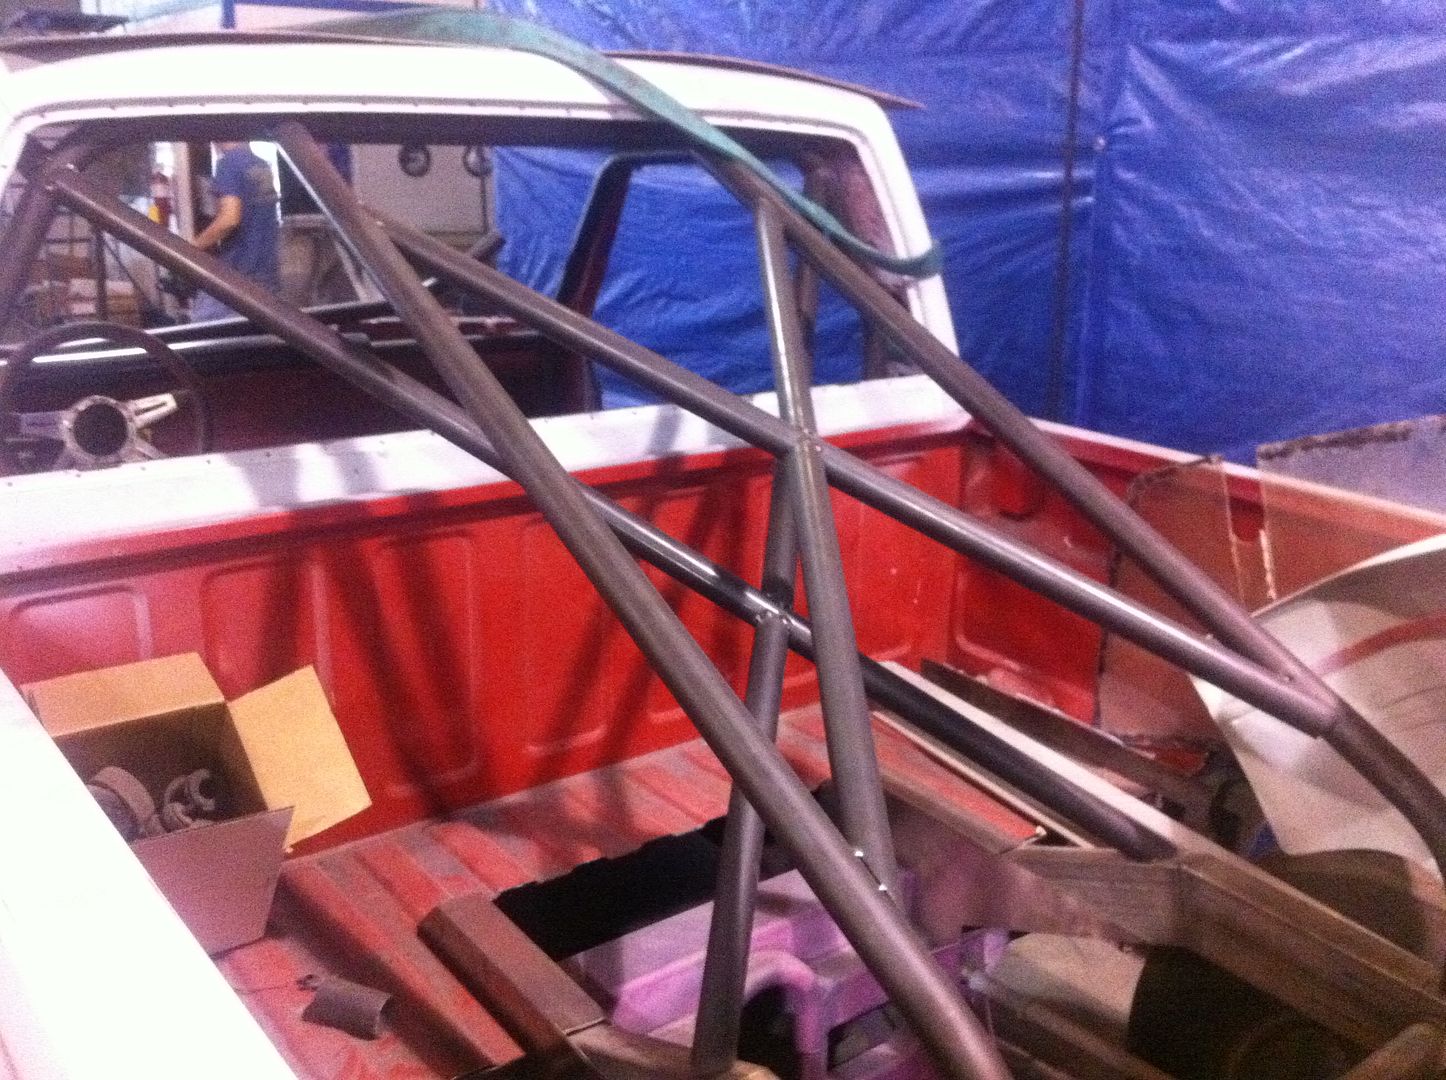
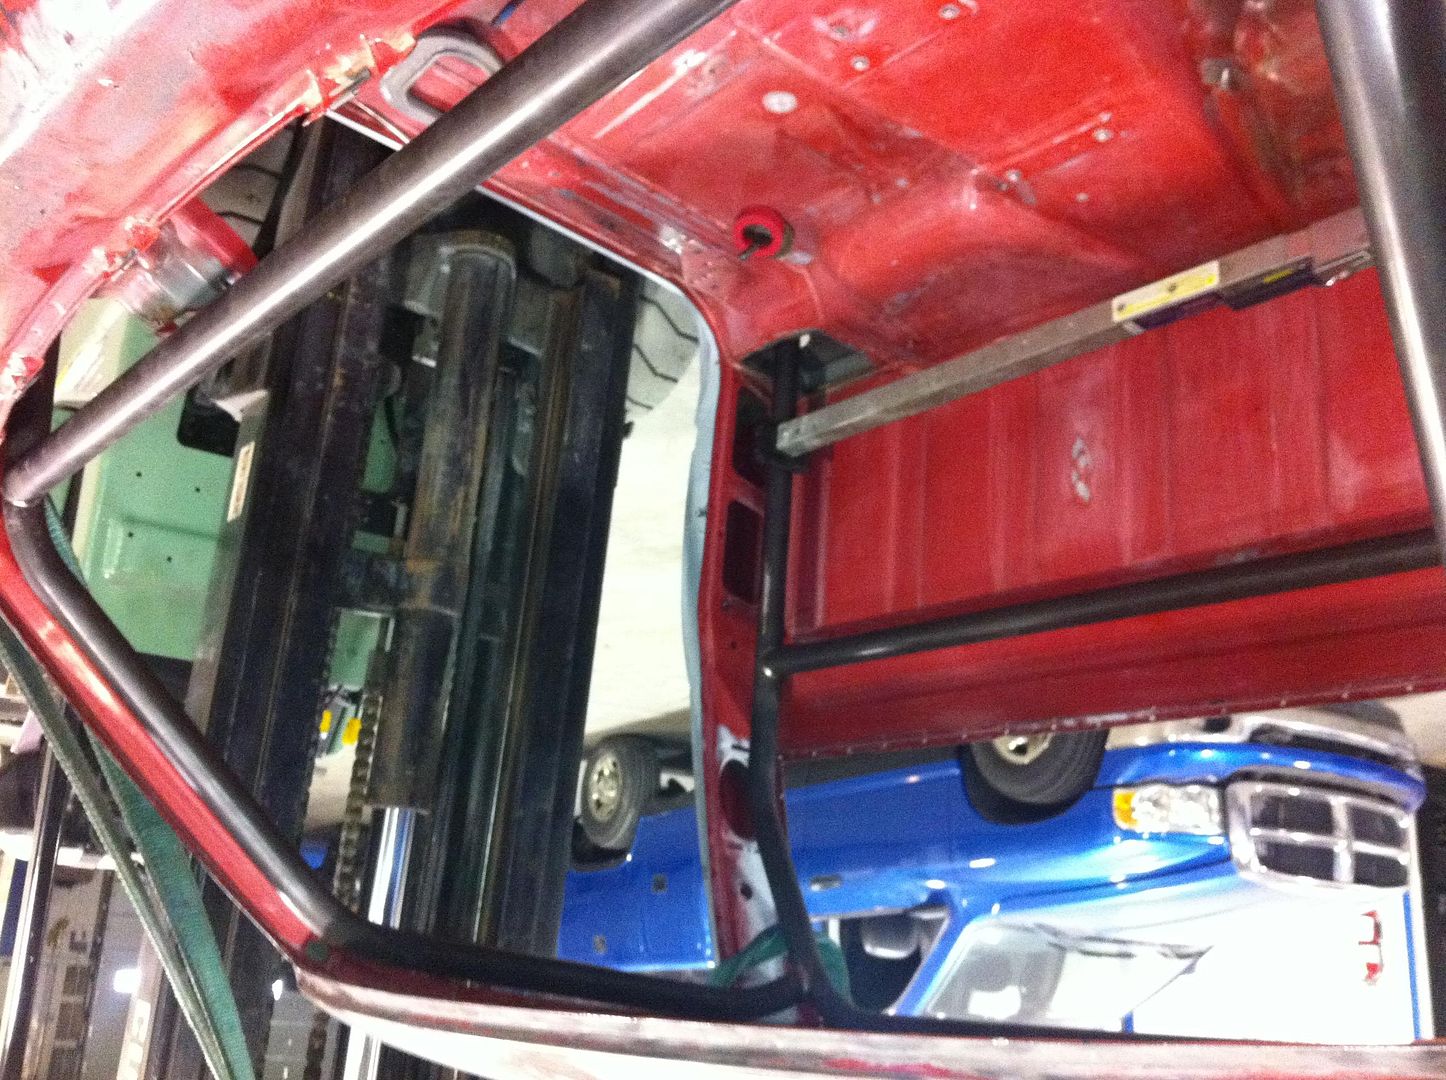
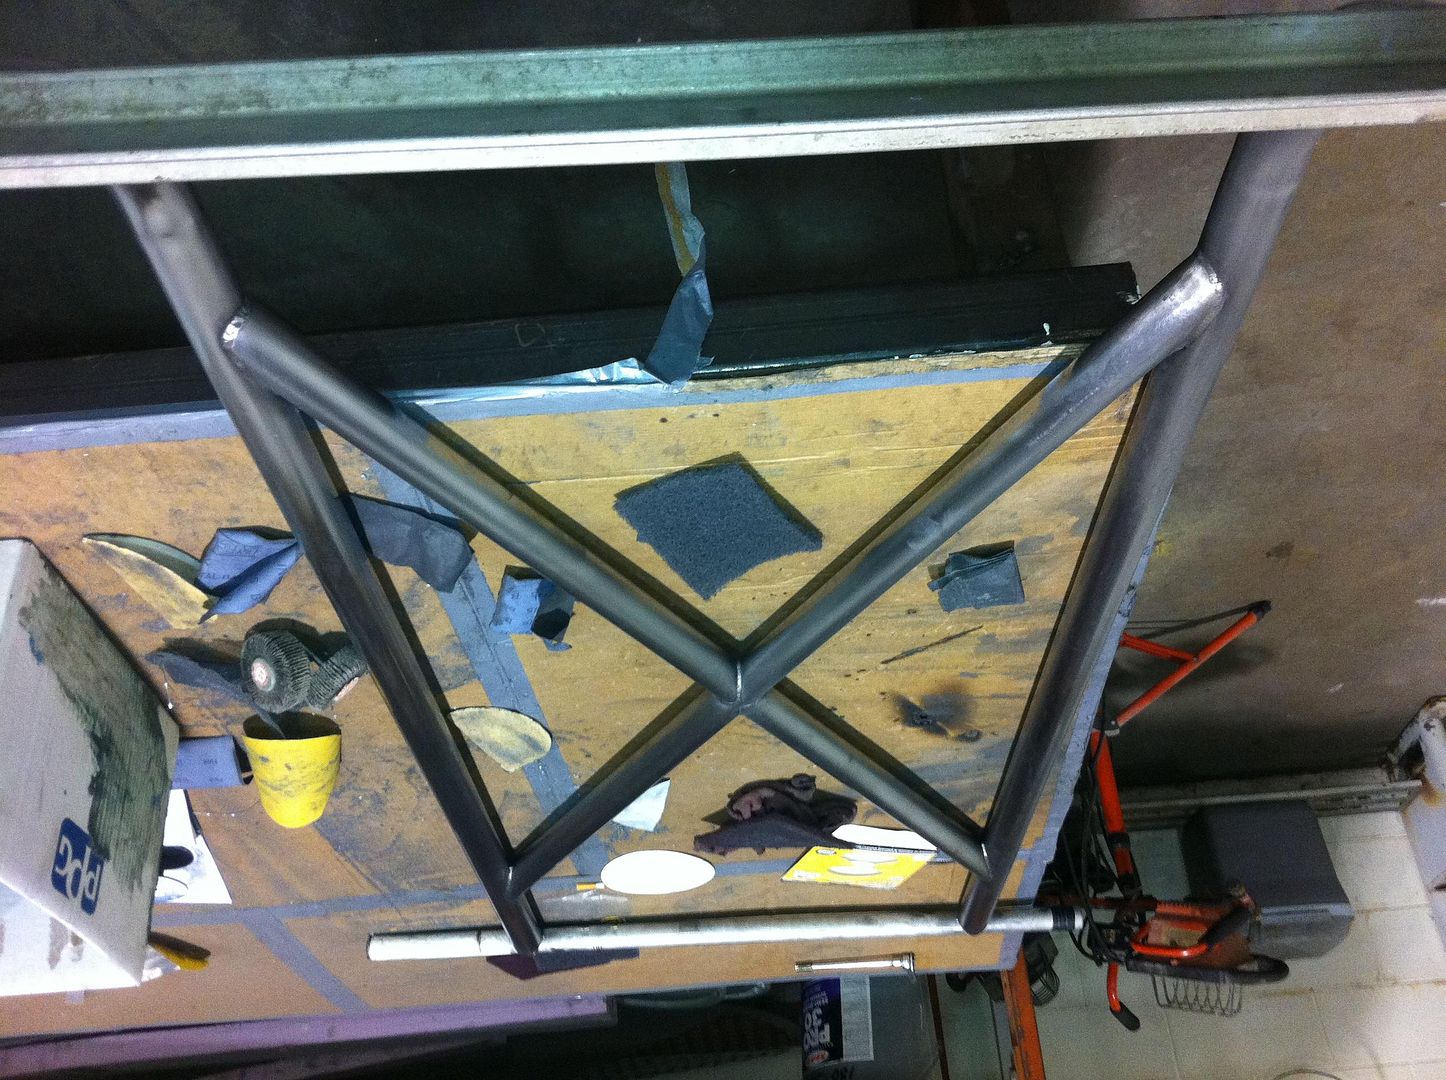
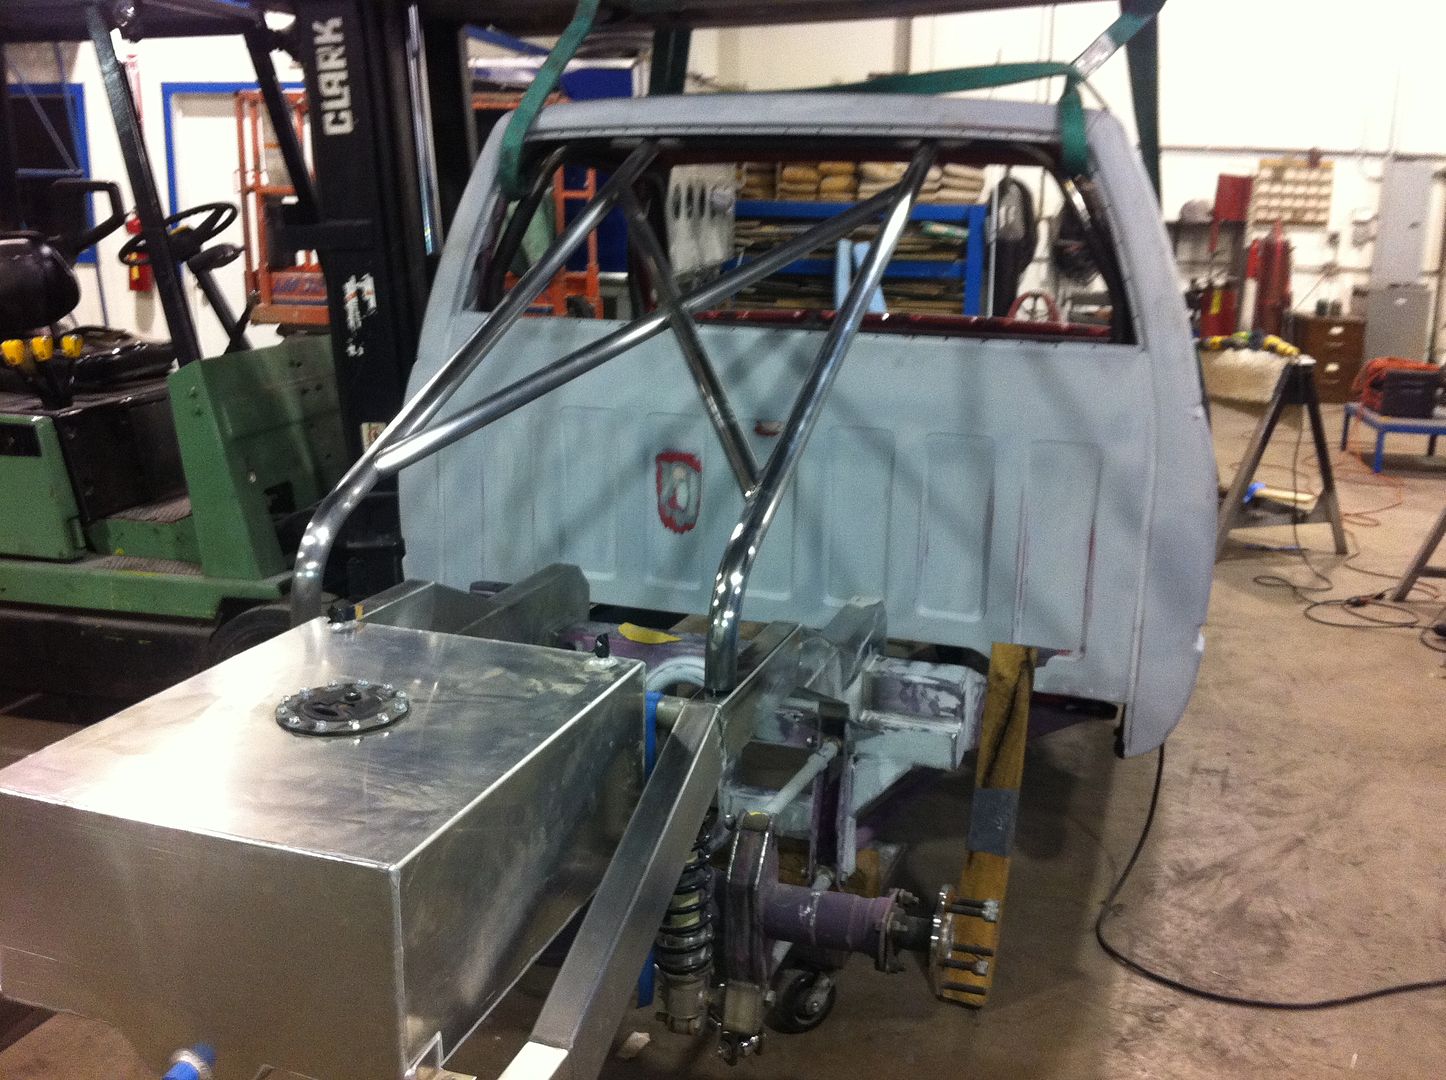
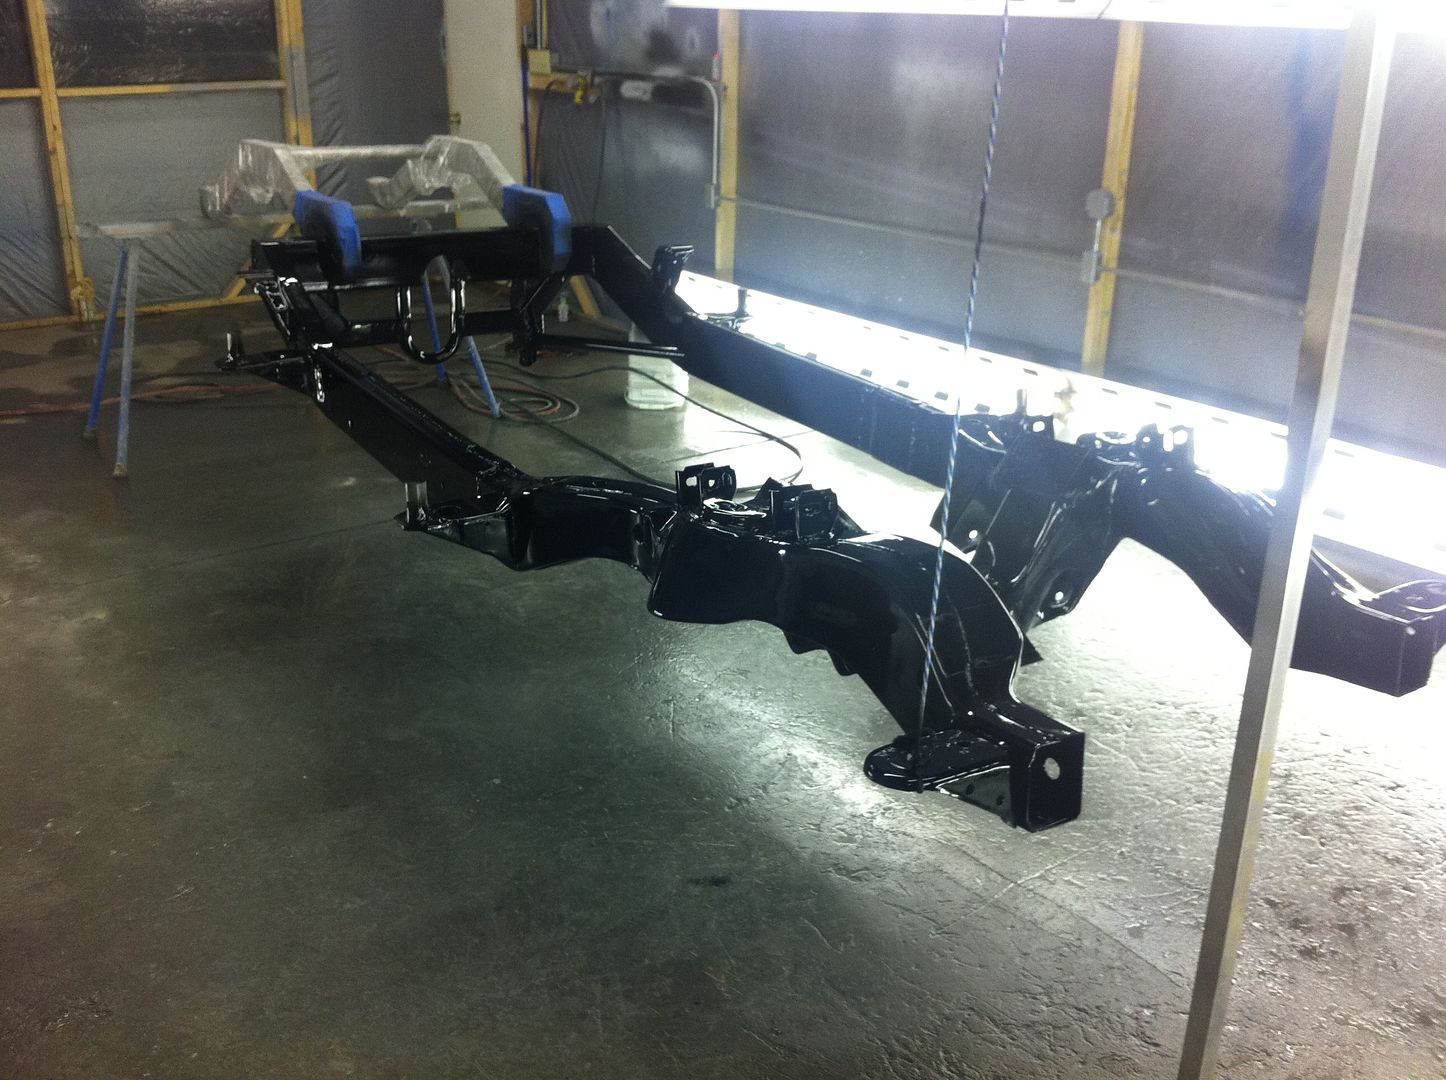
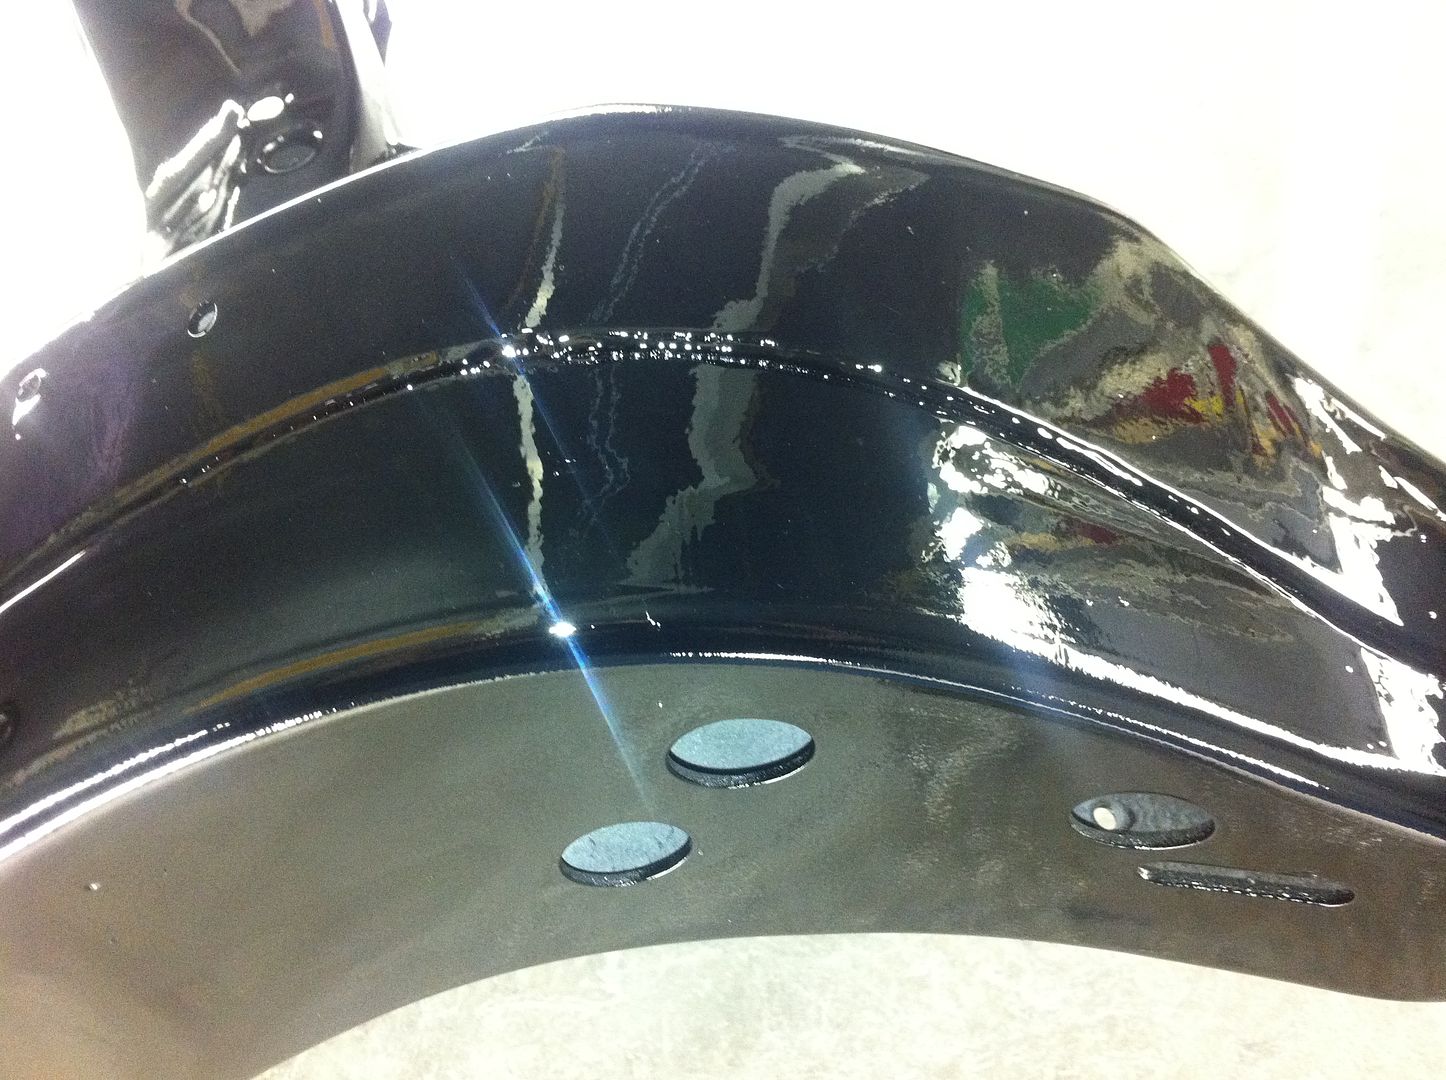
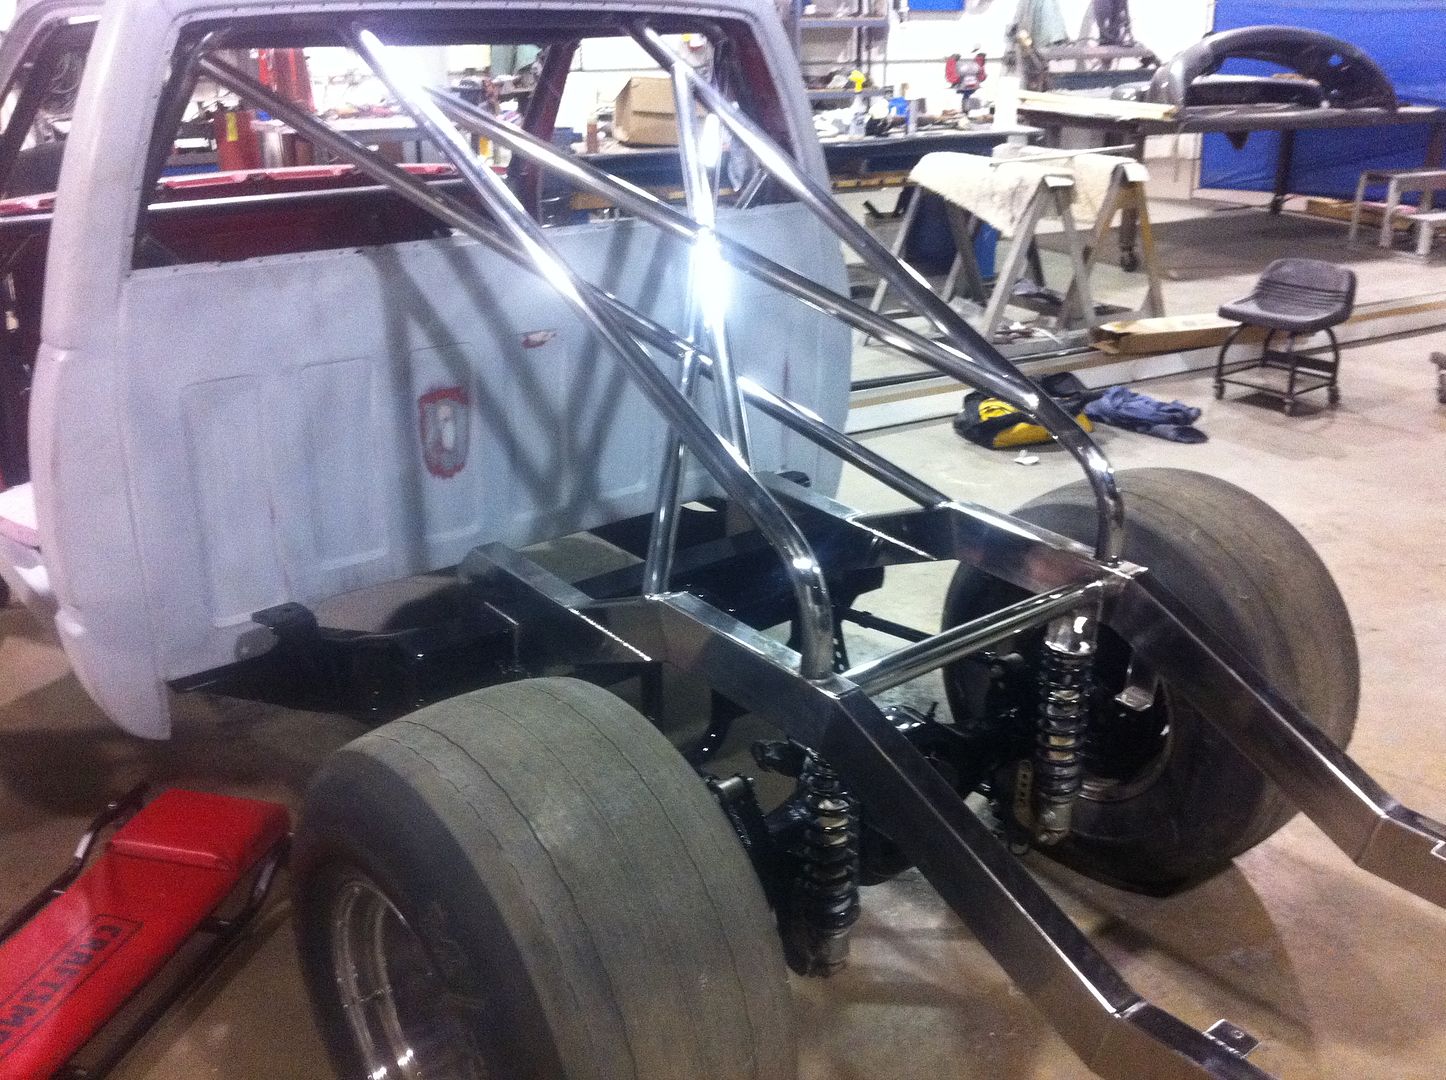
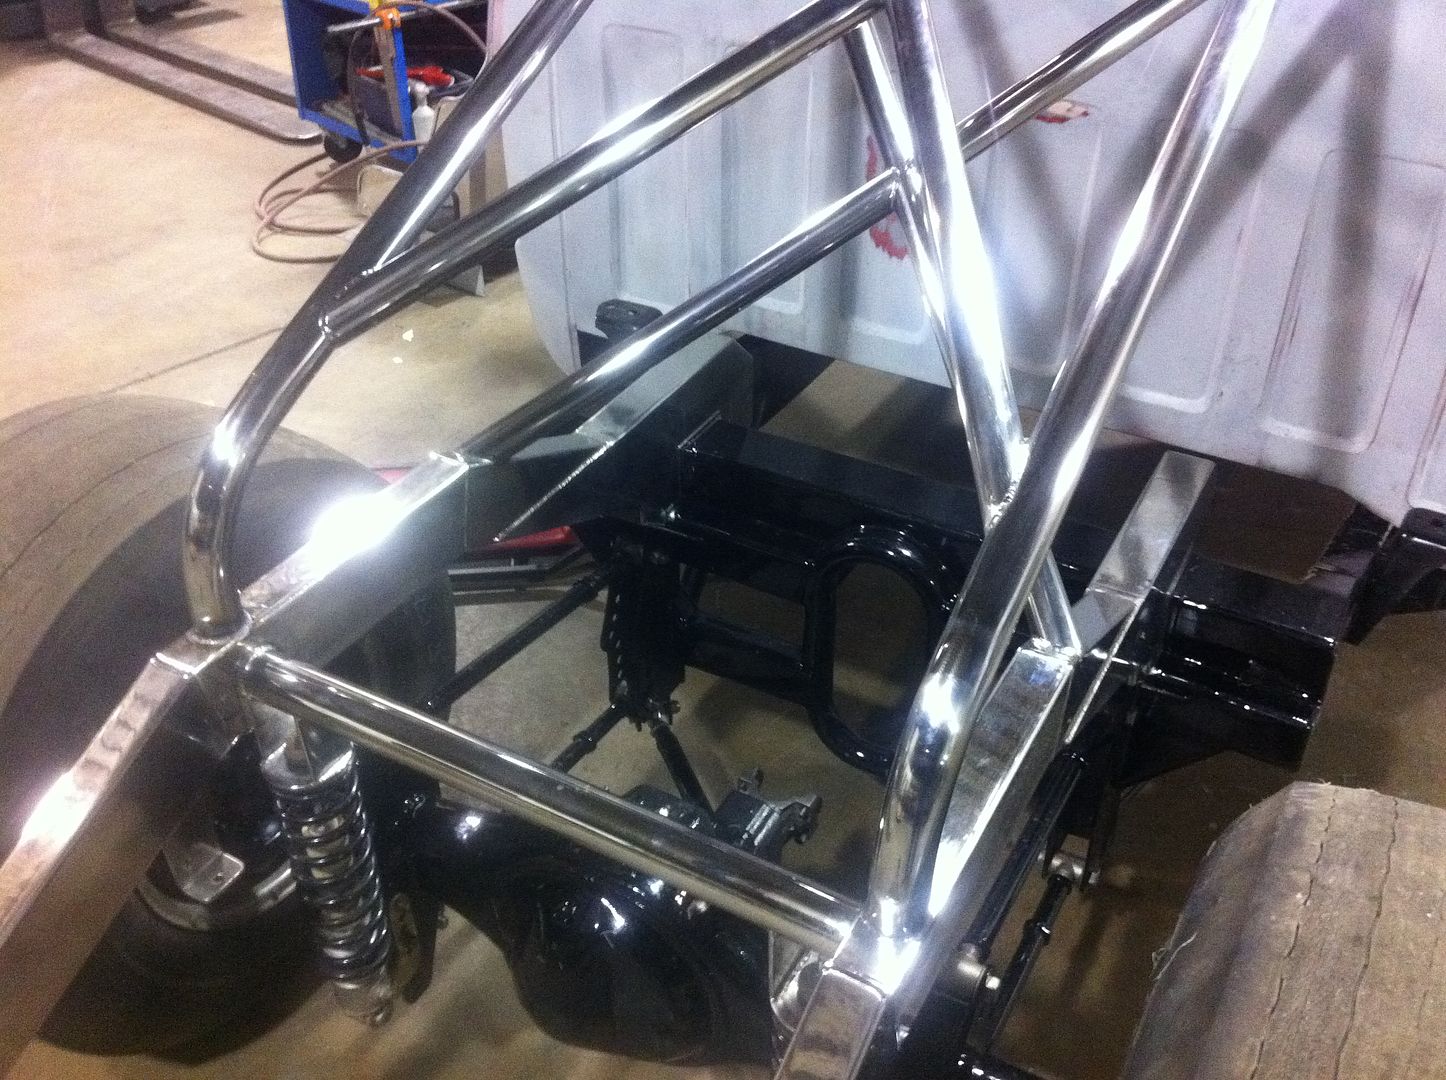
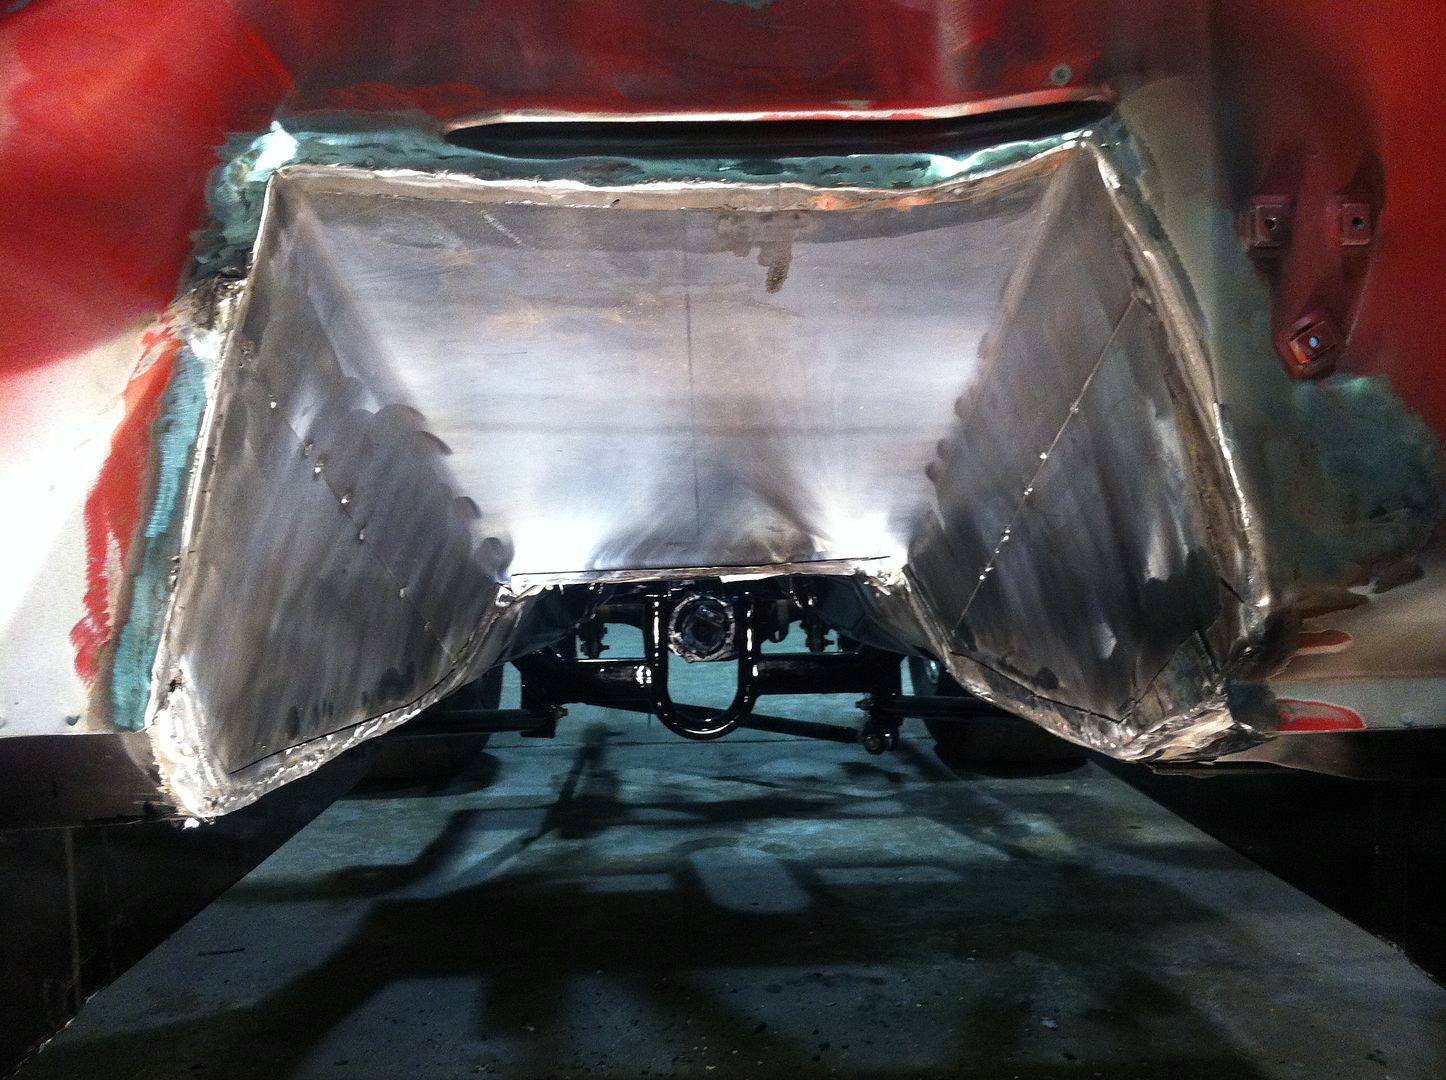
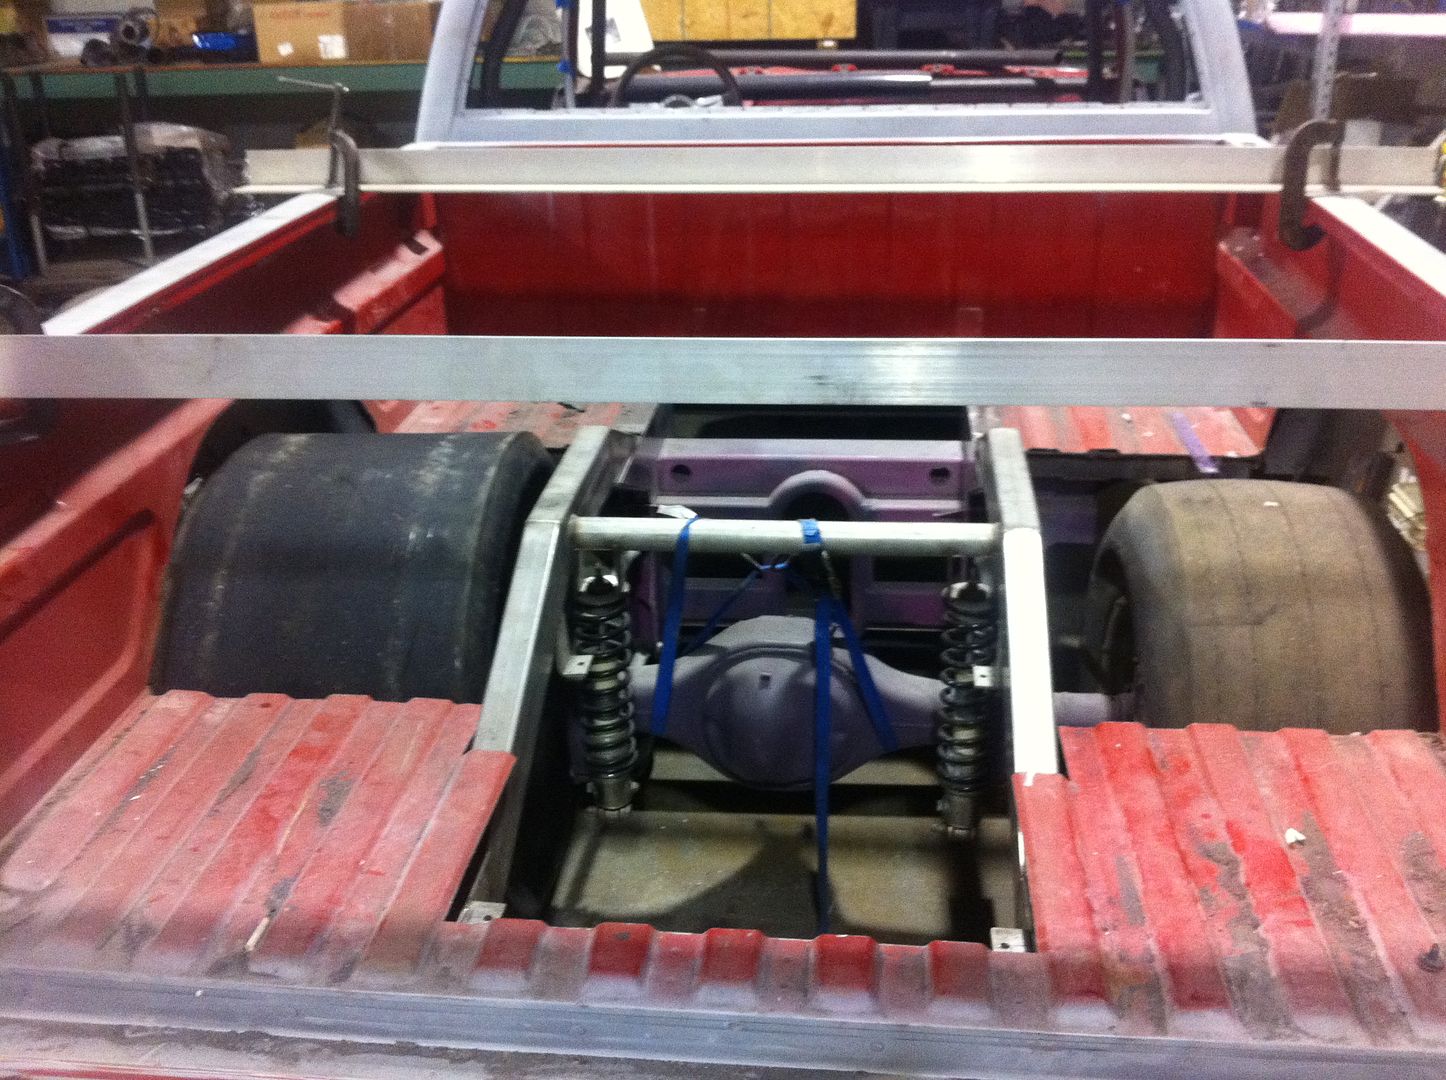
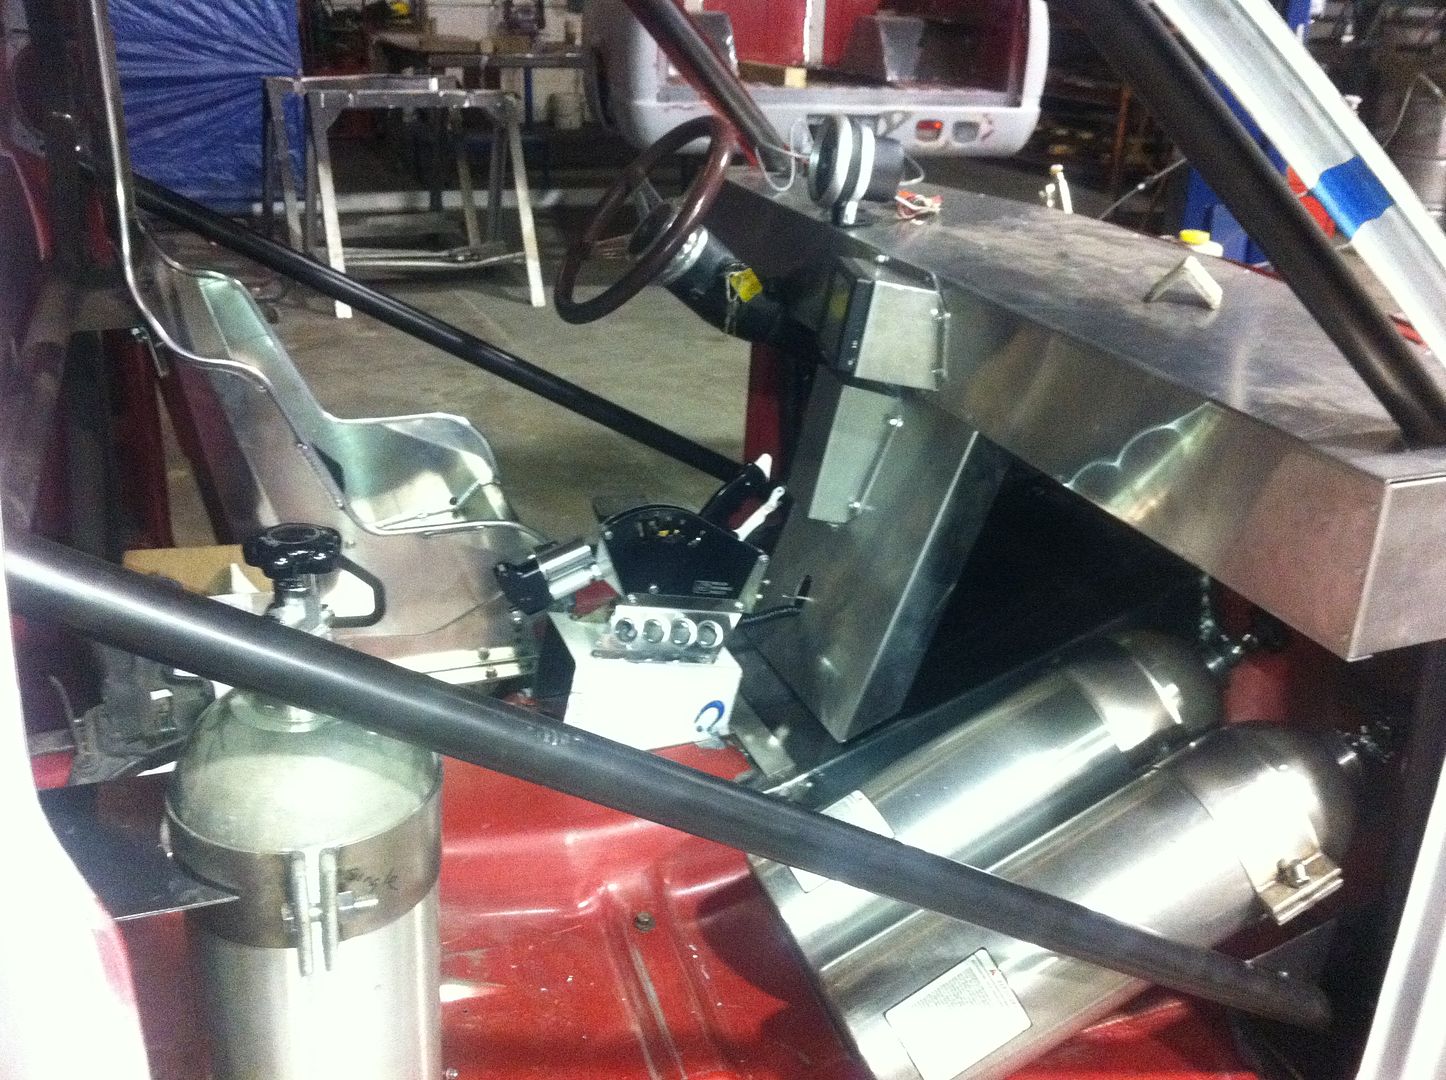
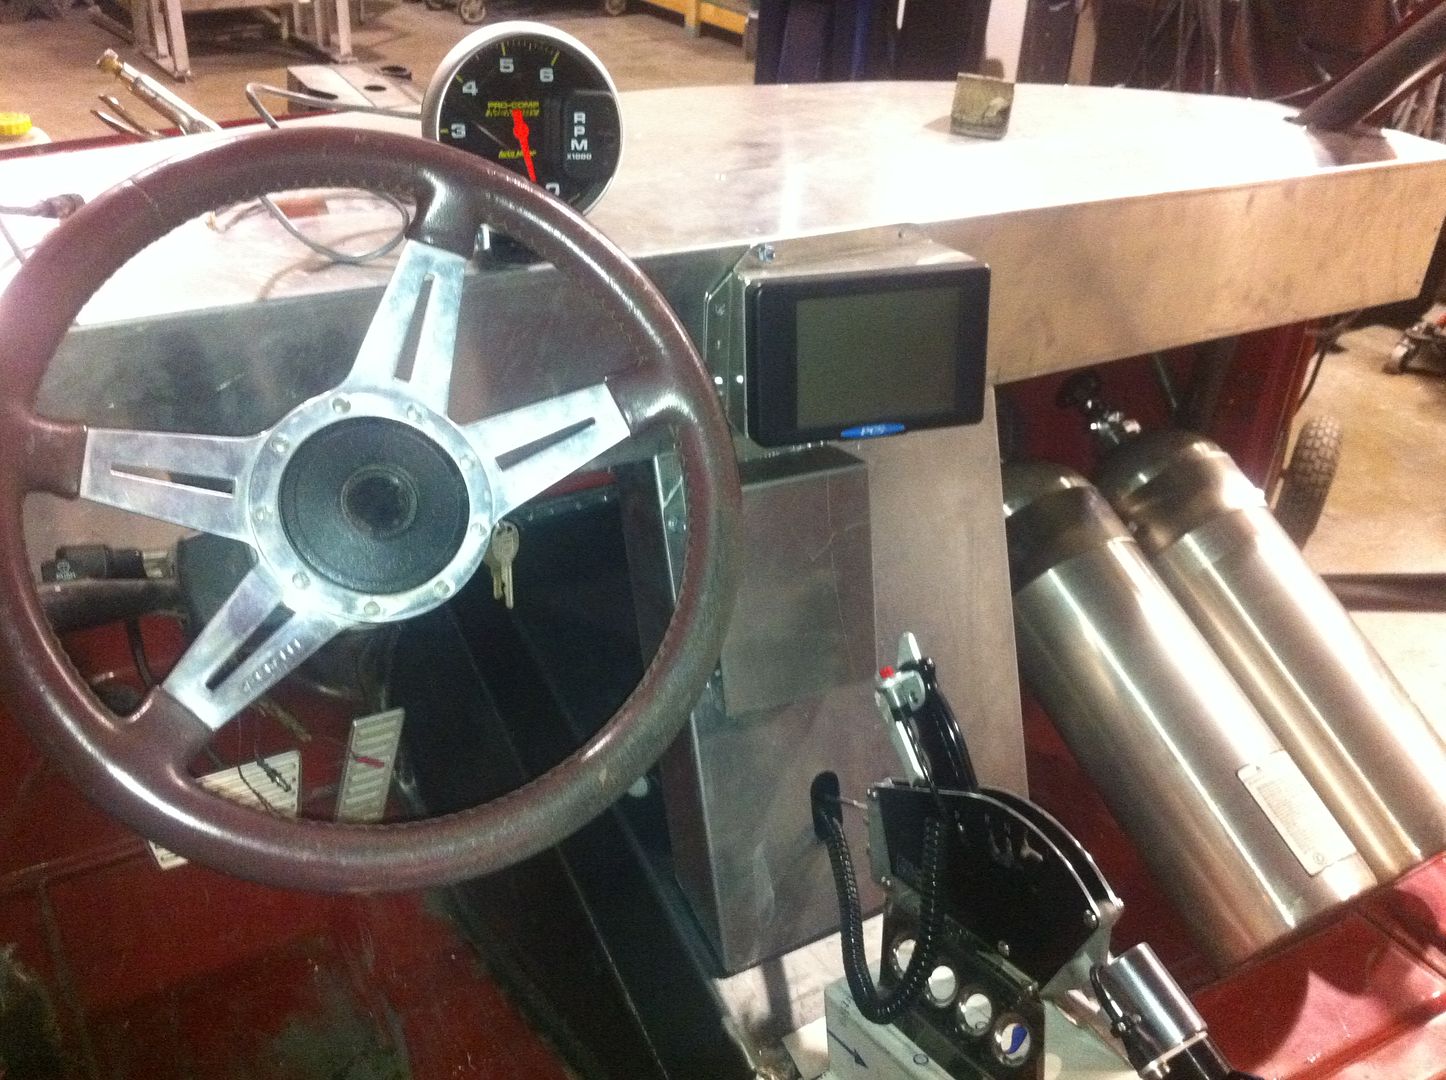
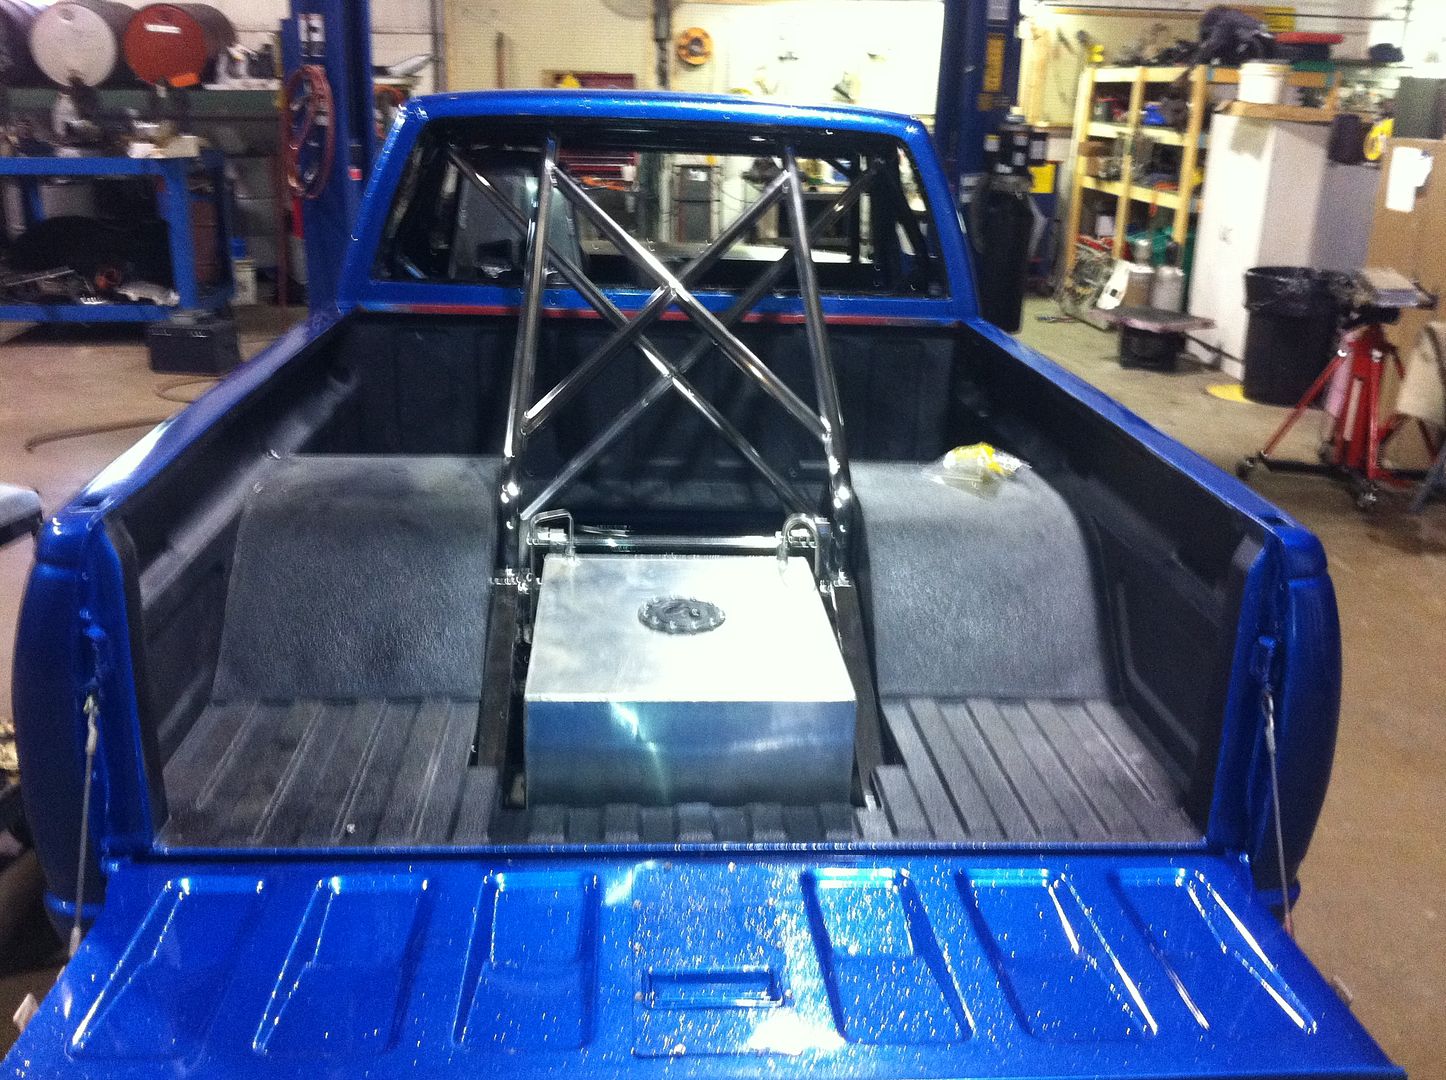
The frame was real weak and thin in the rear and after pulling the bed and seeing this we knew this is not going to work for the power level’s and torque I plan to put this through. The frame also did not allow my tire choice so we needed to narrow it anyway. So we cut off the old back half up to the point that was usable. We fabricated new rear rails to go up over the axle and allow more adjustment in the rear four link and adjust ride height. Also notice the lateral bar going the wrong direction for axle wrap. We took apart the frame and bead blasted it so we can start fresh and get good welds down. Shot some prime on it after blast so it did not rust during the fabrication portion. We also took 16ga mild and boxed the entire frame in while apart tying it all together.


IMG_1395_zps2d3b14a3.jpg
[/URL]


IMG_1378_zps2b0d1a81.jpg
[/URL]


IMG_1376_zpsfb240b23.jpg
[/URL]


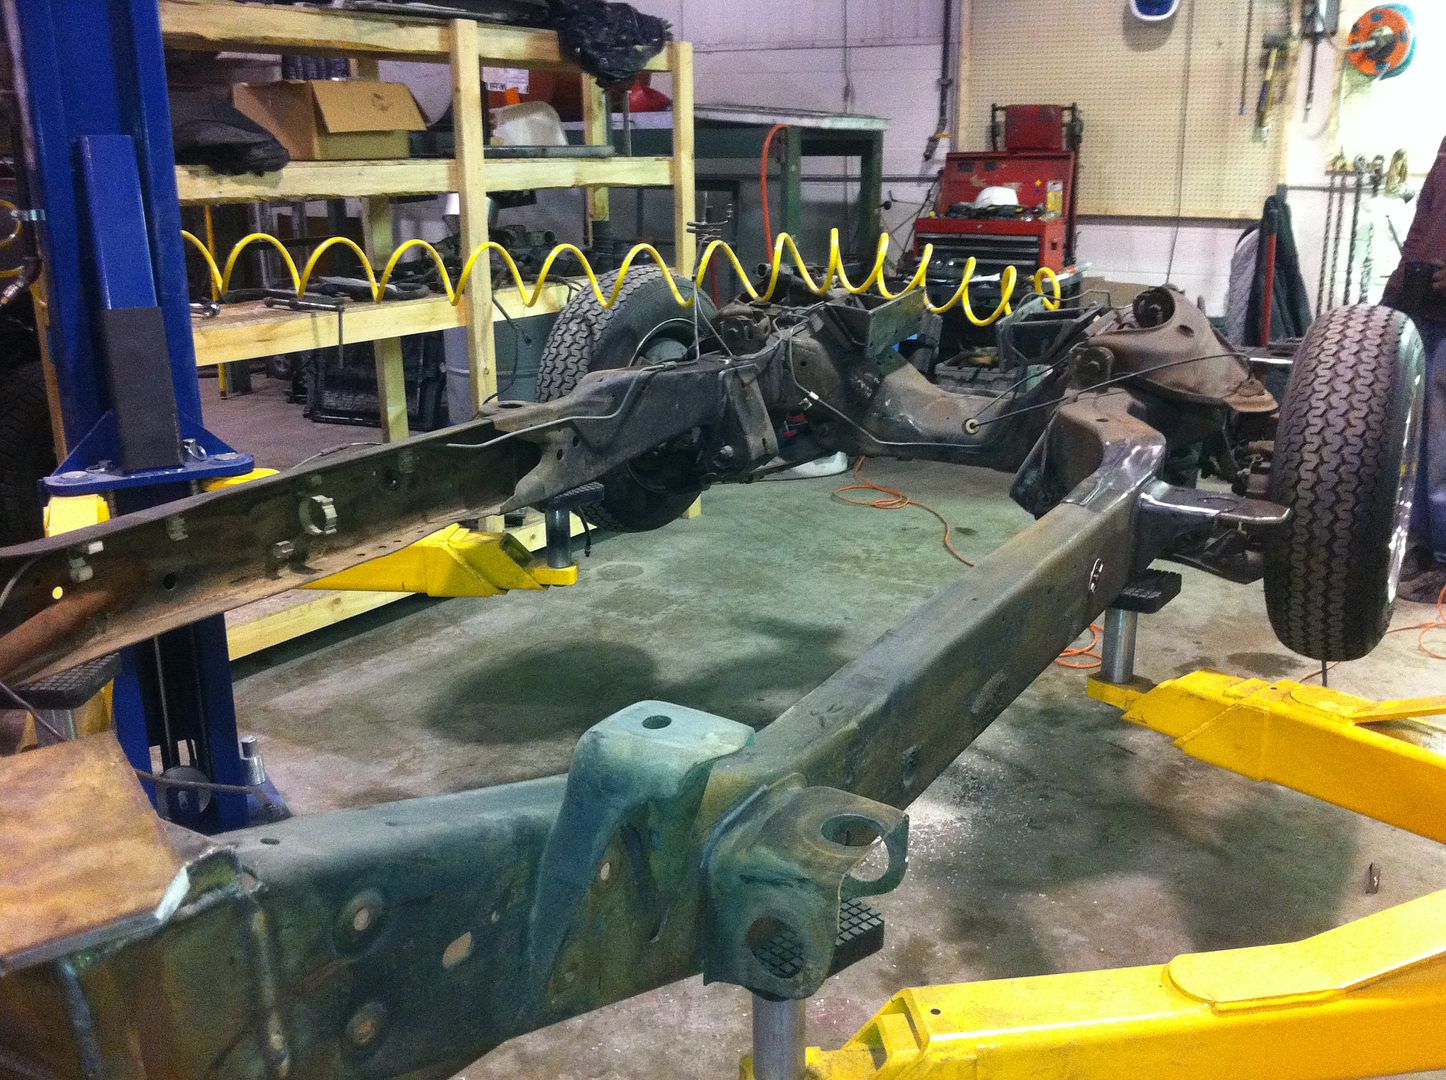
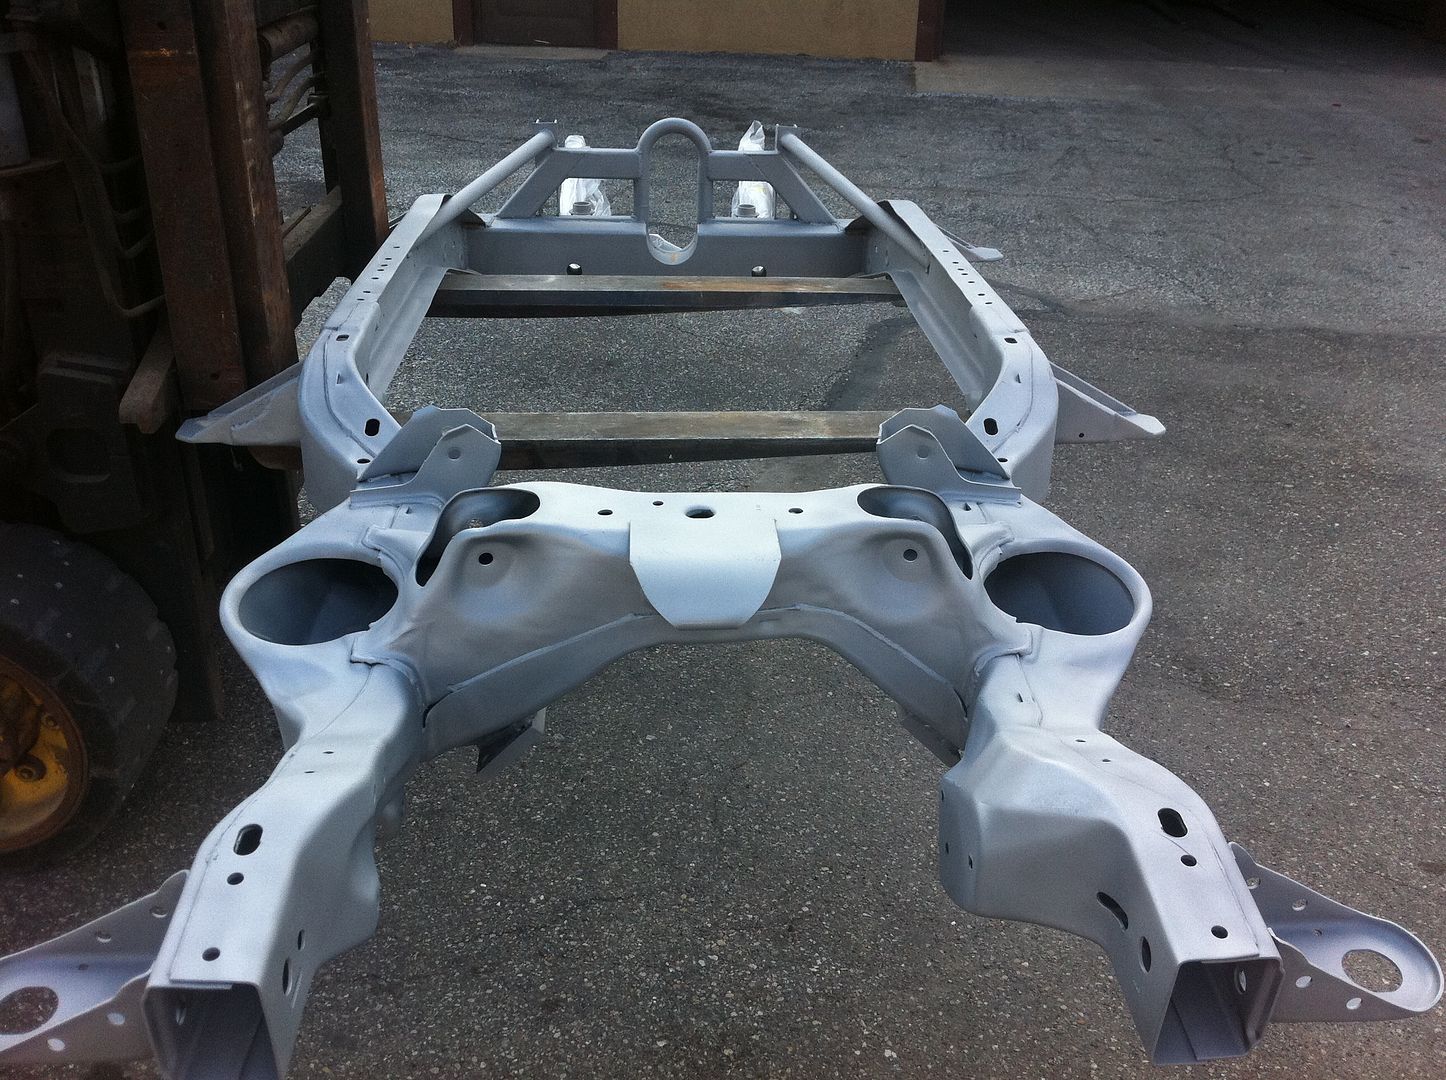
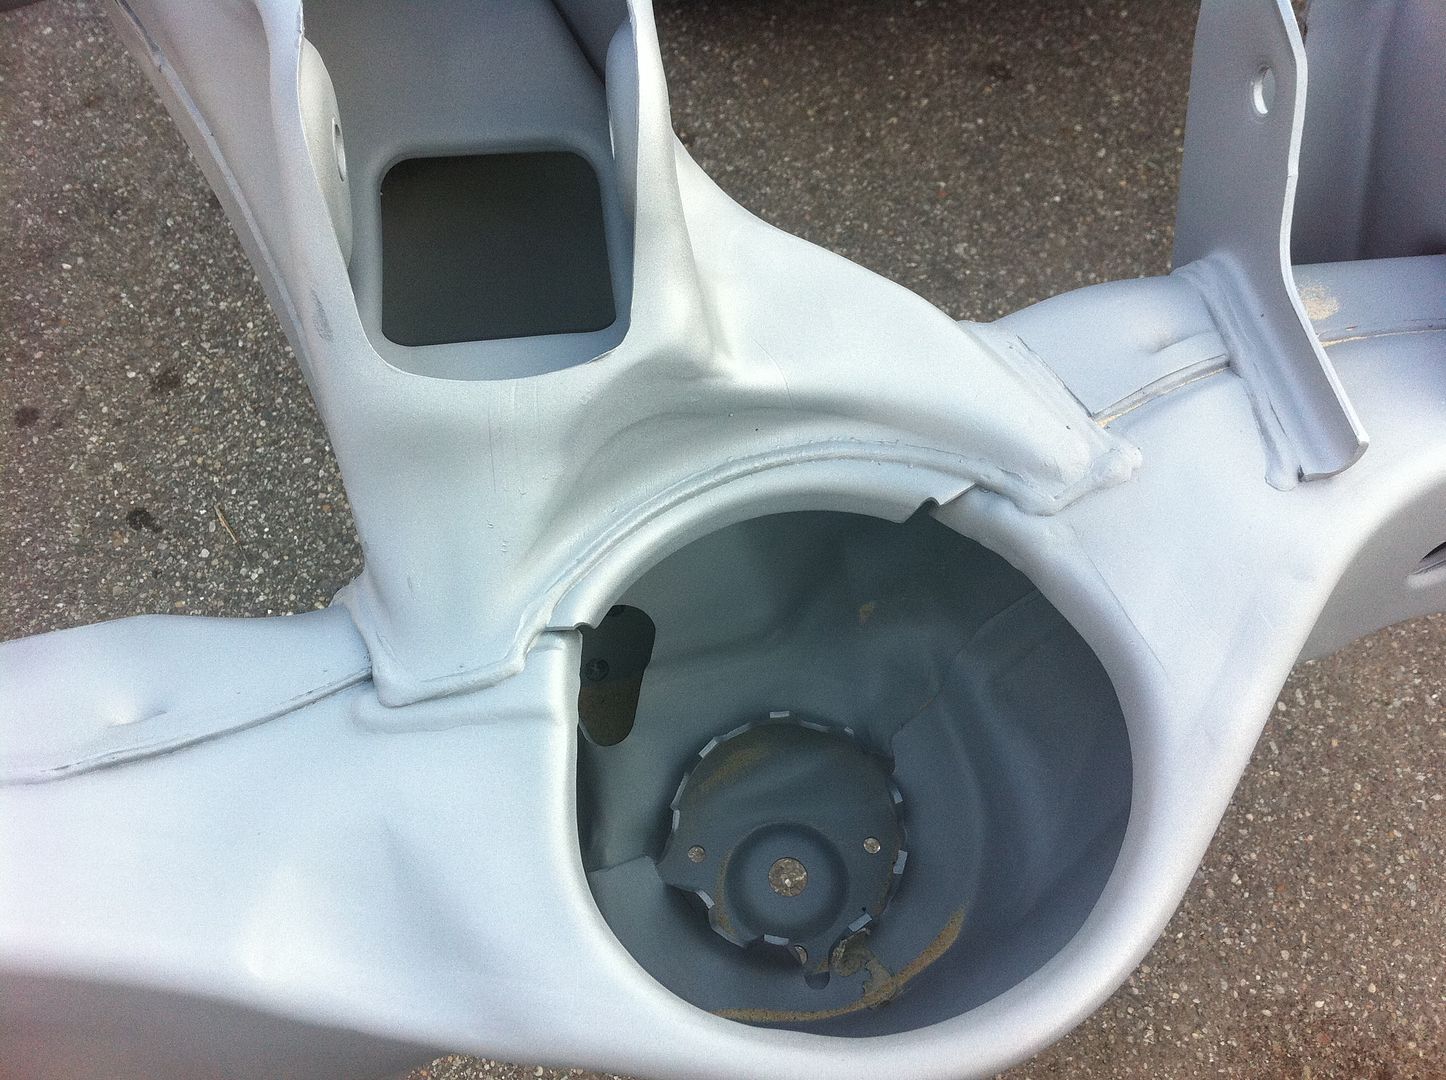
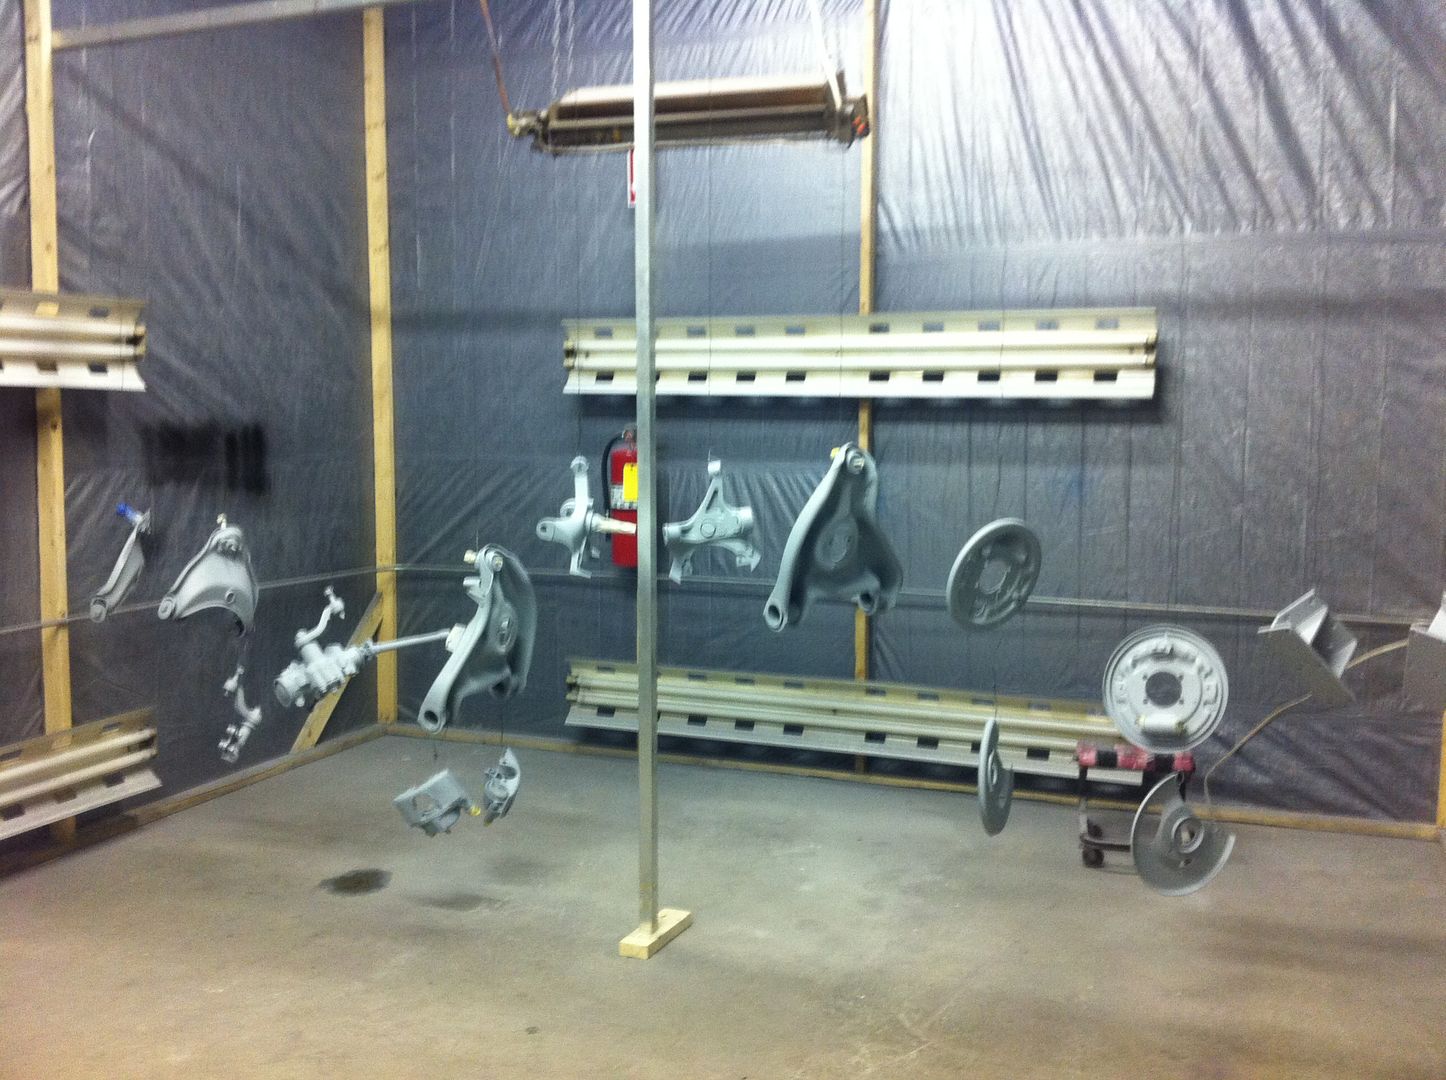
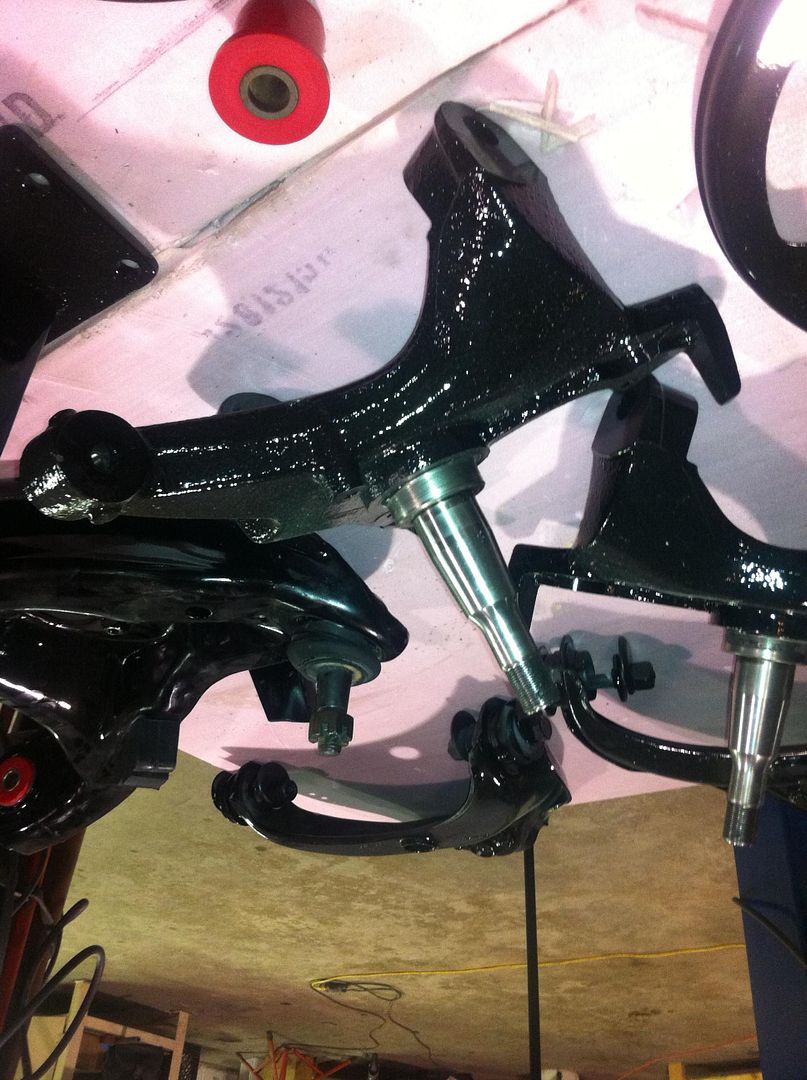
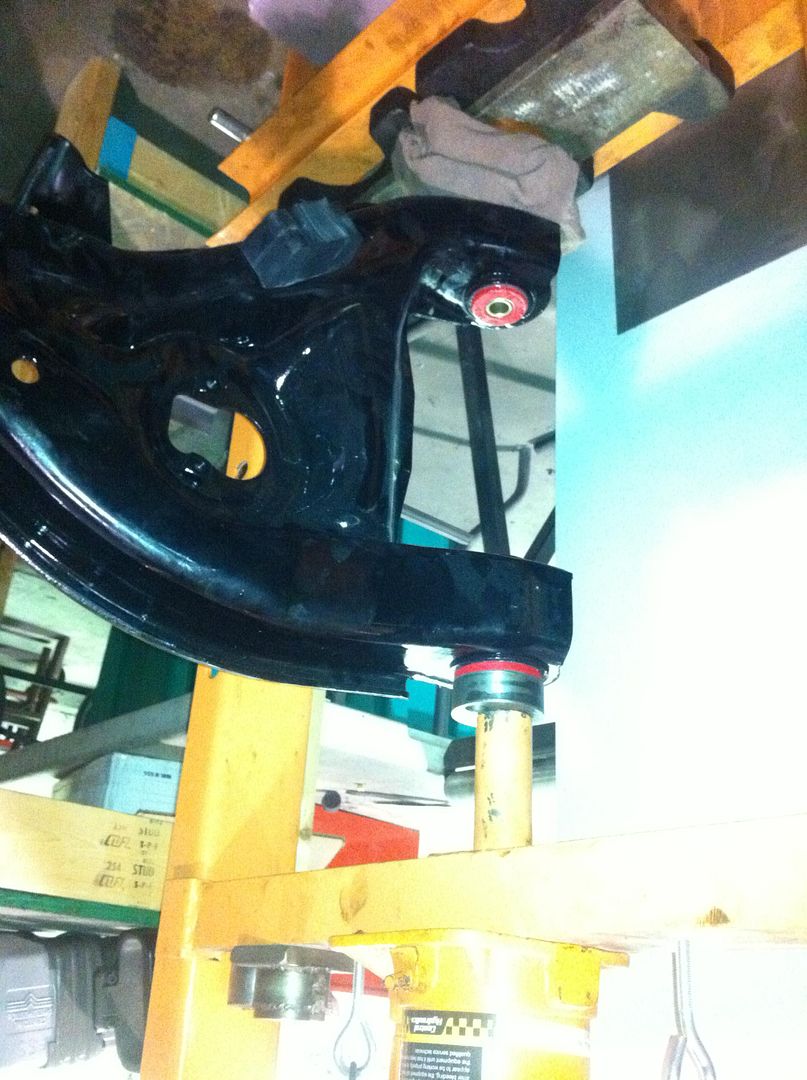
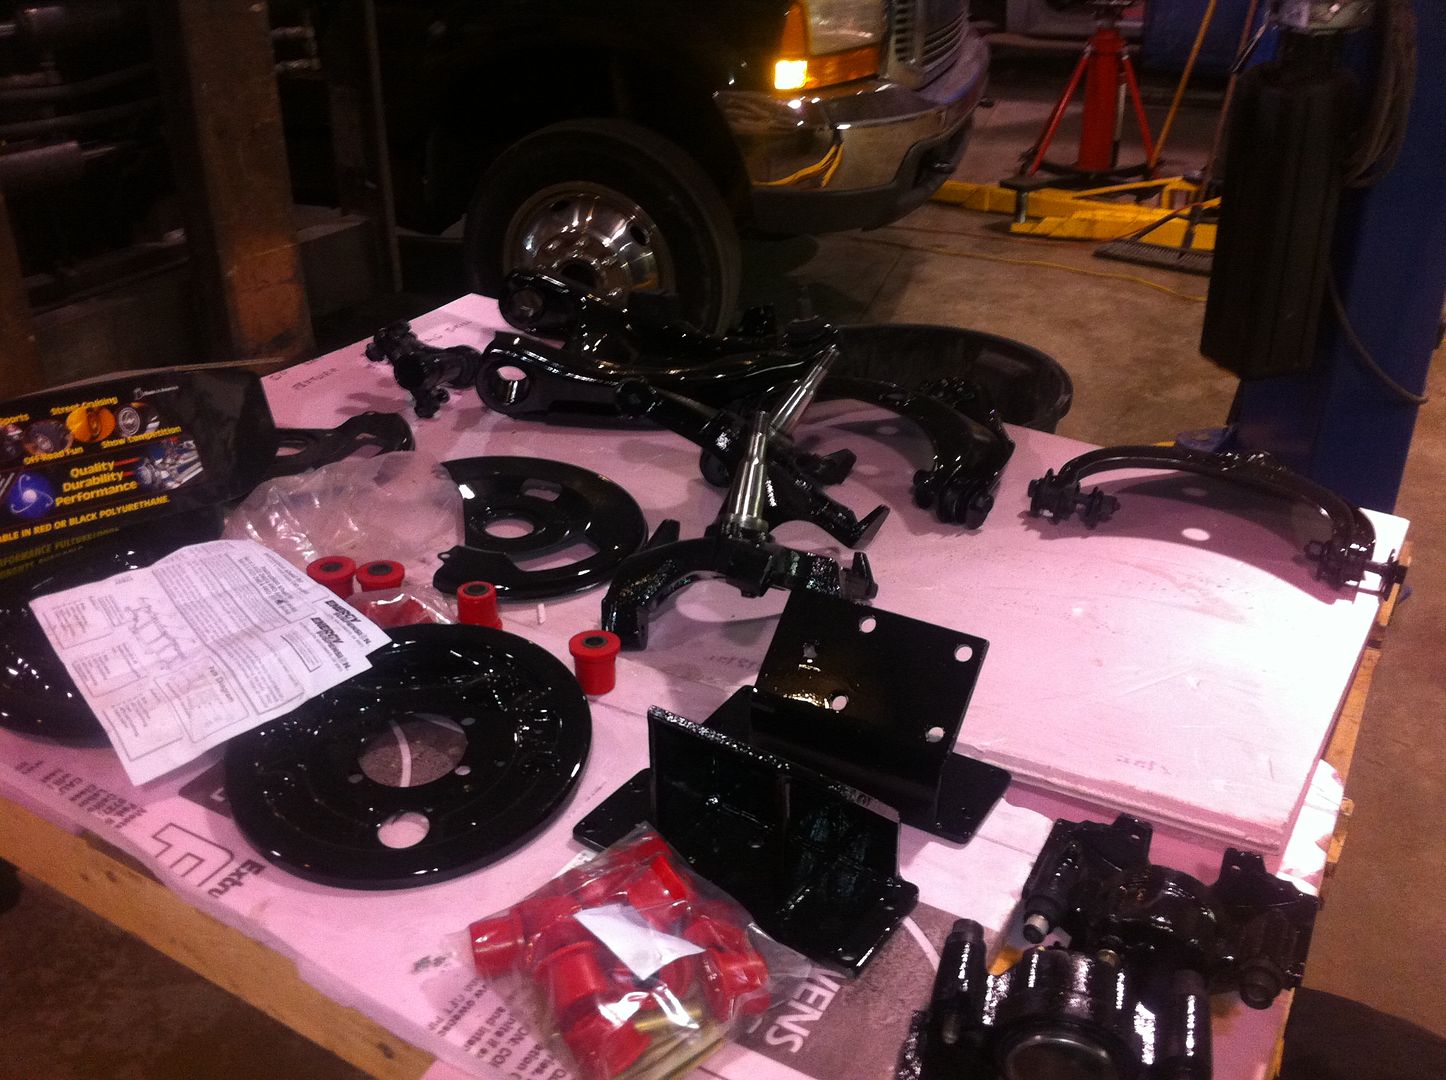
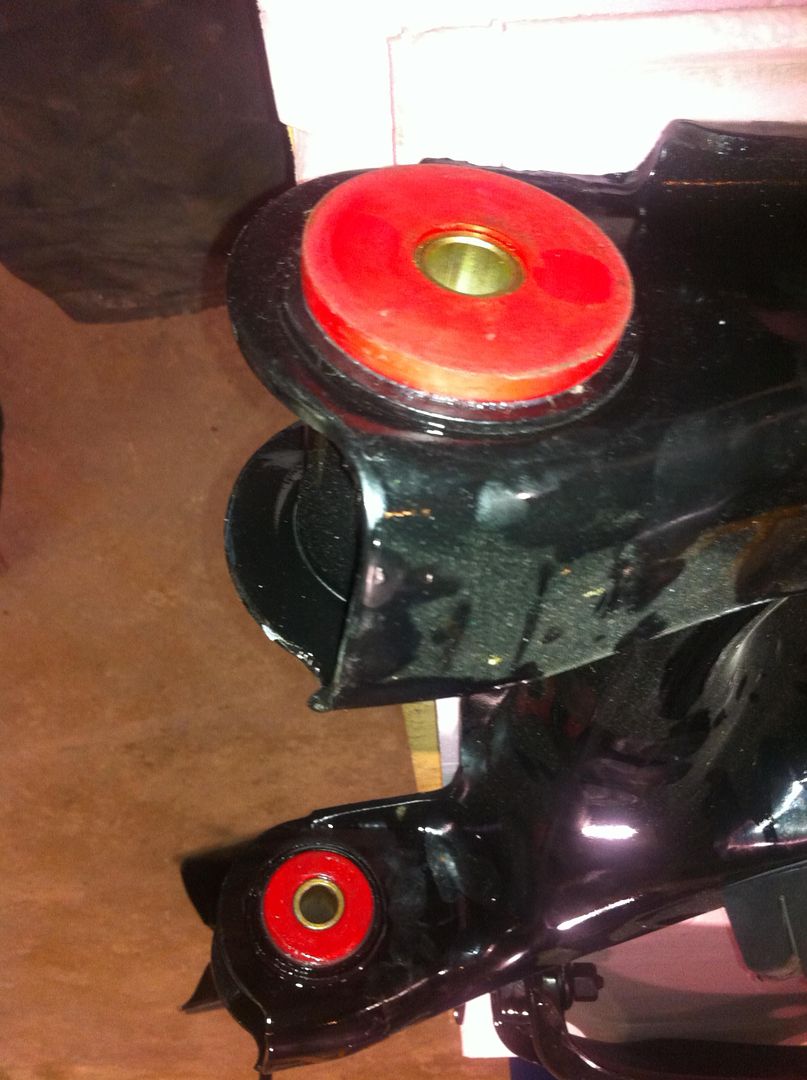
Pushed all the old bushings out and blasted all the small parts and painted in our makeshift booth. Bought a new bushing kit and replaced all the soft parts with 95A durameter. Truck also has bell tech drop spindles.


IMG_1471_zpsfb592388.jpg
[/URL]


IMG_1857_zpse02ec8b3.jpg
[/URL]


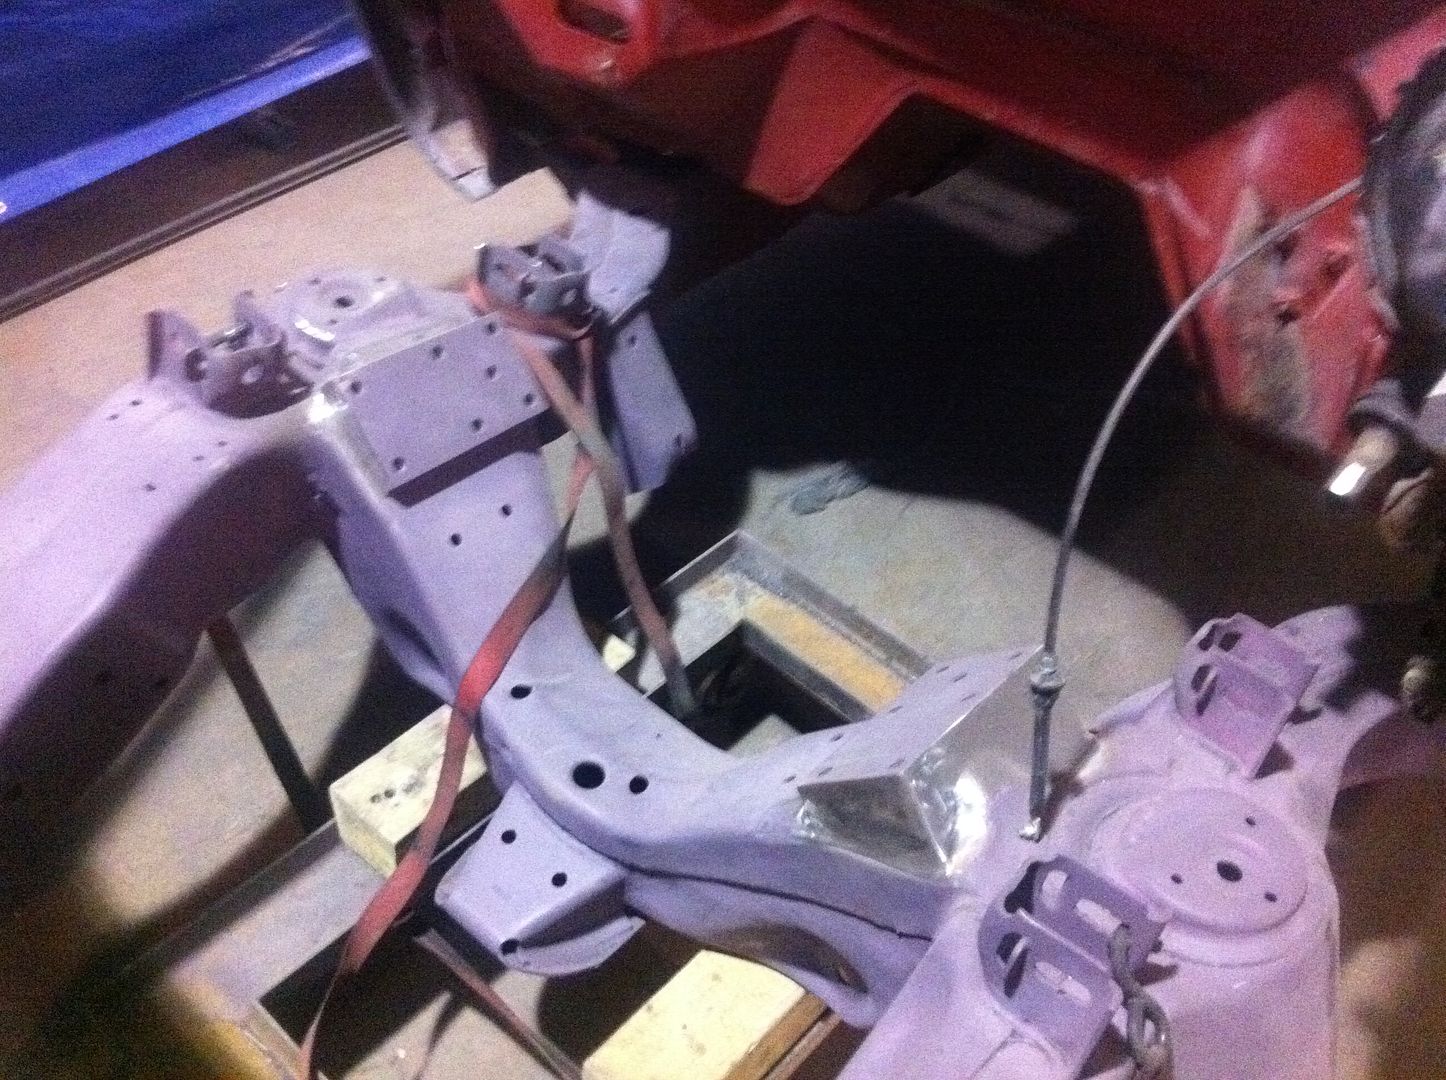
Fabricated new motor mounts.


IMG_1473_zpsf0269507.jpg
[/URL]


Truck side mounts welded into the frame rails.


IMG_2534_zpse48bafce.jpg
[/URL]
 
Here you can see the previous open frame rails were capped and welded with 14ga for strength.


IMG_1486_zps6d0ff018.jpg
[/URL]


IMG_1853_zpsda64799d.jpg
[/URL]


IMG_1854_zpscbbe4bba.jpg
[/URL]


IMG_1856_zps05a701aa.jpg
[/URL]


IMG_3464_zpsb2b4b07e.jpg
[/URL]


Now we were ready for the cage. Although we did build some very heavy roll cage mounts and welded them to the frame already before prime etc. I never built a cage before however we are fabricators by trade so with a ton of reading the forums and my NHRA rule book we had a plan. I used 1.75” chrome molly .093 wall for the main hoop and 1.625” .093” wall for all the rest. We over did it I was told but really this is the last place I plan on skimping on and the NHRA basis all there specs on light weight cars. I feel adding the front bars and stepping up the wall thickness is a must for a high speed crash.


I bought a new bender and dies that was designed to bend up too 2” .093” wall chrome molly and even then it was a beotch to bend this chit. I think we had a 10’ cheater bar on some of the bends and it’s a ratchet bender.
I had called my local NHRA district office to get an inspector to come out to my shop and certify this. Very nervous as this was my first time building a cage let alone going for an 8.5 certification. The tech was very serious when he came out here and short on words not rude but to the book. He brought out all his equipment and a sonic thickness tester and was VERY through looking the entire frame over at each connection and weld. He was very quiet up to the point he was done testing. He proceeded to pull his brief case out and started filling in paperwork. A big sigh of relief came thru the air in my shop as that nice shiny NHRA sticker was placed on the passenger side. Finally he smiled and said great job guys go ahead and paint it just tape around the NHRA sticker and we are good to go. So………Game on!!!


Here are the pictures of the process. This took way to long to complete being our first time and the cost was more than most would charge I would think. However it’s our welds from my shop and the materials came with certification paperwork showing authenticity of the material. At this point I know nothing was compromised in any way for my safety giving myself the best chance if a crash were to happen.


IMG_3509_zpsf297354b.jpg
[/URL]


IMG_3543_zpsd5a8d0d7.jpg
[/URL]


IMG_3546_zps1370aca9.jpg
[/URL]


IMG_3643_zps02c24328.jpg
[/URL]


IMG_3836_zpsabebd7f2.jpg
[/URL]


IMG_2535_zps19675628.jpg
[/URL]


IMG_3645_zps616047f1.jpg
[/URL]


IMG]http://i1208.photobucket.com/albums/cc364/Freezingsystems/Drag%20Truck%20Chasiss/IMG_3837_zpsf4cfc5a2.jpg[/IMG][/URL]


IMG_3648_zps6300bbff.jpg
[/URL]


IMG_3650_zps08968930.jpg
[/URL]


IMG_3785_zps415504a1.jpg
[/URL]


IMG_3735_zpsc9f16e54.jpg
[/URL]


IMG_3742_zpsefe52811.jpg
[/URL]
 
The smaller tires shown in some of the pictures are temporary they came with the truck as a roller. We acquired some 34.5”x17.5X16 slicks shown in a few of the pictures hopefully giving us the best traction out of the hole possible since it’s a two wheel drive.


IMG_3922_zps4d2e27df.jpg
[/URL]


IMG_3923_zps700fd9b8.jpg
[/URL]


Had to cut the tunnel out and make it much larger to give room for safety equipment and trans also step the floor board thickness to 12ga 4140 plate as added protection in the bell housing area.


IMG_3965_zps095d66f3.jpg
[/URL]


IMG_3971_zps4e4ee4e4.jpg
[/URL]


IMG_4072_zpsc6214ab2.jpg
[/URL]
 
Sizing up the new meats on the driver side. You can see on the right that old tire used to rub the frame rail slightly on the old setup. Now plenty of room for the new slicks.


IMG_3360_zpsda27d2fc.jpg
[/URL]


IMG_3361_zpsd973751c.jpg
[/URL]


IMG_3925_zps92404cd6.jpg
[/URL]


Working on seat placement. I'm 6'2" and it was tight with the cage taking space and mounting the seat to the cage push's it forward. So we shortened the steering column to accommodate. Now its all good surprised how easy that was to do.


IMG_3940_zpsaffeee59.jpg
[/URL]


IMG_3927_zpse8464917.jpg
[/URL]


Then it was time to fabricate an aluminum dash and console area for basic gauges, switch’s and a stand for the shifter. We also fabricated our own nitrous bottle mounts and one CO2 bottle mount to drive auxiliary stuff.


IMG_4235_zpsd85bec47.jpg
[/URL]


IMG_4241_zpsfcb5e7ec.jpg
[/URL]
 
sweet! always have liked this body style. what turbo/turbos?
 
Nice work Chris, anyone that has seen your silver truck knows that your attention to detail and craftsmanship is spot on. Can't wait to see it out on the track!
 
Wow! Thank's for sharing, should be a riot when your done.
"Ray Charles could have welded better than this PRO race car shop IMO".....I'm going to use that the next chance I get.
 
Great build!!! I share your pain, having bought a previously certified chassis that turned out to be junk. I feel the same way, it may have taken a lot longer but now I know it is built properly. Can't wait to see it on the track!
 
This is only the 3rd or 4th thread I've ever sub'd to.

Awesome.
 
^^^^ Thanks for the kind comments guys.


The fun begins again. Tearing it all back down after the cage certification and basic mock up of the larger components so we can paint everything.

Painted the frame and under sides of the truck cab and bed prior because once the cage is welded to the frame there is no pulling the cab anymore. All the openings thru the firewall were covered in 14ga sheet metal then fully tig welded 100% including around all the cage penetrations etc. The bed is removable for working on it or making suspension adjustments out at the track. I chose to make a bolted panel to allow the bed to pass thru the rear cage bars.


IMG_4672_zpsce135594.jpg
[/URL]


IMG_4673_zpsee01a039.jpg
[/URL]


IMG_4671_zps86b4518a.jpg
[/URL]


I have a gap in pictures here trying to locate some of them but here’s the truck after we painted it BBB. “Bass Boat Blue”


IMG_5142_zpsff895c4c.jpg
[/URL]


IMG_5143_zpsb186db35.jpg
[/URL]


IMG_5145_zps42fc39e5.jpg
[/URL]


IMG_5161_zps27f68a61.jpg
[/URL]


IMG_5141_zps0bfd045b.jpg
[/URL]


More to come here shortly.

Chris.
 
Looking real good!!! I can't wait to see it in action and get some great shots of it... Maybe we can shoot it for a feature too!
 
Ahh, I had seen the pics with the final paint on it, very similar to the paint color on my truck (but I wish mine were as bright as yours)!
 
Good color choice. Get some striking color graphics....think photographer. Ask Chris about what will get you well photographed at the track. That was one of the things that got my old man's car so much time in magazines.

Looking good!
 
Nice work Chris, anyone that has seen your silver truck knows that your attention to detail and craftsmanship is spot on. Can't wait to see it out on the track!

Thanks man!!! I love building this chit wish I had more time and $$$.

Looking great!!! Can't wait to TUNE it!

Fixed it for you^^^^:evil

Wow! Thank's for sharing, should be a riot when your done.
"Ray Charles could have welded better than this PRO race car shop IMO".....I'm going to use that the next chance I get.

LOL you may use that line as you see fit Chris. Cant wait to see your three some in action.

Great build!!! I share your pain, having bought a previously certified chassis that turned out to be junk. I feel the same way, it may have taken a lot longer but now I know it is built properly. Can't wait to see it on the track!

Thanks Michael. Yeah I followed your blog on your build yours was pretty scary being it was going that fast prior. When I find the pictures of the welding and chity fab work holding the rear suspension I'll post them up. The pictures sent to me from the seller were either 10 to 20 feet away or strategically taken to hide certain views. I do know its my fault for buying sight unseen. I didn't think about it much as the receipt from the pro shop had the VIN number and truck I.D. matched to the work done so I know it was not one of those "Yeah Joe Blow's Race Shop" built it and it cost me $$$$$ amount.

This is only the 3rd or 4th thread I've ever sub'd to.

Awesome.

You joking me Jeff? If not that's an honor sir :Cheer:. I promise you will like whats coming to this thread soon. :evil
 
Back
Top