Dicking Around . .

Still poking at it . . .

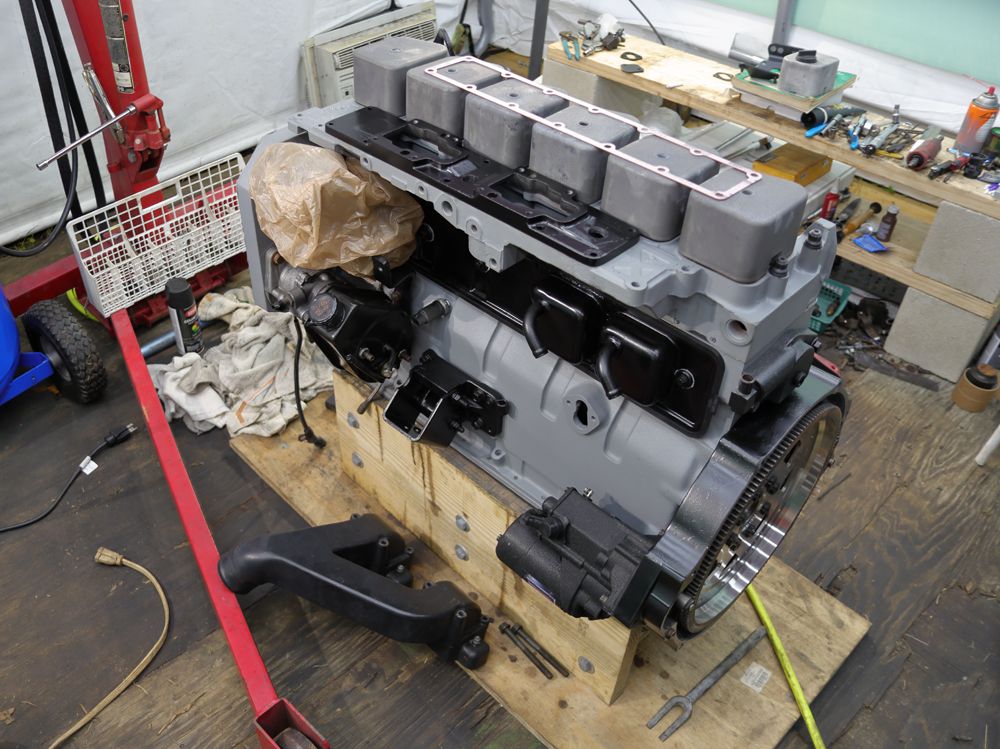
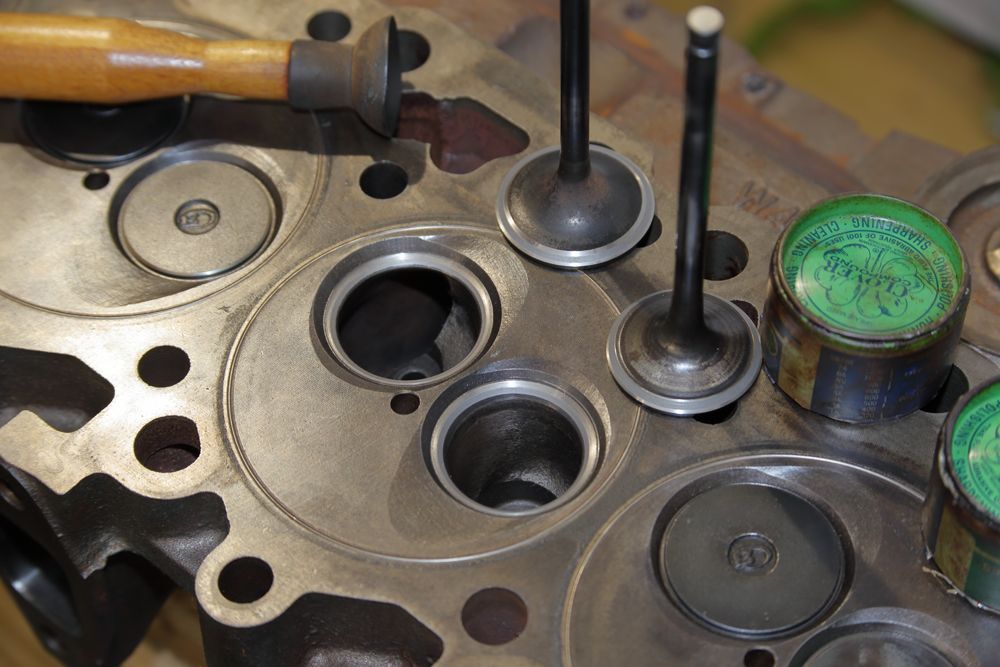
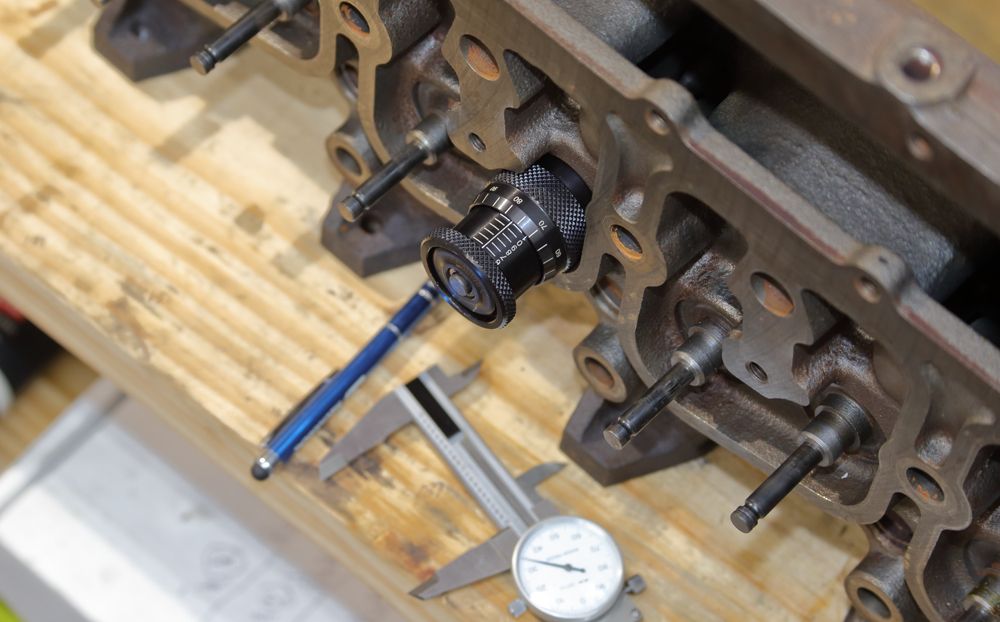
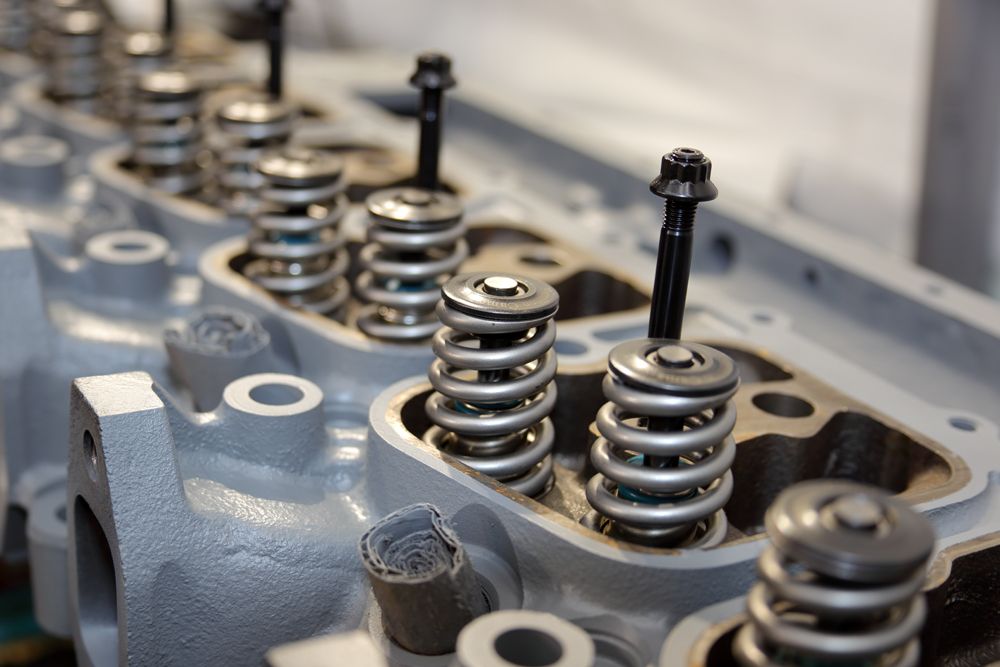
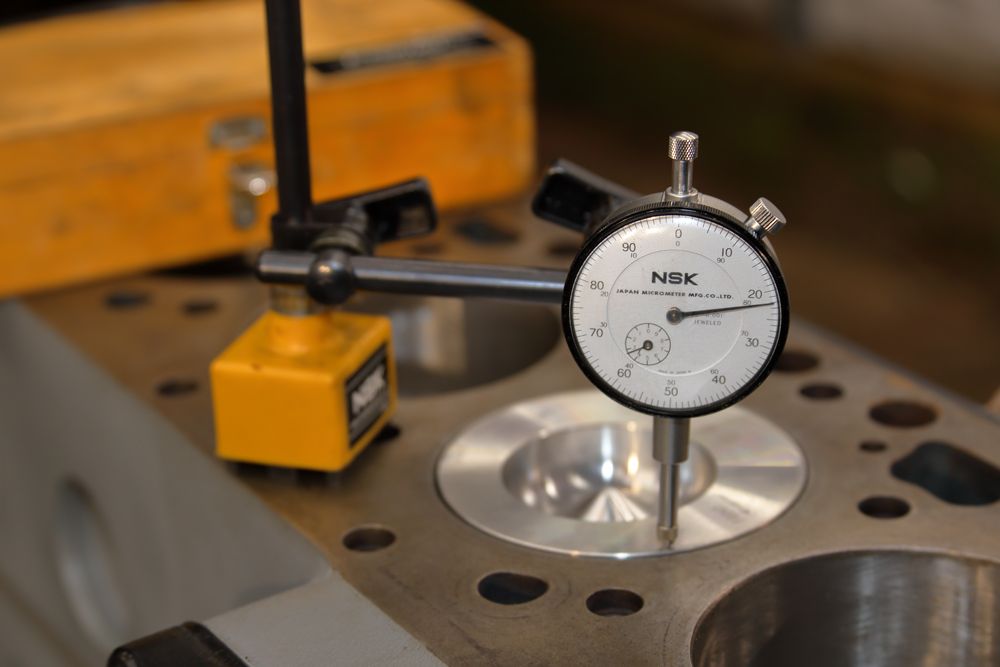
Lapped the valves today. The machinist was pretty-good with keeping the proper width seat, centered on the valve and what he had to work with in the head (the innermost angle (15*?) is scant in places). If I'm reading the Cummins manual right, this would have been the last time theses valve-seats can be cut (at 0.060" max valve top to head-deck). Service/replacement seats are out of the question as there's been notable whittling in there and to try and blend it in, would leave little on the bottom of the thing.

Lapping_Valves.jpg


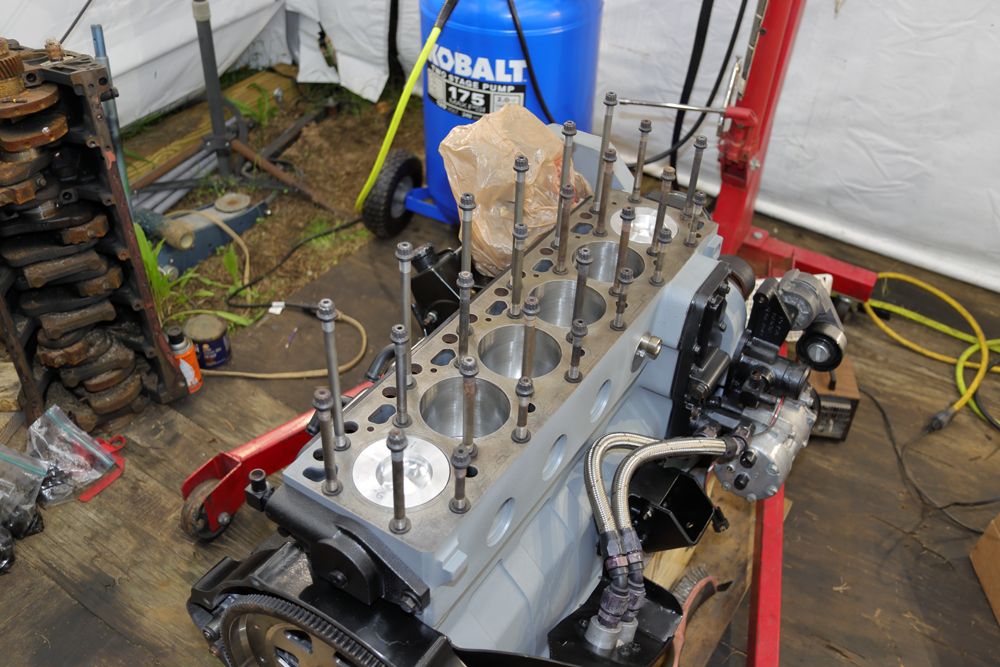
Started cleaning up the 12mm A1 head-studs harvested from the original build. Still gotta check the lengths.
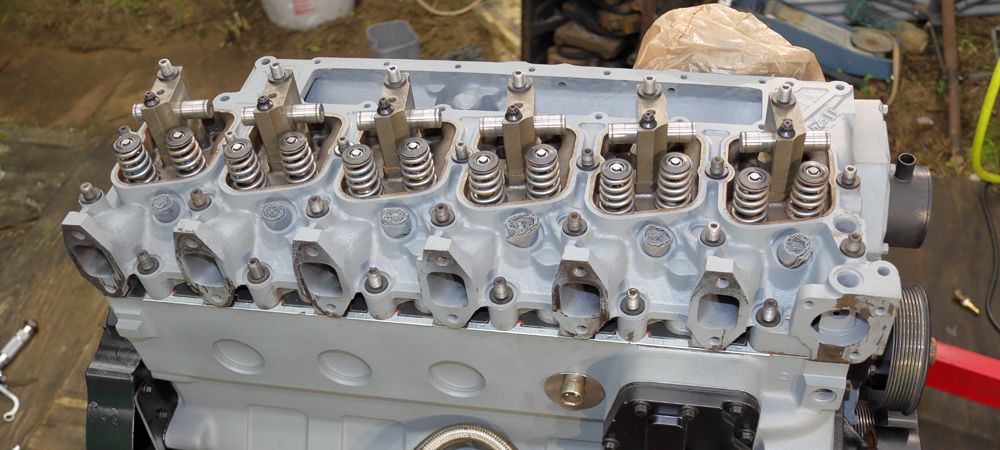
Cleaning_fitting_Used_Head_Studs.jpg
 
Gonna need some valve-spring shims.

I found that the new valve-guides are sitting a little proud such that the top-hat style valve-stem seals weren't quite fully seating in the valve-spring pockets. DOH!!
- I figure I can slip a valve-spring shim under the top-hat's flange.

After the 0.030" valve-stem seal's flange, they average needing 0.060" to bring the installed valve-spring height to the specified 1.880". Had a couple of odd-balls needing 0.040" and damned near 0.070".

Determining_Valve_Spring_Shims.jpg
 
Gonna need some valve-spring shims.

I found that the new valve-guides are sitting a little proud such that the top-hat style valve-stem seals weren't quite fully seating in the valve-spring pockets. DOH!!
- I figure I can slip a valve-spring shim under the top-hat's flange.

After the 0.030" valve-stem seal's flange, they average needing 0.060" to bring the installed valve-spring height to the specified 1.880". Had a couple of odd-balls needing 0.040" and damned near 0.070".

Do you have any new valves on hand? I’d pop one in and take another measurement. I know you said that the seats are heavily ground and you don’t want to replace them, but you might be able to make up for some valve recession with new valves. Personally, I don’t like grinding valves very far because the hardening of the face only goes so deep.
 
Do you have any new valves on hand? I’d pop one in and take another measurement. I know you said that the seats are heavily ground and you don’t want to replace them, but you might be able to make up for some valve recession with new valves. Personally, I don’t like grinding valves very far because the hardening of the face only goes so deep.
It's not necessarily that I don't want to replace the seats at it is there's not much to let the new service/replacement seat in. The metal of the head surrounding the valve-seat over the runner is thin. I'm with you on grinding the valves but, they're within Cummins spec regarding the thickness of the outer periphery of the valve itself.

I hope having to put the shims under the top-hat valve-stem seals isn't gonna come back and bite me regarding the compressed valve-spring's retainer kissing the tops of the seals. :doh:


When you poop on Halloween, does that make it a "Spooky-Dooky"? :huh::

Got the valves, springs, shims and seals installed. Carrying on with it . . . .

Valves_Springs_and_Seals_Installed.jpg
 
Going through those rocker-arm pedestal assemblies harvested from my original engine reveals all six intake rockers had bad galling going on.

Typical:

Intake_Rocker_Journal_Galling_Found.jpg


Intake_Rocker_Shaft_Galling_Found.jpg


Fortunately, those from the donor engine were usable after a thorough cleaning and refacing the valve-stem pads.

Rocker_Arm_Pedestals.jpg


I reckon I need to look into the piston protrusion, head-gasket, etc mess next.
 
those get starved for oil or something?
Nope. I think it's pretty-much a regular occurrence with some high-mileage engines. I've always run a Zinc supplement as well.


Checking the piston protrusion reveals 0.022" ~ 0.024". Cool.
Checking the valve recession reveals 0.055" ~ 0.060(+)". Perhaps pushing it.
With those numbers in mind, the 188/220 cam should work with a standard thickness head-gasket.

Measuring_Piston_Protrusion.jpg
 
I bought this head-gasket some years ago as a spare. I've read where perhaps the quality has changed (read: Less) since.

Standard_Head_Gasket_1.jpg


Standard_Head_Gasket_2.jpg


Time to torque it down. I reckon I need to run to the store first though. Wheaties or spinach? Hmmmmm . . . .

Head_Set_2.jpg
 
Been slowly whittling at it.
- Got the head torqued down. Using the digital torque-wrench, I pulled them up to 125ft/lbs in numerous stages, confirming each stage is at the target-torque before moving on. Once at 50ftlbs, from then on, each stud's pull to its target was held constant so as to actually see the fastener stretch as well as the gasket structure being crushed/pinched (by way of wrench movement). You can pull up to torque, just to see the torque fall as things settled. Continuing the pull would see the wrench come well around a bit after INITIALLY reaching the target. This particular wrench has an accompanying tone that starts beeping once within 5 ft/lbs of the target. The tone goes solid when at target. The long stud's pull could last up to a minute or so once initially at the target-torque. Can't see/do that with the typical Click-Wrench. ;) To top it off, I initially pulled things up to 50ft/lbs. After 24 hours, pulled them up to 100 ft/lbs in two secession's. 24 hours later, pulled them first up to 115, and after a couple of hours, pulled them up to 125 ft/lbs. (Normally, I would simply allow an hour or more "rest" between stages but, I'm in no hurry here). I've used this method for years and after the above, have taken the truck out and after letting things come up to proper operating temps, promptly beat the chit out of it. No subsequent re-torques required.
- Completed the valve-train install including hybrid push-rods to accommodate the 24v lifters.
- Still sorting out what I'm gonna do with the valve-covers.
- Been focusing on the little brackets, un-used port-plugs, etc.

banks.jpg


I'm gonna have to start on the turbo heap directly I reckon.
 
If you find a way to stop the tappet cover from leaking let us know!

Nice work, attention to detail is awesome!

Chris

I've always brake cleaned everything dry, including the new gasket, and in the gasket groove.
I put Right Stuff in the gasket groove before putting it on the side cover, then run a bead on the block gasket surface.

The only thing is that you'll cuss me if you ever have to take it off.
 
That is a well described torque technique, and makes complete sense in my head.
Have you ever checked head stud torque later on down the road after using this technique?
 
Have you ever checked head stud torque later on down the road after using this technique?
No. Never had a reason to check it.

Further, Break-Away torque can often be well above your target-torque. As such, one can appreciably overshoot the target-torque just trying to get the nut to move. For that reason, I don't use less than 10ft/lb increments when pulling things up.

Backing off the nut is, IMO, counter productive as you've made useless the work involved in getting the thing to where it is now. But, that's just me.
 
No. Never had a reason to check it.


Further, Break-Away torque can often be well above your target-torque. As such, one can appreciably overshoot the target-torque just trying to get the nut to move. For that reason, I don't use less than 10ft/lb increments when pulling things up.


Backing off the nut is, IMO, counter productive as you've made useless the work involved in getting the thing to where it is now. But, that's just me.
What friction modifier did you use?

Sent from my motorola one action using Tapatalk
 
No. Never had a reason to check it.

Further, Break-Away torque can often be well above your target-torque. As such, one can appreciably overshoot the target-torque just trying to get the nut to move. For that reason, I don't use less than 10ft/lb increments when pulling things up.

Backing off the nut is, IMO, counter productive as you've made useless the work involved in getting the thing to where it is now. But, that's just me.


I torque tie rod nuts on high pressure pumps to 170 ft-lbs regularly. All stainless fasteners, washers, tie rods, and mating surfaces. So other methods and ideas of torquing are intriguing to me.

But that’s another discussion for another thread. Keep dicking around.
 
New bearings and seals for the center sections . . .

Rebuilding_Turbos.jpg


Turbos_Ready.jpg


I reckon I'll start reassembling the "group" tomorrow, God willing. :)
 
Back
Top