Disassembly for rebuild has started.

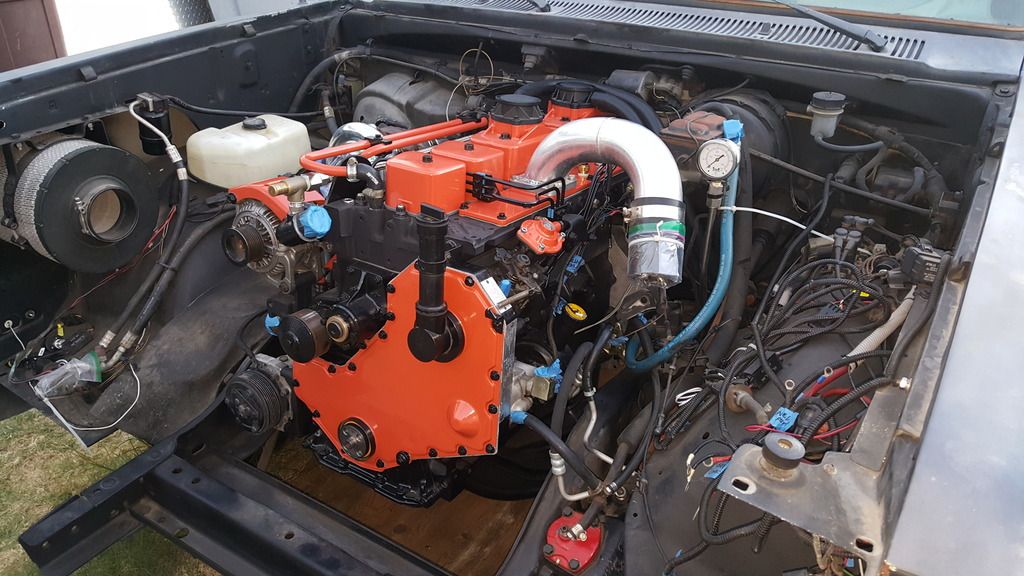
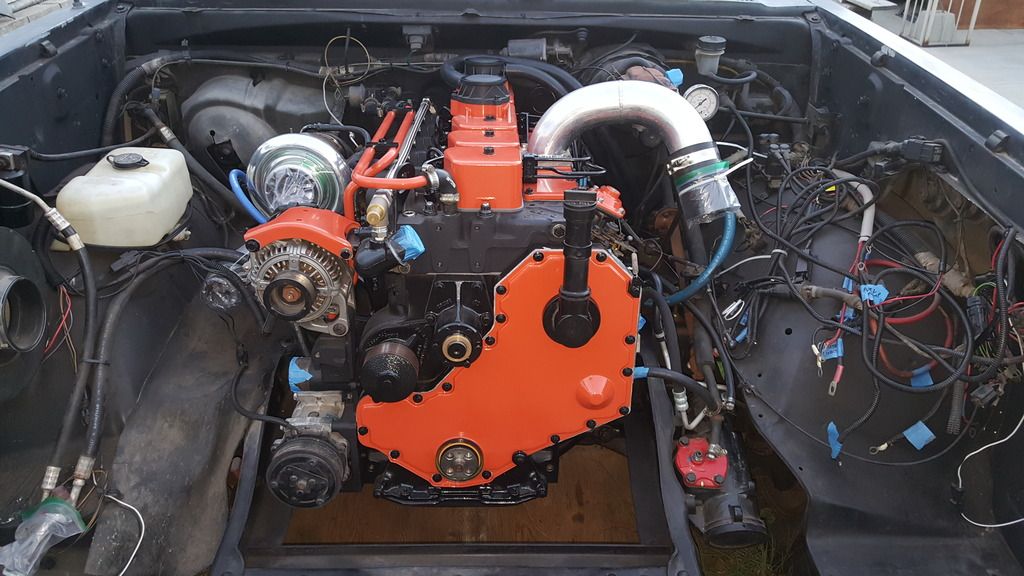
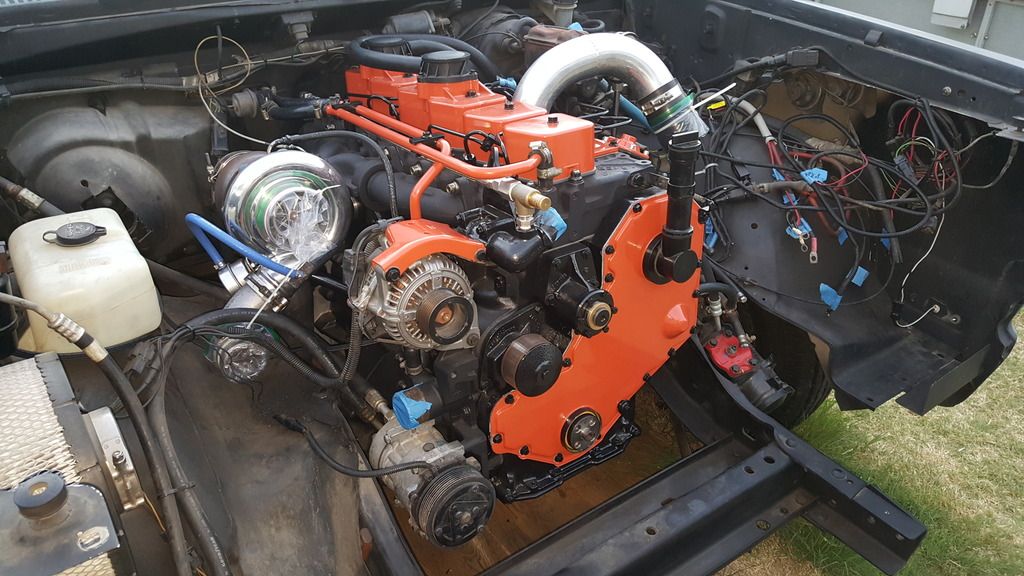
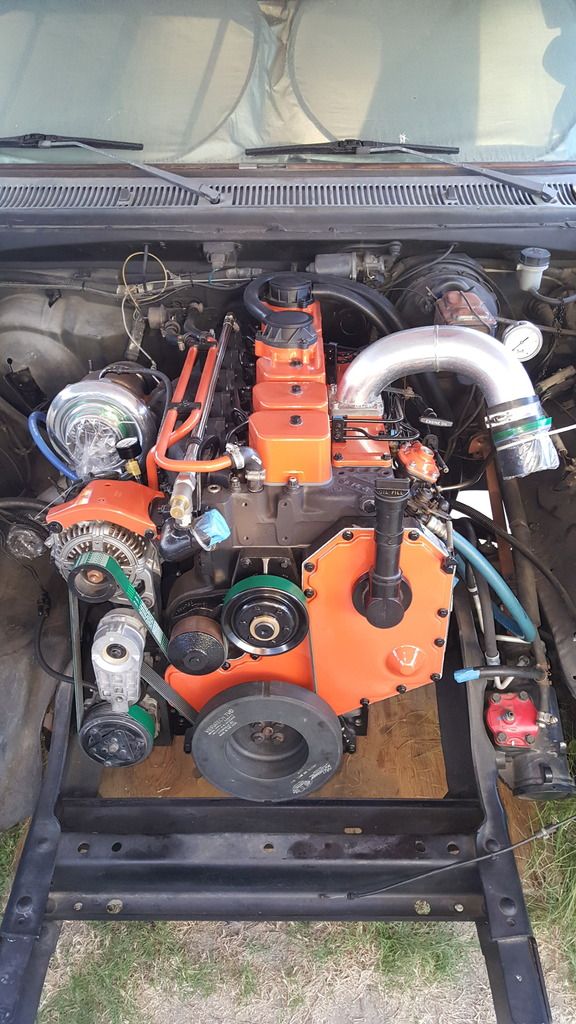
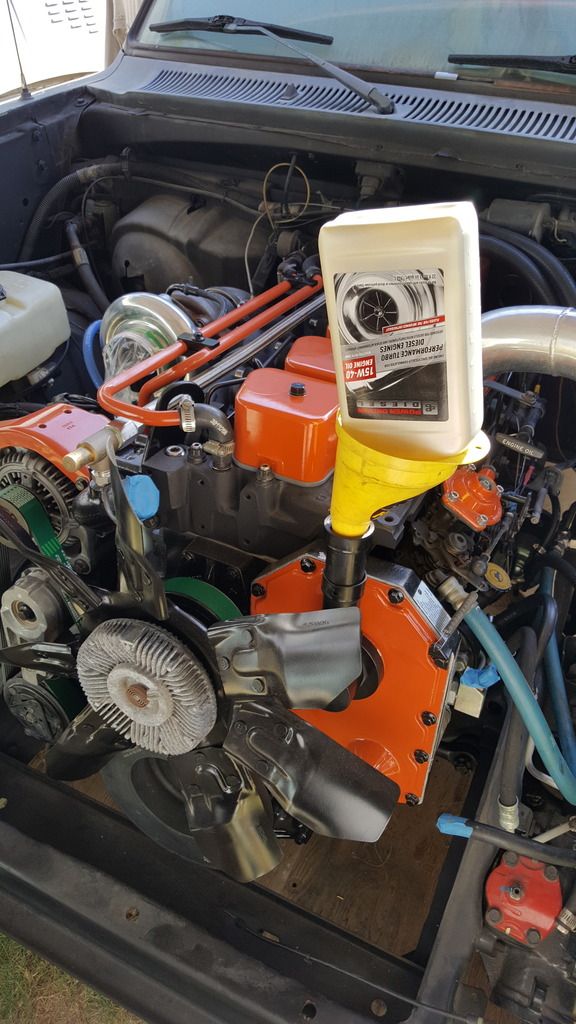
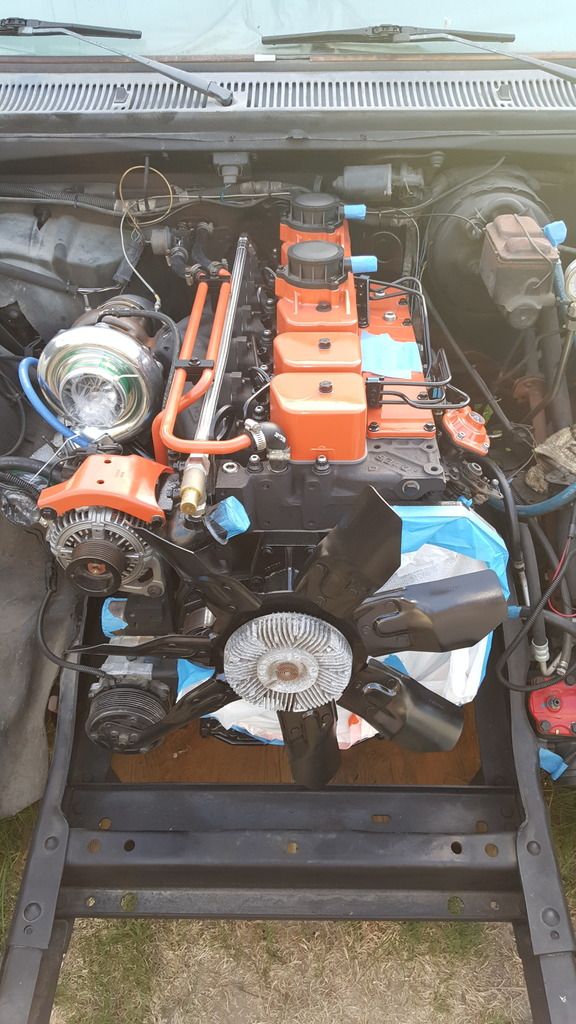
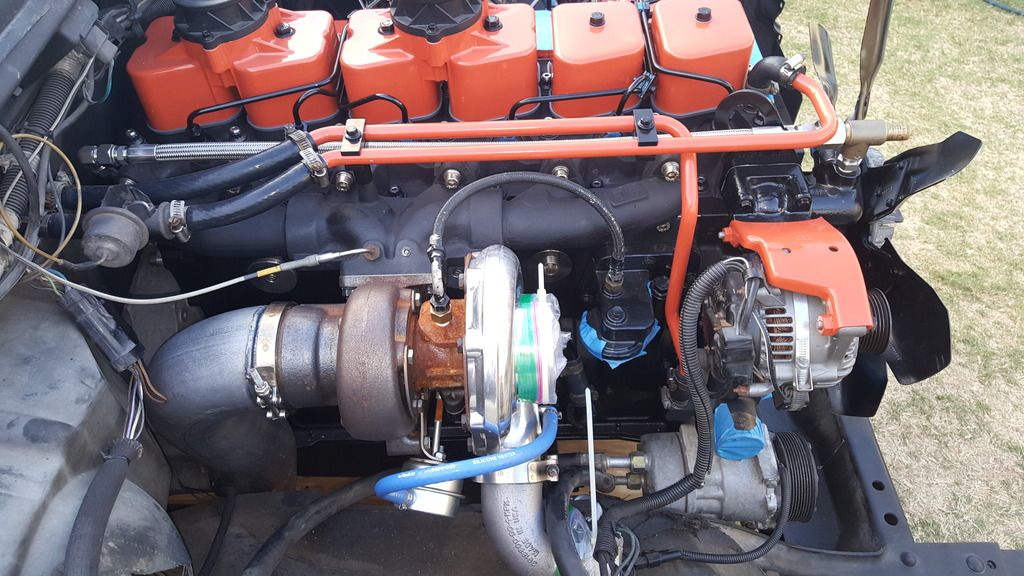
Hung the turbo, installed the heater core supply and return tubes/hoses and mounted the A/C compressor.

20160701_192949_zpssdlhc2oq.jpg


20160701_193115_zpse64e1cuv.jpg


20160701_193011_zpskjk6xqvp.jpg


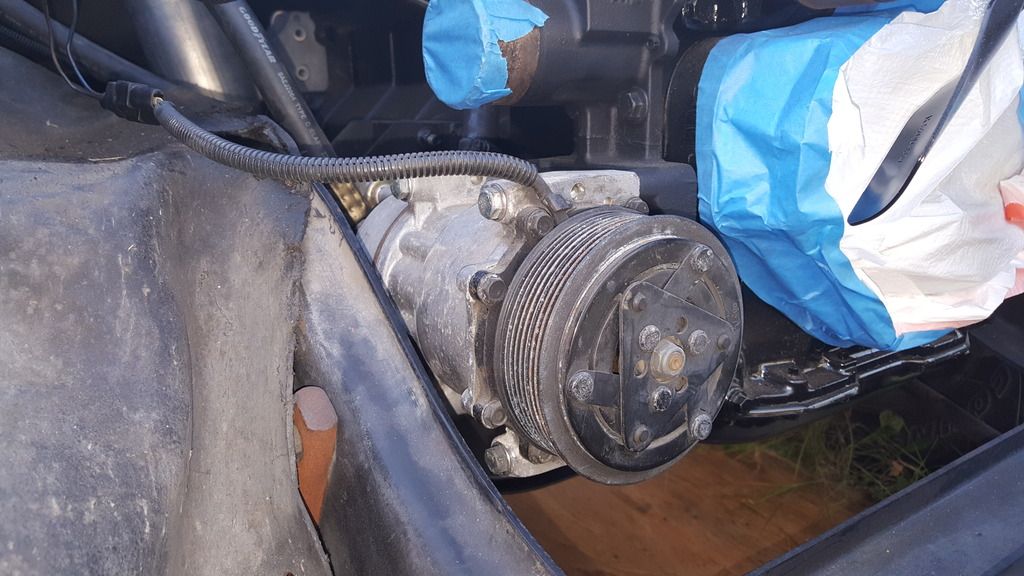
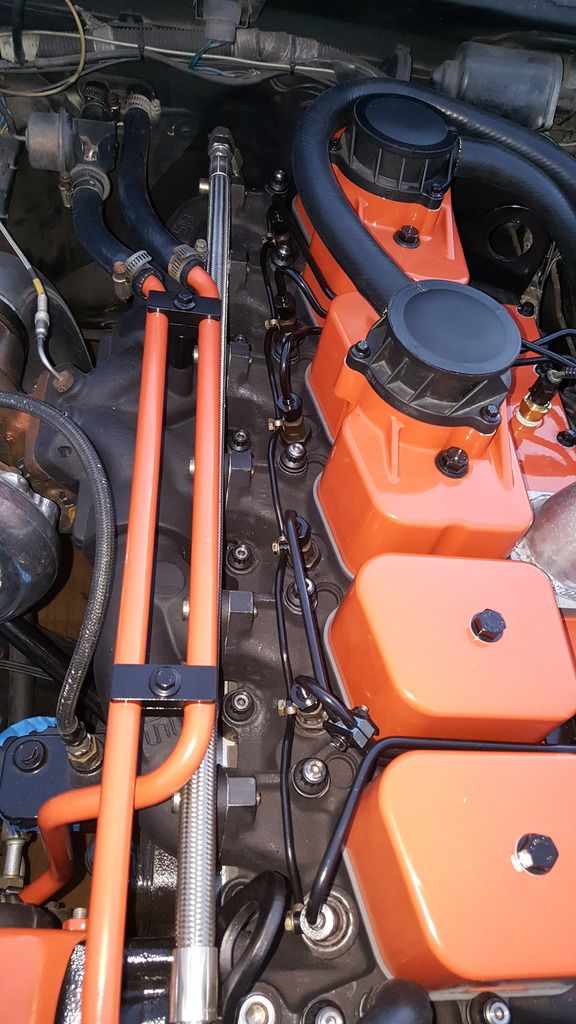
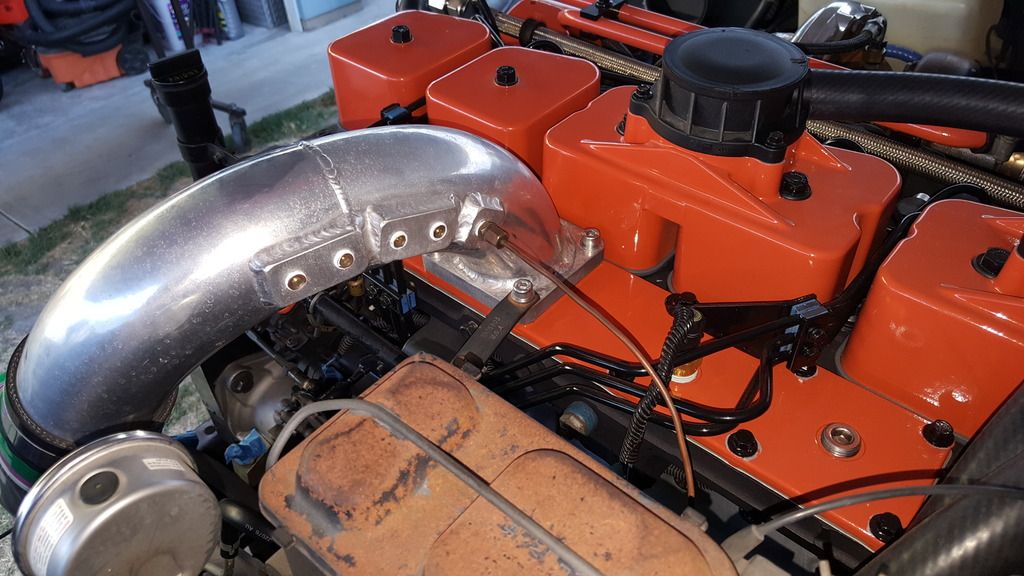
The braided hose for the bypass line lays exactly where I intended it to.

20160701_193219_zpsir9aqcfz.jpg


20160701_193145_zpsfc1mlbvx.jpg


20160701_193200_zpsvczemho1.jpg


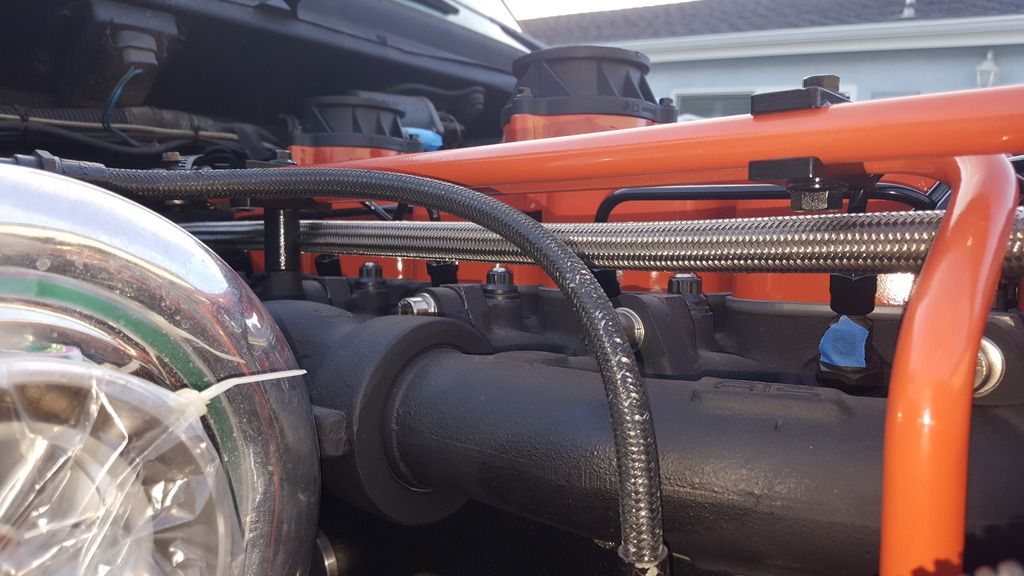
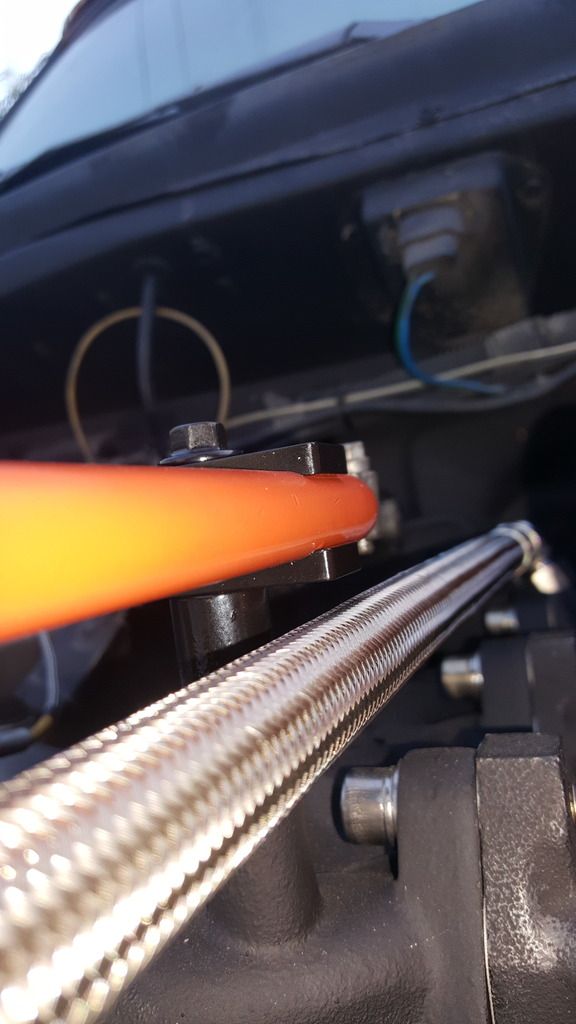
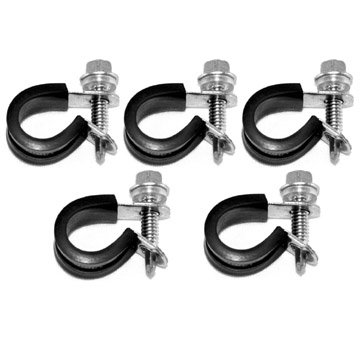
I tried to make one of these clamps work between the rear tubing clamp and its stand-off on the exhaust manifold. However, the OD of the braided hose was too large. I can make one of the proper length out of some thin gauge flat stock in the future. The hose has a very small amount of slack in it but not enough to move much or vibrate against anything near it.

ss_cushion_clamps_picture.jpg


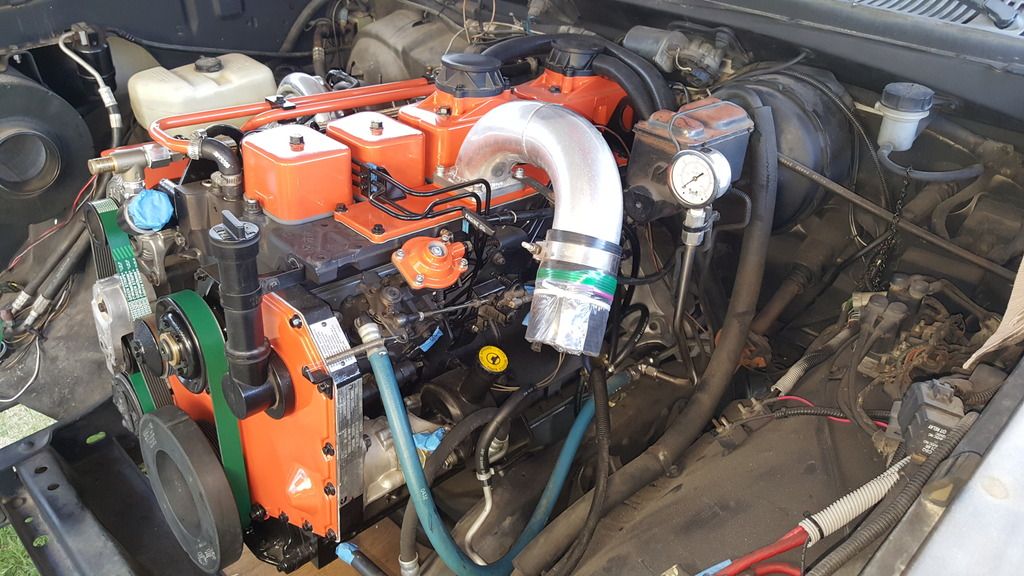
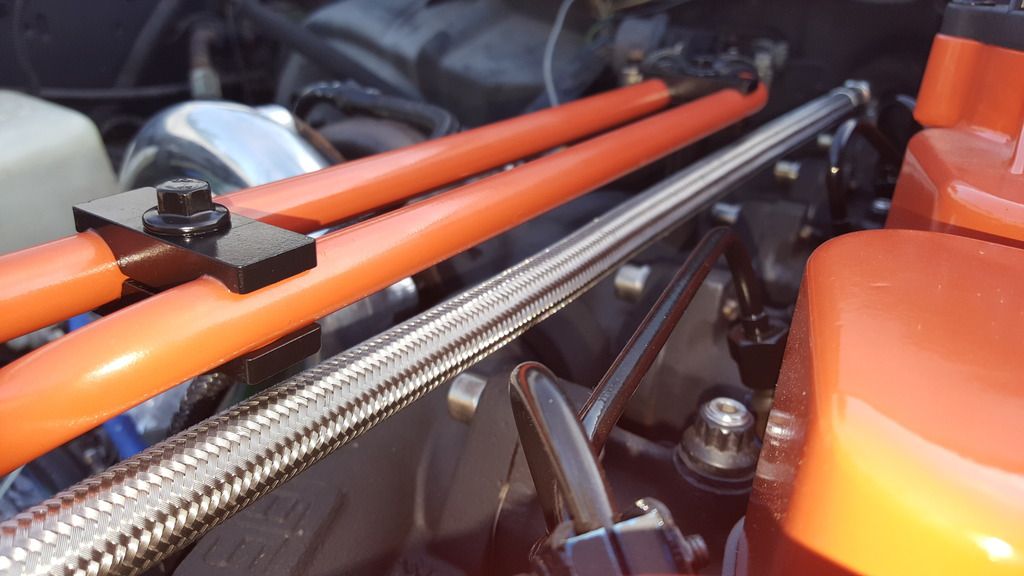
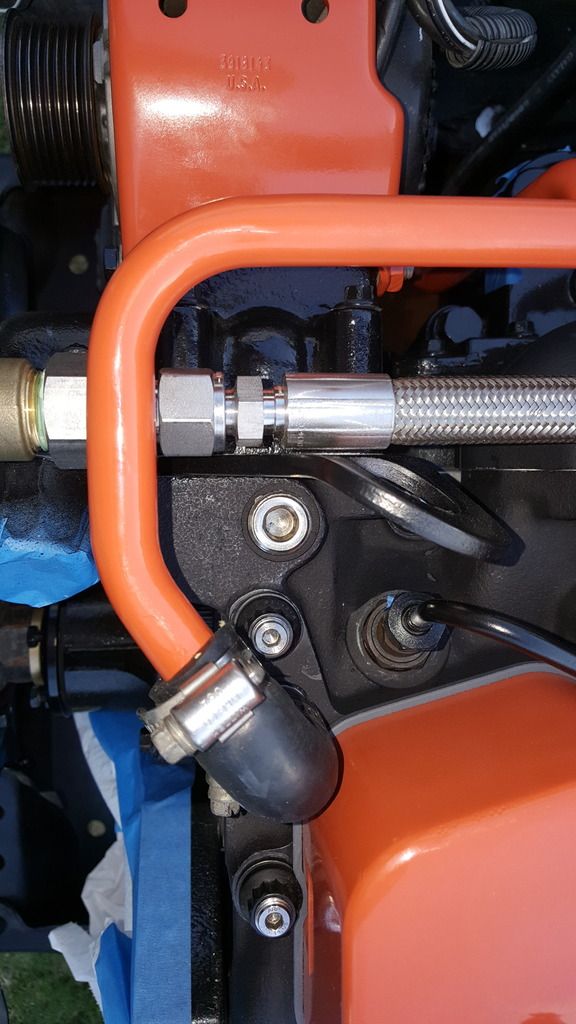
Situated the heater core tubes at just the right height to clear the PRV.

20160701_193253_zpsguapfs0w.jpg


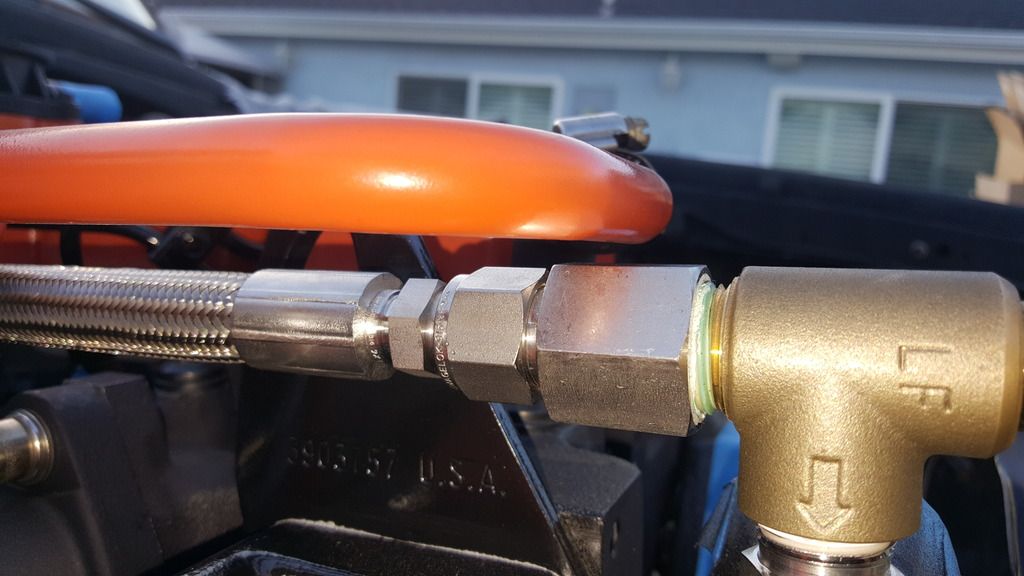
Still enough room to get wrenches on the fittings.

20160701_193315_zpsdg1jehi0.jpg


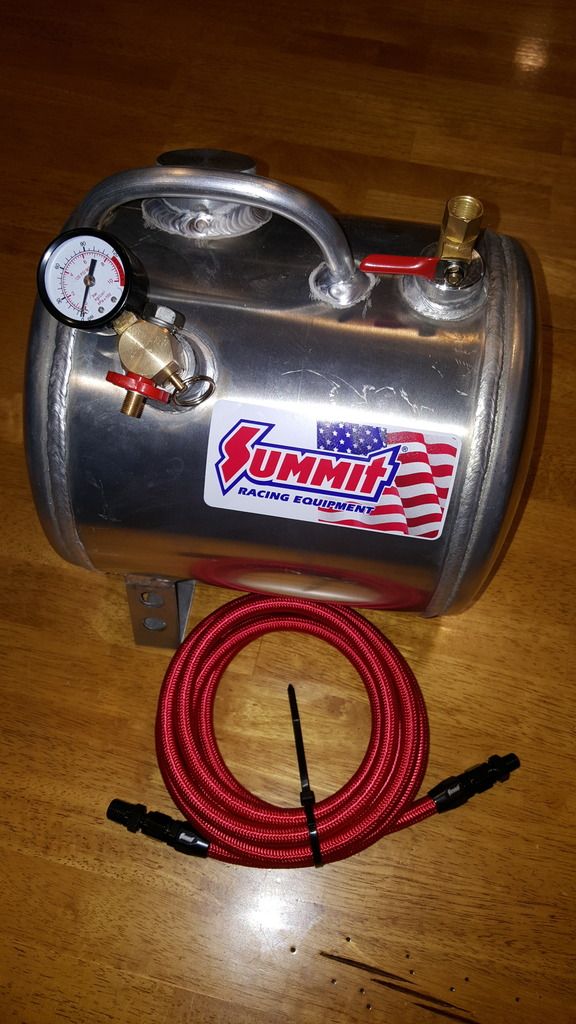
Finally, I decided to buy an engine pre-oiler kit. Found a Summit special for $160. 2.5gal capacity with a 6ft braided hose. I can justify that price for my peace of mind about getting oil to the main rifle and all the passages to the main and rod bearings, etc.

20160701_201026_zpsris3qqos.jpg
 
Thanks! That's what I was going for. I always do my best to make things look clean and like it came that way.

I had a buddy ask me to build a "kit" for him. For myself, I already had a few of the fittings I needed and had to buy a couple others. For the cost including everything minus the price of a couple fittings, it's totaled a little over $300. Could be closer to $330 with the remaining fittings needed.
 
Last edited:
Forgot to mention, included in the cost is the thermostat housing, thermostat and seals. Only included because my buddy's truck is a 1st gen as well and doesn't have the vent port in it. All that contributes almost $115 to the total cost. If it was a p-pump motor, those wouldn't be needed.
 
A replacement Donaldson air filter (aka BHAF) arrived today along with an Outerwears pre-filter.

20160707_122351_zpsstegbner.jpg
 
Installed a transmission fluid filter for the NV5600 from Quad 4x4. Looks to have plenty of clearance from the exhaust.

20160702_181937_zps2pu9yaaj.jpg


20160707_155905_zpsppv1pfas.jpg


20160707_160033_zpsaoucq84c.jpg


The injectors came back out to have thinner sealing washers installed, ~.022". Injector and injection pump return lines installed. Then drizzled some oil on the front gear train before closing it up with the timing cover.

20160707_200610_zpsrdfdaprl.jpg


20160707_200513_zpsas08qljz.jpg


20160707_200540_zpsmgkvgpbe.jpg


20160707_200530_zps2uyaz7we.jpg
 
Last edited:
Finally had a couple of days of freedom to get more done to my project.

All electrical connections to the engine made. Vibration damper, fan pulley, belt and belt tensioner installed. Fuel return lines connected to the steel lines at the frame. Fuel supply connected to the VE inlet.

Dipstick and tube installed. Throttle linkage and brackets mounted and connected. I plumbed the tubing for the boost gauge in the air horn rather than in the head as it was before. Looks a bit cleaner since you can't see it from the front.

I took the driveshafts to a driveline shop for balancing and to have new non-greasable Spicer u-joints and a center (carrier) bearing installed. The shop found that the long tube was tweaked lightly and needed straightening.

Once the intermediate shaft was in, I filled the transmission with 6qts. of Amsoil Synchromesh 5W-30 MTF.

The engine was filled with 1.5gals of PDD's oil. The remaining 1.5gals with go into the pre-oiler and the majority of it will fill the oil rifle and passages prior to the first start-up.

20160721_192359_zpslts1acer.jpg


20160721_192436_zpsz4fbgyfu.jpg


20160721_192450_zpsj3ivcwvn.jpg


20160722_175012_zps2uytzvqr.jpg


20160722_193130_zpslz65ahbv.jpg


20160722_193150_zpsysvbdfk7.jpg


20160722_193339_zpsychtbj5o.jpg
 
Well, today ended on a disappointing note. I filled the cooling system with distilled water for the initial cam break-in and to test for leaks. There was only one leak but it's the location of the leak that ruined my day and made the last 6 months feel like a waste.

Of all places to leak, it's between the block and the head gasket at the rear. I hadn't even turned over the engine yet. Merely just the head pressure within the system.

A very disappointing day knowing that I have to undo a lot of the work I've done up to this point. I'm at a loss. I didn't need this right now.
 
Sorry to hear that. I have been following your build closely, trying to decide how to go about mine. Good luck getting it resolved.

96 3500 5x018 7mm dvs 62fmw
 
Thanks. I'm getting some good advice and info in another thread I created in regards to this. Sounds pretty common with o-rings.
 
Sorry to hear about the leak man, really enjoyed reading up and following this rebuild. Did a great job with the thread
 
Well, after a cold retorque, running the engine without water to about 180°, shutting down and a hot retorque, I still saw some bubbles from the same spots.

However, I figured the ideal test would be to fill the system again with water and pressurize it.

I saw no leaks from anywhere with just the head pressure within. So I pressurized the system to 16psi and so far I haven't seen a drop from anywhere. So far pressure has been holding steady for about 30 minutes and still no evidence of a leak anywhere. I'm gonna let it sit for about another hour just to be sure. Although, I'd like to think if it were going to leak, it would've by now.

So far, so good!
 
In the meantime, I finally found the plastic fittings I'd been looking for in order to tie the crankcase breather tubes together.

5fbfd4597377e022ff50ade71b8f26e2.jpg
 
Continuing with the good news... it's moving under it's own power again and still without a single leak. It feels good to get behind the wheel and row some gears again! It runs so smooth too. Under conservative acceleration, I was seeing 10psi while only in 3rd gear. I can't recall if it was the same before the rebuild and with the stock cam but I know the cams tend to lower overall boost pressures. I guess they can also play a role in spool up.

I did forget to post an update before the leak revealed itself. With every other precaution I took, it hadn't crossed my mind to pin the Fluidampr. Cheap insurance. Man, was it easy to drill! I also fastened it with new ARP bolts.

20160804_102201_zpsmwmnzl4z.jpg


20160804_103934_zpspwdyqenu.jpg


20160804_113437_zpsfvnmqpz0.jpg


Fast forward to yesterday. I set the valve lash for the final time, bled the high pressure lines, cranked without fuel to verify good oil pressure, then let it fire and proceeded to follow Hamilton's break-in procedure; holding 1200-1500rpm for 5 minutes. Once that was done, I made all the charge air and inlet air filter connections, mounted the grill, headlights and parking lamps.

20160820_150739_zpsh3odi4v1.jpg


It was finally time to get it out of the backyard and pounding the pavement again. After a short drive around the block and bringing it up to temp, it was time to bathe it and get rid of the 8 months of layered on dirt.

20160820_180554_zpsw14i8r7z.jpg


20160820_180631_zpseyflx93q.jpg


20160820_180655_zpsihdgrje1.jpg


20160820_180713_zpsrc2vgvak.jpg


Love hearing that turbine whine again!

[ame]http://vid20.photobucket.com/albums/b235/jimbo486/cars%20and%20trucks/1990%20dodge%20ram%20d350/20160820_160525_zps9hrmvh9q.mp4[/ame]
 
Last edited:
Glad to see it under its own power after all the work you have done.

96 3500 5x018 7mm dvs 62fmw
 
Thanks. I'm glad it held! I was determined to not pull the head if I could help it.

What are some opinions when it comes to retorques? How many, how often, how easy or hard to drive it between them? I'd like to load this thing down for a break-in ASAP but want to be sure the head gasket will be good to go.

Brandon thinks it should be fine after the cold and hot retorque I've done. His advice hasn't let me down so far!
 
Roughly stock timing, no more than 20#boost, get it done. Cold retorque after. That's what I would do, sooner the better for sure though.
 
Back
Top